
Results 11 to 18 of 18
 17Likes
 LinkBack URL
 About LinkBacks
-
04-24-2013, 03:30 AM #11Senior Member

- Join Date
- Jan 2013
- Location
- Texas City Texas
- Posts
- 109
Thanked: 17
I have left the blade in the tumbler for many hours at a time. Check it periodically, mostly because you are curious that way,
( I was). It should be fine. One note on the corn cob, there is a regular and fine cob mix for the tumbler. I got my media at Bass Pro Shop. The walnut will clean the thing pretty well and leave a little shine. When you put it in the corn cob, let it run a little while and then add some of the metal polish. I have a theory that the media needs to bang the rough edges off of each other to really polish the metal. It just seemed that way yo me. I know when I added that first bit of polish the cleaning accelorated a good bit. I think you will like the results.
-
04-24-2013, 04:10 AM #12Senior Member

- Join Date
- Apr 2013
- Location
- Houston, TX
- Posts
- 199
Thanked: 28
I don't know for sure, but I imagine the blade is ok with what I've done to it. I definitely took off more metal from the spine down the rest and left more metal near that last millimeter or two near the edge. I was concerned with damaging the edge sanding so shied away from it. I'm excited to try this half hollow if it turns out alright as I've only shaved with two full hollows so far. I'm already looking for a full wedge restore project so I can check that out as well. Originally Posted by onimaru55

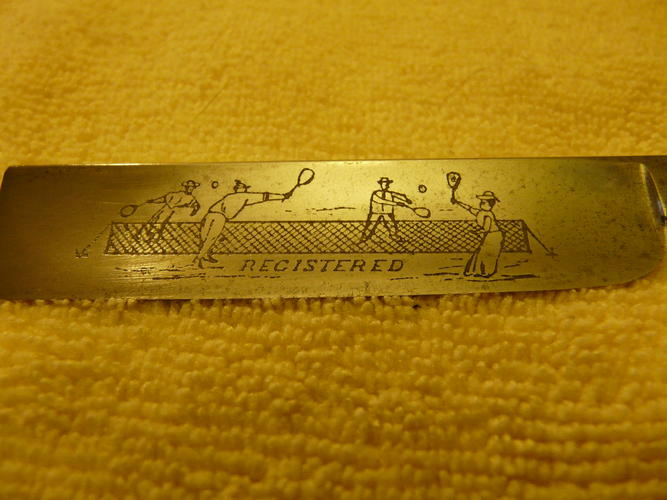
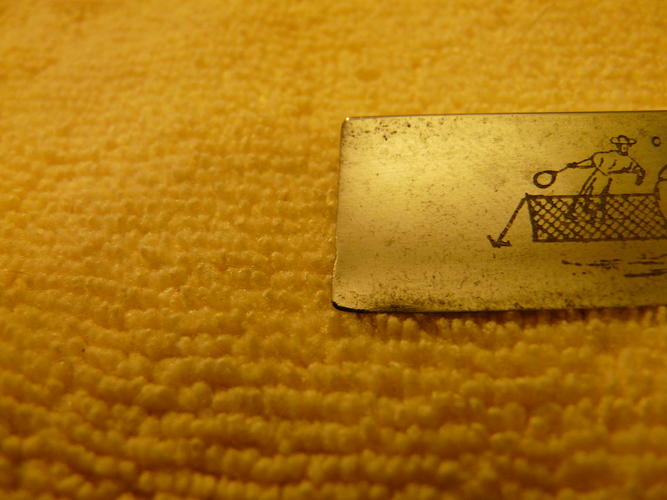
Yeah, when I saw the e-bay pictures I thought this thing might have a beautiful patina, but the low lighting photos had something to do with that. When I got it in my hands I wanted to clean it up a bit and couldn't resist doing something with it. I think this one will keep much of it's charm. Searching the internet I found only one other blade with this etching and it was mostly faded away. I am interested to know more about this blade, when it was made and so forth - I really like it. Originally Posted by pfries
After about 10 hours, I see little to no change but that is nothing new from what I've read. I did find this post from a guy who used the same type of media I've got and after a few razors claimed that there was no difference between it and the corncob. It does look very fine to me, maybe moreso than the other walnut medias, but I have nothing to compare it to. So, I'll let it keep running over night and am going to mix some blue magic around in there tomorrow when I can monitor it and see its effects. Like you said, I've heard that really makes a difference. Originally Posted by DOGRAH
Oh, the screw on top of the tumbler was pretty hot when I checked it last. I'm wondering if this is normal or if its a harbor freight tumbler thing. If it happens to give out, I'm glad there is a 90 day return policy and I have a store nearby. I am going to let it cool down for a half hour before running it overnight.DOGRAH likes this.
-
04-25-2013, 01:48 AM #13Senior Member
- Join Date
- Apr 2013
- Location
- Houston, TX
- Posts
- 199
Thanked: 28
So, it's been eventful this time, at least as eventful as waiting around for the tumbling polisher to work can be. I added most of a 7 dollar tub of blue magic this morning and it's run for around 12 hours. It's had much more effect that with the plain walnut.
The good - it's visibly cleaning up some of the rust around the etching:
and polishing out the 320 grit scratches a bit:
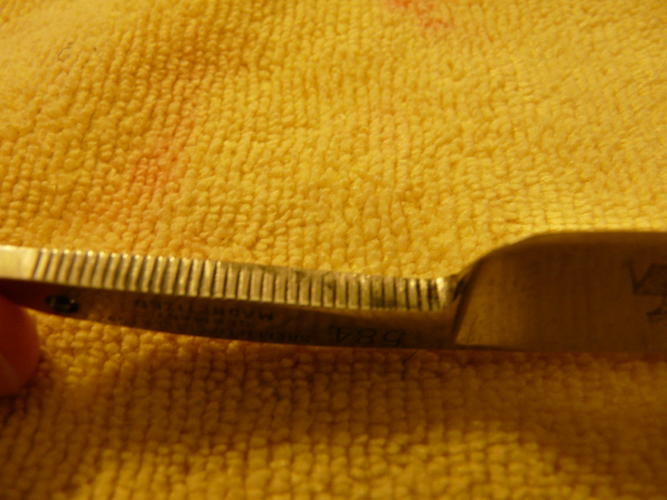
The bad - It's developing a chip about three quarters of the way down the nose where I sanded with the 320 grit:
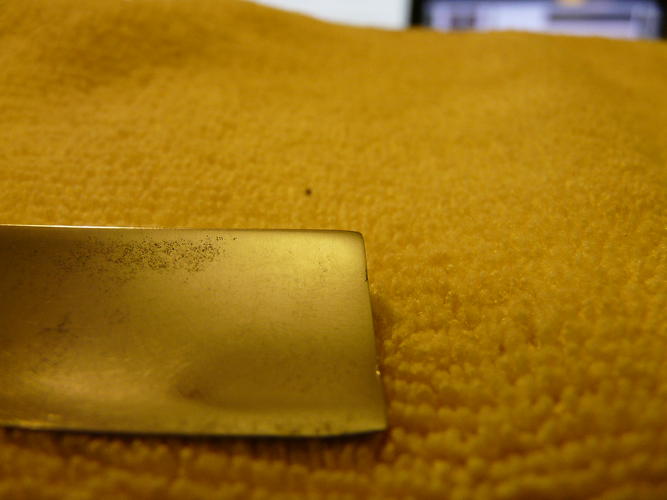
So, if I could do it over again of course I would put it in the tumbler before sanding. As it is, I think the blades integrity is fine and it would hone up alright - at least that's my guess. But, if I continue to polish it in the tumbler the chip is going to get bigger.
I do really like the effect the tumbler is having. The rust looked more like grime than attractive patina to me and I'm glad it's coming off. I don't think the blade will be weakened too much if I continue tumbling except maybe right on the nose. I imagine I'd be able to sand it on the end carefully by hand a round it off just a bit. Assuming that the razor isn't damaged from tumbling any more than increasing that chip a bit, does that sound possible sanding it way by hand?
p.s. I think the Harbor Freight tumbler heard me talking bad about it. This morning the wingnut on top was so hot it burned and I pulled my hand back. I let it cool awhile, then the next time I checked on it, the threads were stripped and the washer was riding up. So, I removed a washer and threaded it lower. The following time I checked, the nut had fallen off completely and it had bore a hole in the plastic cover. Rigging it again with a lock washer and repositioning - it's stable for the time being I guess.DOGRAH likes this.
-
04-28-2013, 04:28 PM #14Senior Member
- Join Date
- Apr 2013
- Location
- Houston, TX
- Posts
- 199
Thanked: 28
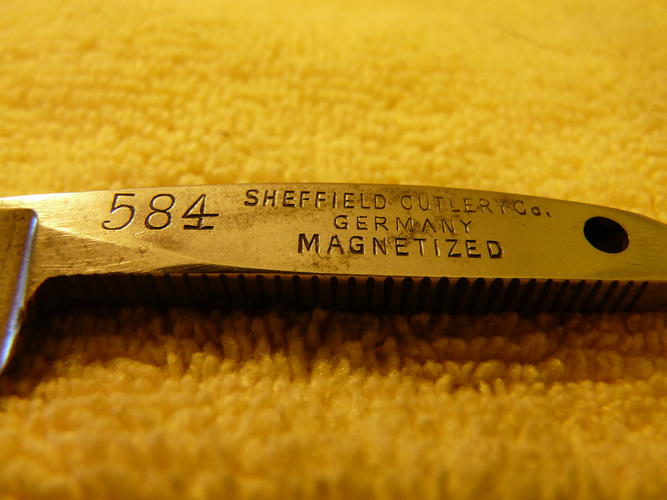
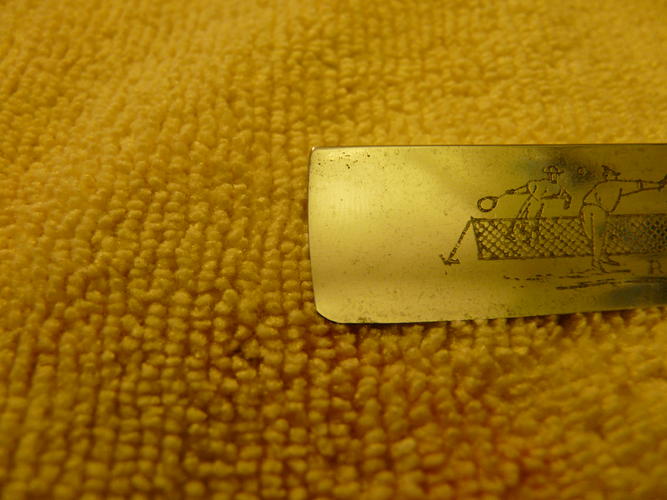
Well, I think I'm done with the blade. Overall, I'm very happy with it as I don't mind the light pitting as much as the rust - of which I got 95% out.
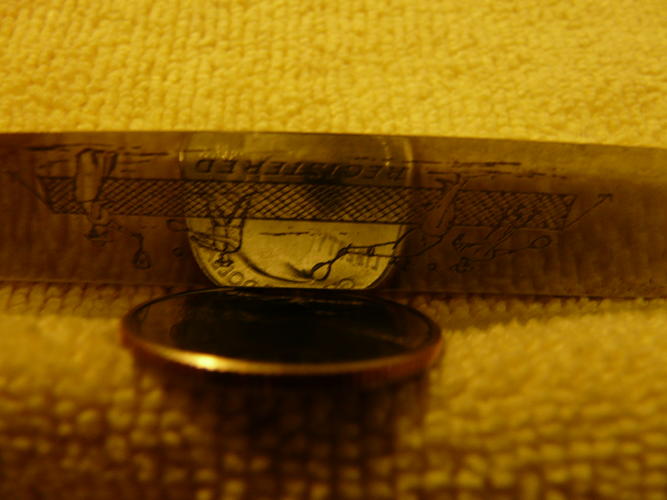
It's cool how you can use the tumbler to remove rust and polish without messing up etchings:
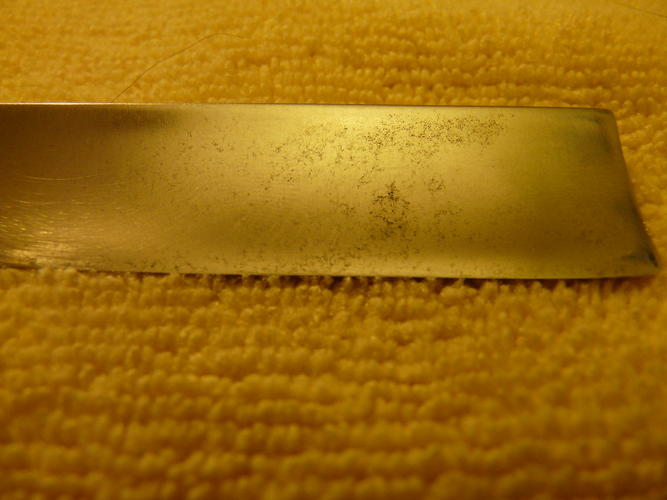
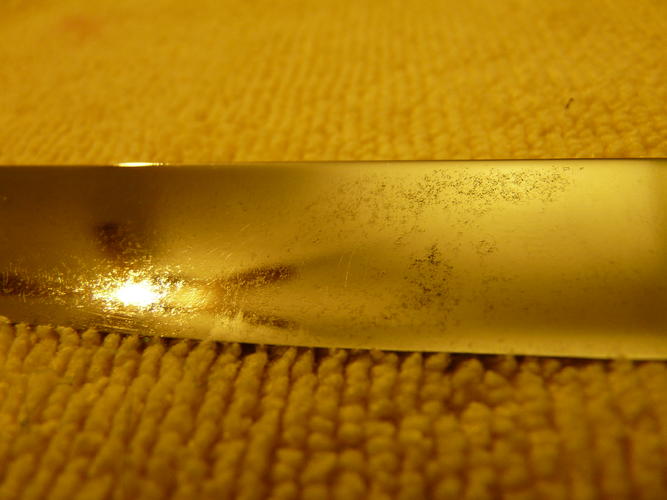
These are the 2 areas where I couldn't get off enough rust to my liking, but still much, much, much better than where I started:
I would have kept going, but the nose was wearing down from where I'd oversanded. I sanded the pit in the earlier pictures down and the tip had worn down in the tumbler a bit as well:
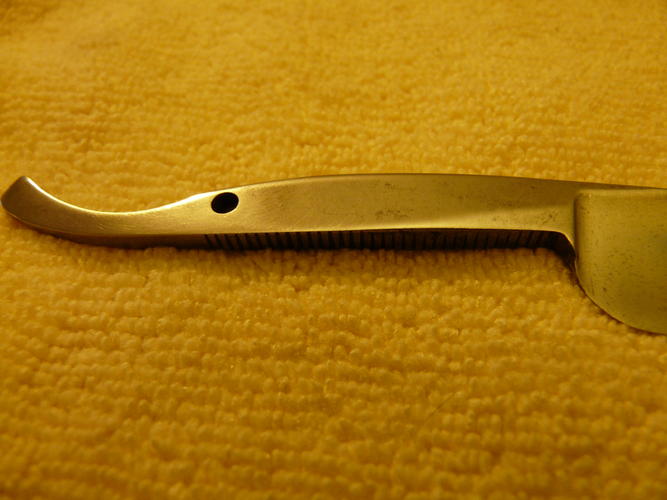
So, now I have this and thinking about my first repinning. What I'd really like to do with this some day is take an old wooden tennis racket to make scales out of:
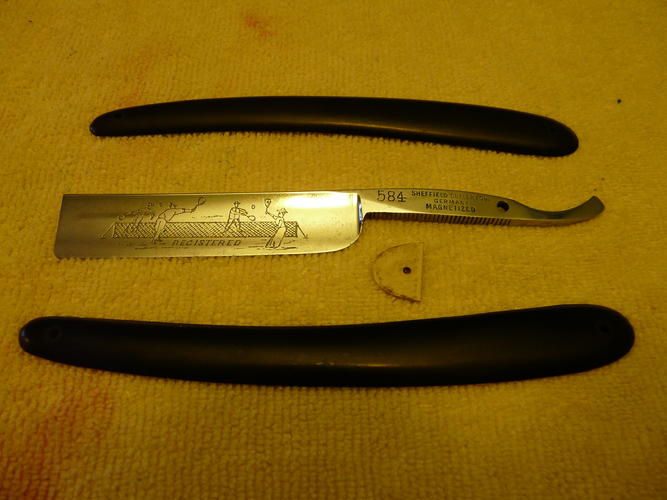
This wedge seems very small. I might just clean it up or may make another:
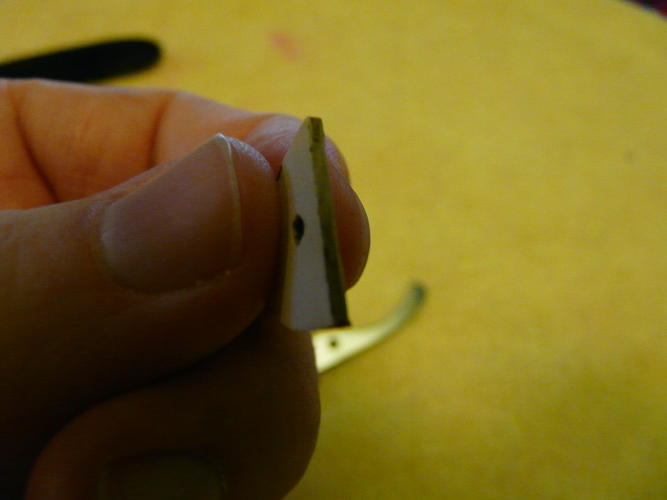
One question I have about repinning is that the hole in the blade is much larger than the hole in the scales. Before I unpinning it you could actually move it around by pulling on it. I'm wondering if I should just drill the holes in the scales bigger and use larger than 1/16 pins or what is normally done?Last edited by RADisorder; 04-28-2013 at 04:31 PM.
-
04-28-2013, 05:29 PM #15
I Think Most Guys Put Tubing In The Pin Hole To "Fill" The Gap.
-
The Following User Says Thank You to Chevhead For This Useful Post:
RADisorder (04-28-2013)
-
04-28-2013, 05:37 PM #16Senior Member
- Join Date
- Apr 2013
- Location
- Houston, TX
- Posts
- 199
Thanked: 28
Simple idea that should work, thanks. Is that the normal sized hole in the blade or do they differ very much? Just curious as this was the first I unpinned.
-
04-29-2013, 12:33 AM #17The Great & Powerful Oz


- Join Date
- May 2008
- Location
- Bodalla, NSW
- Posts
- 15,638
Thanked: 3751
Pivot hole in the razor has very little to do with alignment in scales. Even if you bush the tang dead centre it can still close off to one side if the tang is not true. Many old razor pivots were simply punched thru when hot & were rarely true & often over sized. The plasticity of horn etc is what made it & some other materials perfect for scaling razors. A little heat & voila.
cudarunner likes this.The white gleam of swords, not the black ink of books, clears doubts and uncertainties and bleak outlooks.
-
The Following User Says Thank You to onimaru55 For This Useful Post:
RADisorder (04-29-2013)
-
04-29-2013, 12:54 AM #18Senior Member
- Join Date
- Apr 2013
- Location
- Houston, TX
- Posts
- 199
Thanked: 28
Yeah, I saw the trick of dunking misaligned horn scales in boiling water to straighten - that's a good one. The issue here isn't scale alignment, but the hole was so big compared to the pin, it would move around. Chev's suggestion to put a small tube in there should fix it. Originally Posted by onimaru55
Sounds like the old razor makers didn't generally regulate pivot holes, straight jimps and symmetrical spines so much as today.DOGRAH likes this.


 Reply With Quote


