
Results 21 to 30 of 36
 16Likes
 LinkBack URL
 About LinkBacks
-
05-03-2013, 01:47 PM #21I used Nakayamas for my house


- Join Date
- Aug 2009
- Location
- Des Moines
- Posts
- 8,664
- Blog Entries
- 1
Thanked: 2591 When you have room for them in your living room they do for sure
 Originally Posted by pixelfixed

 Neil Miller and pixelfixed like this.Stefan
-
05-03-2013, 03:44 PM #22Senior Member
- Join Date
- Mar 2011
- Location
- Corcoran, Minnesota
- Posts
- 665
Thanked: 170
Harbor Freight has their disc/belt combination sander on sale now. Just FYI.
Last edited by skipnord; 05-03-2013 at 09:13 PM.
-
05-03-2013, 04:53 PM #23The Shell Whisperer


- Join Date
- May 2008
- Location
- Sin City
- Posts
- 5,597
Thanked: 3384
Same principle as the Stewmac. I made a jig for the magnetic holder of my surface grinder and with the electronic drop indicator I can thin out any material to whatever thickness I want. Works like a charm.
Last edited by Maximilian; 05-03-2013 at 05:55 PM. Reason: typo
əˌfisyəˈnädō | pərˈfekSH(ə)nəst | eS'prəSSo | düvəl ləvər
-
05-03-2013, 05:05 PM #24Senior Member

- Join Date
- Jan 2011
- Location
- Roseville,Kali
- Posts
- 10,432
Thanked: 2027
can we see a pic? what type wheels do you use for certain materials,have an old brown & sharp with a mag table in storage. Originally Posted by Maximilian
never thought about using it for scale material,great idea.
-
05-03-2013, 05:54 PM #25The Shell Whisperer
- Join Date
- May 2008
- Location
- Sin City
- Posts
- 5,597
Thanked: 3384
I don't have a pic but I'll take one next time I need to thin out something. Originally Posted by pixelfixed
əˌfisyəˈnädō | pərˈfekSH(ə)nəst | eS'prəSSo | düvəl ləvər
-
05-03-2013, 06:10 PM #26Senior Member
- Join Date
- Jan 2011
- Location
- Roseville,Kali
- Posts
- 10,432
Thanked: 2027
Great,would love to see it. Originally Posted by Maximilian
-
05-03-2013, 09:05 PM #27Scale Maniac

- Join Date
- Mar 2009
- Location
- Decorah, IA
- Posts
- 2,671
Thanked: 641
No, no... a wide belt sander is a specific tool (think 35-horse $20,000 tool) used for sanding to thickness within a few thousandths of an inch, dead flat. Originally Posted by eod7
But yes, if you are careful and have a good bench stop and nothing valuable behind you the belt sander can do some of the coarse stock removal.
-
05-03-2013, 09:10 PM #28At this point in time...


- Join Date
- Jun 2007
- Location
- North Idaho Redoubt
- Posts
- 27,063
- Blog Entries
- 1
Thanked: 13249
Originally Posted by holli4pirating
Originally Posted by spazola
Originally Posted by BKratchmer
I basically use a combination of what they are talking about,,,
The seperation of the techniques and why I gave up on that old thread is the rounded/contour effect,, I was looking for a way to thin down Scales not Blanks.. To get the effect of contoured scales, the only way I have found to do it is start with Blanks that are .125 -- .140 inches.. build and contour the set of scales as a one piece operation, then after the holes are drilled, I split the two scales apart and thin them down from the back side only, keeping the contour intact.. It is harder to do this way but personally I think they look like sanded Popsicle sticks if you don't JMHO
edit: You also have to take into account that the scales are getting smaller as well as thinner when you do this, so you have to be careful not to drop the height so much that the heel drops through the bottom Means you also have to fit the wedge as a last step operation..
Last edited by gssixgun; 05-03-2013 at 09:15 PM.
-
05-03-2013, 09:58 PM #29Scale Maniac
- Join Date
- Mar 2009
- Location
- Decorah, IA
- Posts
- 2,671
Thanked: 641
Originally Posted by gssixgun
I second that!
-
05-03-2013, 11:04 PM #30Senior Member

- Join Date
- Feb 2012
- Location
- West Midlands, UK
- Posts
- 1,263
Thanked: 360
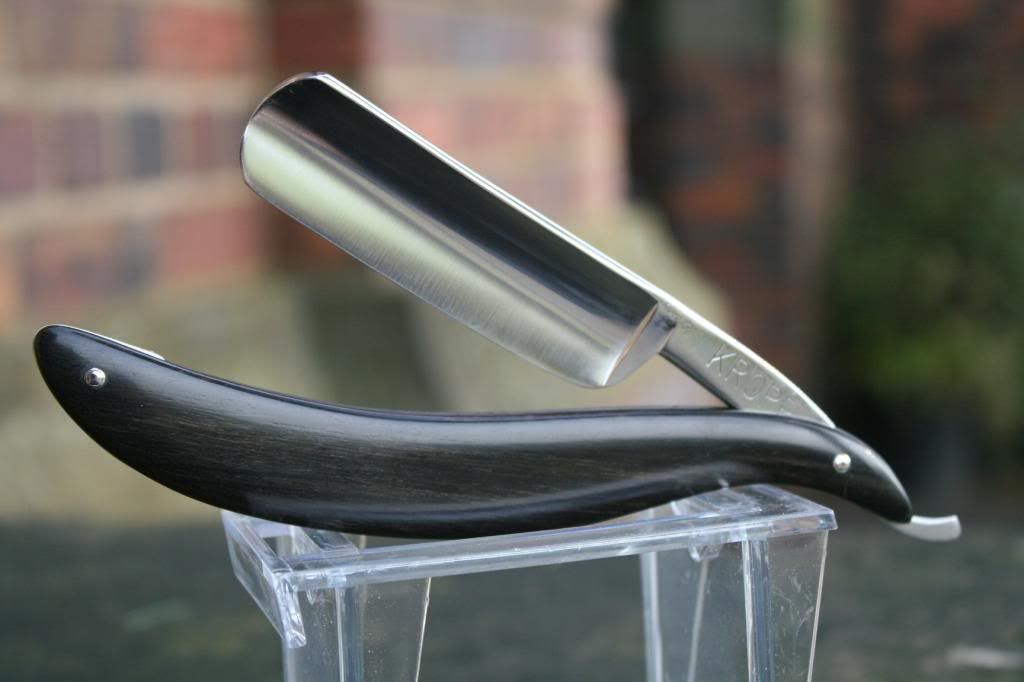
Glen. I have to disagree with your conclusion here. I've attached a picture of some scales that I made using exactly the method described earlier and I don't think they look like Popsicle sticks. The stock was sanded as one piece and then cut in two and taped together whilst profiled and sanded. I always sand the inside of the blank before taping - that way I ensure that the two scales are completely flat. Originally Posted by gssixgun
You may or may not like the end result, but Popsicles it aint.


 Reply With Quote
