
Results 1 to 10 of 25
 82Likes
Thread: Rubberset restore
 LinkBack URL
 About LinkBacks
-
09-30-2016, 05:13 AM #1Senior Member


- Join Date
- Aug 2016
- Location
- AK
- Posts
- 214
Thanked: 97 Rubberset restore
Hello all,
I have couple Rubberset 400 restorations under way. Ended up winning an auction on a trio of 400s a little while ago and have started cleaning them up.
Over the last month or two I have read a bunch of restoration posts, and seen some tricks that should be useful but welcome any advice here.
I have a full knife making/wood working shop so I am cutting some corners on many steps, NONE of these will be hand sanded for 6hrs hahaa. But my hands already hurt, so there will be a fair bit of hand sanding and polishing.
Engine46 provided this link in my other post, great info! Thank you.
OSSB - Rubberset 400
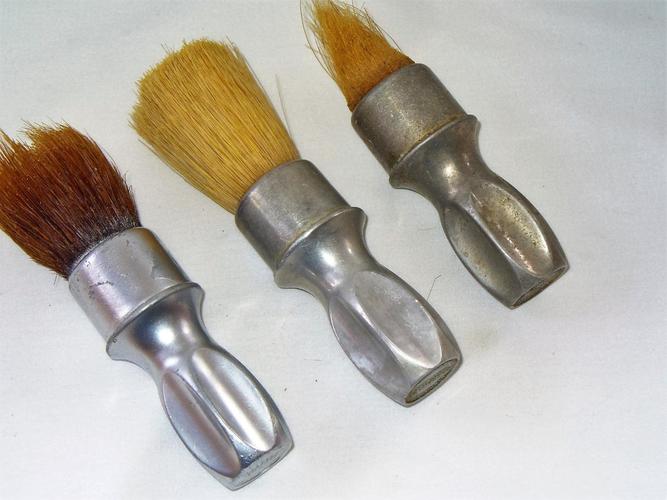
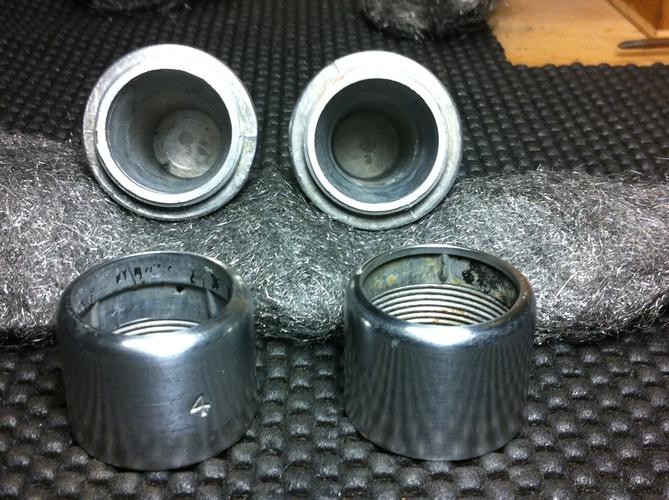
Heres a before pic of the triplets, all in decent shape . one was...umm restored? spray painted anyway, may be bead blasted for prep, was a little rough feeling under the paint.
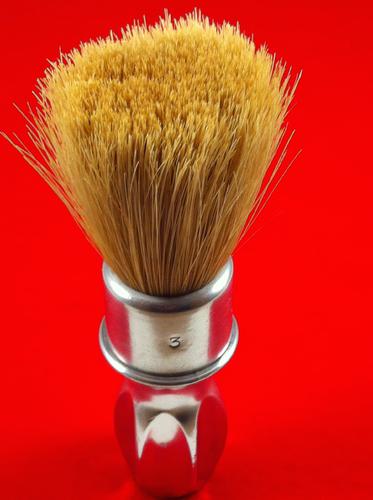
The center #3 looks good, knot is in excellent shape, and the one on the right is ugly for now. Each shows its age the usual for old aluminum, oxidation, some pitting and a few dings here and there on each of them but will clean up nicely.
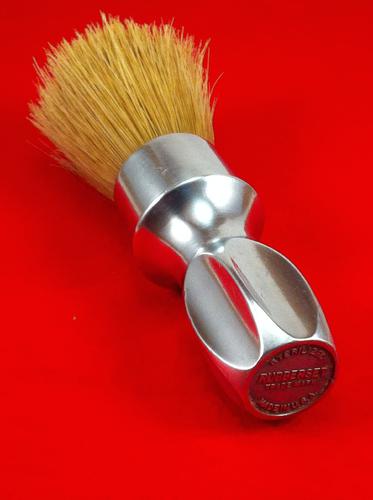
I gave the center one a quick clean up just for kicks, taped up the knot and shined her up a little. Hot soapy water, followed by a quick 000/ 0000 steel wool buffing. Rinsed the knot really well in hot water followed by a blast of compressed air to fluff it up. looks alright. I will properly polish this one up later, once I have a knot for it, for now its on stand by.
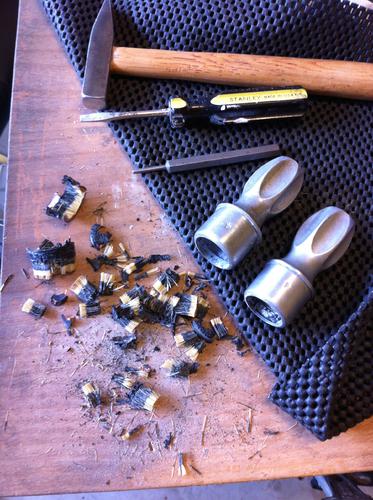
The other two I cut the knots close to the base, then hit quickly on a large disk sander to give me a flat face to drill. Drilled the knots down through the glue 5 or six holes in each and chipped out the glue and old knots. Between the 3 second touch on the 12" disk sander , and the drilling the shop smelled rather funky. The glue chipped out easily with a small hammer and screwdriver. The painted handle was hit with acetone, stripped it clean with a few wipes.
I noticed a few differences between these two #4s once I got them apart.
I both had some decent pitting which I sanded out. Here I cheated a bit with my 2x72 grinder. I used a loose, 220g Jflex belt running very slow to remove the deep corrosion from under the flare just below the rim/cap on both. Then hand sanded with 320g, followed by a quick buff w steel wool. I am just getting the major blemishes out at this point and the quick buff w the steel wool allows me to see where more attention is needed.
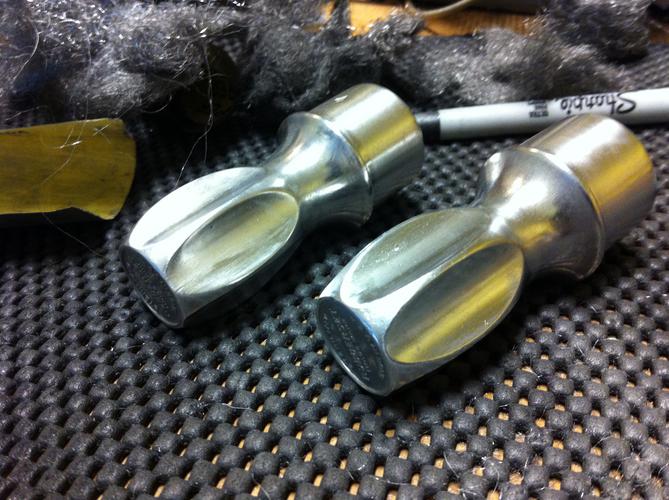
You can see the difference . 320g left, and a quick shine to show me where I need to work more. As with any sanding I want the bulk of the work to be here with the 320, once everything completely sanded and where I want it the finer grits will go quickly.
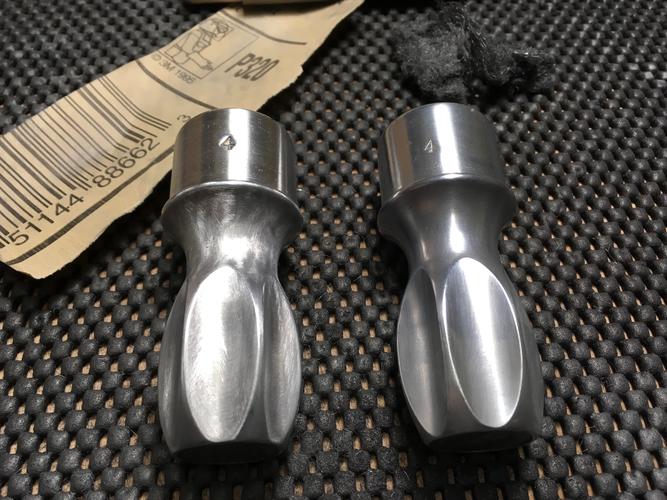
Next I will progress from 400g, 600g, and on up ,Then will see how they look and make a decision on the shine. I have w/d paper up to 2500g so we will see how far I take the finish.
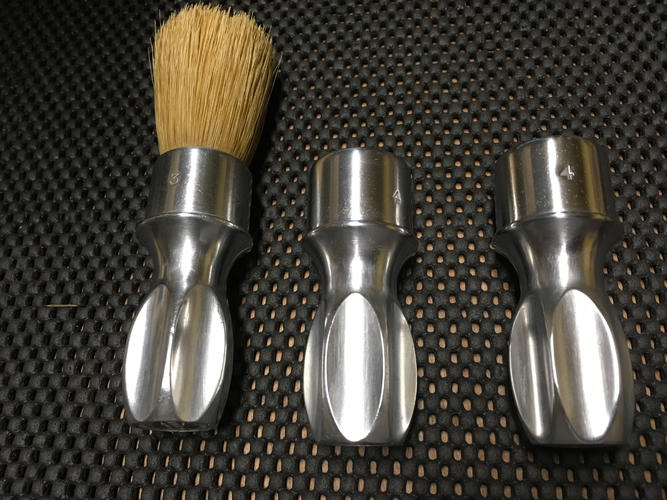
Here are the three as they sit now.The flutes on the two #4s I hit w 600g after the 0000 buff, just messing around. Two tone
More pics soon, Knots are inbound.
I hope to knock these out quickly.Last edited by AKmik; 09-30-2016 at 05:15 AM.
-
The Following 5 Users Say Thank You to AKmik For This Useful Post:
BobH (09-30-2016), Geezer (10-01-2016), Hirlau (09-30-2016), markbignosekelly (10-01-2016), Thug (09-30-2016)
-
09-30-2016, 05:30 AM #2Senior Member


- Join Date
- Dec 2010
- Location
- South Florida
- Posts
- 13,530
Thanked: 3530
Thank you for showing the progression photos.
AKmik likes this.
-
09-30-2016, 02:23 PM #3Senior Member
- Join Date
- Aug 2016
- Location
- AK
- Posts
- 214
Thanked: 97
No problem Hirlau ,
These restore threads are always cool to watch. I have been hunting one of these brushes for a while now, they are about as cool as a brush can get once cleaned up. The prices are getting little nutty for an old hunk of aluminum, but these will be sweet.
Once I saw Phrank's thread on this project I knew what my next brush was going to be so I have been researching this little job for a bit. That one was done by MikeB52 and looks perfect! I will go that route with one, including a Shavemac knot for myself.
The knots for the others will be from Nathan at Envy shave. After reading up on available options , and a ton of reviews I was really interested in trying out a couple of the knots he sells. I have 2 Envy white supreme badger , and 2 of his luxury silvertip knots inbound.
I was going to go with TGN, but read many many reviews and decided to try the Envy knots out. Should be in the mailbox very soon.
**Edit.
I have never ordered anything from Envy but so far so good. 2 day shipping, and he got back to me very quickly with answers to some questions I had before placing my order.
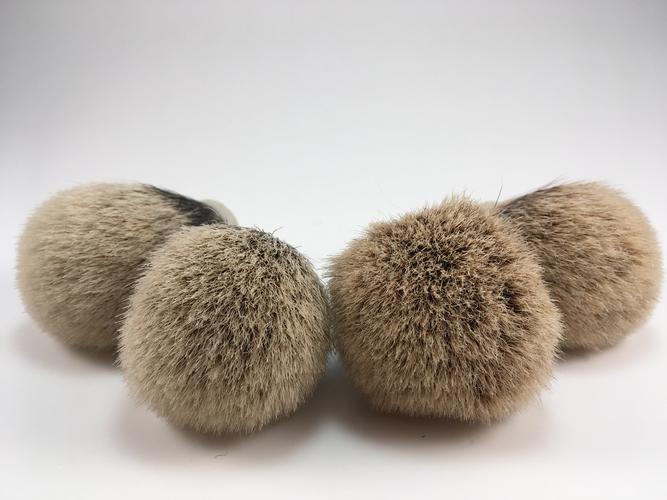
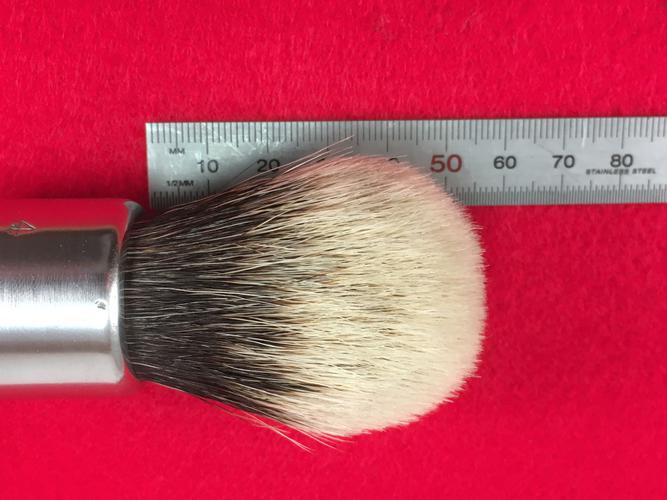
Here are the knots .

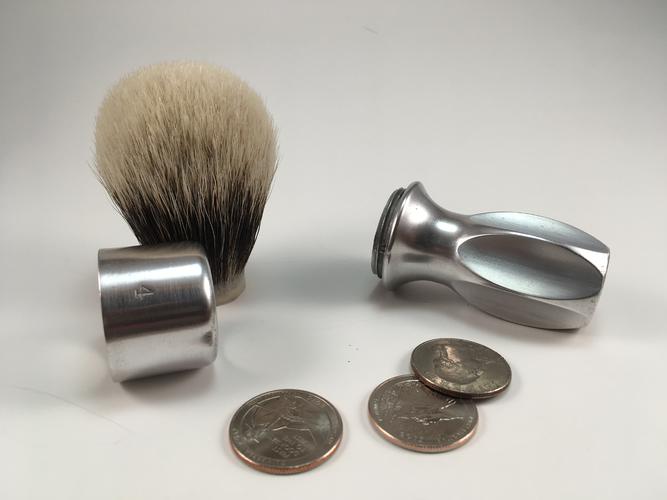
I remember someone mentioning the three quarters to level and set the depth on the knot. I tried it and took a measurement and looked just right to me.
I decided to set one of the knots temporarily in one of the handles to test out. The handle is no where near the mirror finish on some, but I had to test this brush out.
Last edited by AKmik; 09-30-2016 at 09:05 PM. Reason: Ninja fast shipping of badger hair!!
-
The Following 3 Users Say Thank You to AKmik For This Useful Post:
HARRYWALLY (10-01-2016), Hirlau (10-01-2016), markbignosekelly (10-01-2016)
-
09-30-2016, 09:18 PM #4Senior Member
- Join Date
- Aug 2016
- Location
- AK
- Posts
- 214
Thanked: 97
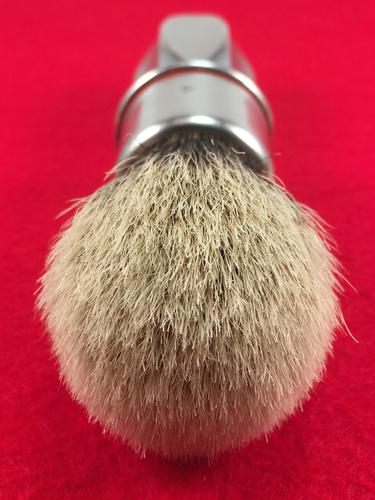
Here is the knot pushed in place by the three quarters.
Once the knot height was set I made sure it was sitting square in the cap and carefully glued it in with a hot glue gun, I was very careful not to let the glue settle down past the plug. It is set for easy removal so I can finish the handle later. But for now I was dying to try it.
This handle got a very surgical 220g removal of the deep pitting/scars on the grinder. Everything else is done by hand , 320g , then 400g, and a fast polishing with 0000 steel wool. Then I retouched the flutes in the handle with 400g for kicks.
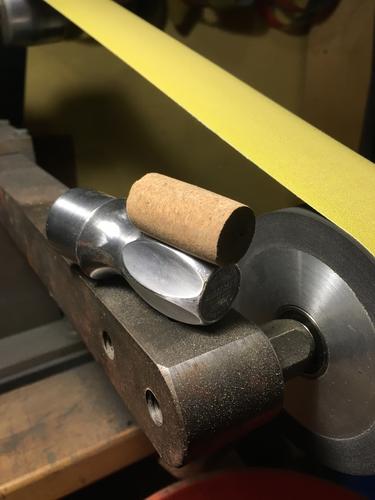
Custom sized cork for sanding the flutes.
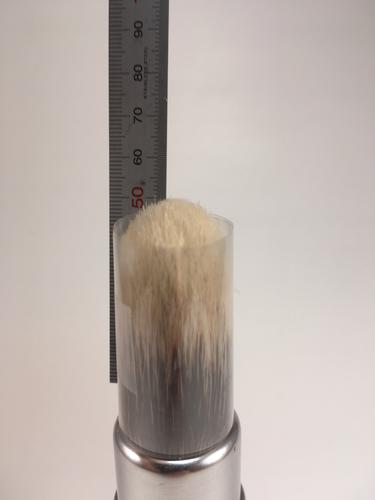
Here is the knot set to depth, and a better look at the measurement.

Knot set, and ready for a shave.
And a couple post use, Had to start it off right.
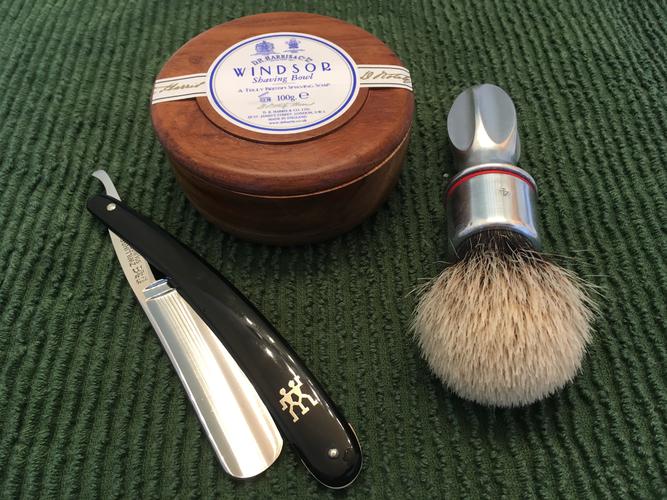
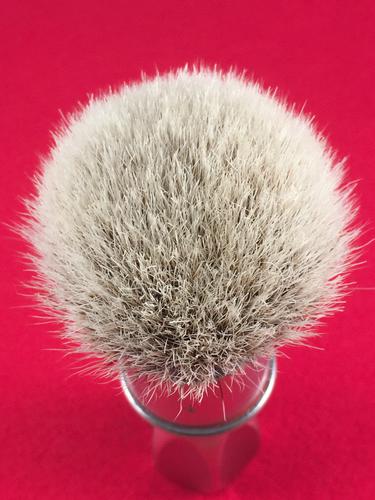
This one will go to the back of the line up for finishing. The brush performed great! Tons of backbone and very dense thats for sure, puts my floppy zenith to shame.Last edited by AKmik; 10-01-2016 at 02:00 AM.
-
The Following 5 Users Say Thank You to AKmik For This Useful Post:
gabrielcr78 (11-30-2017), Geezer (10-01-2016), HARRYWALLY (10-01-2016), Hirlau (10-01-2016), markbignosekelly (10-01-2016)
-
10-01-2016, 02:06 AM #5Senior Member
- Join Date
- Dec 2010
- Location
- South Florida
- Posts
- 13,530
Thanked: 3530
These boar brush restoration threads have opened my eyes. In the past I passed up a few old boar brushes in search of badger,,, now I will look them over & consider replacing the knot.
-
10-01-2016, 03:13 AM #6Str8Faced Gent.


- Join Date
- Aug 2013
- Location
- Orangeville, Ontario
- Posts
- 8,465
- Blog Entries
- 1
Thanked: 4207
Nice work, and nice belt sander!
You will love the Shavemac knot in there. I hope to come across another rubberset myself one day.
Enjoy!HARRYWALLY likes this."Depression is just anger,, without the enthusiasm."
Steven Wright
https://mobro.co/michaelbolton65?mc=5
-
10-01-2016, 12:15 PM #7I love Burls....... and Acrylic

- Join Date
- Mar 2012
- Location
- Baden, Ontario
- Posts
- 5,475
Thanked: 2284
Excellent thread! Thanks for posting. You've done great work on this brush, your work and techniques looks like you've been doing this for years. Seems the research payed off!


Man those Envy knots look awfully familiar.....MikeB52 likes this.Burls, Girls, and all things that Swirl....
-
10-01-2016, 12:46 PM #8Senior Member
- Join Date
- Aug 2016
- Location
- AK
- Posts
- 214
Thanked: 97
Thanks Gents, Originally Posted by HARRYWALLY

Harrywally , theses are my first few of theses , but I have been doing similar work for a long time. Usually sanding steel, this is cake compared to hand sanding a blade . Aluminum works like buttahh!
The Envy knots I don't know a whole lot about them or if someone is selling similar. Any info on these or any other is welcome. So far seems like a quality knot. Very dense and great backbone , I am really liking this one. Just used it again this morning.
Mike ,
Thanks! getting there, but had to put one in service. The grinder is a KMG from Beaumont metal works. variable speed 2x72. The new 4" wheel is for finishing those razors I started a little while ago, but my shop adhd is in full swing!! I have a half a dozen unfinished projects scattered all over the shop, no time, and theses brushes somehow jumped in line. I have another rubberset on the way also.. don't drink and ebay !!
One of these will be the mack daddy brush with Shavemac knot like the one you set up. so any advice on that one would be a big help. I was told 24x52mm D01 on the knot , so have been looking at them.
-
10-01-2016, 01:56 PM #9I love Burls....... and Acrylic
- Join Date
- Mar 2012
- Location
- Baden, Ontario
- Posts
- 5,475
Thanked: 2284
Here are the knots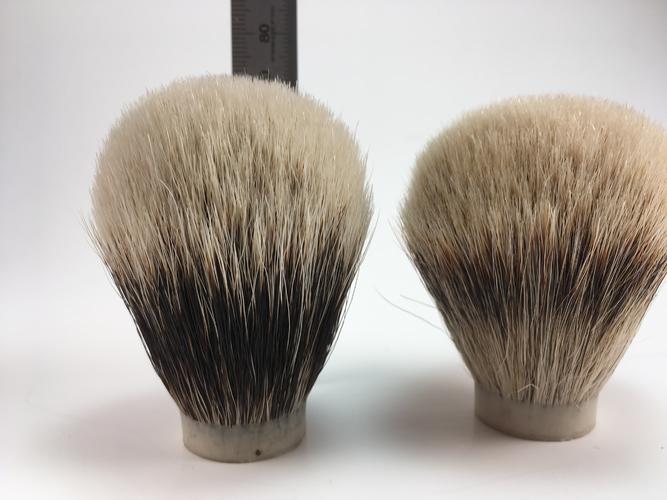
These are the knots I use, I call them, on the left, Extreme altitude Winter coat white tip 2 band, and the one on the right is a Sterling Silvertip Albino ghost badger....... Kinda like those names...... Ha!
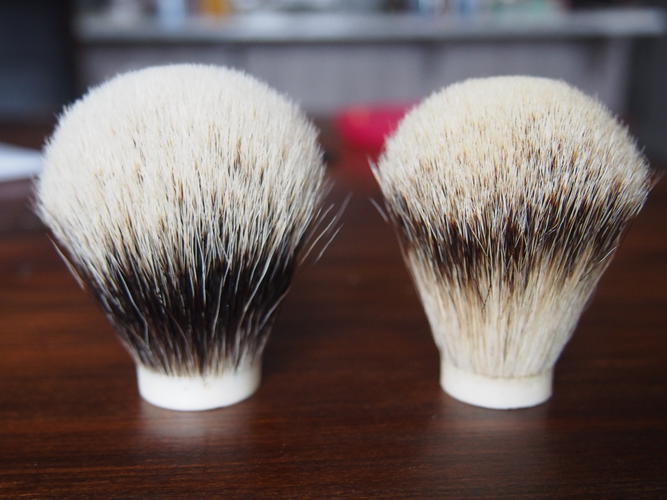
I have a feeling we get them from the same place.
22mm Knot Finest Two Band Badger Hair Shave Brushes Knot | eBay
Buuuuuut, I could be wrong too.Last edited by HARRYWALLY; 10-01-2016 at 01:59 PM.
Burls, Girls, and all things that Swirl....
-
10-01-2016, 02:22 PM #10Str8Faced Gent.
- Join Date
- Aug 2013
- Location
- Orangeville, Ontario
- Posts
- 8,465
- Blog Entries
- 1
Thanked: 4207
I'm in the process of gathering the stock to build my own 2x72 for improved sanding options in the shop myself so appreciated the tool arm shot above..
Those specs are the ones I used for the rubberset I did and as per Andrew, it came in at just the right finished height and backbone. The D01 two band is the perfect balance between backbone and tip softness, IMO, when you want the 'very best knot on the market' in your handle. Going to be ordering a few more from Shavemac for two special brushes on the bench right now. Only downside is the price, and wait time as the top end knots take a week or two to build before shipping.
When I was setting mine, I set up a holder that gripped the top piece of the brush and allowed me to hang it, knot down, or knot up while curing. That way after about half an hr tips up, I was able to allow the knot to fully cure tips down and the knot settled into the E6000 nicely. Plus I was able to back fill the area behind the knot base to ensure a fully encapsulated knot base.
Again, great work on that first one, look forward to seeing the rest. And you have another one you won?? Nicely done Rubberset mogul! I need to search harder it seems, lol."Depression is just anger,, without the enthusiasm."
Steven Wright
https://mobro.co/michaelbolton65?mc=5


 Reply With Quote