
Results 21 to 30 of 57
 39Likes
Thread: Tightening pins
 LinkBack URL
 About LinkBacks
-
09-02-2015, 02:21 PM #21Senior Member


- Join Date
- Feb 2013
- Location
- Haida Gwaii, British Columbia, Canada
- Posts
- 14,457
Thanked: 4830
http://straightrazorpalace.com/works...mechanics.html
This was a very good discussion for the most part and if you read through it I think you will see how it all works together.It's not what you know, it's who you take fishing!
-
The Following User Says Thank You to RezDog For This Useful Post:
JOB15 (09-02-2015)
-
09-02-2015, 02:32 PM #22Senior Member

- Join Date
- Jul 2014
- Location
- Clearwater, FL
- Posts
- 233
Thanked: 31
I'd like to jump in here if you don't mind, I have a couple of razors that became loose shortly after I got them back from being sent out. Is there a cheap easy solution to tighting or repining razors like Microbolt pin kits that I have seen on other websites. I would to take care of some stuff if its easy enough instead of constantly send out the razor.
thanks,"Everybody owes, everybody pays. Because that's how you stand up against the rising of the tide."
-
09-02-2015, 02:44 PM #23Incidere in dimidium


- Join Date
- Mar 2012
- Location
- Val des Monts, Quebec
- Posts
- 4,070
Thanked: 1440
If all they need is to be tightened, it's dead easy. Find a solid surface (a little jeweler's anvil is ideal but anything hard from the side of a hammer head to the top of a vise, to... well, you get the picture), hold the razor so that the pin is supported on that solid surface. And then VERY gently tap around the end of the pin. You don't even need a hammer to do this - the back of a spoon will have enough heft to it. Whatever you do, don't use a full-sized hammer as you can very easily bend the pin and/or crack the scales. If you have a tiny little ball peen hammer that's ideal. And I do mean tiny - mine is a either a 2oz or 4oz hammer. Can't recall which. But seriously, the back of a spoon works fine. Originally Posted by Mafuzul

Don't just hit straight down on the end of the pin but rather around the outer edge. This is why you want to use a rounded thing to strike it with.
And - this can't be stressed too much! - easy does it. markbignosekelly and Mafuzul like this.
It was in original condition, faded red, well-worn, but nice.
This was and still is my favorite combination; beautiful, original, and worn.
-Neil Young
-
The Following User Says Thank You to Cangooner For This Useful Post:
Mafuzul (09-02-2015)
-
09-02-2015, 03:18 PM #24Senior Member

- Join Date
- Feb 2012
- Location
- West Midlands, UK
- Posts
- 1,263
Thanked: 360
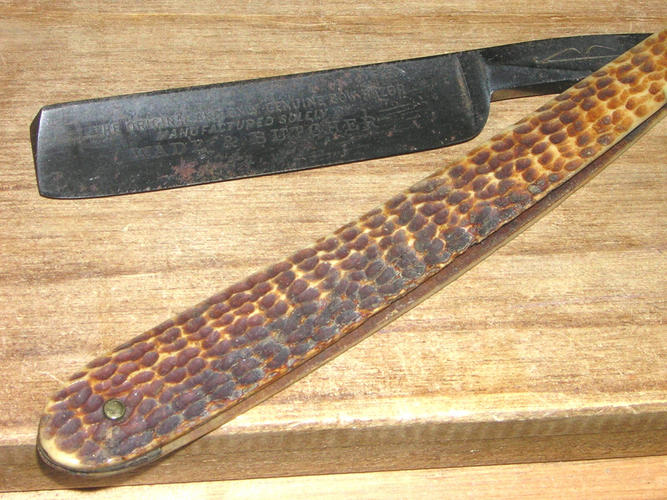
Well, I like the look of the original scales - I can see they are grubby but - assuming the pivot end is OK, I'd be tempted to clean them up. Again, the 'How To' wiki has lots of good ideas on scale cleaning and restoration. Originally Posted by JOB15
My service is good, fast and cheap. Select any two and discount the third.
-
09-02-2015, 03:23 PM #25www.edge-dynamics.com

- Join Date
- Feb 2013
- Location
- London
- Posts
- 3,066
Thanked: 512
They are broken at the top with a piece missing . Originally Posted by UKRob
Plus I like new shiny things.
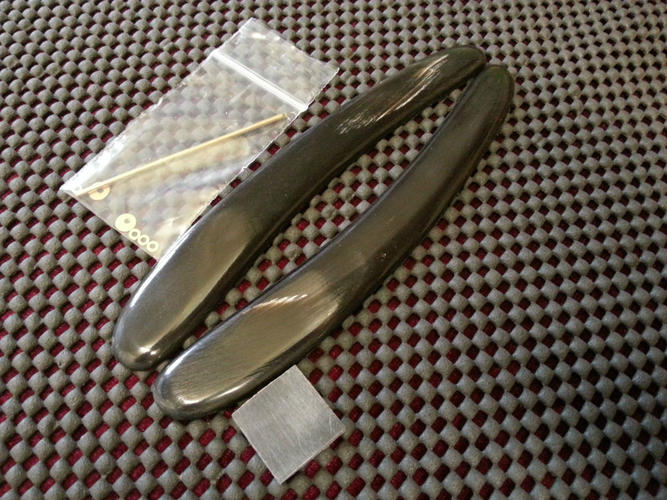
The horn scales im using will do for a time or depending on the finished restoration of the blade, I haven't received it yet.
If there is a lot of hone ware or some other issues then i'll leave the horn on. If however it ends up shiny and a great shaver then ill consider better scales.Last edited by JOB15; 09-02-2015 at 03:38 PM.
-
09-02-2015, 03:24 PM #26Senior Member
- Join Date
- Feb 2012
- Location
- West Midlands, UK
- Posts
- 1,263
Thanked: 360
It depends what you mean by micro bolts. The ones regularly used for mocking scales prior to final fitting (available from Micro Fasteners) - are small enough to use on most old and new razors - but not really suitable for a final result. The alternatives used by a few of the custom makers (with hex heads) are too big for use in old razors as they will not fit through the pivot hole. It's possible to re-drill the pivot - but not easy with tempered steel. Originally Posted by Mafuzul
Mafuzul likes this.My service is good, fast and cheap. Select any two and discount the third.
-
09-02-2015, 03:39 PM #27Senior Member
- Join Date
- Jul 2014
- Location
- Clearwater, FL
- Posts
- 233
Thanked: 31
that clears that up, back to just tightening up the pin then Originally Posted by UKRob
"Everybody owes, everybody pays. Because that's how you stand up against the rising of the tide."
-
09-02-2015, 06:11 PM #28www.edge-dynamics.com
- Join Date
- Feb 2013
- Location
- London
- Posts
- 3,066
Thanked: 512
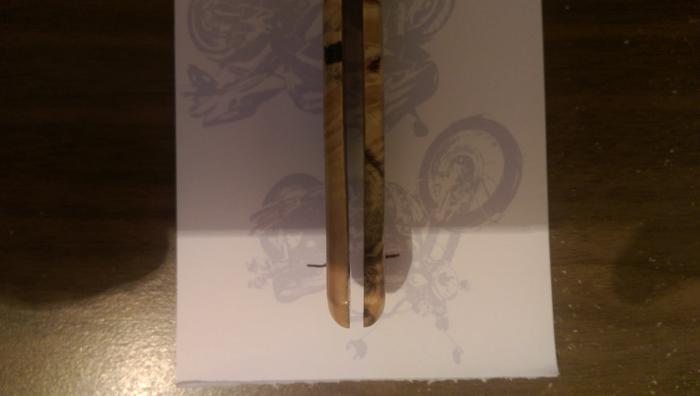
I've also just realised that the pin holes were drilled at an angle. I've marked them out in the picture below:
 celticcrusader likes this.
-
09-02-2015, 08:27 PM #29Senior Member
- Join Date
- Feb 2012
- Location
- West Midlands, UK
- Posts
- 1,263
Thanked: 360
That looks to be quite some angle - does the blade close to the left when assembled? Apart from bad workmanship, the only reason I can suggest is that it was done deliberately because the blade itself is way out of straight. Originally Posted by JOB15
I'd be tempted to fill the pivot with epoxy and start again with a straight hole. See what you get for trying to help your BiL.My service is good, fast and cheap. Select any two and discount the third.
-
09-02-2015, 10:46 PM #30Senior Member
- Join Date
- Feb 2013
- Location
- Haida Gwaii, British Columbia, Canada
- Posts
- 14,457
Thanked: 4830
I think there may be more going on here than first glance. Put it together with microbolts first to see hoe it dummies up.
Cangooner likes this.It's not what you know, it's who you take fishing!


 Reply With Quote