
Results 1 to 10 of 14
 10Likes
Thread: Union Cutlery Spike (Wednesday)
 LinkBack URL
 About LinkBacks
-
07-01-2012, 10:35 PM #1Senior Member


- Join Date
- Apr 2011
- Location
- Wheat Ridge, Colorado
- Posts
- 1,330
Thanked: 262 Union Cutlery Spike (Wednesday)
Hi again all,
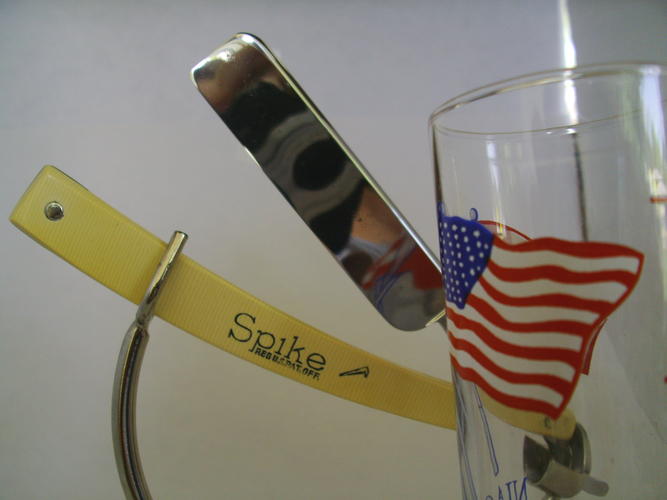
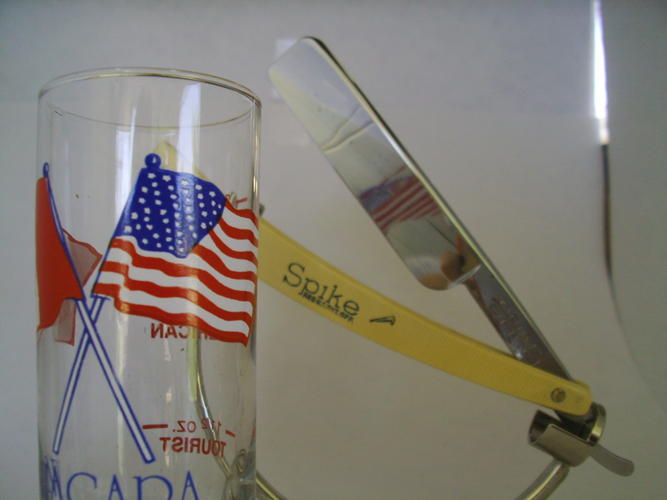
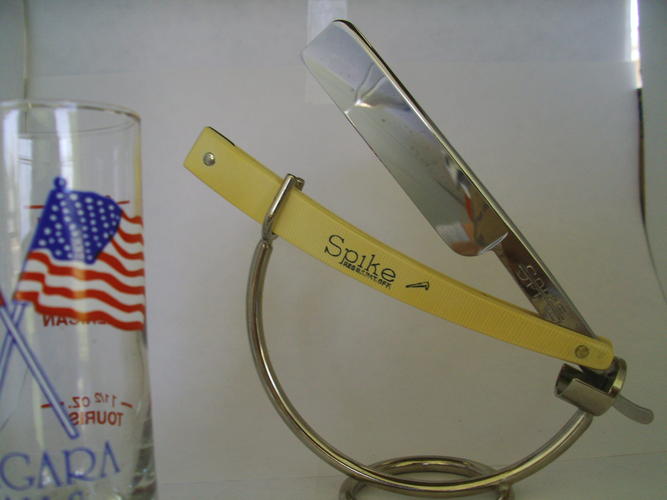
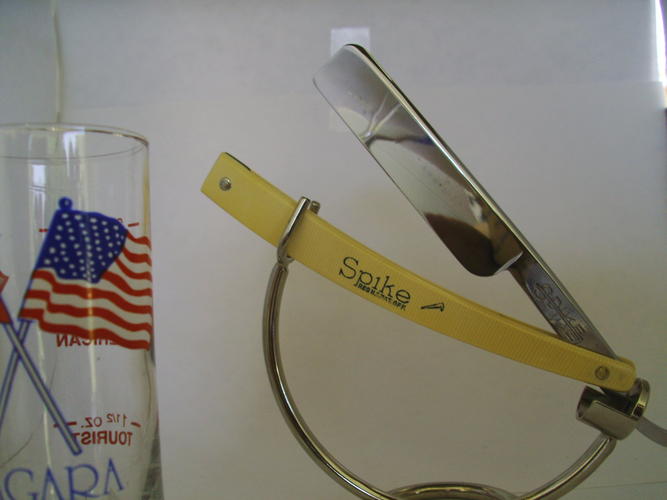
I have a 7 day set of Union Cutlery Spikes, and some of them are not exactly 'pristine' razors. So one by one I have been going through them and restoring them to as close to original as I can.
So far I have completed Monday and Tuesday, with Monday having been re-honed and shave tested. Tuesday is due for a honing, and I just started on Wednesday today.
The things I wanted to accomplish on this razor were:
Safely remove the scales, clean and re-color the etchings to original.
Sand and polish the blade to near original (or better, you know how spikes come, pretty rough from the factory even)
Make my own domed washers and make my own peened brass pin.
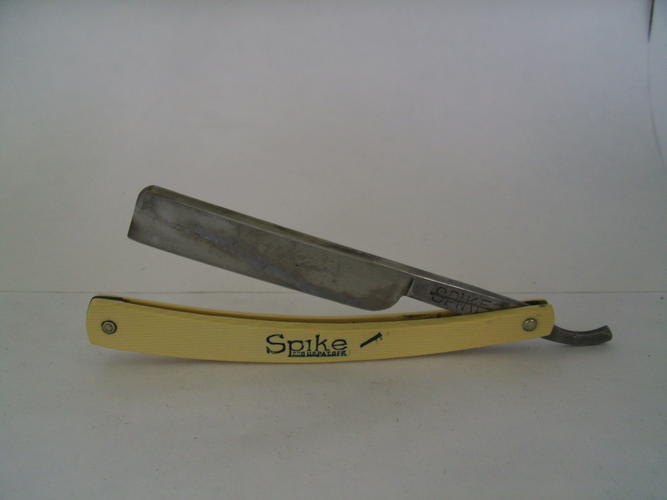
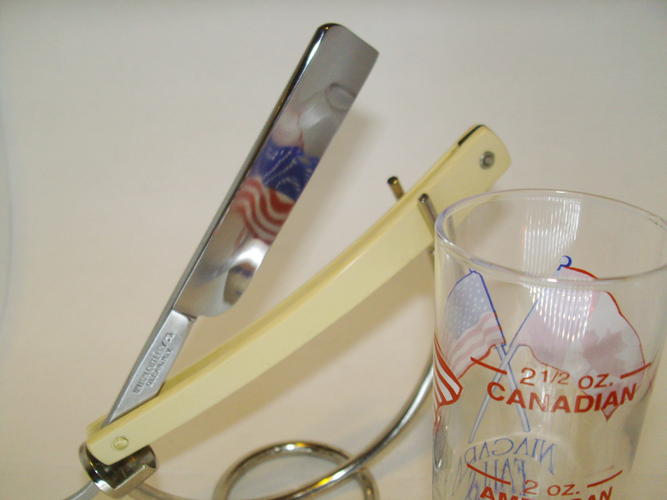
I sanded and sanded, but it seems there is always going to be some pits that are just impossible to get out completely. I would have to sand until way to much metal had been removed for my liking. I went from 220 to 1000 W/D and then polished it with black, brown and green polishing compounds on my bench grinder with 6" buffing wheels installed. Since there are only 2 sides I have to swap out wheels when I swap out grits, as I have kept the very fine grinding wheel on the right side for those razors that just require and must has some additional metal removed.
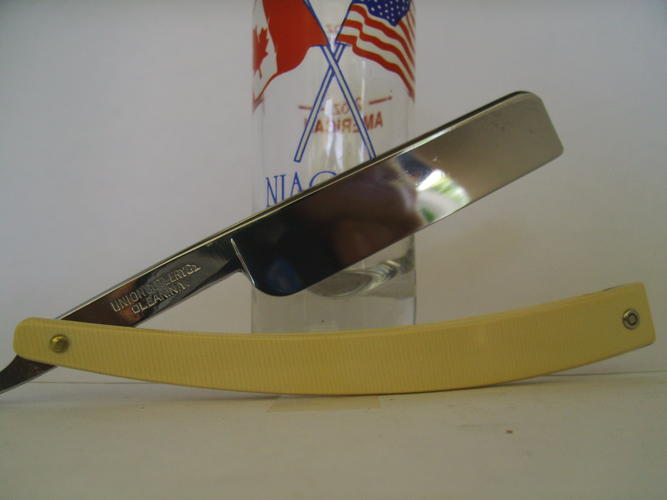
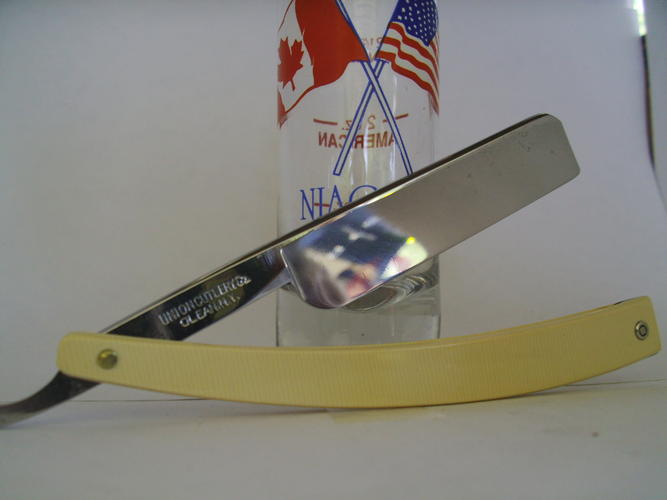
I was able to accomplish everything I set out to do. I used 3/32 brass rod and 2 brass washers that I domed using a simple punch, a piece of iron with a 1/16 hole drilled in it. I started with the 6" brass rod in my vise, and peened over a small mushroom. I slid on a newly domed brass washer and assembled the razor on the rod. I cut the rod to length and then peen'd over both ends to the look you see it here. I think it will look better with more practice, but for my first ever true 'custom' pin, I'm quite happy. I used 2 stainless steel bearing washers for it. I don't know if the brass and stainless will react together, but I did it anyway. I can always cut it off and do it again if I need to.
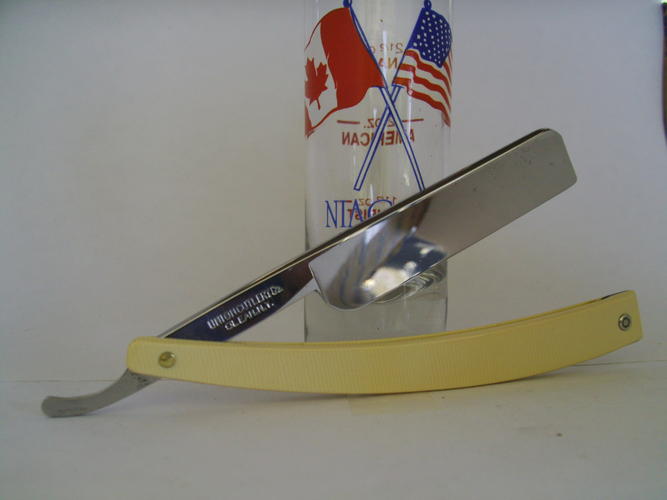
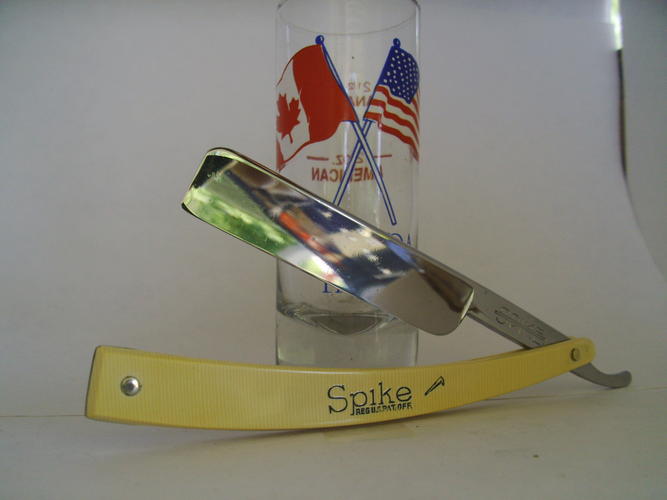
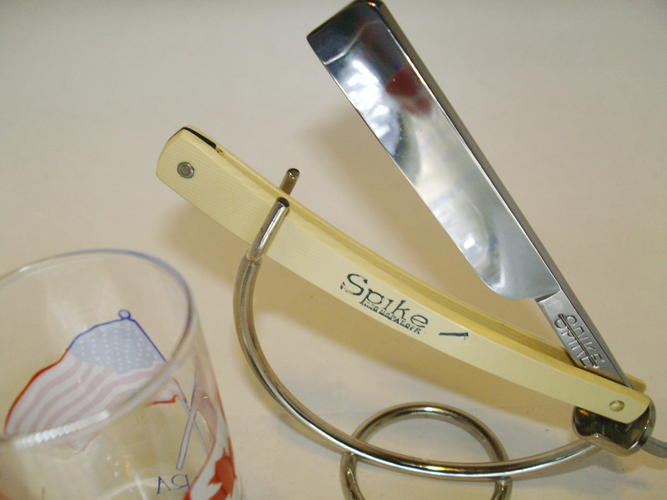
The scales are original, but I had previously re-colored the etching with wax based automotive scratch sealer (original color) but during the cleaning process, much of it came out again. So, I re-colored it again after cleaning.
The razor even exceeded my own expectations as I was able to get a true mirror finish to her. I think it looks better now than it did when it left the factory, for sure. I have 8 other examples of the Union Cutlery variety, so I know.
It is still waiting it's turn at being re-honed, but I think I shall wait until every day of the week is completed and then hone Tuesday thru Sunday all together. That sounds like a great couple of evenings of honing to me!!
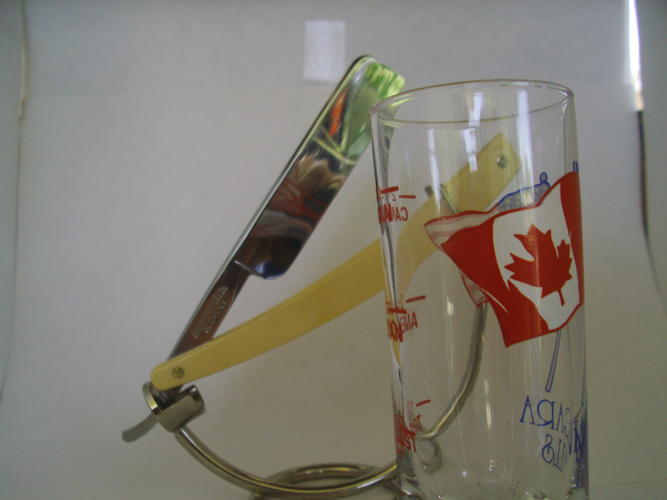
So, here she is, ready to go back into the rotation. Enjoy!!
M

-
07-01-2012, 10:49 PM #2..mama I know we broke the rules...


- Join Date
- Feb 2010
- Location
- Toronto, Ontario, Canada
- Posts
- 2,895
- Blog Entries
- 8
Thanked: 993
Nothin' wrong with that one! Nice work.
It will be interesting to see your whole set when it's complete.
-
The Following User Says Thank You to Maxi For This Useful Post:
mjhammer (07-01-2012)
-
07-02-2012, 12:01 AM #3Senior Member

- Join Date
- Mar 2012
- Location
- Tulsa, Oklahoma, United States
- Posts
- 1,031
Thanked: 163
Love it! I have a spike with the green translucent scales and I love that little guy!
-
The Following User Says Thank You to maddafinga For This Useful Post:
mjhammer (07-02-2012)
-
07-02-2012, 12:16 AM #4Pasted Man

- Join Date
- Jul 2010
- Posts
- 1,283
Thanked: 269
The spike is a good razor and that one looks great.
The seven day set you have did it come as a seven day set or did you put it together from collecting them?
-
The Following User Says Thank You to Castel33 For This Useful Post:
mjhammer (07-03-2012)
-
07-02-2012, 01:27 AM #5Senior Member
- Join Date
- Apr 2011
- Location
- Wheat Ridge, Colorado
- Posts
- 1,330
Thanked: 262
I put it together.... It took over a year to get 7 'nice' Spikes that all matched in size and condition. I had over 20 at one time, but most had problems. I have 8 spikes now, one Gold Arrow and another 'Union Cutlery' no name. But the 7 day set is complete now with all matching 5/8's in almost as good of condition as this one. This is the 3rd of the set to be fully restored and polished now. I am going to work my way thru the rest throughout this week. Next week I'll post up another pic of the completed 7 day set. I may add to this thread as they get finished. Originally Posted by Castel33

Thanks for askin'...
M
-
07-02-2012, 01:58 AM #6Pasted Man
- Join Date
- Jul 2010
- Posts
- 1,283
Thanked: 269
Nice I have been doing almost the same thing just with 4/8th spikes.
mjhammer likes this.
-
07-03-2012, 01:44 AM #7Member

- Join Date
- Apr 2011
- Location
- Brisbane, Australia
- Posts
- 1,434
Thanked: 642
Mike,
Looks great. +1 to Maxi's comment, would love to see the whole set once they're done.
Well Done.
Stu
-
The Following User Says Thank You to Str8Raz0r For This Useful Post:
mjhammer (07-03-2012)
-
07-03-2012, 02:34 AM #8Senior Member
- Join Date
- Apr 2011
- Location
- Wheat Ridge, Colorado
- Posts
- 1,330
Thanked: 262
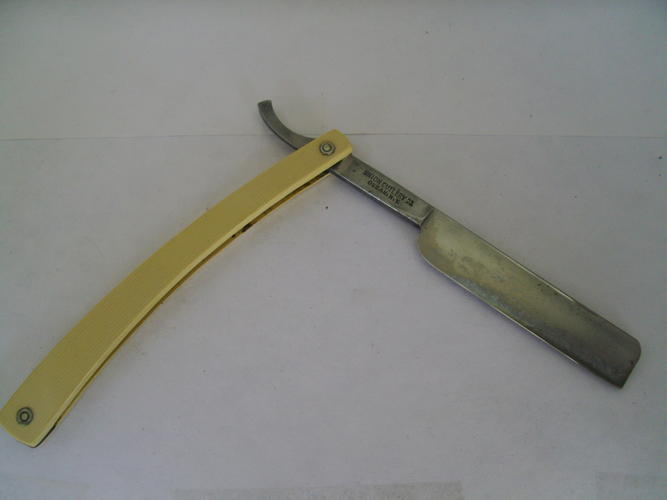
here is Thursday, just finished her minutes ago. I didn't re-color the etching on the scales after cleaning, and you can tell. I'll have to re-do it after I hone it up. This time I was smart enough to take a couple of before pictures.
I did the same thing as Wednesday and made a new brass pivot pin, stainless bearing washers and polished the bejeeezus out of it. I hate bejeeezus's, hehehe.
So, Heeeeeeeere's Thursday!!!
Thanks men,
M
 Havachat45 likes this.
-
07-03-2012, 03:14 AM #9Senior Member
- Join Date
- Mar 2012
- Location
- Tulsa, Oklahoma, United States
- Posts
- 1,031
Thanked: 163
Love it! Can't wait to see the full set when they're done.
-
The Following User Says Thank You to maddafinga For This Useful Post:
mjhammer (07-03-2012)
-
07-03-2012, 05:13 PM #10'with that said'


- Join Date
- Aug 2010
- Location
- Walla Walla in WA State USA
- Posts
- 11,226
Thanked: 4237
Looking Good my friend!

-
The Following User Says Thank You to cudarunner For This Useful Post:
mjhammer (07-03-2012)


 Reply With Quote