
Results 1 to 10 of 24
 35Likes
 LinkBack URL
 About LinkBacks
Hybrid View
 Voidmonster


-
01-10-2013, 05:04 AM #1Captain ARAD.


- Join Date
- May 2011
- Location
- Pacifica, CA
- Posts
- 2,474
Thanked: 2227 Ivory-scaled 1820's Joseph Elliot restore
This will be split into two parts. Part one will be about the original condition of the razor.
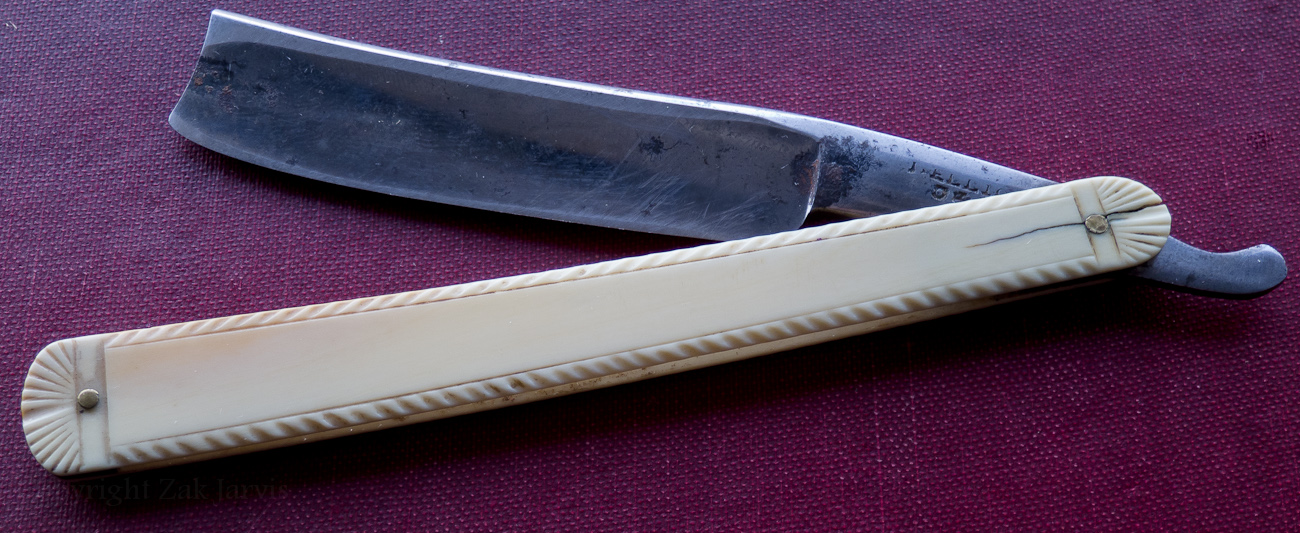
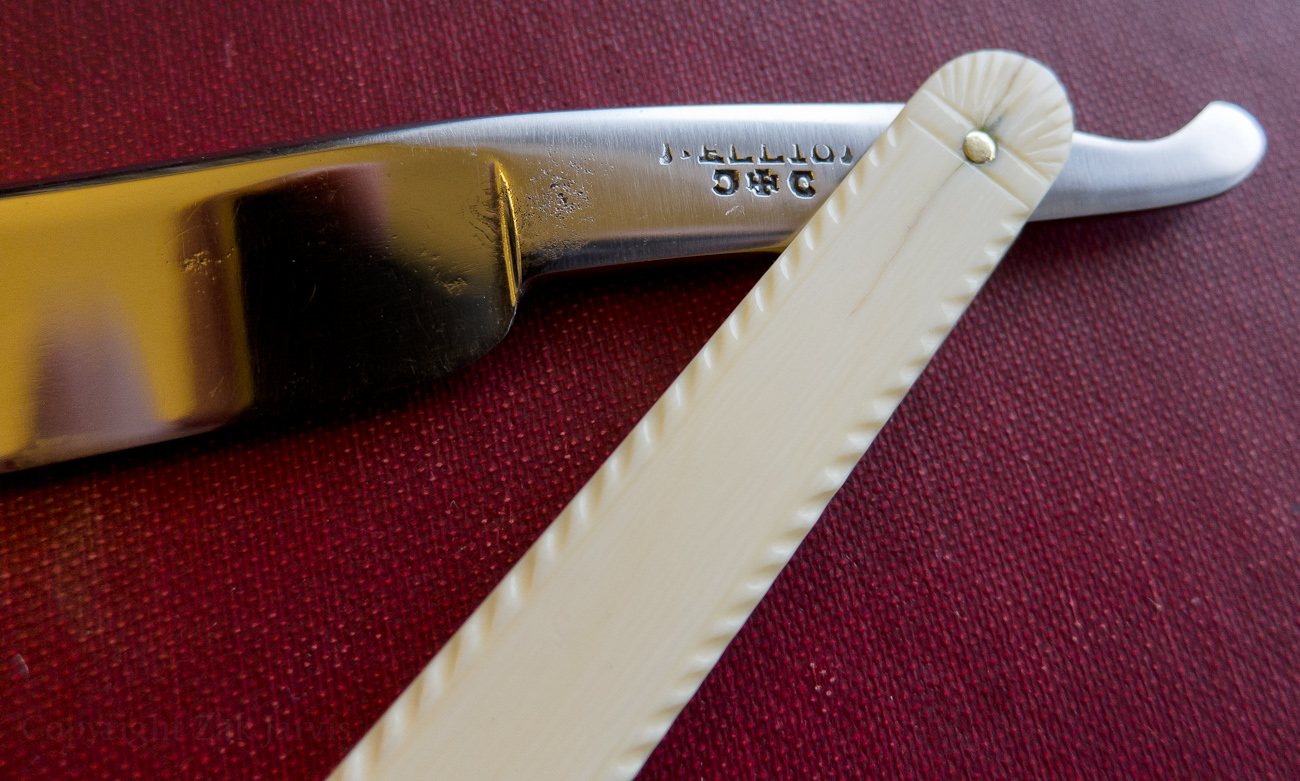
Coming up with a date of manufacture for this is fairly difficult. It has transitional features from the early 1810's, 1820's and 1830's. I'm going to split the difference and go with early 1820's, mostly because of the partial stamping. There was clearly room for the full name, but it's reduced an initial.
The blade is on the 6 side of 5/8 with a rounded tang and somewhat stubby tail. The grind of the blade is very light.

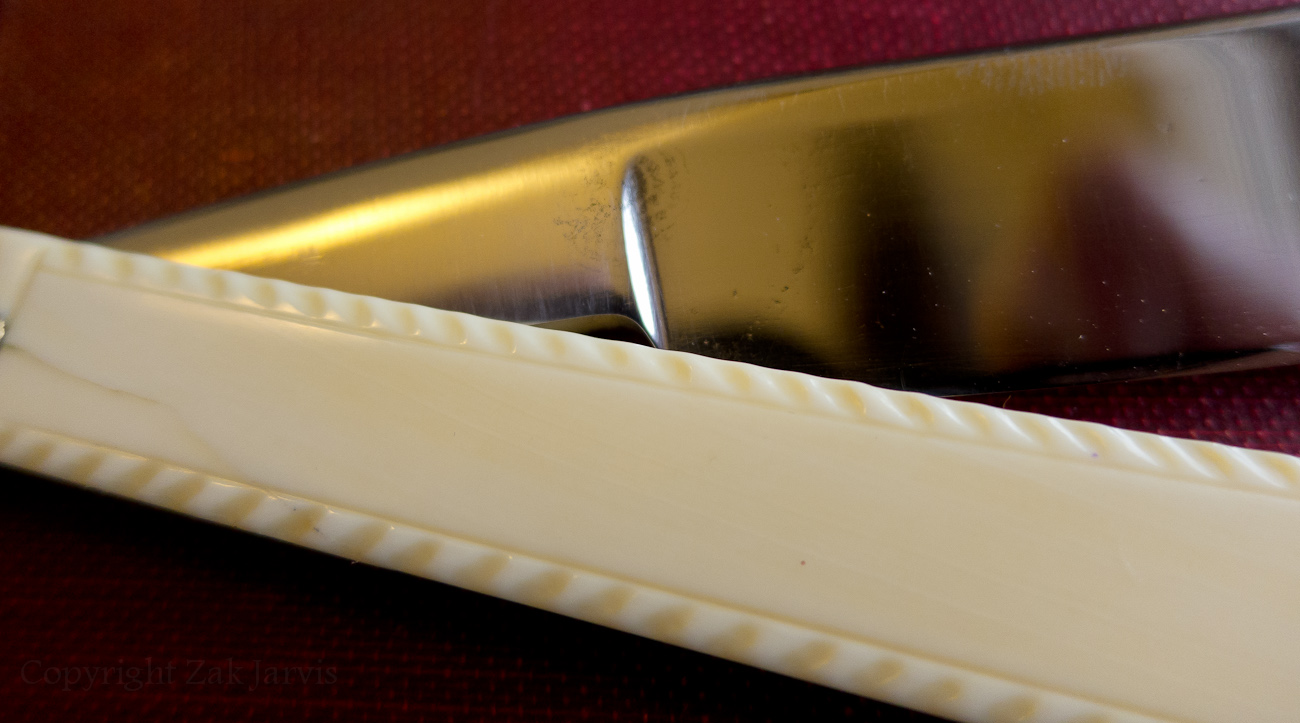
The stamp is only partial, but Elliot's trademark makes it completely unequivocal. When I got it, the scales were cracked on both sides.
The last time it was used it was put away wet. You can see the rust spots where water was held against the steel by the ivory. On the pile side you can even count the rings of day-night cycles of drying. Three of them. Where the point of the blade rested in the scales, on the inside is a fair bit of rust staining of the ivory.
However, for all that, it's in surprisingly good shape for a razor of it's age. There were a few features of the wear that made it a bit more difficult to fix up than I had anticipated.
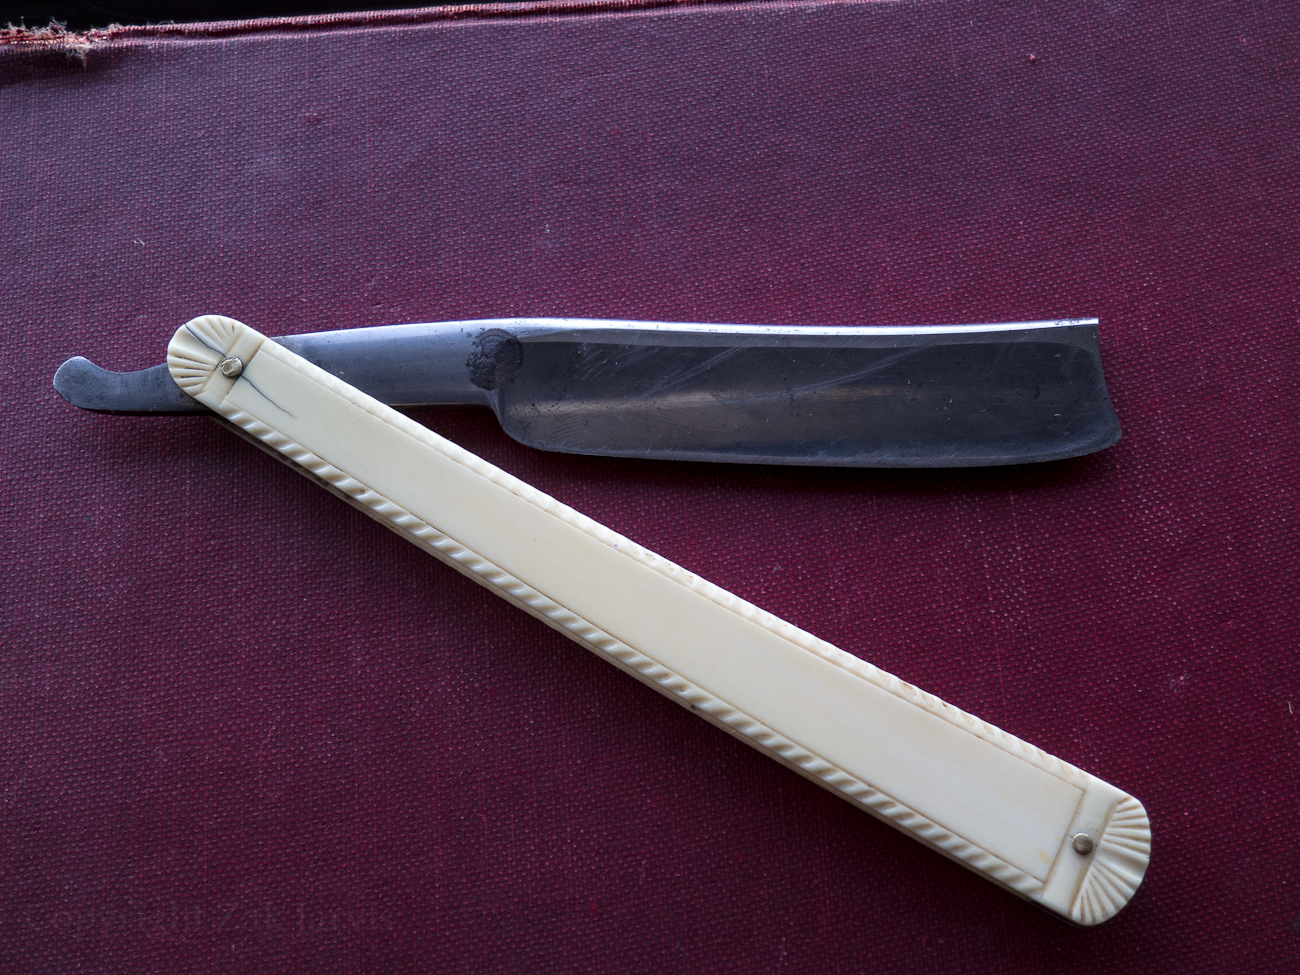
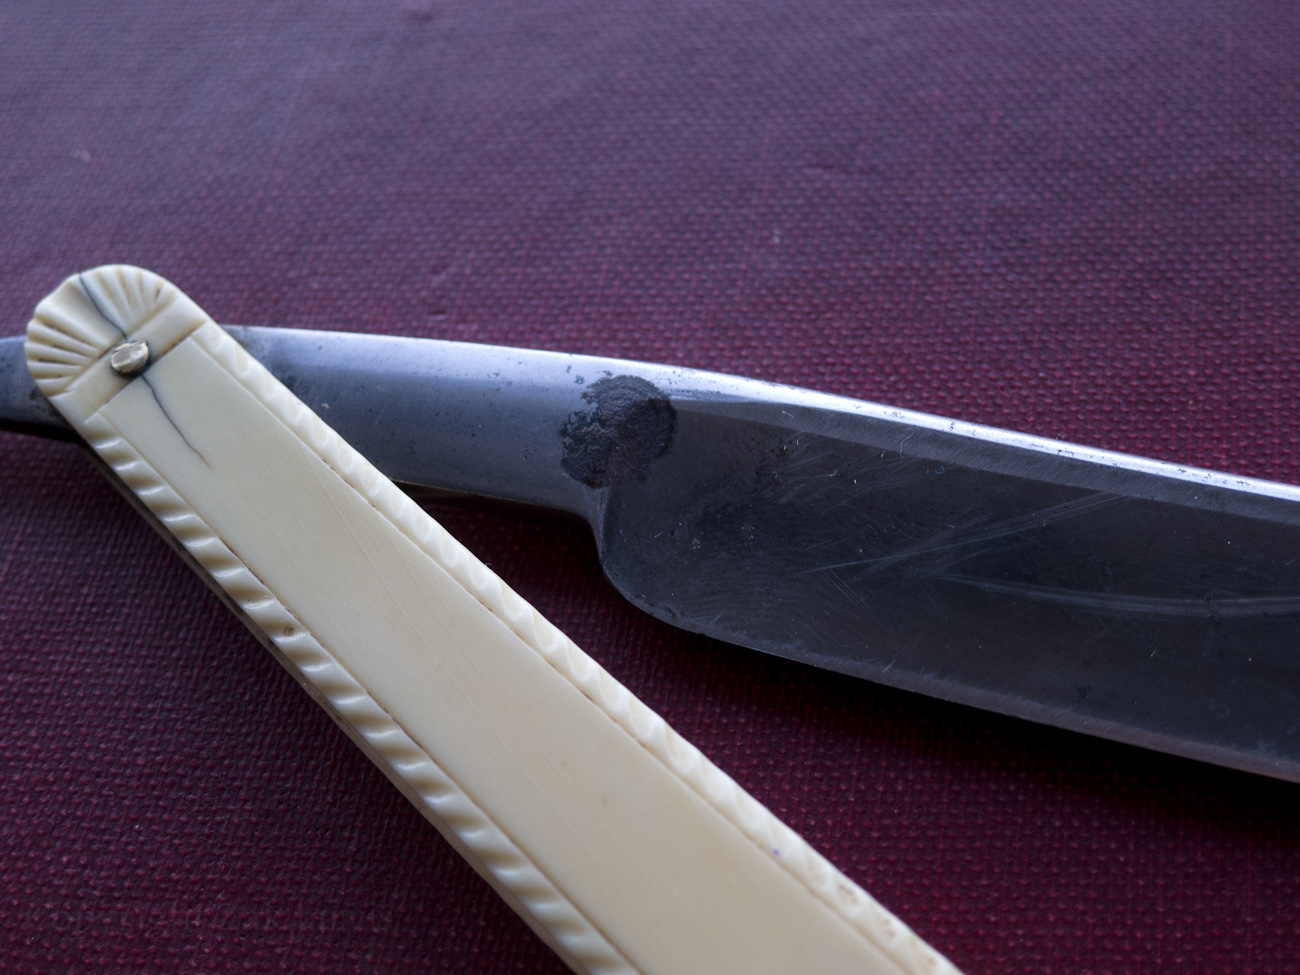
Someone tried to tighten the scales and managed to crack it. I'd guess it was in use for a good while after because the cracks have verdigris worked deep into them from the brass pins. The front scale fared worst. The tightened pin pressed down far enough into the scales that the crack was held open, apparently for years, because it had warped. After drilling out the pivot that crack remained open.
After I'd removed the blade I put the scales into an ultrasonic jewelry cleaner to get the really deep-down grime out, or at least most of it. Ivory usually warps a little bit after being immersed in warm water for a while, and this was no different. However it manifested a third crack on the front face of the wedge end.
My goal from here was to make the cracks as invisible as possible as well as restore the blade to something resembling factory finish. If the blade had had more patina, I would likely have polished it up and kept it, but the finish was surprisingly clean.
In the next part I'll show the finished restore and talk about how I did what I did.-Zak Jarvis. Writer. Artist. Bon vivant.
-
The Following 4 Users Say Thank You to Voidmonster For This Useful Post:
BobH (01-10-2013), carrolljc (11-16-2014), cheetahmeatpheonix (01-12-2013), sharptonn (01-10-2013)
-
01-10-2013, 05:23 AM #2Greaves is my friend !!!

- Join Date
- Nov 2012
- Location
- N.East OH
- Posts
- 2,297
Thanked: 307
looking forward to seeing it again when its done ...
-
01-10-2013, 05:28 AM #3Captain ARAD.
- Join Date
- May 2011
- Location
- Pacifica, CA
- Posts
- 2,474
Thanked: 2227
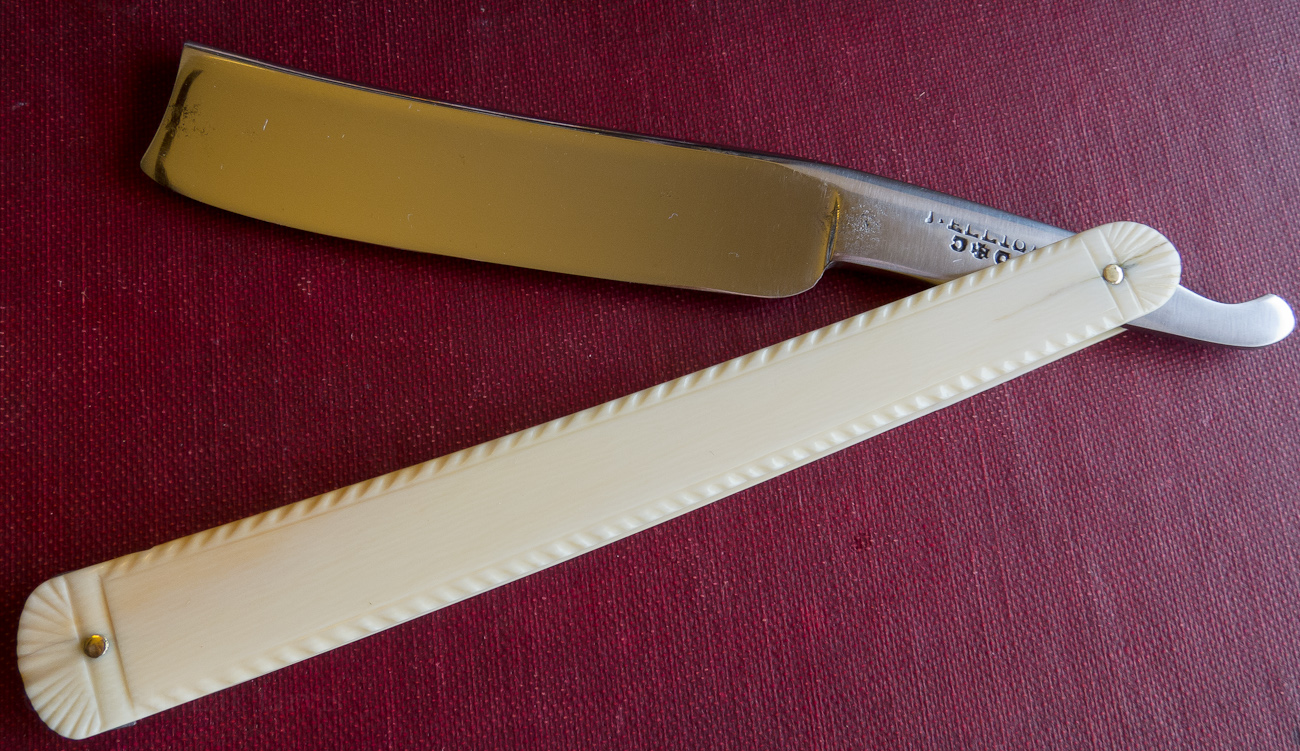
I'd finished sanding the blade some time ago, but I came down with the same cold/flu that seems to be tearing the lungs out of half the world and progress ground to a halt.
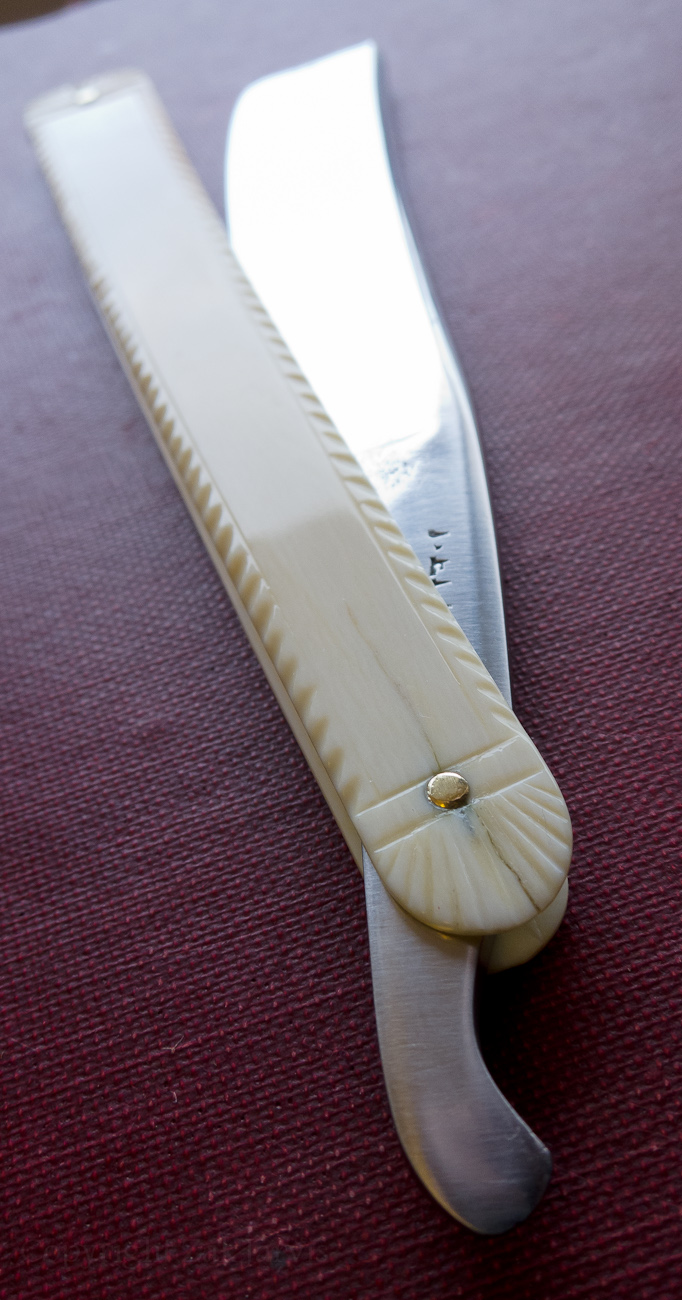
To get that finish on the blade, I used every trick at my disposal. The bulk of it was done with hand-sanding, using the shaped rubber guides that Woodcraft sells and the following grits of sandpaper: 150, 200, 320, 400, 500, 600, 800, 1000, 1500 and 2000. Then I used the full range of Micromesh. I then polished it with Maas. Then I hand sanded through the full progression again because I wasn't happy with the result. Then I used the Dremel and some greaseless compound to get a couple stubborn scratches, then I polished with Maas. I masked off the blade with electrical tape and hand sanded the tang and spine with 400 grit sandpaper, then polished that with Maas. I decided I liked the raw-sanded finish better and tried one of the 320 grit Dremel 'puff' sanders, which worked wonderfully. There was more Micromesh, more Maas and probably a little bit more hand-sanding involved.
The blade as you see it is the result. The other result is that my entire right side is still sore and my right bicep is now visibly larger than the left. ("No, really! It's from SANDING!")
The scales were more complicated.
From the beginning I'd planned to use a cyanoacrylate/ivory dust slurry to make a kind of spackle to fill in those gaps. But the pile side crack held together really tightly and I couldn't get the grime out, leaving an ugly black line.
I fixed that by breaking it off completely and then running the pieces through the jewelry cleaner again and finally lightly filing the edge of the crack. Once I had both cracks glued, I filed a trough through the top of the crack, poured ivory dust into it, pressed it down really tight and let thin CA glue wick down in. After filing and sanding off the excess ivory spackle I polished them with micromesh and Maas.
It didn't work as well as I really wanted it to, but it's far better than it was.
Finally, I put it back together with more brass rod, careful not to pin it too tight. I left the wedge-end as it was, even though it's a little bit loose (you can twist the wedge around just slightly).
I'm happy with the results. The blade is a little looser than I would ideally like (I used the original thrust washers when I put it back together), but I think it'll hone up and shave great!-Zak Jarvis. Writer. Artist. Bon vivant.
-
-
01-10-2013, 05:32 AM #4Poor Fit
- Join Date
- May 2010
- Posts
- 4,562
Thanked: 1263
Nice work on both blade and scales alike.
 gooser likes this.
-
The Following User Says Thank You to Catrentshaving For This Useful Post:
Voidmonster (01-10-2013)
-
01-10-2013, 05:35 AM #5Senior Member


- Join Date
- Feb 2008
- Posts
- 32,564
Thanked: 11044
Remarkable job you did on this. I would have never thought the scales could be so nicely saved. A guy I knew used to say it would take him 10 hours just for the hand sanding on a blade like that. Then the buffers. So I don't doubt the bicep growth.
-
The Following User Says Thank You to JimmyHAD For This Useful Post:
Voidmonster (01-10-2013)
-
01-10-2013, 05:43 AM #6Captain ARAD.
- Join Date
- May 2011
- Location
- Pacifica, CA
- Posts
- 2,474
Thanked: 2227
I realize now that the sun has set that I don't have a picture that really shows the finish on the blade face. It looks satiny in these pictures, but it's actually more of a mirror. It looks satin because what it's reflecting is far enough away to be out of focus.
 -Zak Jarvis. Writer. Artist. Bon vivant.
-
01-10-2013, 05:50 AM #7Not with my razor 🚫


- Join Date
- Oct 2011
- Posts
- 1,859
Thanked: 568
Really nice work!! Very creative on the scale repair!! I'd be proud of that job any day of the week!!!
Regards,
Howard
-
The Following User Says Thank You to SirStropalot For This Useful Post:
Voidmonster (01-10-2013)
-
01-10-2013, 05:52 AM #8Captain ARAD.
- Join Date
- May 2011
- Location
- Pacifica, CA
- Posts
- 2,474
Thanked: 2227
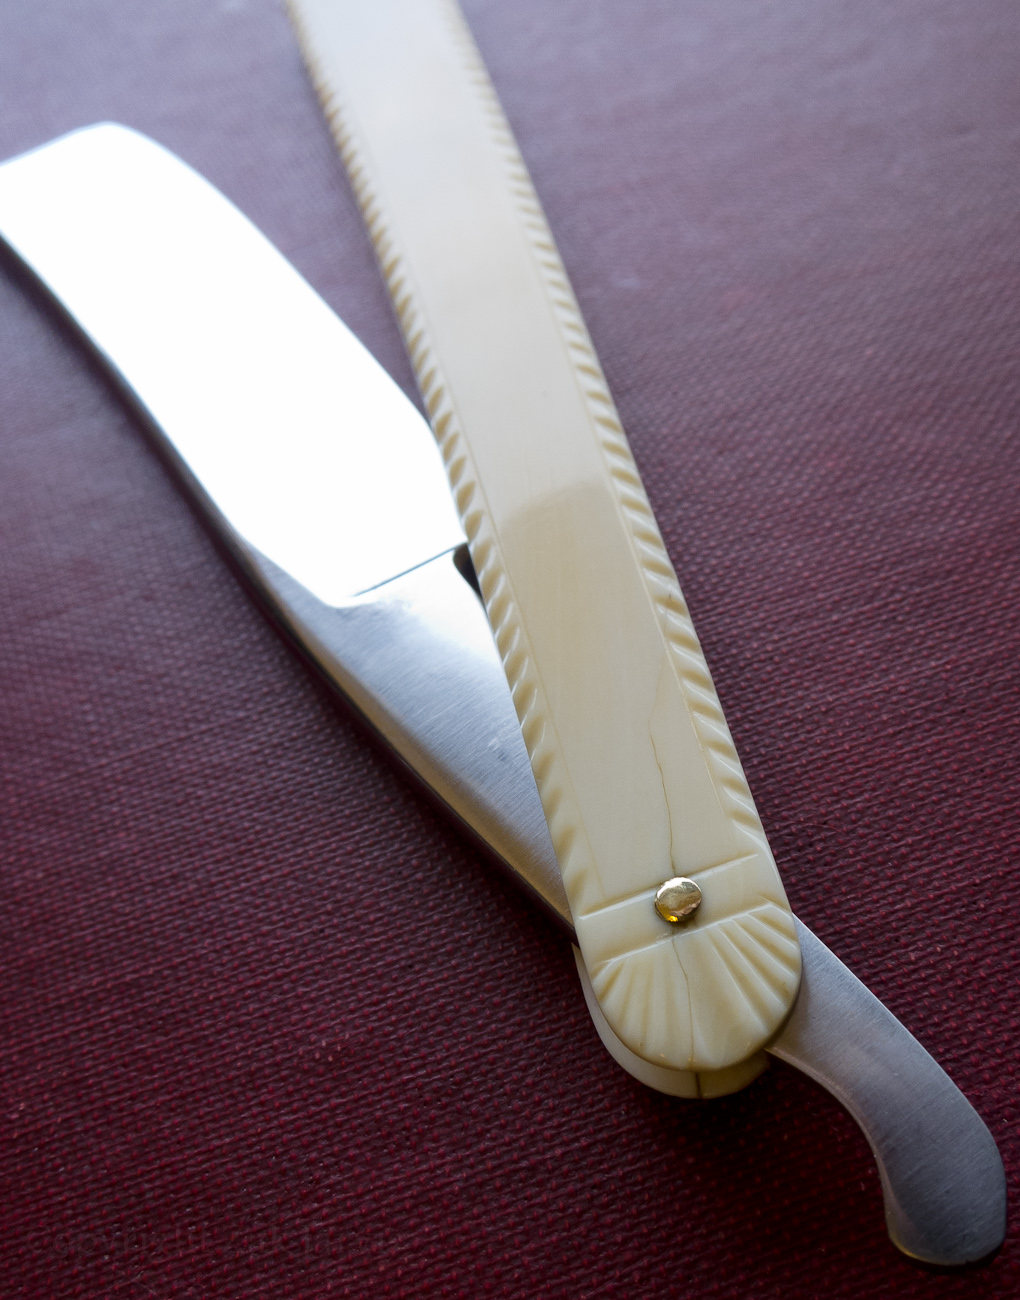
Oh, wait! Stop the press, I did have one that shows the blade finish.
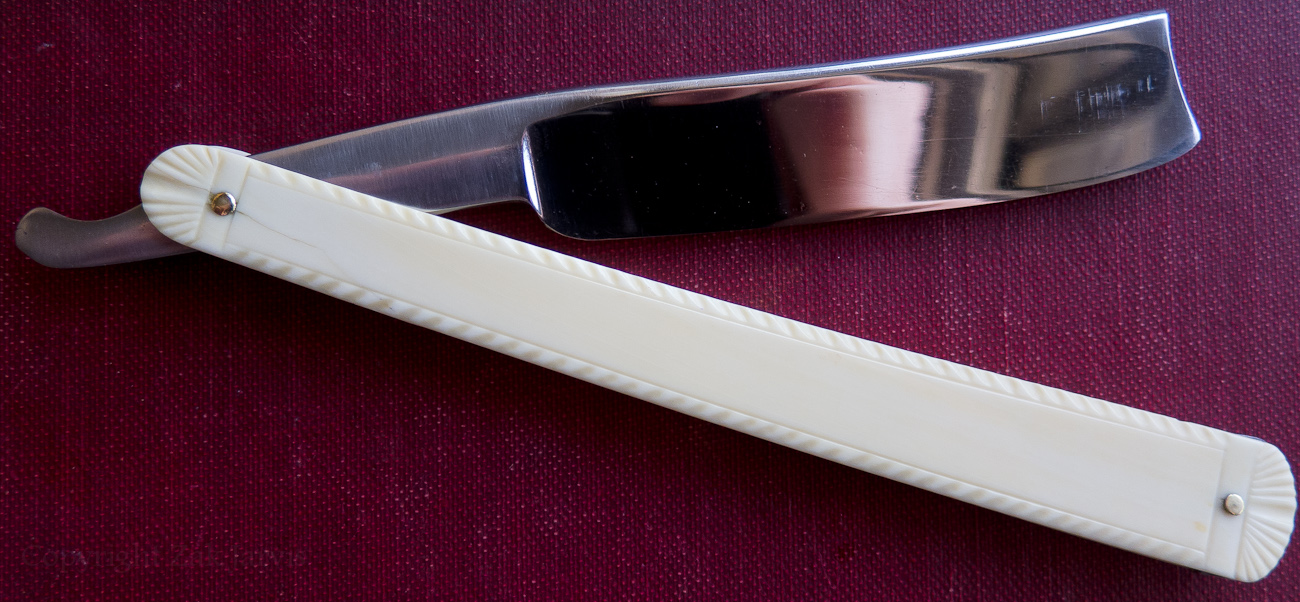
You'll note it also shows where I scratched the blade on the scales while taking pictures.
 -Zak Jarvis. Writer. Artist. Bon vivant.
-
-
01-10-2013, 06:44 AM #9Senior Member

- Join Date
- Mar 2012
- Location
- Tulsa, Oklahoma, United States
- Posts
- 1,031
Thanked: 163 Re: Ivory-scaled 1820's Joseph Elliot restore
Really fantastic! Thanks for walking us through your procedure and sharing the pics. It's really a beauty!
When the Dude is recognized in the world, unDudeness will be seen everywhere--- the Dude de Ching
-
The Following User Says Thank You to maddafinga For This Useful Post:
Voidmonster (01-10-2013)
-
01-10-2013, 01:08 PM #10Historically Inquisitive

- Join Date
- Aug 2011
- Location
- Upstate New York
- Posts
- 5,782
- Blog Entries
- 1
Thanked: 4249
A fine job Zak, love it, and thanks for the write up!
-
The Following User Says Thank You to Martin103 For This Useful Post:
Voidmonster (01-10-2013)


 Reply With Quote