
Results 1 to 10 of 16
 20Likes
 LinkBack URL
 About LinkBacks
-
03-01-2013, 11:38 AM #1Senior Member


- Join Date
- May 2012
- Location
- Nuriootpa, Australia
- Posts
- 130
Thanked: 27 W. JNO. Baker in natural G10 scales and recon stone wedge
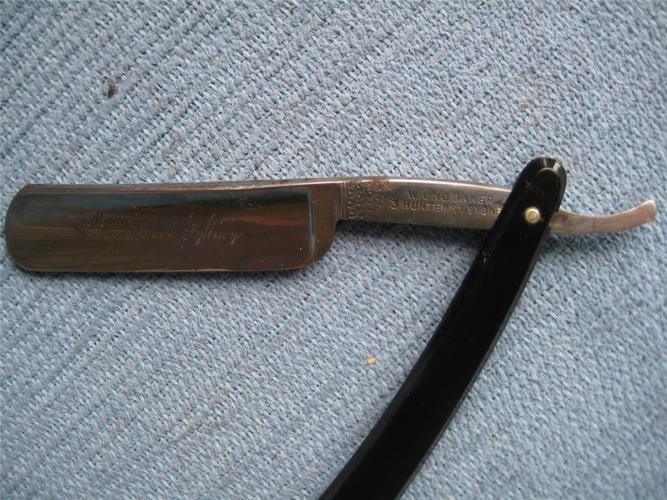
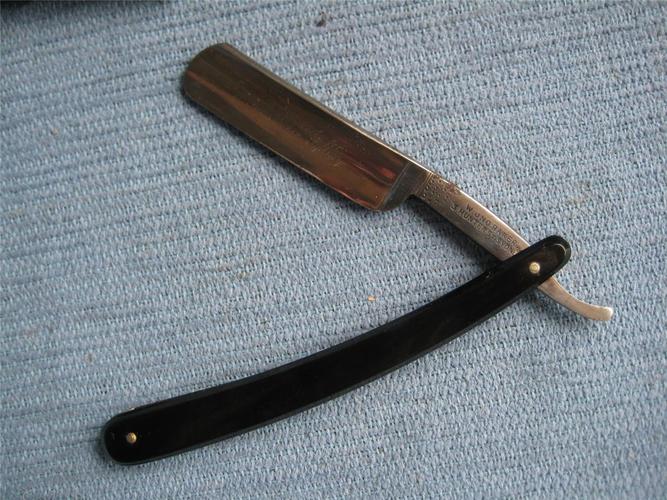
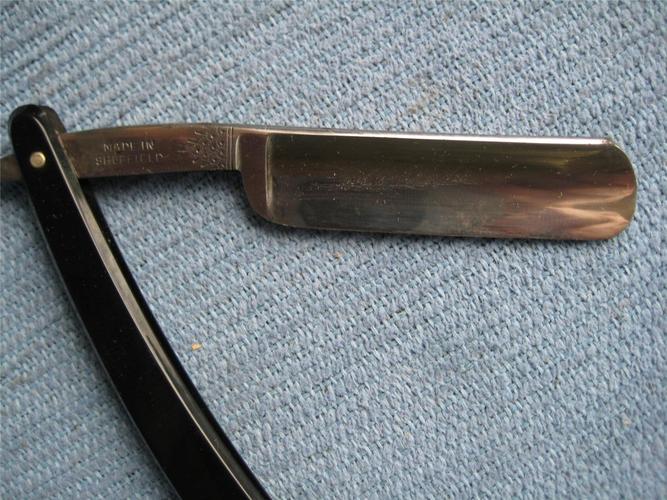
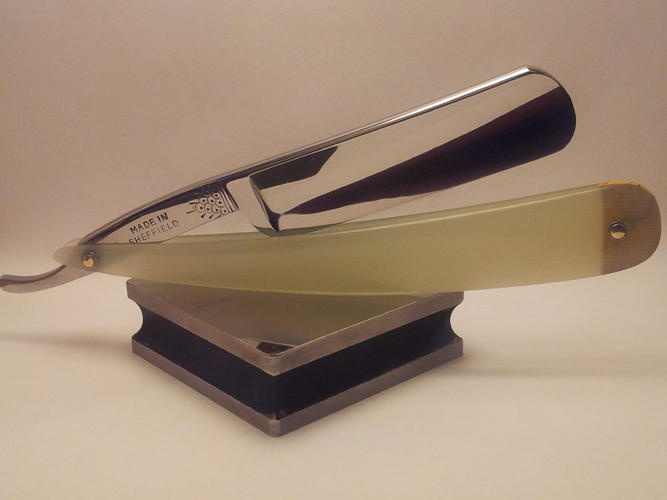
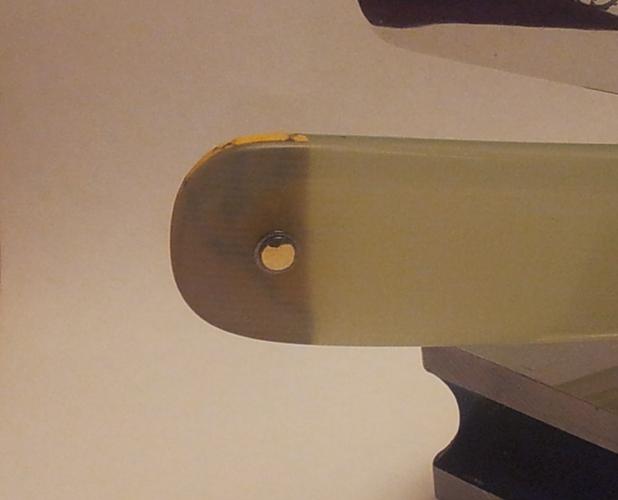
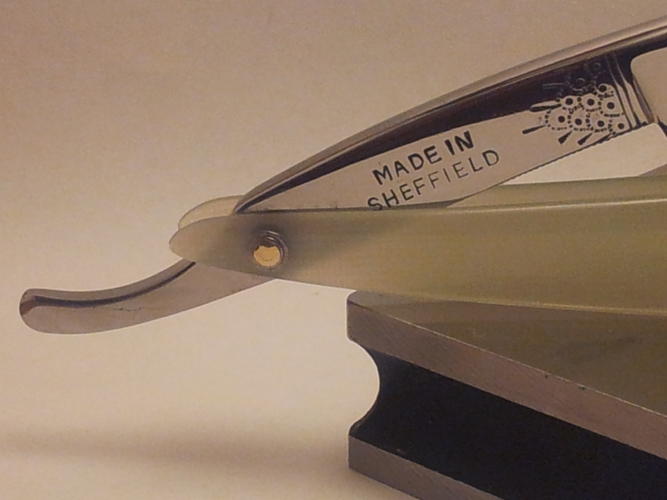
I recently picked up this W. JNO. Baker razor off the bay and wanted to give it an overhaul. This is my first time at fully custom restoring a razor. I have simply polished most of the dirt and grime off of a couple razors so far but had yet to make scales and fully finish cleaning up a blade. Here are the ebay pics of what the razor looked like when I first got it. I made the rookie mistake of forgetting to take my own before shots and so had to rely on these lol.
I finished this one yesterday but have only had the chance to do this write up tonight after work. This has been a huge learning experience that you cant get from just reading, its something that has to be done. I am a bit of a perfectionist in a lot of things so my first attempt leaves me both immensely proud of myself but also slightly annoyed that I couldnt get everything perfect! lol.
lol.
Ok.
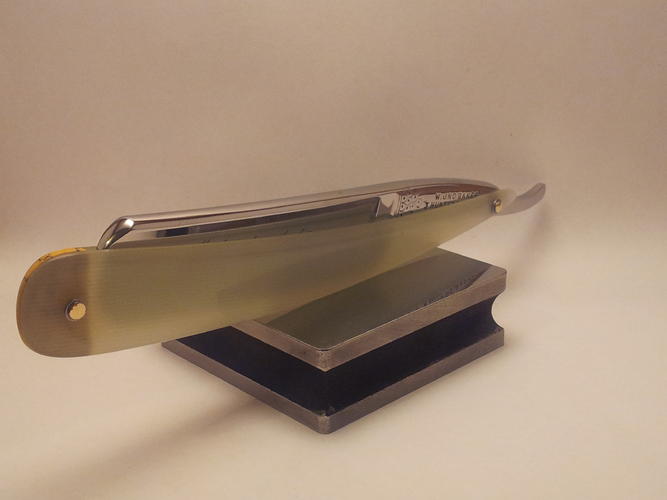
I removed the scales and then decided I wanted to make some scales so I used some natural colour G-10 with a recon/tru stone for the wedge. I traced out the blade on some paper and made the scale shape I wanted to fit the razor and stuck this onto some 1/8 G-10 and then went at it with a coping saw fitted with a hacksaw blade.....FAIL!!!
This stuff is HARD. I have been meaning to for a while but this stuff made me finally pull the pin on getting a dremel to cut out a rough cut of the scale. Once I had both sides, I used double sided tape to fix them together and drill out my pin holes and then use the dremel to rough grind the scales closer to the exact shape I wanted. Once I had done this I took them apart and taped them to a flat piece of wood and sanded down to the thickness I wanted, about 0.91 in the thickest part and tapering down towards to the toe and pivot. I realise that I did this in the wrong order as I had to put them together again to finish the shaping and what not, but hey, its all a learning experience and I learnt a lot haha. I started hand sanding at 120 and went through to 1200 as that is the highest grit I seem to be able to find in SA at any store I have been to. Ill have to buy it online I guess. I then cut out a piece of my recon stone and fitted it according to Brads/Undreams method but also sanding the entire wedge up to 1200 so more pattern was visible through the scales.
After this, I attacked the razor itself but as it was already in pretty good condition I only sanded the tang and spine in lower grits, working from 150 through to 1200 again, leaving only a smidge of pitting so that if anyone looked real close there was some markers of its age. Or was I just sick of hand sanding...
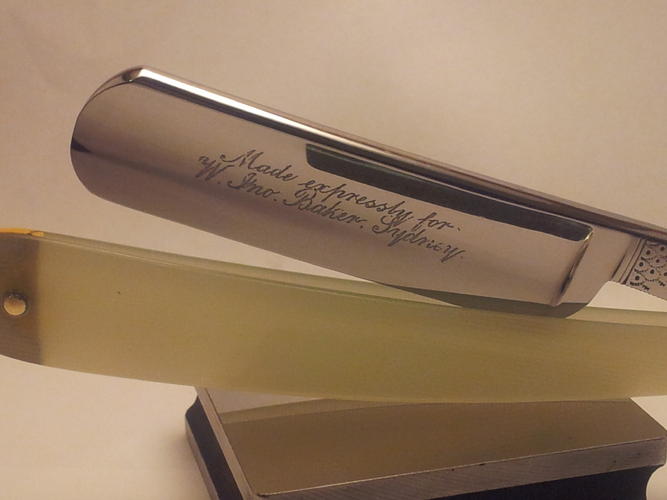
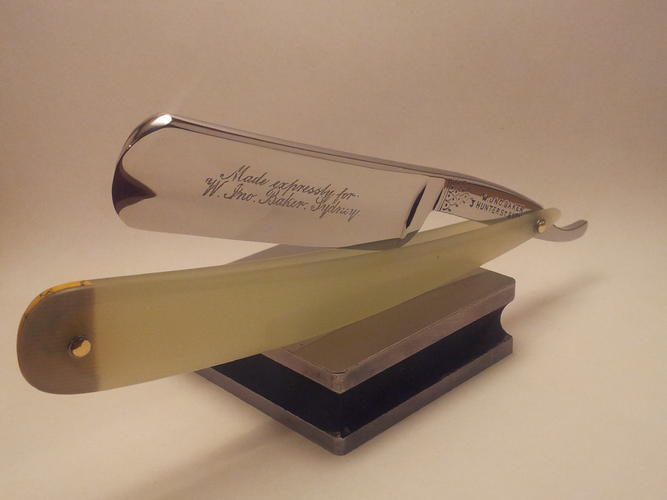
The blade of the razor I only touched with 1200 grit as that is all I thought it needed and I did not want any chance of losing the lovely etching.
Once I had finished sanding and polished the razor with some autosol I mocked it all up with micro fastener bolts to get a look at it all. I liked it but was not completely happy with the wedge as it sat in the scales just a smidge more than I wanted. So I went back online and read up on fitting wedges and read about Glens/Gssixguns (and others), approach, so got out my callipers and went back to sanding the wedge down to around the right specifications and then mocked it up again. The blade sat up just ever so slightly more than before which put it right where I wanted it.
I decided that i wanted to use brass pins as that is what came out of it originally but I wanted to use double stacked stainless steel washers to give it a two-tone colouring that sort of tied in with the effect of the wedge, Plus I thought it looked good.
I read that you should practice pinning on popsicle sticks before you try a razor but as I was getting impatient and wanted to just get it done. I have been flat out for the past two weeks with work, getting ready to go back to uni, spending time with the gf, martial arts training, i get very little time to work on anything so every spare minute has been going into this for the past week or so to finish it! So to stop babbling, I just went straight to pinning on the razor for the first time... I call it a success and a failure. The wedge end tightened up to staying in place well but the scales could still move when I twisted them so I kept on tapping and tapping and tapping. It didnt want to tighten up any more than this but the pin was really starting to spread out, especially on the back side as I think I left a little too much pin pocking out when I started so I decided to just peen it over the entire first washer. It came out pretty well I thought.
The pivot end was a little different. I think I didnt quite have enough pin on the back to match the wedge end properly but I tried. I think that it will need to be re-done in the future on the pivot as it ended up being peened out a little thin on the back of the razor, but it holds strong still. In one of the pics you can see the circle mark of the pin in the middle so I dont know how this will hold over time, especially with re-tightening. Ill find out though I guess .
.
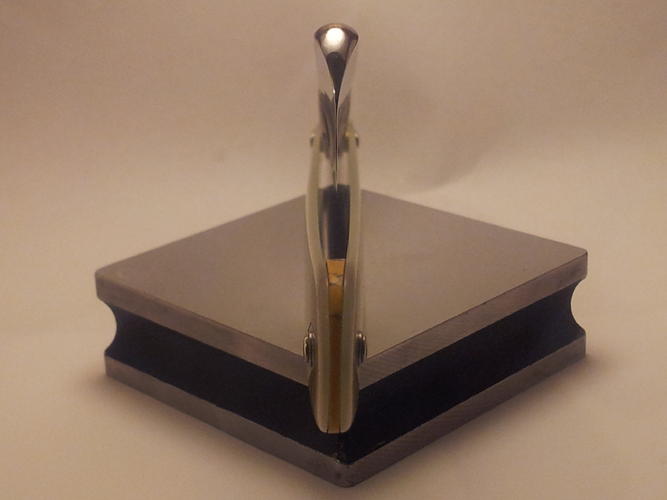
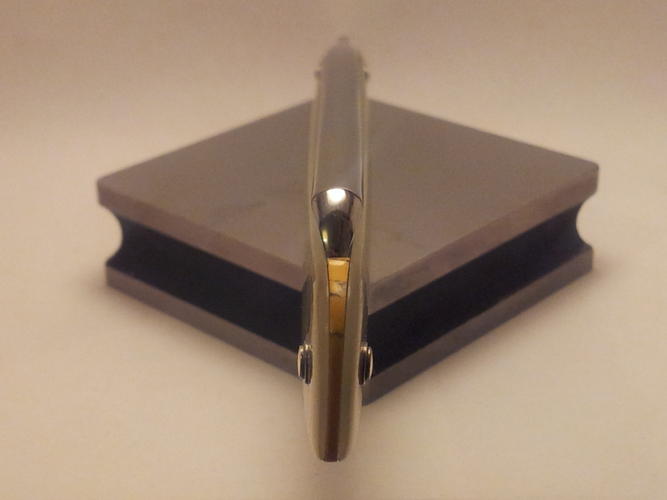
Ok, I have blabbed on long enough, here are the pics!!!


Continue...V
-
03-01-2013, 11:49 AM #2Senior Member
- Join Date
- May 2012
- Location
- Nuriootpa, Australia
- Posts
- 130
Thanked: 27
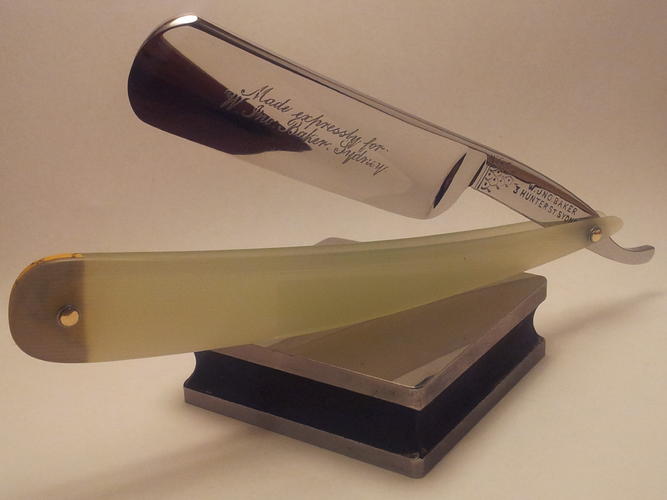
I was very happy that the blade centred perfectly so I didnt have to try and play with the pins on the pivot more to fix it. Another issue I had with my wedge that made me a little cranky was that I found I drilled my wedge end hole a little too far up and so my scales were not flexing over the wedge properly and leaving some small gaps right at the end. After I had thinned out my wedge, the fit improved but there is still a very minor gap that persists to point out the error of my ways.
And here is my little bit of an ohh yeah!, moment...
..
..
..
..
..
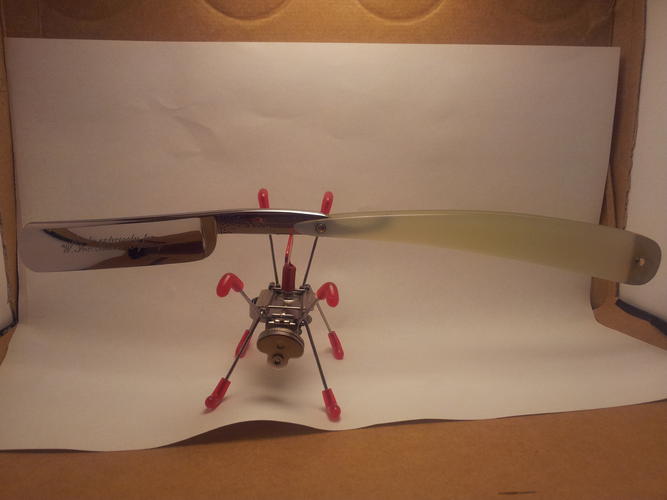
Unfortunately to show this to you, you get to see how dismal my little 2 second, first attempt, throw together light box is. I think I needed more lights to hide it all .
.
But still, not bad on my first attempt if I dont say so myself
I would love to hear anyones feedback on this whether its good or bad or just constructive, its all part of the learning.
Thanks for looking and reading,
Nick.
-
03-01-2013, 11:58 AM #3Senior Member

- Join Date
- Jun 2010
- Location
- Chapel Hill,NC
- Posts
- 709
Thanked: 262
The razor looks super. Excellent work! Maybe I should send some of my razors to you for clean-up.
-
The Following User Says Thank You to nipper For This Useful Post:
Naallen12 (03-02-2013)
-
03-01-2013, 01:17 PM #4Lookin like a crim


- Join Date
- Apr 2009
- Location
- Coffs Harbour Australia, Home of the Big Banana
- Posts
- 2,706
Thanked: 1072
Beautiful work.
You've obviously done your homework and it's paid off.
The blade looks great, and for a first pair of scales, they are exceptional.
GrantGeezer likes this."I aint like that no more...my wife, she cured me of drinking and wickedness"
Clint Eastwood as William Munny in Unforgiven
-
The Following User Says Thank You to baldy For This Useful Post:
Naallen12 (03-02-2013)
-
03-01-2013, 01:34 PM #5Senior Member


- Join Date
- Mar 2012
- Location
- Thunder Bay, Ontario, Canada
- Posts
- 17,350
Thanked: 3228
Just a great job on your first restore. We should all be so successful. Very fine looking razor.
BobLife is a terminal illness in the end
-
The Following User Says Thank You to BobH For This Useful Post:
Naallen12 (03-02-2013)
-
03-01-2013, 01:42 PM #6Senior Member

- Join Date
- Feb 2012
- Location
- West Midlands, UK
- Posts
- 1,263
Thanked: 360
Nick. I think that's exceptional for a first attempt. The only thing I would have changed - and then only slightly, is the wedge pin which I think is a bit too close to the straight edge of the wedge. Everything else from the design, execution, wedge shape and final finishing and pinning is great.
Geezer likes this.
-
The Following User Says Thank You to UKRob For This Useful Post:
Naallen12 (03-02-2013)
-
03-01-2013, 01:43 PM #7Greaves is my friend !!!

- Join Date
- Nov 2012
- Location
- N.East OH
- Posts
- 2,297
Thanked: 307
very nice work !! looks good !! ive been kicking around the thought of trying to make a set of G10 or Micarta scales , just havent takin the plunge yet ...lol
-
The Following User Says Thank You to gooser For This Useful Post:
Naallen12 (03-02-2013)
-
03-02-2013, 04:04 AM #8Senior Member
- Join Date
- May 2012
- Location
- Nuriootpa, Australia
- Posts
- 130
Thanked: 27
Thank you for the praise and your consideration of sending them to me makes me feel very happy with my work however at this stage, I do not feel that I am ready to accept working on anything that is not my own right now. I have another seven or so razors that I want to restore and if they turn out well, I will consider selling some of them (if I can part with them Originally Posted by nipper
 ), and then I may consider to start doing restorations for other people. My honing skills need to be improved as well so it could be a while before I feel comfortable enough to play with other people's precious blades.
Hahaha, Yeah the first time I mocked it all up I noticed it and had a quiet rage to myself. I know for next time now though! Thanks for the positive feedback Originally Posted by UKRob

Nick.
-
03-02-2013, 05:13 AM #9Senior Member

- Join Date
- May 2012
- Location
- Oxford, Al
- Posts
- 1,605
Thanked: 407
Thumbs up here for your first go!
Mastering implies there is nothing more for you to learn of something... I prefer proficient enough to not totally screw it up.
-
03-02-2013, 05:47 AM #10The Great & Powerful Oz


- Join Date
- May 2008
- Location
- Bodalla, NSW
- Posts
- 15,638
Thanked: 3751
Dontcha just hate that G10 stuff ?
Awesome job Nick. As I read your post I thought oh no ! he's gonna take off the original scales but the replacements really impressed me & the colour is reminiscent of the vintage Ducks or maybe blonde horn.
You really need very little pin exposed for a successful peen but hey for #1 you get 2 thumbs up from me.
The white gleam of swords, not the black ink of books, clears doubts and uncertainties and bleak outlooks.
-
The Following User Says Thank You to onimaru55 For This Useful Post:
Naallen12 (03-02-2013)


 Reply With Quote