
Results 21 to 30 of 47
 16Likes
Thread: Alls Well that Anv-ells?
 LinkBack URL
 About LinkBacks
-
08-21-2013, 06:06 PM #21Senior Member

- Join Date
- Mar 2011
- Location
- Corcoran, Minnesota
- Posts
- 665
Thanked: 170
I used a 7 inch body grinder with 30 grit discs to clean mine up - it was a lot worse than yours - major dents, chips, and one piece broken off, due to my carelessness. Welded first, with an arc welder and rod recommended for patching anvils, then ground flat and smooth. One edge with 1/8 radius, the other around 1/4. Works great. Good luck with yours. Peter Wright is about as good as it gets.
-
08-21-2013, 06:59 PM #22The First Cut is the Deepest!

- Join Date
- Feb 2010
- Location
- Upper Middle Slobovia NY
- Posts
- 2,737
Thanked: 481
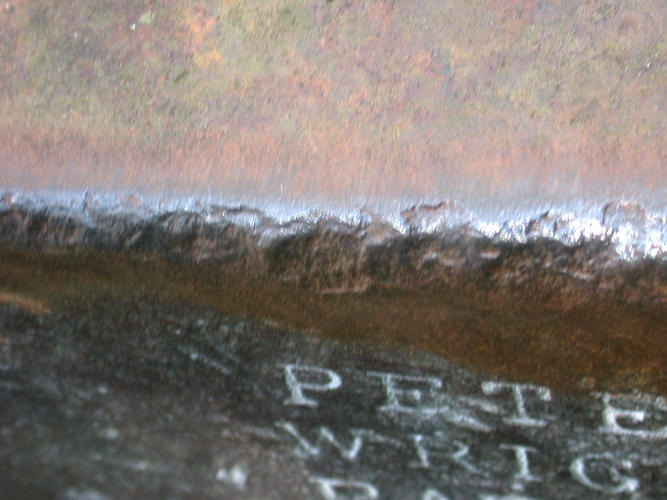
Here is a better close up, after a good brisk wire brushing.
Simple damage, or welded up, either way, she "rings true" as the saying goes.
I do need to soak the hardy hole/cutoff in some oil as it is pretty solidly rusted in place. tried gentle tapping and nothing. So a punch from below is in order.
-
08-21-2013, 09:10 PM #23Member

- Join Date
- Jul 2013
- Location
- Central Texas
- Posts
- 39
Thanked: 9
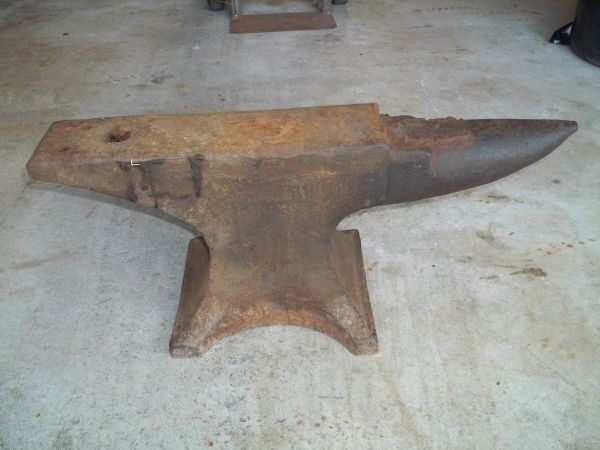
Very nice anvil, I'd put it to use right away and not grind on the face or table. Definitely don't take it to a machine shop, welders and machinist ruin more anvils than anyone else. If you have mushroomed sides I'd grind them back without grinding the top at all. Here's pictures of my 190 lb Peter Wright which I used for almost a year before deciding to grind the sides.
When I first got it.
After I cleaned it up with a wire brush.
This picture shows the mushroomed edges better.
After I ground away the mushroomed edges from the sides only.
Eventually I'll take it to a nearby blacksmith to have the gouges in the heel and step repaired, but that's more cosmetics. I've been using it as is for a year now and it doesn't affect my work.Last edited by dcraven; 08-21-2013 at 09:16 PM.
skipnord likes this.
-
08-22-2013, 05:43 AM #24
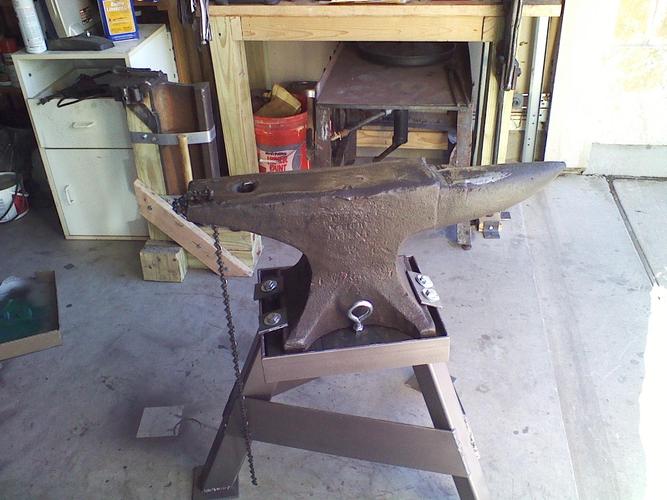
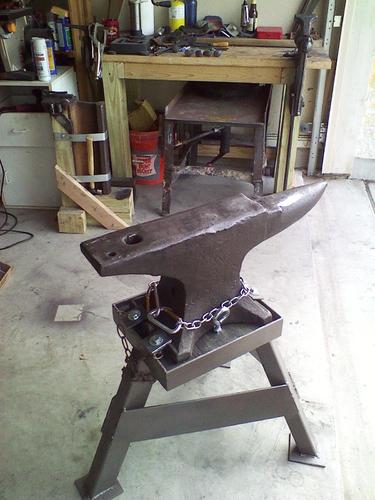
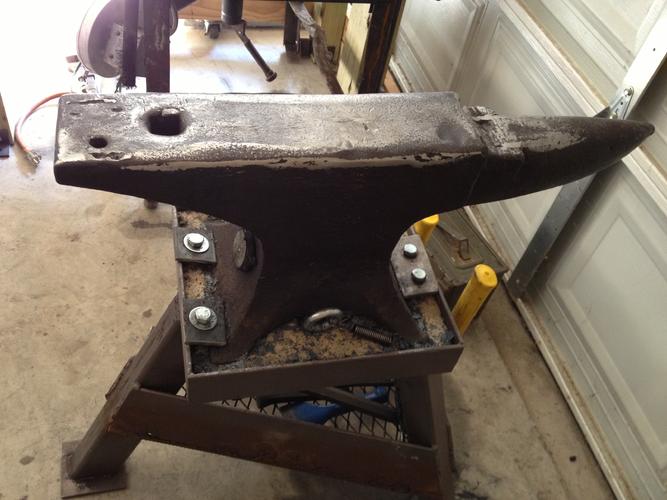
That's a nice anvil stand. Did you make that?
dcraven likes this.Til shade is gone, til water is gone, Into the shadow with teeth bared, screaming defiance with the last breath.
To spit in Sightblinders eye on the Last Day
-
08-22-2013, 02:28 PM #25Member
- Join Date
- Jul 2013
- Location
- Central Texas
- Posts
- 39
Thanked: 9
Yes, thanks Bruno. I made it from cutoffs for under $25. The legs are filled w/ sand & oil to cut down on the noise, as well as possibly rusting. Under the anvil is a block of wood & caulk. The eye bolts allow me to attach springs to for a hold down.
-
08-22-2013, 07:00 PM #26The First Cut is the Deepest!
- Join Date
- Feb 2010
- Location
- Upper Middle Slobovia NY
- Posts
- 2,737
Thanked: 481
That is a pretty neat stand set. I see chains, I see a magnet.... Has anybody had any success damping the ring by wrapping a length of rubber (like strips of inner tube) around the anvil?
dcraven likes this.
-
08-22-2013, 08:47 PM #27Member
- Join Date
- Jul 2013
- Location
- Central Texas
- Posts
- 39
Thanked: 9
I haven't heard of doing that, but putting the sand & oil into the legs of the anvil stand was new to me at the time and seems to have worked. Thanks for the idea, I've give it a shot if I have an old inner tube I can find.
Have you had a chance yet to forge with the new anvil?
-
08-22-2013, 11:26 PM #28The First Cut is the Deepest!
- Join Date
- Feb 2010
- Location
- Upper Middle Slobovia NY
- Posts
- 2,737
Thanked: 481
Not yet. I still need to assemble the forge itself, and for the next few days I am on the road making deliveries. But SOON!

-
08-23-2013, 05:32 AM #29"My words are of iron..."

- Join Date
- Oct 2006
- Posts
- 1,898
Thanked: 995
Some folks deaden an anvil with a magnet on the side. Sand has been used for a long time in anvils of all kinds. I build my anvil stands out of 6x6 timber and inlet the base of the anvil. Works well and still moderately portable. Originally Posted by Magpie

-
08-23-2013, 06:30 AM #30
What do you mean by inletting the base?
Til shade is gone, til water is gone, Into the shadow with teeth bared, screaming defiance with the last breath.
To spit in Sightblinders eye on the Last Day


 Reply With Quote

