
Results 11 to 20 of 45
 89Likes
Thread: Hot & Shiny WIP
 LinkBack URL
 About LinkBacks
-
05-12-2015, 07:52 AM #11Senior Member


- Join Date
- Jun 2013
- Location
- Gladstone QLD AUSTRALIA
- Posts
- 3,245
Thanked: 804
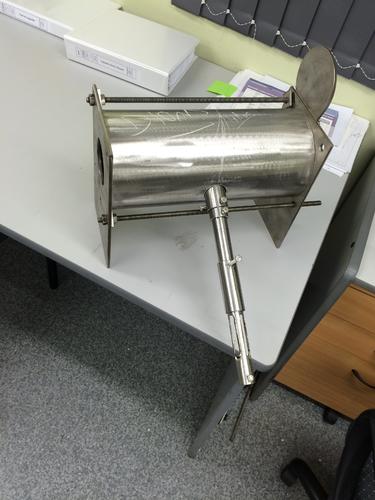
todays Progress another hour spent on it before it got dark
trail fit with threaded rod, ready for mounting of bolt flange lugs & the burner stab
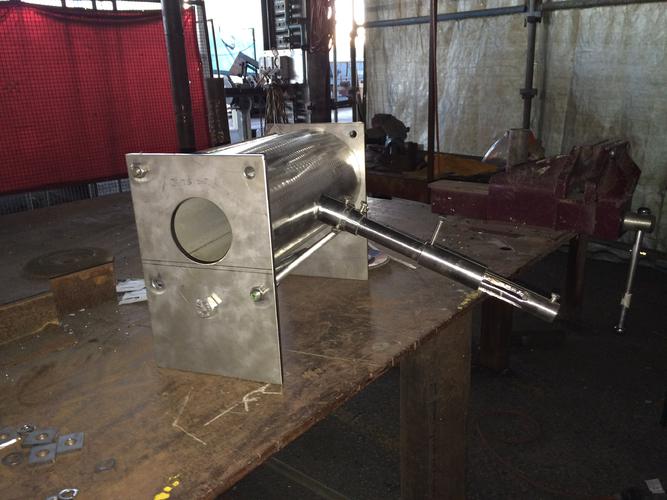

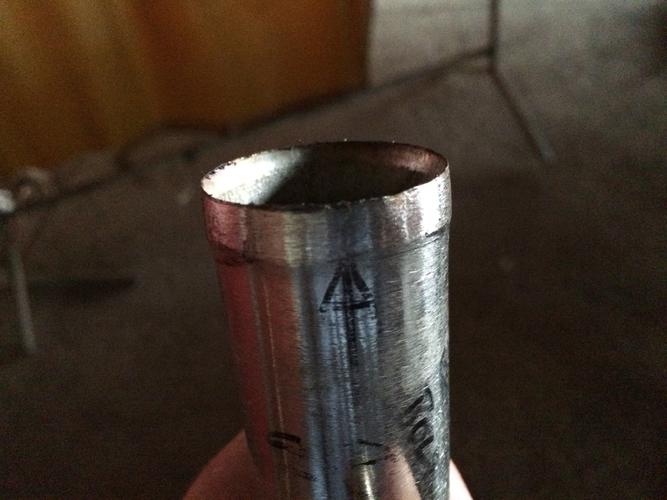
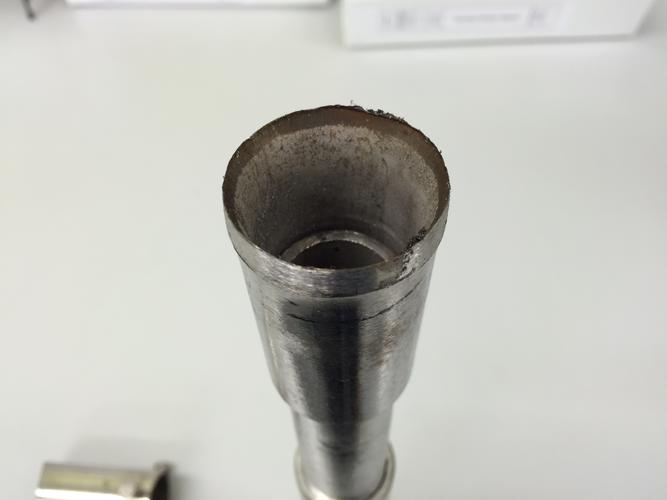
internal view of stab end shaped to suit the inner walls shape
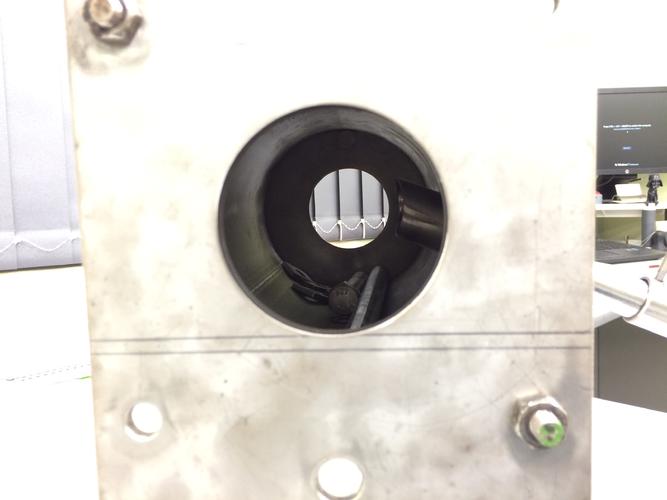
Flared my tip then ground the outside to fit my stab pipe
1 practice / spare and the finished item
amazing what you can do with a 50t press and a ball peen hammer
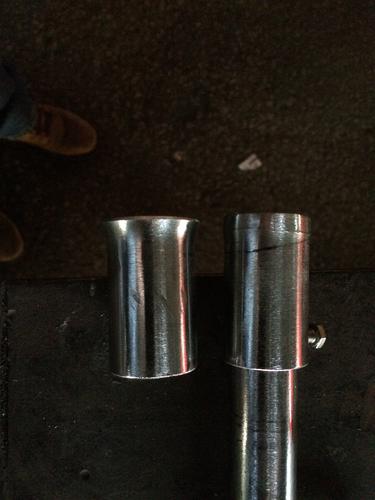
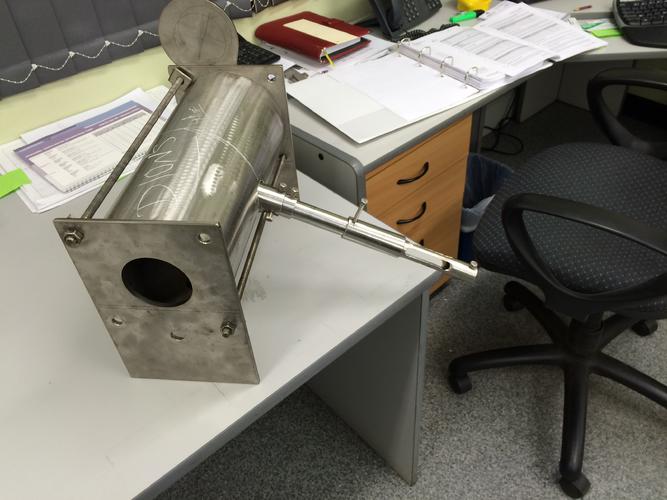
stills need a clean up but a step closer
may get to tacked it up tomorrow arvo if work doesn't get in the wayLast edited by Substance; 05-12-2015 at 08:02 AM.
Saved,
to shave another day.
-
The Following User Says Thank You to Substance For This Useful Post:
spazola (05-12-2015)
-
05-12-2015, 12:11 PM #12Senior Member


- Join Date
- Jul 2014
- Location
- Denver CO
- Posts
- 4,635
Thanked: 811
Looks real nice substance. My thoughts are that after you get it lined it looks to me like you will have trouble keeping your work out of the cone of the primary flame. I may be looking at it wrong, or I may not know what I'm talking about.
 I guess finish it, light it, and take a look. Without seeing the shape of the cone, it's hard to tell.
Substance likes this.
I guess finish it, light it, and take a look. Without seeing the shape of the cone, it's hard to tell.
Substance likes this.
-
05-14-2015, 05:30 AM #13Senior Member
- Join Date
- Jun 2013
- Location
- Gladstone QLD AUSTRALIA
- Posts
- 3,245
Thanked: 804
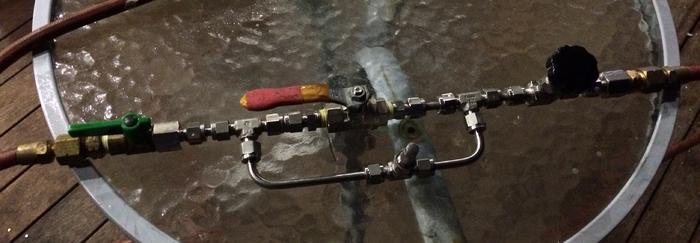
sorted my adjustable Jet System today
I have used a hazardous area cable gland, 1/4" instrument tube & compression fitting joiner currently fitted with a #35 (0.9mm) MIG tip but might have to actually buy some smaller #23 (0.6mm) tips if I need them. which won't be to bad considering the current build cost LOL

now just need to chase up my Son in-law (a Gas Fitter) about an Idle loop & some gas supply connections to hook up a bottle.
then I can hopefully start the magic Blue light of death on the weekend & try tune it.
Also I decided I'm not going to tack the Forge body or anything until I have the Burner working & confirm the flame size as I may reduce the burner size or the insulation to only 1" & take the access forge from 3" to a 4" opening??Last edited by Substance; 05-14-2015 at 05:33 AM.
sharptonn likes this.Saved,
to shave another day.
-
The Following User Says Thank You to Substance For This Useful Post:
Razorrookie01 (05-16-2015)
-
05-14-2015, 01:25 PM #14Senior Member
- Join Date
- Jul 2014
- Location
- Denver CO
- Posts
- 4,635
Thanked: 811
Good plan. Also the burner will likely operate a little differently when it is in the forge. You may also be able to recess the burner nozzle back into the liner a bit and create a tapered port with refractory cement. Originally Posted by Substance

-
05-16-2015, 03:51 PM #15Senior Member

- Join Date
- Mar 2013
- Location
- Alberta, Canada
- Posts
- 252
Thanked: 154
That is a nice build! Looking forward to seeing it complete!
My friends call me Bear.
-
05-19-2015, 08:08 AM #16Senior Member
- Join Date
- Jun 2013
- Location
- Gladstone QLD AUSTRALIA
- Posts
- 3,245
Thanked: 804
limited progress this week
big week at work with late nights & large tenders due haven't had much time for the Forge
I did get my idle loop & gas supply finished bits & bobs finished & will hopefully remember to get a photo later tonight.
my Gas fitter Son in-law told me to stick with Oxy acetylene hoses & gauges etc but I managed to find an actual LPG regulator so even better.
went to put it on the bottle last night & try a leak test & possible test fire only to find my 9kg bottle is dead empty & my small back up bottle for the BBQ has a smaller connection
so see how I go tonight if I can get the big bottle filled.Saved,
to shave another day.
-
05-19-2015, 10:25 AM #17Senior Member
- Join Date
- Jun 2013
- Location
- Gladstone QLD AUSTRALIA
- Posts
- 3,245
Thanked: 804
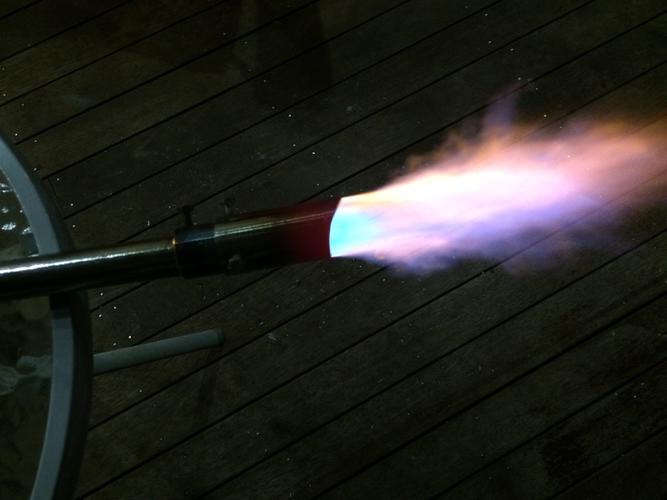
Major step completed
No bubbles on any joins - check
First fire - 10 psi & ignition
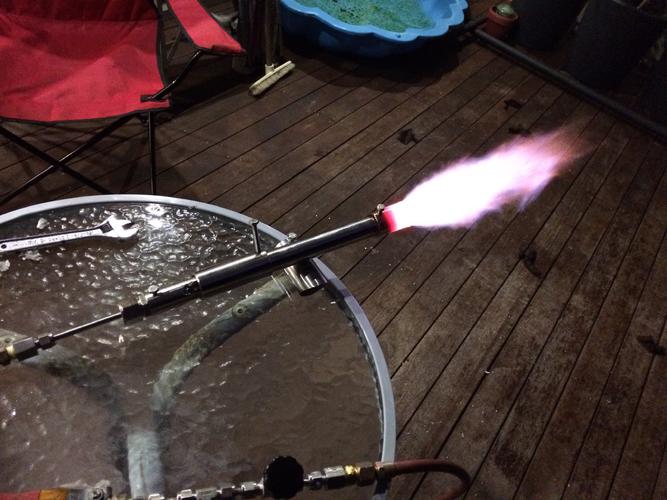
After a bit of tuning running at 10-20psi 10 seams enough
With the forge nozzle also connected
Last edited by Substance; 05-19-2015 at 10:29 AM.
Saved,
to shave another day.
-
The Following User Says Thank You to Substance For This Useful Post:
Geezer (05-19-2015)
-
05-19-2015, 01:47 PM #18Senior Member

- Join Date
- Jan 2014
- Location
- Ukraine
- Posts
- 684
Thanked: 239
We are waiting for completion of the project. Simply good!
 Substance likes this.
-
05-21-2015, 07:44 AM #19Senior Member
- Join Date
- Jun 2013
- Location
- Gladstone QLD AUSTRALIA
- Posts
- 3,245
Thanked: 804
hopefully this video works of the burner running
https://youtu.be/nBQ_IjqG1vYGeezer likes this.Saved,
to shave another day.
-
The Following User Says Thank You to Substance For This Useful Post:
Geezer (05-29-2015)
-
05-29-2015, 07:07 AM #20Senior Member
- Join Date
- Jun 2013
- Location
- Gladstone QLD AUSTRALIA
- Posts
- 3,245
Thanked: 804
Update
work on the forge was halted due to a big week odd on 12 to 14 hour days,
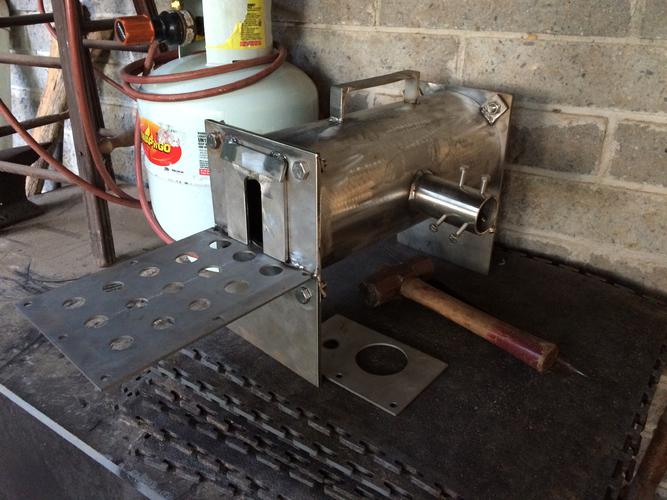
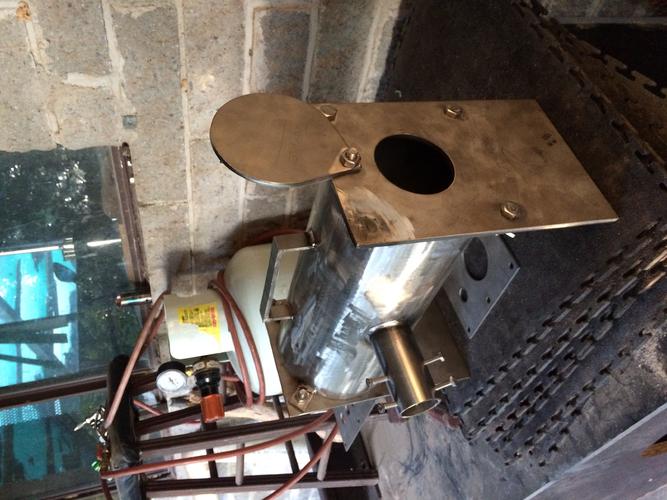
But POETS day today & got 3 hours spare so fabrication completed on the forge for now,
Obtained enough Superwool 601 to do 2 wraps of 1" thick.
A friend is keeping some refractory aside from a shutdown this week, so should have it in the next week to finally complete the forge ready to melt & smash some steel next weekend
Ok enough yibbaing here's some photos
Last edited by Substance; 05-29-2015 at 07:11 AM.
Saved,
to shave another day.


 Reply With Quote