Results 1 to 10 of 32
Thread: a crap ton of blades
-
05-13-2015, 12:33 AM #1
 a crap ton of blades
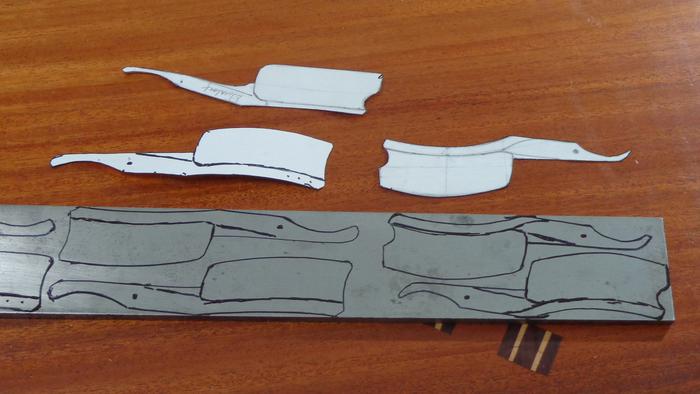
started with a big bar of 5/16" O1 Starrett Tool Steel. i ran over it real quick with 220 grit to knock off rust and then wiped down with denatured alcohol to give a clean surface for marking out. i drew up my blade designs on poster paper, put packing tape on front and back and then cut them out to use as templates. i then traced around them with sharpie to get my rough layout in nested blanks on the steel.
Silverloaf
-
-
05-13-2015, 12:50 AM #2

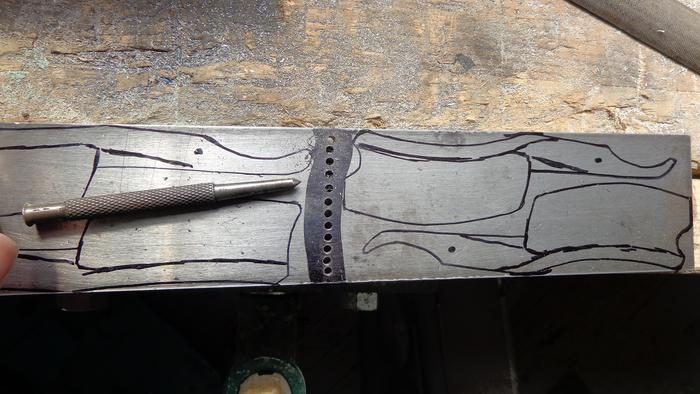
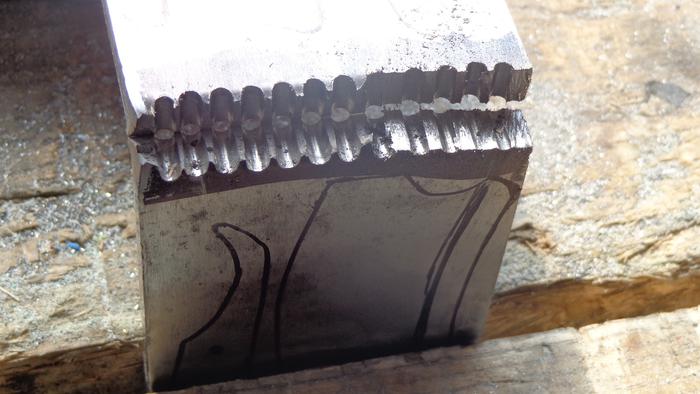
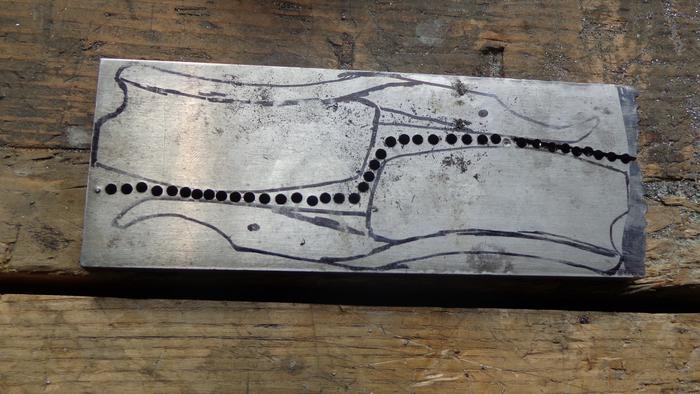
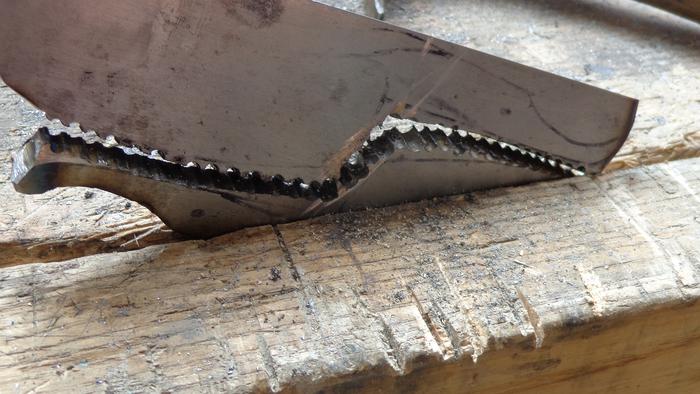
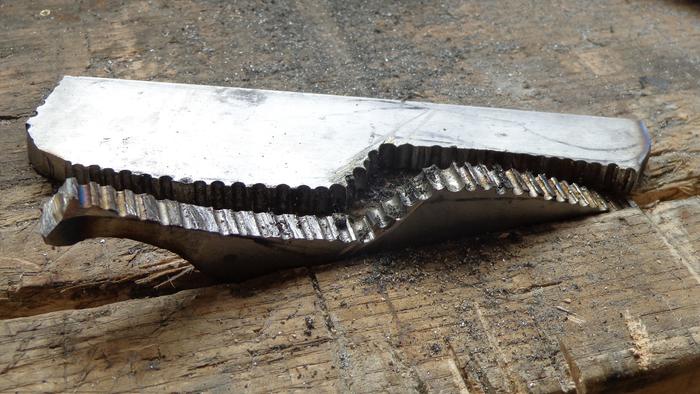
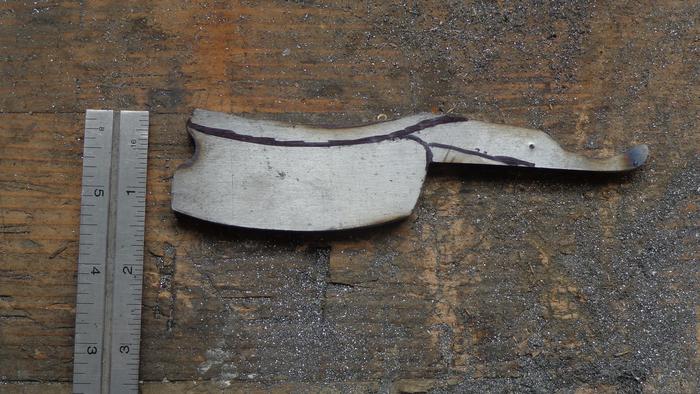
i next focused on freeing the two mammoth choppers from one ed of the bar. i dont have a metal cutting bandsaw (at the moment) so i resorted to punching centers across the bar between groups of nested blanks. then the drilling of those centers to make a line of holes. the steel is substancially weak across that line of holes so i just broke off the end i needed with one swift ghetto slap while clamped in the bench vise. basically the same thing for separating the two blanks from each other, much more carefully. after drilling the holes between the blanks i hacksawed til the blanks popped apart with minimal effort. as you can probably tell my ADD kicked in before i got them apart and thus i ground as much profile on one blank as i could while still together. not really wasted time but definitely not an advantage to do so
 finally once separated i profiled the blanks completely, marked center lines on the cutting edge, heel, toe, top and bottom of tang.
 Silverloaf
-
The Following User Says Thank You to silverloaf For This Useful Post:
williamc (05-16-2015)
-
05-13-2015, 12:52 AM #3Senior Member


- Join Date
- Nov 2012
- Location
- Across the street from Mickey Mouse in Calif.
- Posts
- 5,320
Thanked: 1184
7 day set with room for a mistake? Looks like your graduating away from restore work :<0)
Good judgment comes from experience, and experience....well that comes from poor judgment.
-
The Following User Says Thank You to 10Pups For This Useful Post:
silverloaf (05-13-2015)
-
05-13-2015, 12:57 AM #4

after marking center around the blade i rough ground the hollows and rough tapered the tang. for reference here is one of the blanks next to a 15/16 razor.
 still a bit oversize so after heat treat it will shrink in most dimensions a bit but the design called for finishing at 10/8, maybe slightly larger on these ones, with beveled spines. superfluous to say the least. but fun and pushing the learning curve is always beneficial in my mind. these two shown in a grouping of other blanks just about ready for heat treat. and this is roughly half of them....... a crap ton
Silverloaf
-
The Following User Says Thank You to silverloaf For This Useful Post:
williamc (05-16-2015)
-
05-13-2015, 12:58 AM #5I love Burls....... and Acrylic


- Join Date
- Mar 2012
- Location
- Baden, Ontario
- Posts
- 5,475
Thanked: 2284
Love seeing all these steps Man! Keep me coming.
Aaahhhhhhhhhh! Those Kamis!!!!!!!!! I need one!!!!!!Burls, Girls, and all things that Swirl....
-
The Following User Says Thank You to HARRYWALLY For This Useful Post:
silverloaf (05-13-2015)
-
05-13-2015, 01:00 AM #6
-
05-13-2015, 01:02 AM #7
-
05-13-2015, 01:04 AM #8

Looking good. Can't wait to see them finished.
*Insert deep thought/profound statement here*
-
The Following User Says Thank You to UAcowboy For This Useful Post:
silverloaf (05-13-2015)
-
05-13-2015, 02:26 AM #9

Thanks for the photo progression! I admire your ability to stick to a job and see results happening without some of the "needed" tools! Very good jobs of work and well proportioned while you were at it!!
~RichardBe yourself; everyone else is already taken.
- Oscar Wilde
-
The Following User Says Thank You to Geezer For This Useful Post:
silverloaf (05-13-2015)
-
05-13-2015, 02:29 AM #10

I see mine........Right there!
 "Don't be stubborn. You are missing out."
I rest my case.
-
The Following User Says Thank You to sharptonn For This Useful Post:
silverloaf (05-13-2015)


 102Likes
 LinkBack URL
 About LinkBacks


 Reply With Quote

