
Results 1 to 10 of 15
 53Likes
Thread: Old Razor Repro
 LinkBack URL
 About LinkBacks
Threaded View
-
11-19-2020, 06:40 PM #9Senior Member

- Join Date
- Jul 2020
- Posts
- 270
Thanked: 44
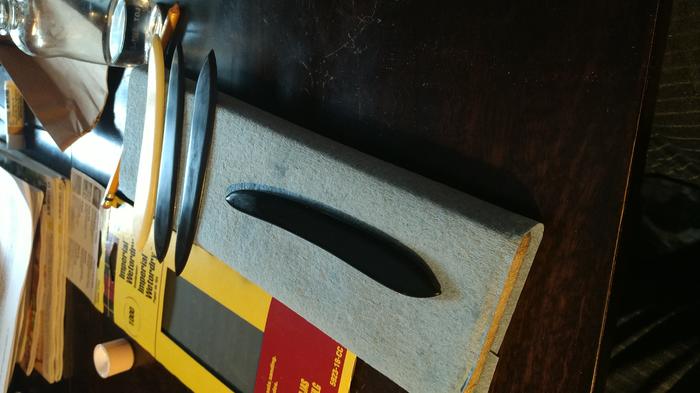
Working on some scales today, I like to do all the rough work down in the shop and then complete the finishing upstairs where it's much cleaner and especially at this time of year warmer

I have template for the shape of the scales which I trace onto the covering paper that comes on the acrylic sheet, or in the case of the horn I cover both sides in masking tape, the masking tape also helps prevent the horn from splitting/delaminating when sawed. I then saw the rough shape out and then use double sided tape to stick two blanks together, that way a pair of scales match exactly. Next I sand the shape down to size going from 60 grit, to 120 grit, to 220 grit.
Next I use my calipers and set a distance from the edge of the scales and score a line, I also score a line around the edge of the scales, this gives me a guide for filing. I use a double cut file to hog of material to create the chamfer around the perimeter of the scales. After that I use a cabinet scraper to remove the file marks; this tool will greatly reduce sanding time.
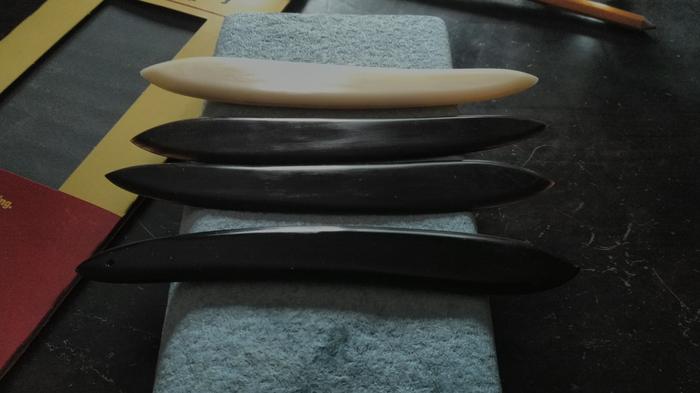
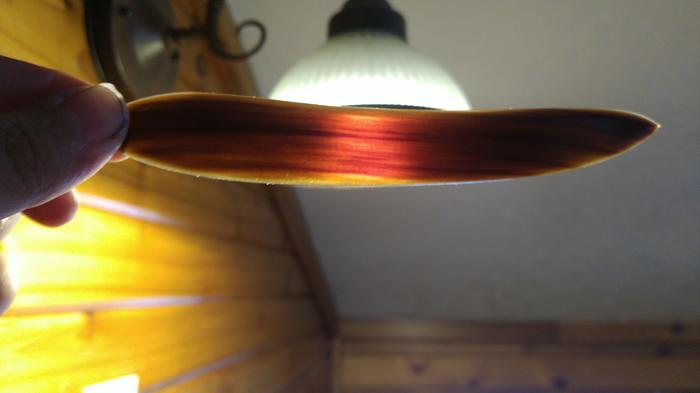
Then comes the hand sanding, I progress all the way up to 1000 grit before buffing with compound. The pics here are of hand sanding at 800 grit and a picture of one of the horn scales showing the nice patterning when held to the light. I use mineral oil as a lubricant to stop the wet/dry paper from clogging up too quickly. In the case of the ivory acrylic scales I might not sand past 800 grit to try replicate the look of ivory texture, I am also experimenting with adding a light dye to the ivory scales then sanding back to create a grain look. Will post pics once I have the process down.
(Pics aren't the best, not very bright here today)


 Reply With Quote