Results 1 to 10 of 43
Thread: Grinder accesories and ideas
-
12-22-2020, 03:51 AM #1
 Grinder accesories and ideas
I am new to razor grinding. I have a 2x72 AmeriBrade fastback, flat platen, small wheel set, 12” wheel, 6” wheel and hopefully soon a 4” wheel.
I have seen many videos on grinding. I have seen freehand and grinding with a rest.
For those using a rest I would like to see ideas of what you use. I have seen small flat rests and some more like a post (i imagine better for blades with a smile).
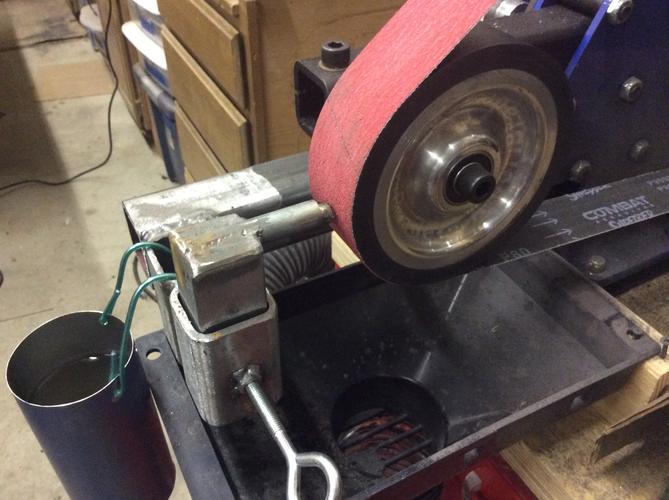
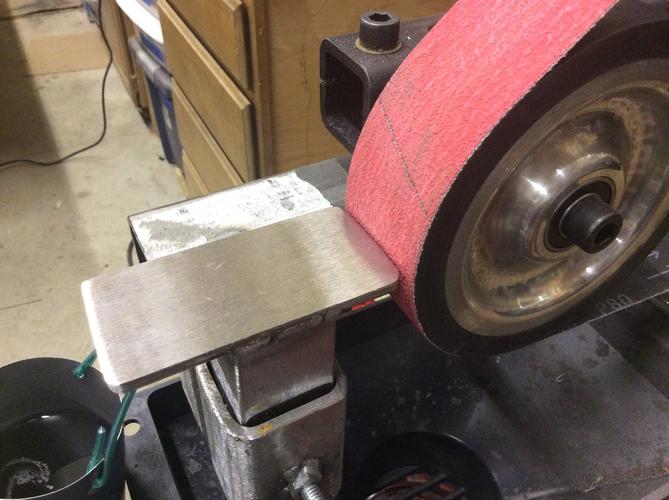
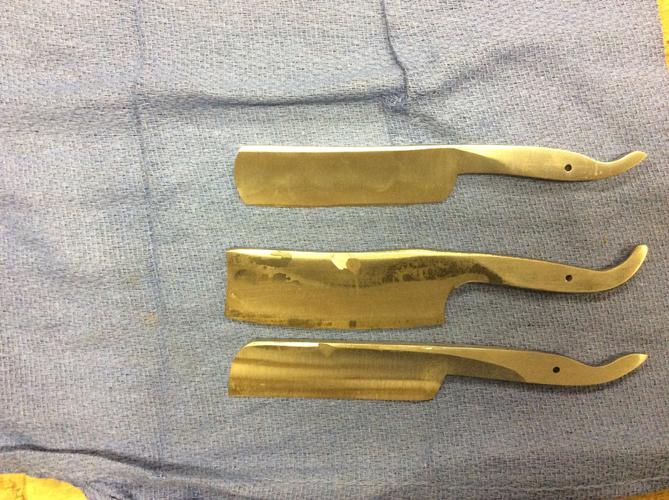
I built both. I was really enjoying my adjustable post rest. It has a step ground into it which I thought would help if i needed stabilization from behind. Turns out all it did was to help me put two nearly identical grinder gashes my second and third blade attempts. I was using my right hand (non-dominant), blade was pushed to the left and then instead of drawing back to the right and removing the blade I pulled the tang toward my body which caught the mid-spine on my ground step and pivoted the blade into the left side of the wheel creating the gashes you see below on two heat treated and tempered blades. (My first one I did not screw up—guess I got cocky).
I believe I will cut off the step and just use the rounded post.
Any other thoughts or jigs or rest ideas out there?
Stepped post.
Flat rest.
Grinder gash!
-
12-22-2020, 05:50 AM #2Senior Member

- Join Date
- Jul 2020
- Posts
- 270
Thanked: 44
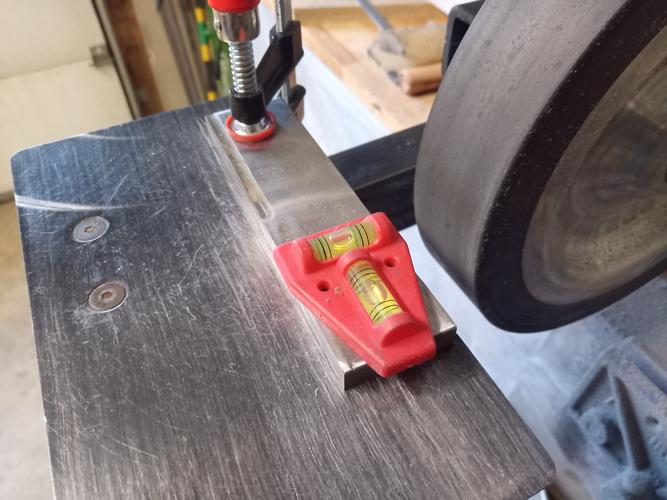
If I am grinding something like a smiling wedge I grind freehand, on the rough belts I have the wheel rotating toward me but when I go finer I reverse and have the belt going away from me. I will use a flat stick (I have a thread about it with link to video) for this type of grinding. I have just HT'd two blades which are going to be full hollow ground and for that I use the standard rest that came with the machine (I have the same grinder). I level the tool rest with a bubble level so it is square to the floor. I have a small flat bar of polished steel as a rest which I clamp on just to provide clearance for the tail and my hand. Then I adjust the height of the wheel so the center of the wheel is in line with where I want my grind height to be. All my razors are stock removal so for grinding on the rest I don't round the spine until I have finished the hollows. The spine lays flat on the rest and I just guide with my fingertips or I hold a small wad of felt on the other side of the blade to keep it all upright. You only need something like the post rest if you want to have a smiling blade, if I were to make a smiling blade with a rest I would just clamp a thin bar to the standard rest and set up my wheels how I do for a razor with a straight edge. By calculating all my grind heights for what thickness of steel I am using and my final edge widths I get very consistent results razor to razor. I will take some pics for you tomorrow of how I grind a blade using the rest.
Last edited by thp001; 12-22-2020 at 05:55 AM.
-
12-22-2020, 02:02 PM #3


I'm heavily jigged up for my all my phases of rough grinding, but do all of my finish work totally free hand.Last edited by bluesman7; 12-22-2020 at 03:01 PM.
-
12-22-2020, 10:44 PM #4

I do everything freehand. My grinders don't even have a horizontal plate attached.
Victor uses jigs primarily because of the type of razors he makes and how he makes them. Idk how you'd be able to work freehand with that setup for rough work, using the small wheels.Til shade is gone, til water is gone, Into the shadow with teeth bared, screaming defiance with the last breath.
To spit in Sightblinder’s eye on the Last Day
-
12-22-2020, 10:55 PM #5Senior Member

- Join Date
- Jul 2020
- Posts
- 270
Thanked: 44
Obligatory shop pic:
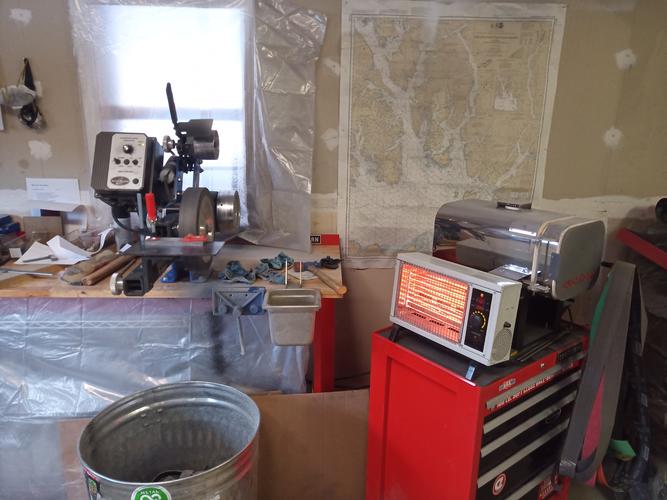
So first thing is I clamp on my flat bar to the tool rest, the bar provides clearance for the tang and my fingers as I move the blade back and forth. I check that I am level with the floor. I guess you don't need to do this but it just gives a point of reference:
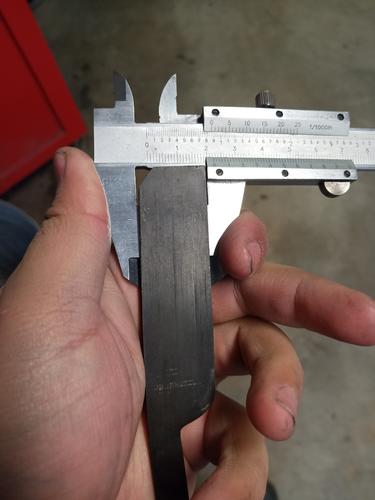
I then measure the width of my blade:
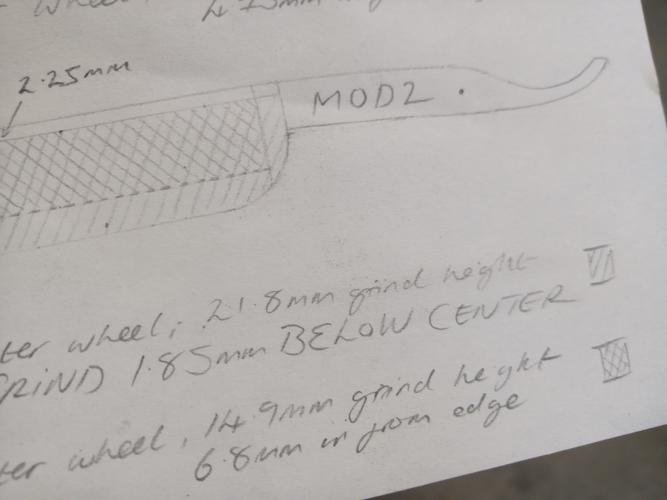
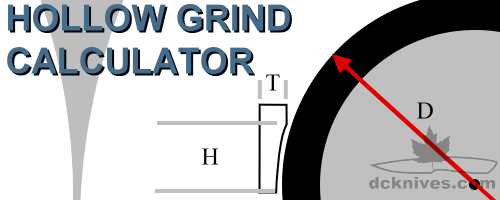
Then I check the grind heights I have calculated for the blade width, stock thickness and wheel sizes. I use this hollow grind calculator I found online to determine the total grind height per wheel from the thinnest part of the grind. (http://dcknives.com/public/grind_angle_concave.php):
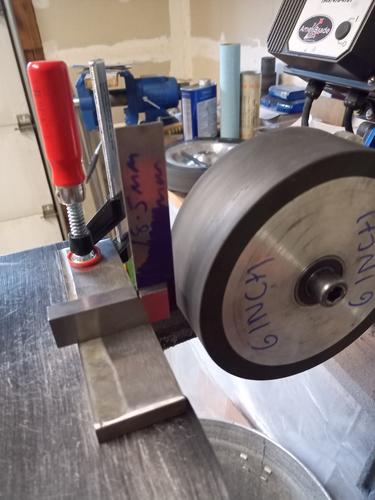
I then use my calipers to scribe a line on an engineers square which is set for the height of the blade +/- and difference between the height of my blade and the grind height that the wheel will impart. I then set the apex of my wheel in line with this mark by adjusting the accessory spindle (https://www.ameribrade.com/drawings - Contact wheel kit drawing part No 5, adjust by loosening part No 2):
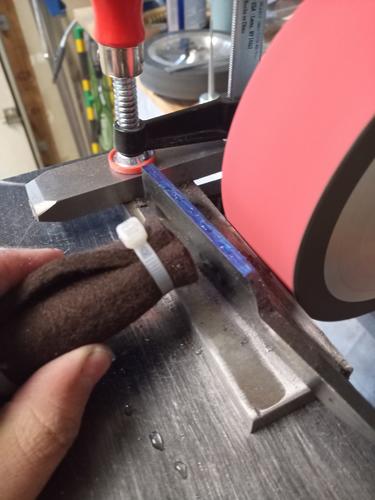
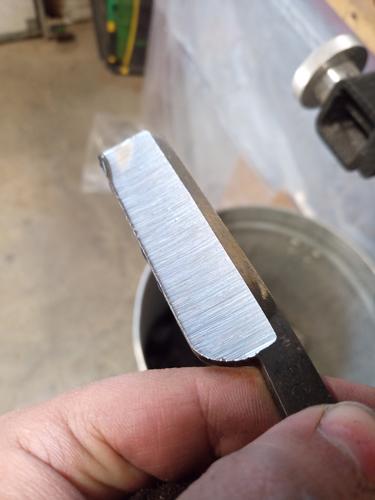
I am now ready to grind. I scribe my centerline on the edge of the blade and the toe end. Here I am using a piece of felt rolled up as a way to press the blade into the wheel. You don't want to push so hard that the blade leans into the wheel, the edge should be upright and the spine flat to the tool rest. The felt being compressible spreads the force you push with and prevents hinging the blade on the wheel and gouging the blade:
The result, if you do your part in being consistent with pressure and movement is an even grind:
-
The Following User Says Thank You to thp001 For This Useful Post:
randydance062449 (12-29-2020)
-
12-23-2020, 01:55 PM #6
-
12-25-2020, 01:14 AM #7

THP001, I would like to see a full pic of your detailed technical drawing. Currently I mostly do a “looks about right” plan. Your drawing looks like a great learning tool to see how others plan a blade.
-
12-25-2020, 04:14 PM #8
-
12-25-2020, 08:32 PM #9Senior Member

- Join Date
- Jul 2020
- Posts
- 270
Thanked: 44
I don't remember much geometry terminology, basically for my initial grind what will be the apex of the blade is in line with the highest point of the wheel, so you have the thinnest part of the grind at the edge. If your edge is above this you would actually be thinner behind the edge so could theoretically grind through the blade if negligent enough. Now when I do the second grind with a smaller wheel for a full hollow blade you actually want to be thinner some way back from the edge to get the belly.
The pic on the hollow grind calculator should make sense.
-
12-25-2020, 09:26 PM #10

Yeah, your description answers my question. Do you finish grind with your method too? I think that Bob Allman of OCD Razors ground his the way you are describing.
Last edited by bluesman7; 12-25-2020 at 09:31 PM.


 88Likes
 LinkBack URL
 About LinkBacks


 Reply With Quote


