Results 11 to 20 of 74
Thread: electrolysis for rusty razor
-
09-20-2012, 03:08 AM #11

I do not know what you mean by "black" or "spider" rust. If by "black" rust you mean tarnish or what some call "patina", I am going to give that a try before the end of the week. I actually do not know what "spider" rust is. If you could explain, I would be grateful.
Does it remove rust just from the surface? I am not a metallurgist and can not say one way or another. But my educated guess is that it removes rust through out the metal. This is an electro/chemical process that works at the level of atoms (as I understand it). My personal observation has been that the process works deeper than just the surface. But, again, I am just giving a layman's observation. This might be a worthwhile topic for someone to research.“Tell me and I forget. Teach me and I remember. Involve me and I learn.” Ben Franklin
-
09-20-2012, 03:31 AM #12Poor Fit

- Join Date
- May 2010
- Posts
- 4,562
Thanked: 1263
Seems pretty neat and all...in the interest of science...but I think I'll just stick to my buffers

-
09-20-2012, 03:45 AM #13

Thank you for the your compliment. As for your concerns about when a razor would be "done" the answer is: "It is done when it is done". I'm not trying to be flippant. That really is the answer. Again, this is an electro/chemical process. When there is no more rust to remove, the process ceases. The electrolytic process works on one thing only, rust! It will not eat metal! Again, I am NOT a chemist or metallurgist. All I can do is report my personal experiences and share research I have done on the subject. The internet is available to recheck my assertions and I recommend you do so before undertaking this process. Many videos are available on YouTube and a Google search on electrolytic rust removal will yield a good number of results.
Randy“Tell me and I forget. Teach me and I remember. Involve me and I learn.” Ben Franklin
-
The Following User Says Thank You to WhiteLion For This Useful Post:
regularjoe (09-20-2012)
-
09-20-2012, 05:30 AM #14At this point in time...


- Join Date
- Jun 2007
- Location
- North Idaho Redoubt
- Posts
- 27,061
- Blog Entries
- 1
Thanked: 13249
I would like to see more Randy, this is the first one of these experiments that actually shows promise...
Trust me I went through all the nay sayers when I started the tumbler experiments too, but once people saw that it can work they tried it and everyone learned a ton...
There is no draw back if it works, and I really don't care if it adds a step, if it improves the outcome, I doubt I would trade it for the buffers but on certain razors I might want to add it to the system...
Would love to see more of your trials.. Thanks in advance
-
09-20-2012, 03:54 PM #15

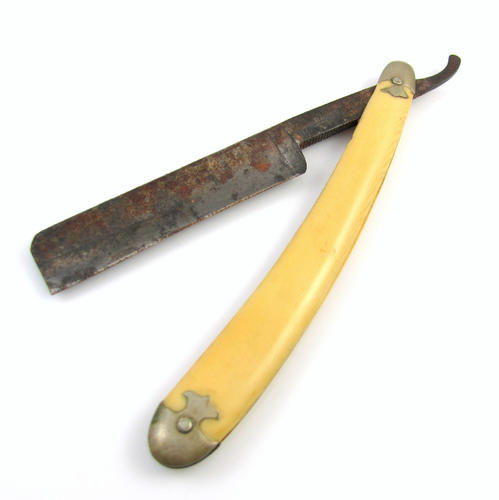
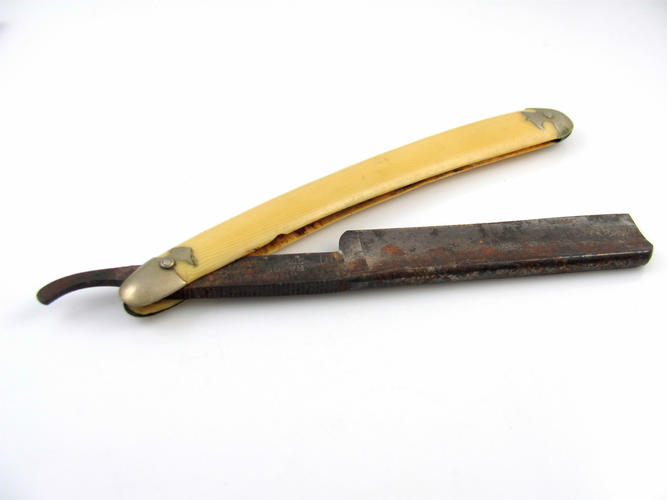
Ask and you shall receive. This next razor was done at the same time as the one posted earlier. It started off in much worse condition and did not clean up as well as the first razor. I think part of that was my fault. These were the first two blades I had tried the process on and I was being extra cautious. I made an assumption, one I now believe was incorrect, that since the first blade had turned out so well, I must have reached the effective limits of the process. If I could, I would test that theory by putting the blade back in the vat and let the process continue further.
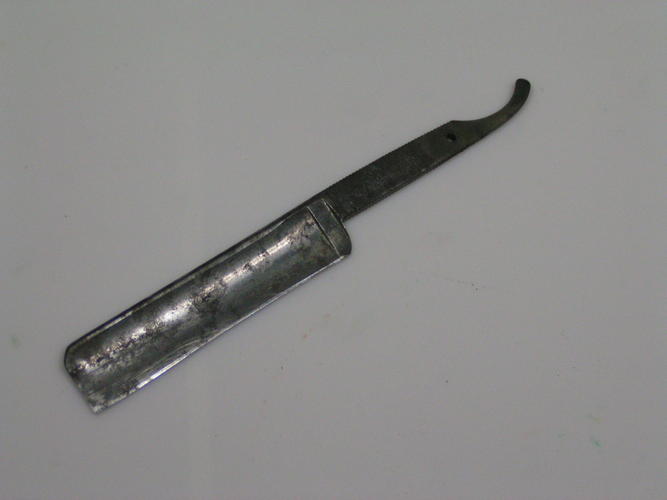
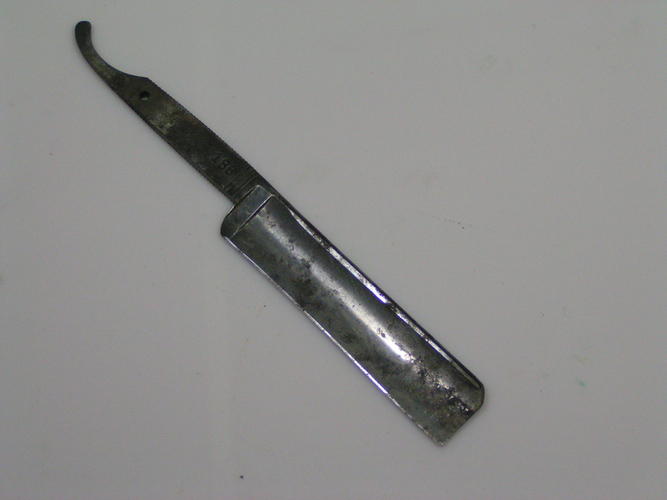
As you may recall Glen, you helped me with removing a frown from a blade. This was that blade. I could not continue any further testing because, as you may recall, this is also the blade I dropped on the garage concrete floor and broke in half. This also why the photographs were not published earlier. I was not trying to hide a "bad" result. I simply forgot about this blade all together until Glen asked for more examples. There is no reason to tout a process that doesn't work. At present, the worth of the process is up for consideration and further experimentation. At least on a blade that was not too badly rusted, it worked well. On the other hand, as far as I was able to go with the second experiment, the results were not so impressive. I only have (had) four blades and one of those broke and is pictured below. One I did not put through the process and royally F'ed it up trying to use a Dremel to restore it. The Third is pictured at the start of my post. The fourth is currently in the vat processing to see how it handles "patina".
I will gladly continue the experimentation if members will send me some blades they do not want. PM me and I will give you my mailing address.
Without further ado, here are additional pictures.
Before:


After electrolysis:


I'll report on the blade currently in the vat in a day or two.
Randy“Tell me and I forget. Teach me and I remember. Involve me and I learn.” Ben Franklin
-
The Following User Says Thank You to WhiteLion For This Useful Post:
mapleleafalumnus (09-20-2012)
-
09-20-2012, 05:40 PM #16At this point in time...


- Join Date
- Jun 2007
- Location
- North Idaho Redoubt
- Posts
- 27,061
- Blog Entries
- 1
Thanked: 13249
Thanks Randy,
See the black rust at the front of that blade, the stuff that goes deep into the metal ???
That is the stuff I would love to know if it can take out, normally that black stuff requires some serious work on the 80 Grit Greaseless buffers to dig out.. Even worse is the Infamous "Devil's Spit" which looks the same except it is smooth and slick to the touch and eye, Devil's Spit looks almost like a darker water stain, until you dig into it, and find that it runs deep into the steel..
If this process can even help to get the stuff out of there so that I could just buff to a shine after, I think it could save steel
Please let us know, and I will also go through the "Bench Babies" to see what I have to send for you to try out
-
09-20-2012, 06:36 PM #17

The blade I have in the vat at this time has exactly the problems you are wondering about. It even has a spot of Devil's spit if I am correct. It is cooking as I reply and I will post results at the earliest. Two hours in and there is some minor improvement. Not enough to pick up on camera. It may be an overnighter or even a second day before I can say anything one way or another.
I want to make a clarification. I am using a one amp motorcycle charger set at 12v, not a 2 amp charger as stated previously. The process would go quicker with higher voltage and amperage but I am not going there as the blade I have in the vat is a nice Wostenholm frameback that my mentor is going to be furious about. Not only that I am experimenting with it, but also that I am trying to remove the "patina" he loves. But it is all I have and one must make sacrifices for science and SRP! So guys, it really will be appreciated if you send those old razors so I don't have to use any more good ones. The first two I did cost $10 each including s/h so there was really no risk. The Wosty I got at a good price but substantially more than $10. I do hope that I don't screw it up!!!“Tell me and I forget. Teach me and I remember. Involve me and I learn.” Ben Franklin
-
09-20-2012, 08:06 PM #18

Randy, You are indeed the "Master Tinker" . Some rusty old research blades are on the way!
Tom
-
09-20-2012, 08:45 PM #19

No chewing out Sahib?
Thanks for the donation to my tinkering shop. Any other generous member who wishes to donate will be gratefully appreciated. If you happen to throw in a Dubl Duck, Henckels or Torrey by mistake and they turn out marvelously, I'll sure let you know and return them to you.
UPDATE: The blade has been in the vat for 4 hours now with what I believe is noticeable improvement. I put the blade into the tumbler to remove the "chalky" residue the process leaves on the blade. I'll be able to tell more after it tumbles for a while. It is possible this will need to go overnight. I'll report more later.“Tell me and I forget. Teach me and I remember. Involve me and I learn.” Ben Franklin
-
09-20-2012, 09:50 PM #20


 59Likes
 LinkBack URL
 About LinkBacks


 Reply With Quote
 I just dropped off a priority box at the PO. A buch of junkers and some which you might fix up as well! Good Luck!
