
Results 11 to 20 of 48
 65Likes
 LinkBack URL
 About LinkBacks
-
07-29-2016, 10:13 PM #11At this point in time...


- Join Date
- Jun 2007
- Location
- North Idaho Redoubt
- Posts
- 27,054
- Blog Entries
- 1
Thanked: 13249
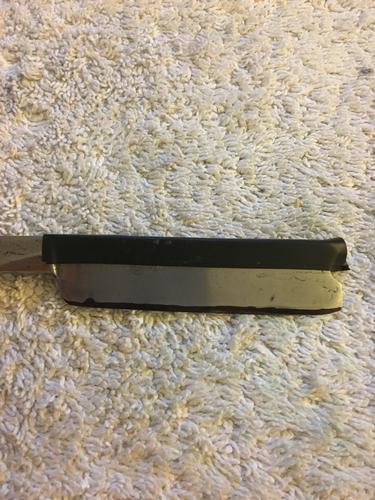
I would stay on the 1k until you figure out what steel needs to be removed, is there clean shiny steel at the edge of the bevel from heel to toe on both side or is there still marker
The object is to see where the Hone and the bevel are making contactSubstance likes this.
-
07-29-2016, 10:13 PM #12At this point in time...
- Join Date
- Jun 2007
- Location
- North Idaho Redoubt
- Posts
- 27,054
- Blog Entries
- 1
Thanked: 13249
Yes that is a good place to start, you can always subtract once you get it sorted Originally Posted by Johntoad57

-
07-29-2016, 10:15 PM #13Senior Member


- Join Date
- Feb 2016
- Location
- San Antonio, TX
- Posts
- 1,836
Thanked: 428
Looks like clean shiny steel. Could it be a secondary bevel? Originally Posted by gssixgun
Semper Fi !
John
-
07-29-2016, 10:22 PM #14At this point in time...
- Join Date
- Jun 2007
- Location
- North Idaho Redoubt
- Posts
- 27,054
- Blog Entries
- 1
Thanked: 13249
Maybe, but honestly it doesn't mater, you can always adjust that once you get a solid bevel set
The object now is to evenly and equally move the razor across the hone until the bevels meet in a sharp >
Here is where the fun begins, if you rush it and push too hard you can set yourself back, but doing it with no pressure means you are not creating the bevel and keeping it even and equal as you go,,
Circles are good here,,, when faced with a difficult bevel set I will do 20 circles with pretty heavy pressure per side followed by 20 lighter X strokes to blend the circles... Rinse and Repeat
I check the edge with my thumb pad until I feel it getting past Knife sharp along the whole bevel then do however many X strokes it take to get it popping arm hair...
Don't leave the 1k until it is shaving arm hair EASILY from heel to toe
-
07-29-2016, 10:29 PM #15Senior Member
- Join Date
- Feb 2016
- Location
- San Antonio, TX
- Posts
- 1,836
Thanked: 428
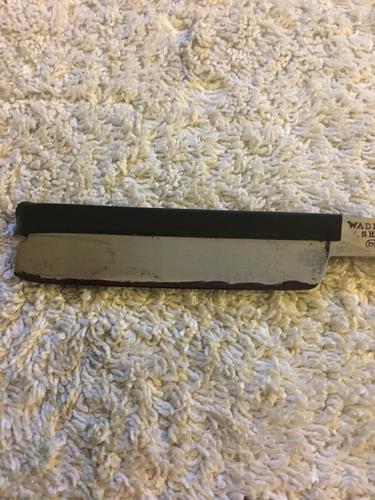
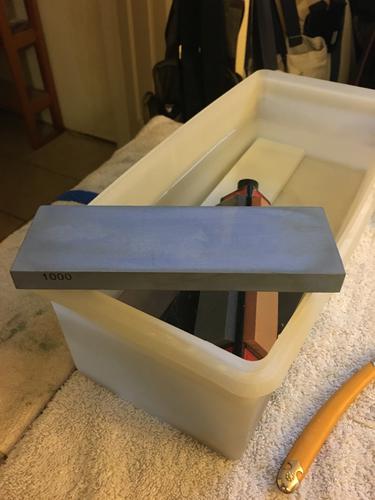
Okay. Here we go...3 layers of electrical tape and the 1K stone that I'll be using. I'll get back to you when I can pop arm hair! Do I have a green light?
 Semper Fi !
John
-
07-29-2016, 10:38 PM #16At this point in time...
- Join Date
- Jun 2007
- Location
- North Idaho Redoubt
- Posts
- 27,054
- Blog Entries
- 1
Thanked: 13249
That looks pretty good John
Go slow to begin with, I would check the Marker test a couple of more times as you proceed, make sure it is cutting evenly and move forwardChevhead likes this.
-
07-29-2016, 10:43 PM #17Senior Member
- Join Date
- Feb 2016
- Location
- San Antonio, TX
- Posts
- 1,836
Thanked: 428
Get back to you soon... Originally Posted by gssixgun
gssixgun likes this.Semper Fi !
John
-
07-29-2016, 11:42 PM #18Senior Member
- Join Date
- Feb 2016
- Location
- San Antonio, TX
- Posts
- 1,836
Thanked: 428
Glen, Originally Posted by Johntoad57
Have completed 100 passes (100 -20 round circles and 100 good X strokes). Blade is about knife sharp right now. Will continue with another 100 passes of circles and x strokes. Get back to you soon.Semper Fi !
John
-
07-29-2016, 11:54 PM #19At this point in time...
- Join Date
- Jun 2007
- Location
- North Idaho Redoubt
- Posts
- 27,054
- Blog Entries
- 1
Thanked: 13249
Can you also see the progression coming together ?? Loupe ??
Also as it gets sharper watch the ripple of water at the front of the blade at the edge, make sure that ripple either rides the front of the edge or is riding up on the face of the blade (Undercutting) if the water is going under the edge you are not refining the very edge Chevhead likes this.
-
07-29-2016, 11:58 PM #20Senior Member
- Join Date
- Feb 2016
- Location
- San Antonio, TX
- Posts
- 1,836
Thanked: 428
Getting a pretty even cut as I look at it from my loupe (60X) visor. I'll pay attention to the water. It feels a little different this time (smoother edge). I don't think I was applying enough pressure. I continue and get back to you. By the way, I really appreciate your help!!! Originally Posted by gssixgun
gssixgun likes this.Semper Fi !
John


 Reply With Quote