
Results 21 to 30 of 46
 21Likes
Thread: Magnification recommendations?
 LinkBack URL
 About LinkBacks
-
12-21-2016, 05:05 AM #21Junior Member

- Join Date
- Oct 2012
- Posts
- 26
Thanked: 14
Will do! It is past 12 PM here in the east coast.... hopefully tomorrow.
-
12-21-2016, 05:13 AM #22Junior Member
- Join Date
- Oct 2012
- Posts
- 26
Thanked: 14
https://www.google.com/search?rlz=1C...ugfAZee2NWM%3A
Just as an idea for tonight, check the link...
-
-
12-21-2016, 07:51 AM #23Senior Member
- Join Date
- Nov 2012
- Location
- Seattle,WA.
- Posts
- 579
Thanked: 55
I figured out two things to help. Instead of having the blade edge face the microscope have it facing away from the microscope. Now instead of a white, reflective line at the edge you can actually see the edge. Originally Posted by Aerdvaark

Get a small flashlight with the kind of color (of light) that you like and lay that down pointing toward the blade. In other words just supplement the light that is built into the microscope.Aerdvaark likes this.
-
-
12-21-2016, 01:23 PM #24Senior Member


- Join Date
- Dec 2014
- Location
- Virginia, USA
- Posts
- 2,224
Thanked: 481
Originally Posted by fxt913
I've actually tried a few variations of that. I bought a 200x magnifier that was made to be attached to a cell phone. Unfortunately, it didn't have good enough focus to get any sort of clear imagery with or without the cell phone at any level of magnification. Lesson learned, you get what you pay for.
I had a tiny bit of luck using the 60x scope that just broke. However, the washer/dryer didn't just kill the battery they also killed the focus mechanism and now the lens just kinda flops up and down in the scope's body. Maybe I can cannibalize that to make one of those safety pin cell phone rigs...assuming I didn't just pitch it. I honestly can't recall what I did with the scope.
I find I'm not exactly a fan of the Carson scope. It gets the job done, but holding a razor and operating the magnification and focus adjustments is a bit of a challenge. Not so much an issue with lighting as it is a juggling act, but I'll give credit where do, when I finally DO get it in focus I can get a much closer view than the 60X loupe it replaced, with more or less just as well focused a view.
-
12-21-2016, 03:27 PM #25I used Nakayamas for my house


- Join Date
- Aug 2009
- Location
- Des Moines
- Posts
- 8,664
- Blog Entries
- 1
Thanked: 2591
I have been using one like that for a long time
https://www.amazon.com/SE-MW10085-Il...eld+microscope
only mine is 30x max.
To get good visuals of the bevel/edge, you have to have the light at the right orientation, you have to focus the scope at the spot you are looking at, if you move the scope you may have to refocus. This is not a plug and play system, it will need some fine adjustments as you go.
EDIT: here is mine
https://www.amazon.com/SE-MW10084-LE...PHCDQN4XQHQYPMStefan
-
12-21-2016, 03:41 PM #26Senior Member

- Join Date
- Apr 2012
- Location
- Diamond Bar, CA
- Posts
- 6,553
Thanked: 3215
Part of the trick to using the Carson is to make a foam piece to glue on the plastic base.
The edge will after a few uses cut into the foam, then to align the edge you just put the edge in the groove. You may need to bump the focus, but your are 99 percent there and in focus.
60X works best for looking straight down on the edge.
Here’s the link to the foam protector.
(Show the world how you’ve modified your tools), Post 78Thug likes this.
-
The Following User Says Thank You to Euclid440 For This Useful Post:
Thug (12-25-2016)
-
12-21-2016, 04:14 PM #27Junior Member
- Join Date
- Oct 2012
- Posts
- 26
Thanked: 14
Here are some links for all of you, just to get a good overall idea as to how you can make a super simple, and fairly powerful setup, for your microscope:
DIY smartphone MICROSCOPE: Turn your mobile into expert kit | Daily Mail Online
https://readfeeldo.wordpress.com/201...or-smartphone/
How To Make A Camera Magnifier Using The iPhone | RemoveandReplace.com
Smartphone microscope takes LED teardown photos | Designing with LEDs
Do they work for our hobby? Yes, they all do! KISS, & DIY! Some are better than others....but it all depends on the quality of the lens. Even cheap, and low quality lenses work very well. Your smartphone's sensor allows for great digital magnification, so even a 10X lens works great. You do not need a high powered lens. Focal length is an issue with them.
Two "secrets" that make this work:
1) The lens HAS to be flushed against the camera, making sure it has made good contact. Make sure there is no dust in between, just as in a normal microscope. Phone protective cases may or may not allow for good contact, so you may have to remove them if that is the case. By the way, it is not just phones.... your old (or new) ipad, ipad minis, android versions...whatever you have.
2) Lighting. You need diffuse light for best results, but even without a diffuser, you can make it to work just fine with two flashlights. Flashlights with diffusers work great!
I bet 99% of you reading this have all you need right now at home and can get one working right away. In our throwaway society there are tons of hardware that get trashed with very decent lenses embedded in them. Old usb cameras (or any camera) have some of the best optical lenses, as do old dvd players, or you can get started with lens from a laser pointer flashlight. There are free magnifier apps for both Android and Apple. Get to know them first and see how they work. They provide digital zoom.... more than you need to see the bevel scratches! The third link I have provided pretty much summarizes this whole concept very clearly. Once I get home tonight I will take some pics of my setup. I would love to see your setups..... and maybe later, Keith would get a hint on a new topic, and put a 30-45 min video of this whole idea, with his interpretation! His youtube channel is indeed cool, and informative! Have fun!!Last edited by fxt913; 12-21-2016 at 06:19 PM.
Aerdvaark likes this.
-
The Following User Says Thank You to fxt913 For This Useful Post:
Aerdvaark (12-21-2016)
-
12-21-2016, 11:11 PM #28Junior Member
- Join Date
- Oct 2012
- Posts
- 26
Thanked: 14
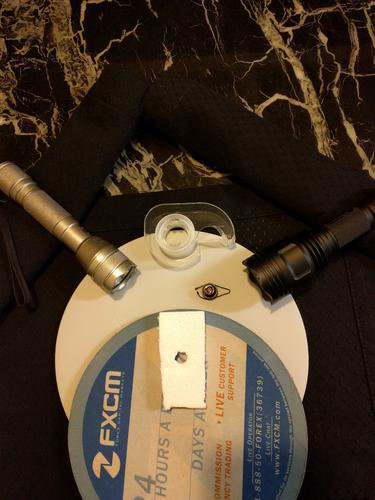
As promised, I am attaching a number of images showing my setup! I went through quickly and did not spend much time with lighting, and did not use any diffusers as I do not have them here right now.... but with better lighting the results are more impressive. For sure most of you can come up with a more elaborate setup....for me though, the simpler, the better. Been doing this for a couple of years now, when I need to look at the edge, but in most refreshes I do not use any scoping, at all. I sincerely hope someone finds these images, and this DIY method, useful.
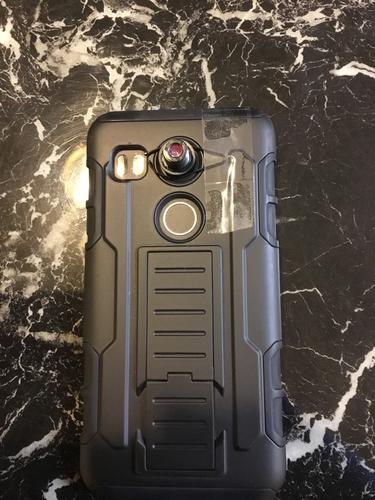
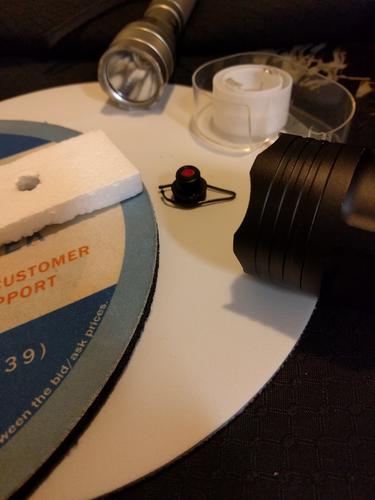
The above images show the lens attached with a hairpin, and scotch tape.
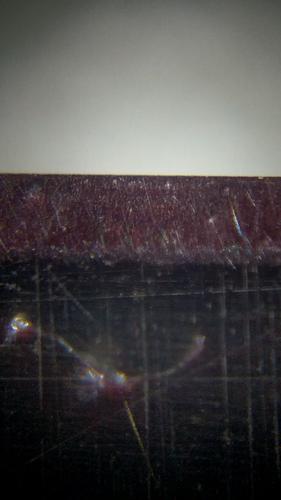
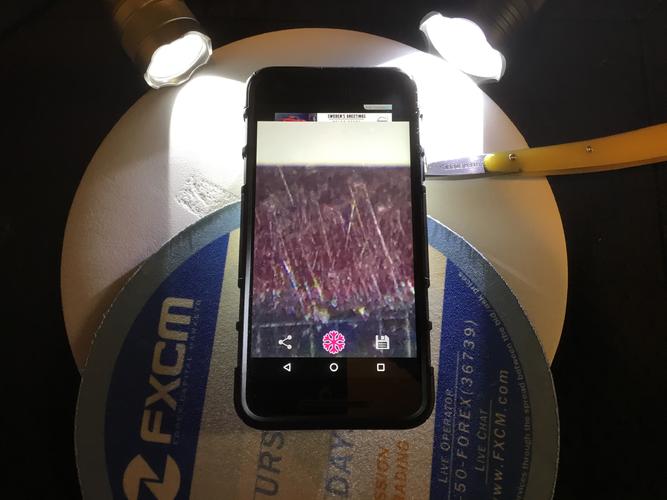
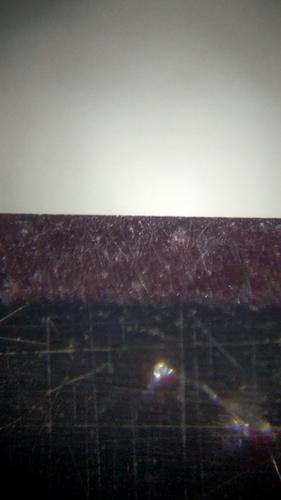
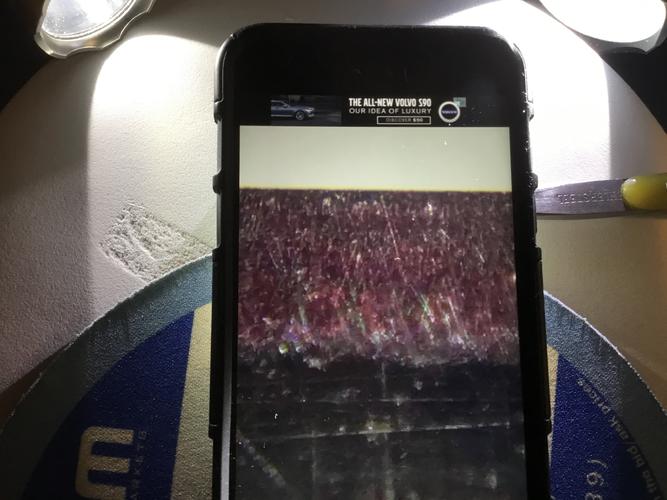
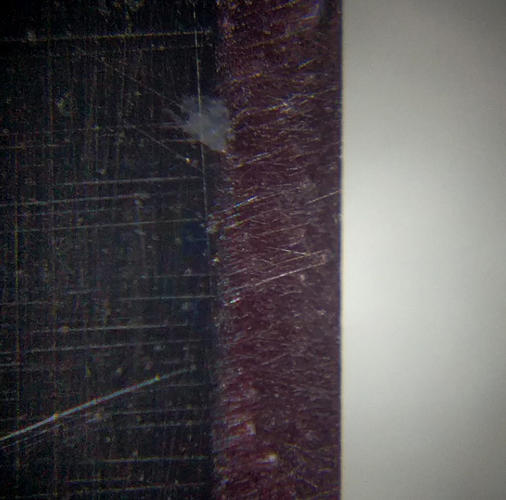
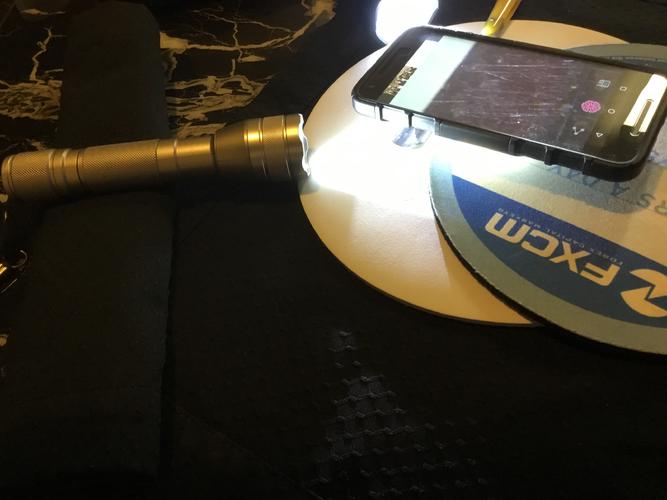
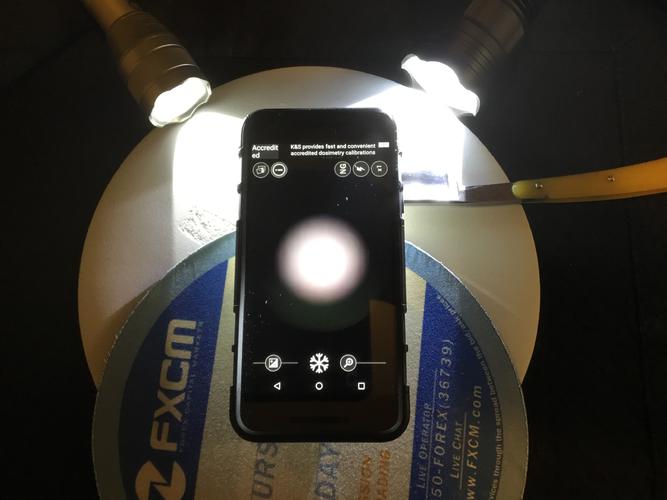
Here you see the setup, and how the image looks like.Last edited by fxt913; 12-21-2016 at 11:19 PM.
-
-
12-21-2016, 11:18 PM #29< Banned User >
- Join Date
- Oct 2016
- Location
- Saratoga, CA
- Posts
- 597
Thanked: 59
Simply remarkable!!! I must have one immediately!!!
-
12-21-2016, 11:37 PM #30Junior Member
- Join Date
- Oct 2012
- Posts
- 26
Thanked: 14
I am sure you will have more than one, or two lenses, very shortly. With an Ipad mini, the setup is quite pleasant. With an Ipad Pro, it is stunning... a sight to be seen!
Unfortunately, I rarely use my Pro for this, as I keep it with a protective case, and the lens does not make good contact, unless I take the case off. I use Super Vision+ app for Apple, and the Magnifier app in Android, for those who want to give it a try. There are other apps too, maybe someone will have another useful perspective on them. Look forward to see what others will come up with, in the meantime.Last edited by fxt913; 12-22-2016 at 07:34 PM.
KenWeir likes this.


 Reply With Quote