
Results 21 to 30 of 32
 75Likes
Thread: Bevel Setting
 LinkBack URL
 About LinkBacks
-
11-04-2020, 02:58 AM #21Senior Member


- Join Date
- Apr 2012
- Location
- Diamond Bar, CA
- Posts
- 6,553
Thanked: 3215
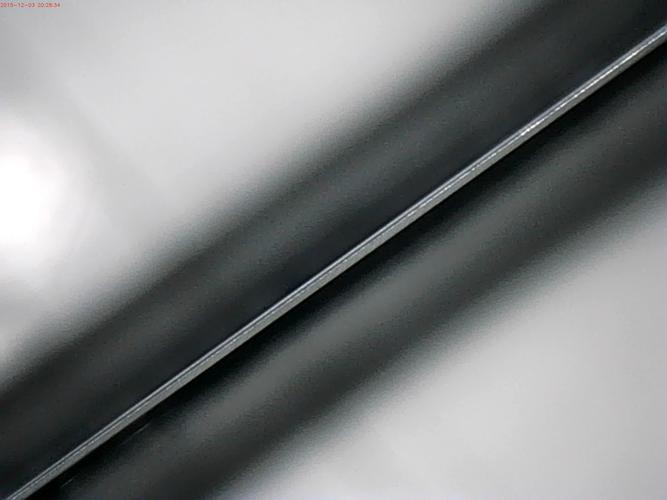
As I said earlier, it looks like you are close, the bevel looks flat and all but a few errant stria have been removed.
So, before you start jumping through hoops, buying a whole new honing system, and re-hone the razor from scratch, try adding a Micro Bevel.
Put one layer of electrical tape on the spine, lightly joint the edge, dragging the edge on the upper right-hand corner of the stone, do one lite stroke and look straight down on the edge.
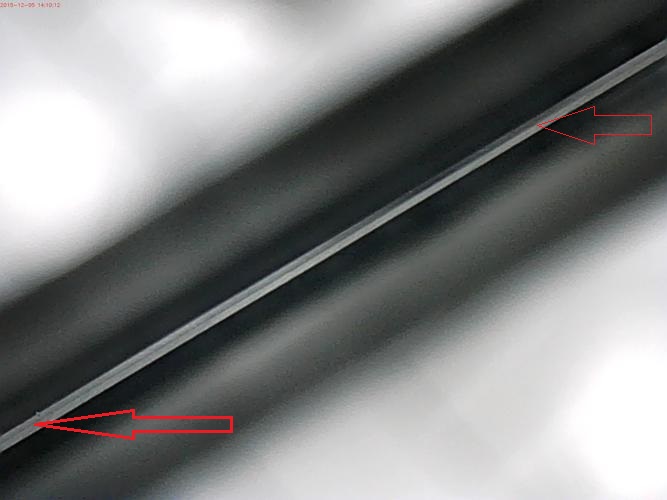
You should see a solid shiny reflection from heel to toe, where the wire has been removed.
On a freshly lapped 12k, (round or bevel the edges), do 15 lite X strokes. Look straight down on the edge again, you should see no shiny reflections. If you do see reflections, do 5 laps, and check again. Keep doing 2-3 laps until the bevel are meeting fully and there are no reflections when looking down on the edge.
If you are just planning on maintaining a razor or 10 you can easily do so with a good 8 and 12k, you do not need to invest in a complete set of stones.
The super stones are notorious for loading up, for your final laps make sure to lap your stones clean. The build up of swarf can trash an edge. You should be easily able to refresh an edge from either and a 12k edge is a smoking shaving edge.
Switching to another stone or system is not a solution. Your problem is technique driven. There are no magic stones or honing systems. Film works just as well as stones, synthetic or natural. It is just a different form of abrasive.
Here are some pics of the edge, looking straight down on the edge, from the Second Try at Honing post. The first is almost fully set, (Note shiny reflections) and the second is fully set bevel, no reflections. The edge is where the Red Arrows are.
-
11-08-2020, 09:00 PM #22Member
- Join Date
- Oct 2020
- Location
- Corfu. Greece
- Posts
- 34
Thanked: 1
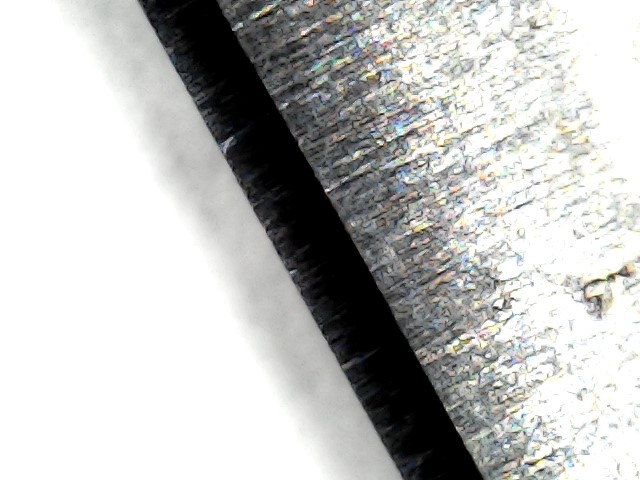
The lapping film arrived ..... at last ! I used a "sharpy" on the edged and started with the sand paper until the black line was removed all the way to the edge . And then progressed through the grits .I have included the photos . The first is the 1200 Sandpaper
-
11-08-2020, 09:02 PM #23Member
- Join Date
- Oct 2020
- Location
- Corfu. Greece
- Posts
- 34
Thanked: 1
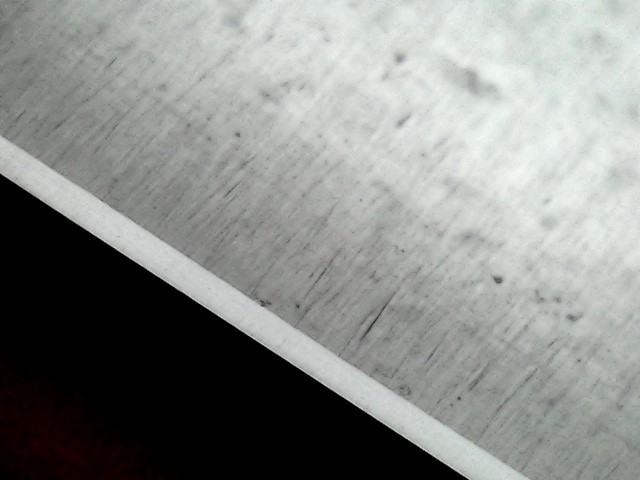
The second is the Brown 5 micron (4000)
-
11-08-2020, 09:03 PM #24Member
- Join Date
- Oct 2020
- Location
- Corfu. Greece
- Posts
- 34
Thanked: 1
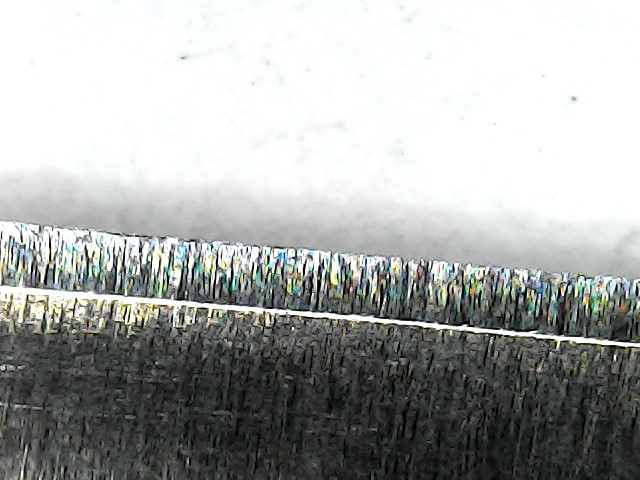
And then the Pink 3 micron (8000)
-
11-08-2020, 09:04 PM #25Member
- Join Date
- Oct 2020
- Location
- Corfu. Greece
- Posts
- 34
Thanked: 1
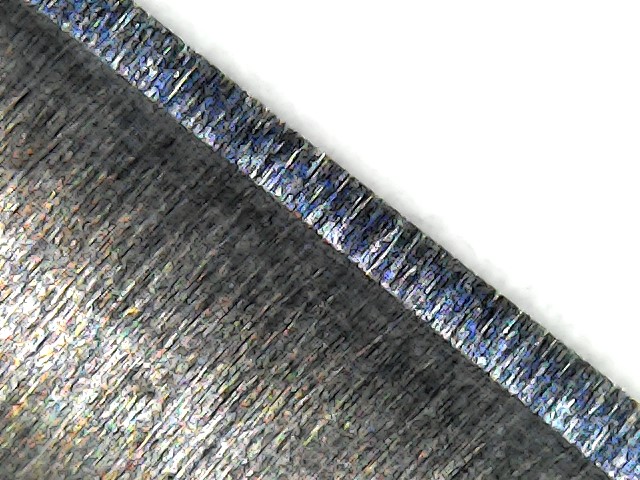
And last of all the Green 1 micron (14000)
-
11-08-2020, 11:35 PM #26Senior Member

- Join Date
- Jul 2014
- Location
- Denver CO
- Posts
- 4,662
Thanked: 811
I'm still seeing a white line along the edge, but it may be an artifact of the camera etc.
-
11-09-2020, 10:12 PM #27Senior Member

- Join Date
- Aug 2017
- Location
- Cowra, Australia
- Posts
- 716
Thanked: 99
The bevel looks nicely polished but is it set? As suggested in post #21, look straight down on the edge and make sure there are no shiny reflections. A nice glossy bevel doesn't necessarily mean a nice shave coz we don't shave with the bevel. Good luck and keep at it.
- Mick.
-
11-09-2020, 11:44 PM #28Home of the Mysterious Symbol


- Join Date
- Dec 2019
- Location
- Chauvin, LA
- Posts
- 864
Thanked: 123
I see what you see, and I think if you look back at the 3u pic, you will maybe have an ah-hah moment if you study it a bit. The razor didn't see enough action on the 3u film to flatten the bevel and eradicate previous scratches all the way out to the apex. There might have been excessive pressure. The 1u film was simply not up to the task of doing what the 3u should have done. I would take this back to the 3u film. It should shave as it is, but it will be a lot better with a bevel that is smooth and flat all the way out. Originally Posted by bluesman7

@Smell, you are getting very close. Look at your 3u pic. Notice how the bevel is nice and smooth at the root, and gets progressively scratchier once it gets close to the edge? You need to keep going on the 3u and get it all looking the same. Watch the pressure. By the 3u stage you should be using about the weight of the razor plus a finger's weight and you should definitely be honing in hand. It may take a lot of laps. Don't compensate with more pressure. The steel flexes too much when the edge starts getting fine. At the 1u stage you should end up with just the weight of the razor. Don't forget to add some pull strokes in there, and finish each stage with very short x strokes.This will keep the apex tight without leaving behind any wire or fin edge.
When you get done with the 1u stage, have a shave. If it feels a bit harsh, first of all lower your shave angle. Don't scrape. Second, take some regular copier paper, cut slightly smaller than your film, dampen it with just a mist of water, apply to your plate, apply your 1u film on top of that, and go another half dozen laps with extreme light pressure, then give it a go. Should be very kind to your face but still pretty darn sharp.Do not be tempted into more laps over the "pico-paper".
The way onward from the 1u film is the pasted balsa progression. I posted at length on that on another forum. I will get around to a comprehensive tutorial on here one of these days. But it does no guud until you are getting good quality 1u edges from the film or extremely good 12k or better synthetic edges. The balsa cannot make a dull edge sharp, but it can make a very sharp edge sharper and smoother.
That's not such a bad looking edge but film can do a lot better.
I could be wrong. Just going by what my eyeball on the laptop screen is telling me.
-
11-18-2020, 04:44 PM #29Senior Member


- Join Date
- Oct 2019
- Location
- Kingsville On, Canada
- Posts
- 2,435
Thanked: 207
I have a Titan Razor that came about a month ago.
I decided to hone it from scratch including bevel.
I don't know if i have a problem child or if i am just useless (Don't feel that you have to comment LOL).
I have bevel set and finished a few of my razors with great success, in my humble opinion anyway but I am having a really frustrating time with this one.
This morning was my third try at setting the bevel and now i set the alarm to go off after 35 minutes at which point i walk away.
I have enough in my rotation that I'm not desperate to use it, on the other hand it's new so I'm keen to have a shave with it.
I'm not going to admit defeat and send it out and i will get it done or turn it into a folding toothpick trying.
I set the bevel at the centre and the toe but the heel isn't set so I try to set the heel and lose the centre and toe.
I've tried straight up and down heel leading, heel following, rolling up and down, rolling x strokes. I've tried putting weight on the heel with my fingers. I've tried the axe method, I've tried circles
I think part of the problem is that i ground the stabilizer like a GD and slipped so the heel got it too and now I'm trying to hone the heel but the rest of the blade suffers as a result.
I wonder if it might be worth taping the bevel except for the heel, any ideas would be welcomed, except send it out because i don't give up that easy.
I have got a really great edge on a couple of my razors from my arks and because they are only 2 inches wide I'm wondering if that could be the way to work just on the heel, I know it would take a while but my Washita might be able to do it.
I've been using 1K so far but I only have 220 that's courser, I wonder.- - Steve
You never realize what you have until it's gone -- Toilet paper is a good example
-
11-18-2020, 04:56 PM #30Senior Member
- Join Date
- Sep 2020
- Location
- Austin, TX
- Posts
- 653
Thanked: 56
So, you think that you ground the heel so that it is shorter and not making good contact with the hone when the rest of the razor is? And not with a nice transition like a smile, just a jump up from 5/8 to 9/16? Originally Posted by STF
If you're wondering I'm probably being sarcastic.


 Reply With Quote