Results 11 to 20 of 29
-
02-18-2024, 02:11 PM #11Senior Member

- Join Date
- Jan 2022
- Location
- canada
- Posts
- 465
Thanked: 58
When you are setting the bevel, using regular strokes without excessive pressure, it is not really easy to over hone at this point. Developing a burr or over honing at this point almost has to be intentional.
If you are developing a burr you are using too much pressure.
Keep an eye on the tape and make sure you do not go through! Your pressure can sort of be checked as you go in that one piece of tape will do till near finishing. That is, if you are working on a wonky razor and it takes a while to get the bevel you may have to change tape regularly. Once the bevel is set I would put on a fresh layer of tape to begin moving forward. On your next stone after only a few strokes check the edge. The new striations will be evident right at the edge and will clearly be a good sign for you. Use that layer of tape till you get to at least 8k then put a new one on to finish.
So, to know when you are done bevel setting: view the edge with a loupe and see that all striations get to the absolute edge of the razor along its full length. If yes, check the edge. If not, modify your stroke to reach the areas not contacted. This sounds easy and where a lot of problems will come from when learning. Makes sure your stones are flat - as stated!!
So now, all striations make it to the edge. Test either on a tomato skin (with no pressure drag the edge a few mm on the tomato and the skin should slice easily) check the entire edge for the same result.
Checking how the edge cuts arm hair at this point is what I use and probably most others. This will develop with practice to know what that should feel like. It will bite easily at the skin and will shave every hair in the way. It will feel sharp!
Once there, progress to finer stones by viewing the edge as before. Testing the edge at each stage is not necessary, but, making sure you reach the edge with every stone is!!
Once to 8k with a new layer of tape and some strokes try stropping and shaving. It should shave surprisingly well. If not, you have not completed your work to that point. Going further with higher grit will not help you. Ground work is the key.
Let us know when you get to that point.
Good luck.Last edited by stoneandstrop; 02-18-2024 at 02:15 PM.
-
02-18-2024, 04:02 PM #12

I never understood the hanging roll of tape thing. I had a meet once and it came up. We all tried it and laughed our asses off!

I prefer to cut a length of tape and put it on. Much easier. Not to mention safer!"Don't be stubborn. You are missing out."
I rest my case.
-
02-18-2024, 04:06 PM #13Senior Member

- Join Date
- Jan 2022
- Location
- canada
- Posts
- 465
Thanked: 58
I have never understood it either!
It's not like it is difficult to cut to length.
Also much easy to apply by placing the razor onto the tape then the other way around.
-
02-18-2024, 04:21 PM #14At this point in time...


- Join Date
- Jun 2007
- Location
- North Idaho Redoubt
- Posts
- 27,152
- Blog Entries
- 1
Thanked: 13249 "No amount of money spent on a Stone can ever replace the value of the time it takes learning to use it properly"
Very Respectfully - Glen
Proprietor - GemStar Custom Razors Honing/Restores/Regrinds Website
-
02-18-2024, 04:58 PM #15Senior Member

- Join Date
- Jan 2022
- Location
- canada
- Posts
- 465
Thanked: 58
I struggle to understand how someone could cut themselves while applying tape.
Cut tape to length,
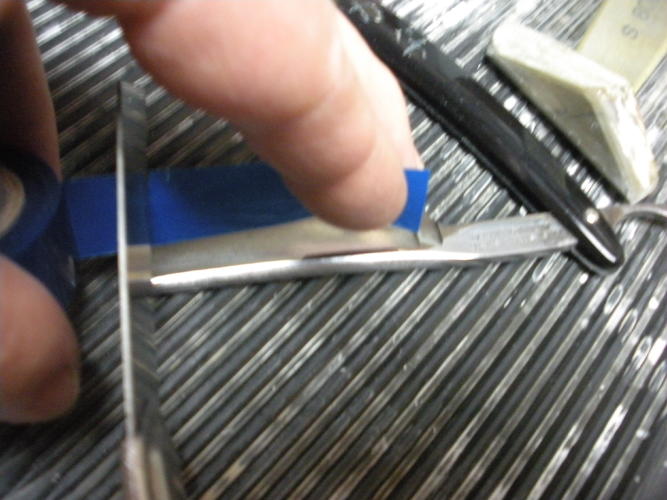
apply to razor with blade facing up away from hand. If it is short cut another - you will know before applying.
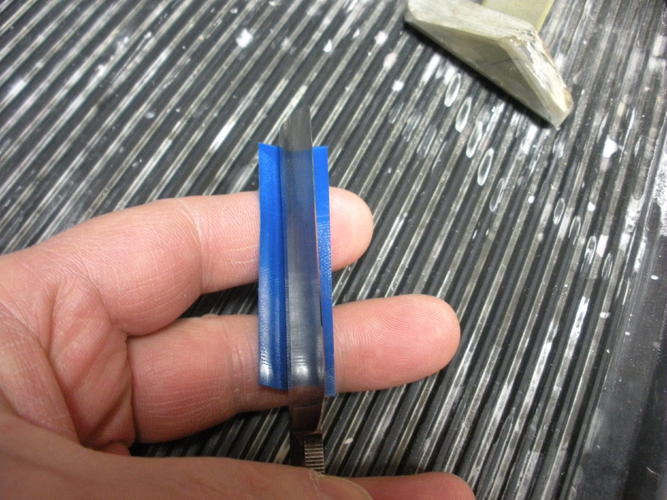
Smooth down from the spine (note the tape is not smeared down tight in the middle).
When starting to round down over spine start in the middle and work outward till it is smooth and tight.
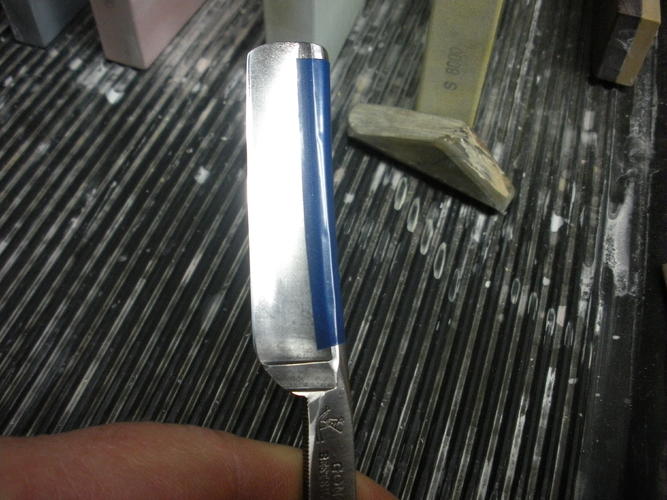
It is also much easier to center this way.
-
02-18-2024, 05:53 PM #16Chisels are not for shaving

- Join Date
- Jan 2024
- Location
- Near Madison Wisconsin
- Posts
- 43
Thanked: 0
Hold up… don’t read further… some new posts came in and I’ll probably delete this…. **********************
So one more simple question as if I knew nothing and had no equipment except
Loupe
Old razor taped properly with no bubbles
1000 grit ceramic stone, little water
Time �� and patience
Maybe I’m missing something in all the piles of videos along the way
This above is ALL that’s needed to set the edge right? We don’t progress up the 3k for example yet. This blade hums on the 1k now. It didn’t when I started. I don’t see consistent scratches and no extra. It looks like a perfect triangle. I’ll keep going because it’s not as pretty at the outer edge.
Continue this step for hours? Hundreds of strokes? This is where I’m lost. That’s a lot of metal removal
Oh yeah, my stones lapped ok. Just a few scrubs and the pencil marks were gone. Edges are eased.
And thanks for patient guidanceLast edited by Scatterjoy; 02-18-2024 at 05:56 PM.
Is that your cheese? No? Really? It's nacho cheese?
-
02-18-2024, 08:56 PM #17At this point in time...


- Join Date
- Jun 2007
- Location
- North Idaho Redoubt
- Posts
- 27,152
- Blog Entries
- 1
Thanked: 13249
Why would you "Center" the tape ??
Second your tape is bubbled and uneven
Third You probably tape maybe one razor a week I do about 40 so when it comes to tape I am very careful
You cut yourself by smoothing the tape along the spine rubbing it to heat it to form to the spine,,, especially curved and decorated spines... by hanging the tape over the nose and leaving it there while smoothing it creates a physical barrier to the edge
You asked why, I explained it, learn from our mistakes or learn from your own, choose wisely
Smooth and even, actually with multiple layers on this one
Proof of concept is seen with the even, straight bevel in the worksLast edited by gssixgun; 02-18-2024 at 09:36 PM.
"No amount of money spent on a Stone can ever replace the value of the time it takes learning to use it properly"
Very Respectfully - Glen
Proprietor - GemStar Custom Razors Honing/Restores/Regrinds Website
-
02-18-2024, 09:02 PM #18At this point in time...


- Join Date
- Jun 2007
- Location
- North Idaho Redoubt
- Posts
- 27,152
- Blog Entries
- 1
Thanked: 13249
You have the right idea,
What you need to figure out is YOUR bevel set Go-NoGo test
There are quite a few
They don't all work for everybnody so use them all until you get the outcome you need
TNT
TPT
4 -Finger test
AHT
Cutting stuff tests I don't use but some do
HHT
Figure out which one works for YOU everytime, not what other people tell you works for them"No amount of money spent on a Stone can ever replace the value of the time it takes learning to use it properly"
Very Respectfully - Glen
Proprietor - GemStar Custom Razors Honing/Restores/Regrinds Website
-
The Following User Says Thank You to gssixgun For This Useful Post:
outback (02-18-2024)
-
02-18-2024, 09:35 PM #19Senior Member

- Join Date
- Jan 2022
- Location
- canada
- Posts
- 465
Thanked: 58
Seems I have ruffled some feathers
 Didn't mean to but... I didn't ask why by the way.
Why not center it anyway- it doesn't really matter.
I noted the tape was not smeared down - you just didn't read it!
If you are cutting yourself from rubbing the tape in then what does a 1/4" to 1/2 in of tape hanging off the end have to do with it? Its not a barrier at all.
Yes, I'm sure you hone more than I do. If you get careless and in a hurry you will probably have an accident eventually.
Lets be serious here.
Accidents can of course happen but it has nothing to do with that tab of tape sticking out the end.
If you are taping with a roll of tape, a sharp razor and a knife or scissors in your hands at the same time then you will probably cut yourself eventually.
Carelessness, not a tab of tape is to blame.
-
02-18-2024, 09:38 PM #20

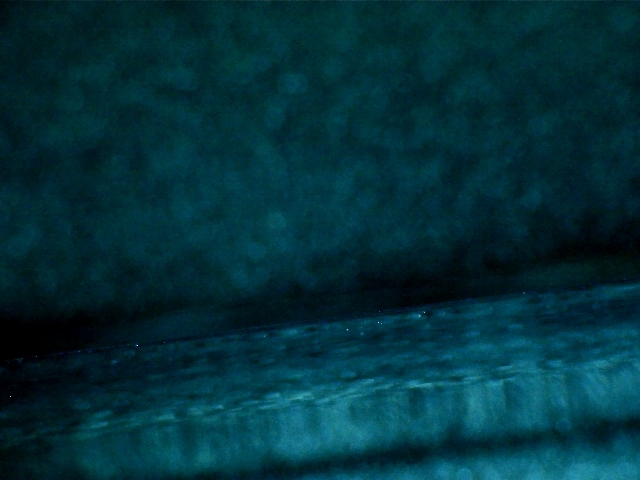
When is the bevel set?? Man......this stumped me for ages. These pics really helped me to understand when the bevel is set (apex formed). Look directly down onto the edge with your loupe with a bright light on edge. When the bevel is set, no light will reflect off the edge. If light does reflect (sparklies), the bevel is not set at that spot.
Lots of light reflects off edge. No apex is formed. Bevel not set
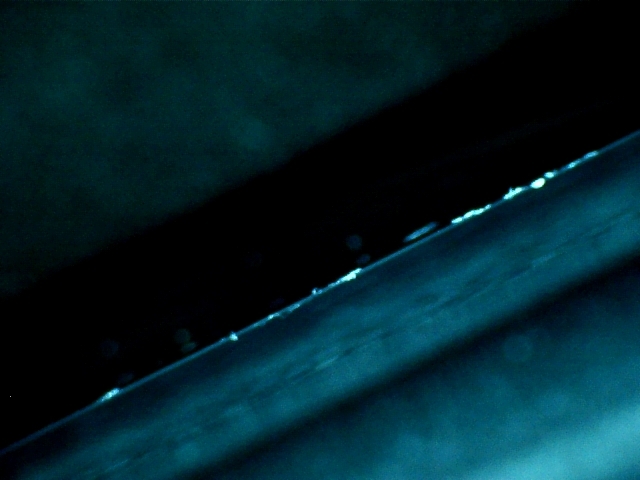
After more honing we are closer to forming an apex, but not there yet. Light still reflects
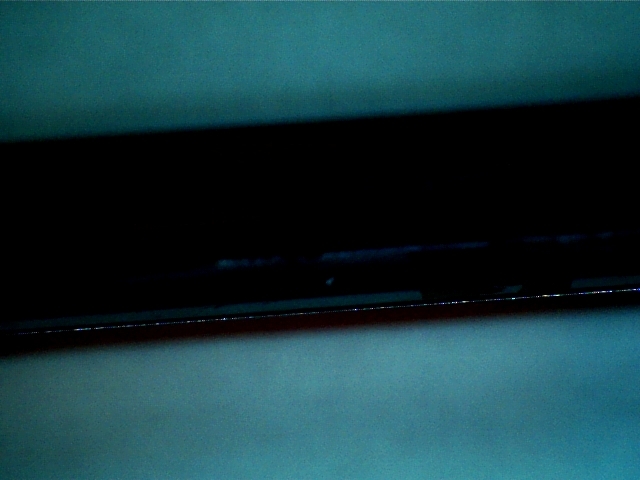
More honing and no light reflecting off edge. Bevel is fully set. (tiny white dots are from lens)
 - Mick.


 41Likes
 LinkBack URL
 About LinkBacks


 Reply With Quote
