
Results 1 to 10 of 27
Thread: Kamisuri question
 LinkBack URL
 About LinkBacks
Hybrid View
-
06-06-2013, 02:02 PM #1Senior Member


- Join Date
- Jan 2008
- Location
- Sweden, Gotland, Visby
- Posts
- 1,888
Thanked: 222
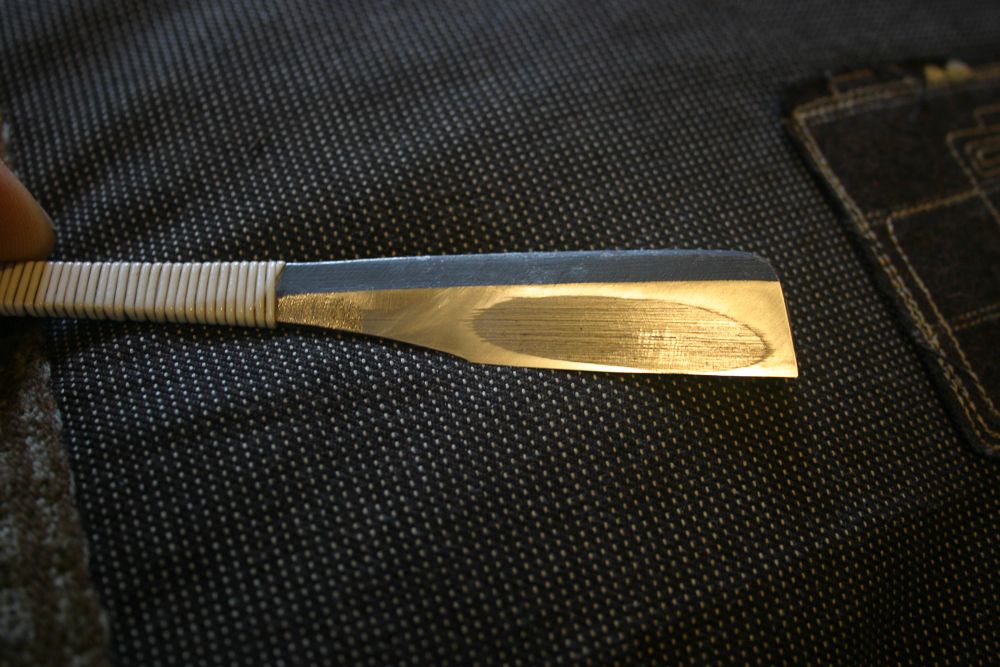
Long time ago so haven't got any more pics than another that is sort of the same but might help with some explanation.
Here's another;
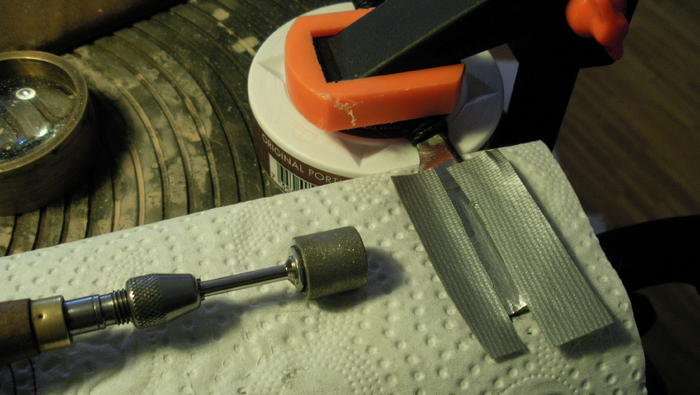
At first I tried the traditional way for Jap. tools, with a scraper, didn't work, the steel was to hard.
So I set up this tool, a diamond tool for "Dremel and such" and a tool holder.
Just held it lengthwise the Kamisori and grinded away, moved the tape so I could do a small area at a time.
The diamond tool is quite course and left tool marks looking like the real deal.
It was so easy to do, if I have to do it again I would do it the same way!Hur Svenska stålet biter kom låt oss pröfva på.
-
The Following User Says Thank You to Lemur For This Useful Post:
pixelfixed (06-06-2013)
-
06-06-2013, 02:23 PM #2Senior Member

- Join Date
- Sep 2009
- Location
- New York City
- Posts
- 664
Thanked: 120
Snapple bottles have a near perfect round for most Omotes. Get some two-way tape or two-way 1/16 weather stripping and a 3X2 piece of 320 W/D sandpaper, adhere the sandpaper to the bottle and reshape the Omote going across the length of the Kamisori, take your time.
-
The Following User Says Thank You to Bayamontate For This Useful Post:
thebigG (06-07-2013)
-
06-06-2013, 02:30 PM #3Senior Member
- Join Date
- Jan 2008
- Location
- Sweden, Gotland, Visby
- Posts
- 1,888
Thanked: 222
Sounds good but what's a "Snapple bottle", diameter? Originally Posted by Bayamontate

My tool was small in diameter but it worked out by moving it and then I remember holding it a little sideways.
I think the main thing is to protect the sides you don't want to touch and then go with something course if you want to keep the rough feeling of it.Hur Svenska stålet biter kom låt oss pröfva på.
-
06-06-2013, 05:09 PM #4Senior Member
- Join Date
- Sep 2009
- Location
- New York City
- Posts
- 664
Thanked: 120
I don't know what the diameter on a Snapple bottle is but typical Omote are 6-7mm measured up from the edge. Your diamond tool will make contact and take off metal on 1 +/- mm of the Omote per pass. It can be done but it will require a lot of patience and touch, either will work.
-
06-06-2013, 07:48 PM #5Senior Member

- Join Date
- May 2011
- Location
- Kallista Victoria
- Posts
- 148
Thanked: 14
So what you guys are telling me is that the rough section in the middle of the un stamped side of the blade should run the whole way through from heal to toe and the hone should only touch the shoulder and the bevel on the blade?when I got it it looked as if someone had just started to hone it and then stopped,ok the blade must be a little warped or something and I thought it was going ok,would a pic from the front of the blade be helpful to show the shape of it? And on the back with the stamps should I keep honing the shoulder down until the hone hits the blade all the way along? Thanks .
-
06-06-2013, 08:32 PM #6Senior Member
- Join Date
- Jan 2008
- Location
- Sweden, Gotland, Visby
- Posts
- 1,888
Thanked: 222
You got it all right! Originally Posted by thebigG
 Hur Svenska stålet biter kom låt oss pröfva på.
-
06-08-2013, 01:06 AM #7Senior Member
- Join Date
- May 2011
- Location
- Kallista Victoria
- Posts
- 148
Thanked: 14
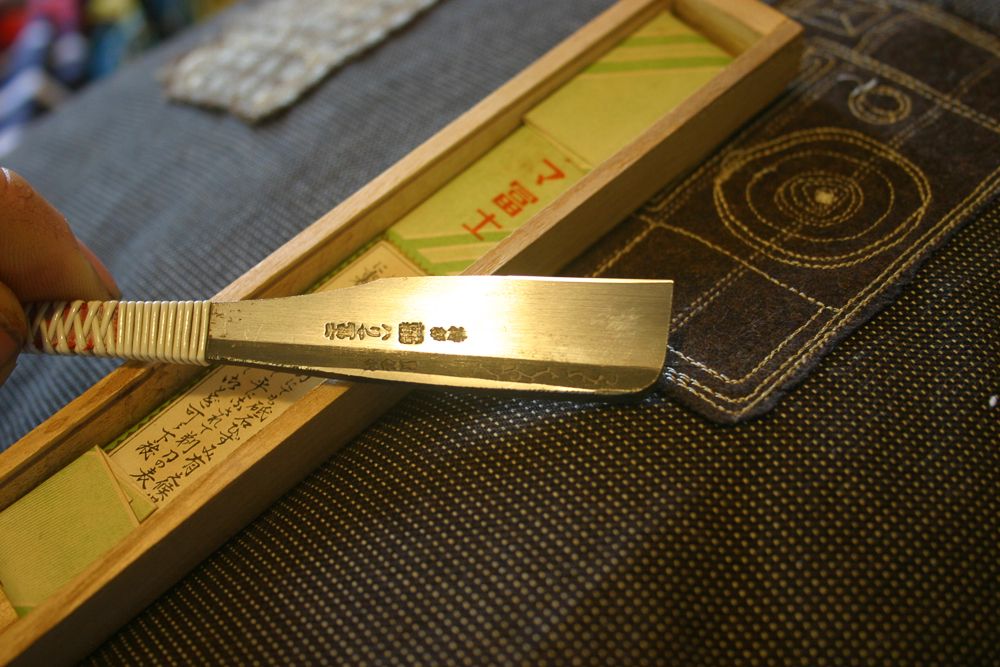
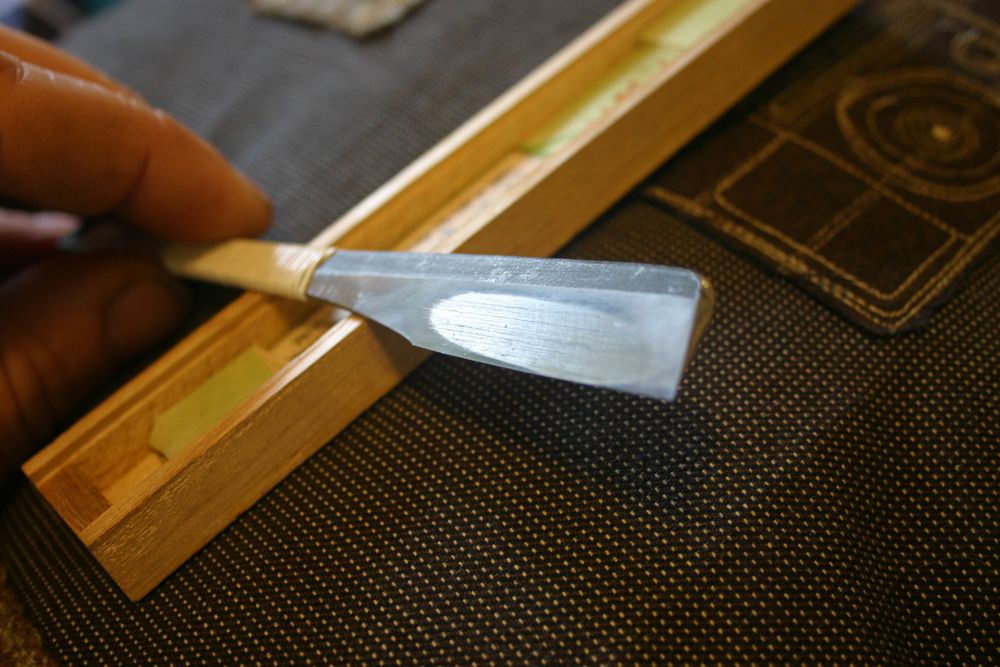
OK here are a couple more shots of the kamisori and a pic i
drew of what it looks like in green and the blue line is how it should look? just want to make sure befor i start the process thank guys.
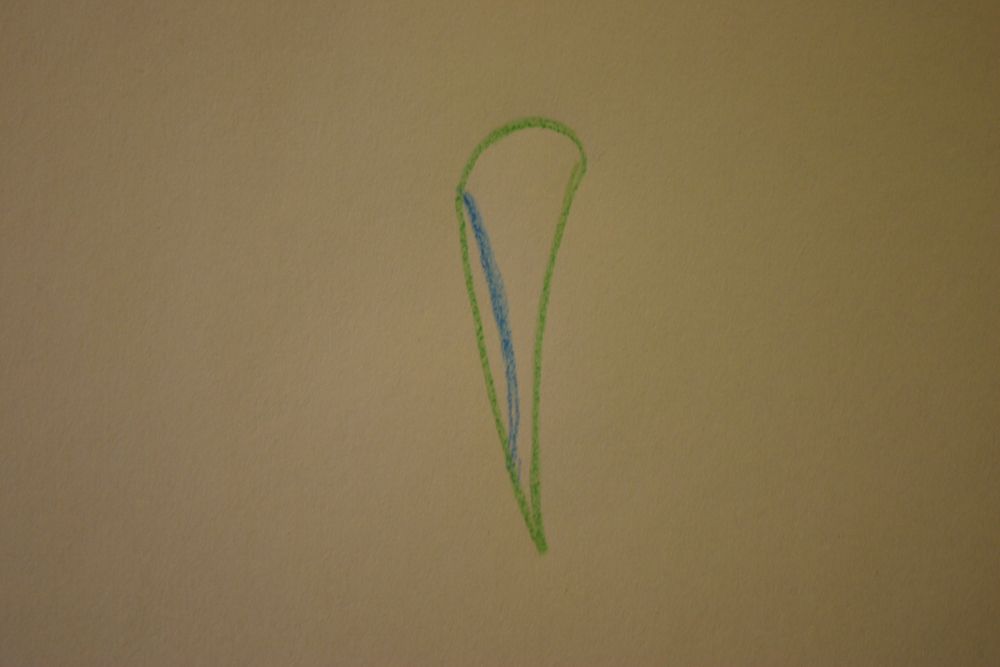
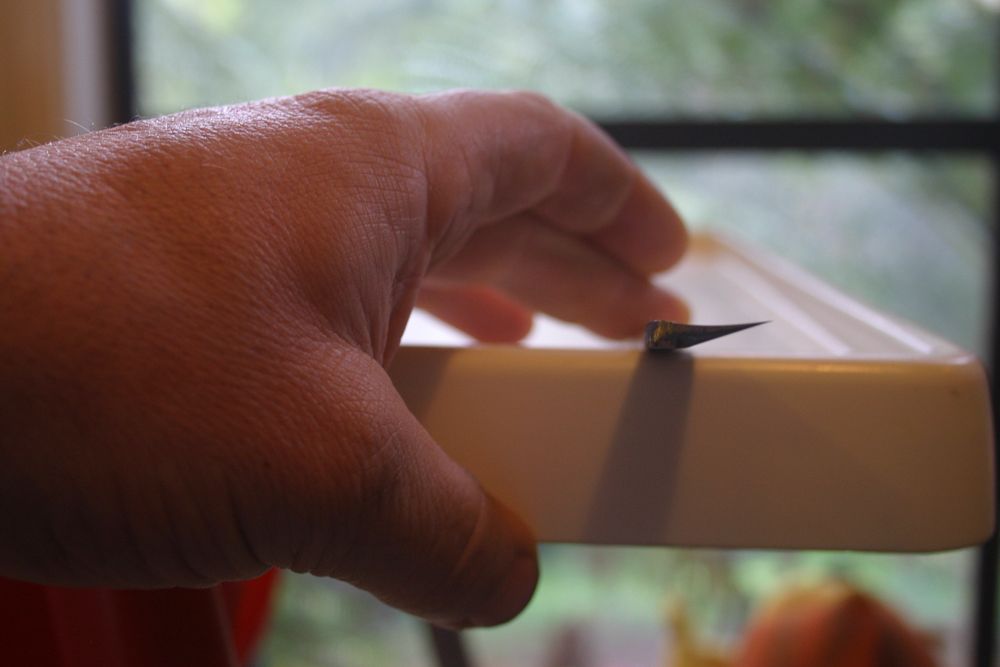
Last edited by thebigG; 06-08-2013 at 04:15 AM.
-
06-08-2013, 02:10 AM #8The Great & Powerful Oz


- Join Date
- May 2008
- Location
- Bodalla, NSW
- Posts
- 15,638
Thanked: 3751
Actually the omote side non stamped is usually iron & very soft. Originally Posted by Lemur
I really hope the razor was not new as it now has really excessive hone wear like a well worn vintage. Way too much pressure which should have been directed at the edge not the whole blade face. Hopefully you can recreate the hollow & direct your fingertip pressure to the edge only.
Seeing there is no contact in the middle of edge, if the pattern is reversed on the Ura (stamped side) the blade may be warped but possibly is where your pressure was greatest.
I know Jknives can be straightened if warped but a 2" blade may be more likely to crack.Last edited by onimaru55; 06-08-2013 at 02:14 AM.
The white gleam of swords, not the black ink of books, clears doubts and uncertainties and bleak outlooks.
-
06-08-2013, 02:24 AM #9At this point in time...


- Join Date
- Jun 2007
- Location
- North Idaho Redoubt
- Posts
- 27,228
- Blog Entries
- 1
Thanked: 13250
Oz I am really confused with why the scratches are running long ways and not Spine to Edge, I really wonder what happened with this razor..
The whole thing strikes me as odd
Thinking more it almost looks like somebody tried get rid of the asymmetrical grind
-
06-08-2013, 02:32 AM #10The Great & Powerful Oz
- Join Date
- May 2008
- Location
- Bodalla, NSW
- Posts
- 15,638
Thanked: 3751
G, the Ura (back or stamped side) is always finished with long ways scratches but someone has already tried restoring the front (omote) so the original spine to edge marks are gone. Good eye. I didn't pick that. Means it was not a new razor. Originally Posted by gssixgun
The white gleam of swords, not the black ink of books, clears doubts and uncertainties and bleak outlooks.


 Reply With Quote


