
Results 31 to 40 of 54
 227Likes
 LinkBack URL
 About LinkBacks
-
01-28-2014, 11:05 AM #31Senior Member


- Join Date
- Jan 2014
- Location
- Ukraine
- Posts
- 684
Thanked: 239
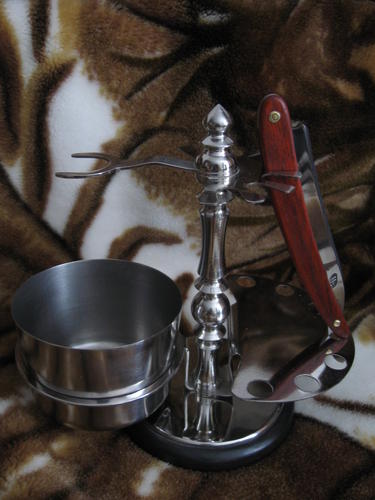
I use here such self-made:
-
01-28-2014, 02:38 PM #32Senior Member

- Join Date
- Jan 2014
- Location
- Brisbane, Australia
- Posts
- 673
Thanked: 79
Wow, did you make that whole stand yourself? That is awesome Originally Posted by Gipson

 I wish I had those skills (and admittedly the skills of most members here lol)
I can make toast, that is the best I could post here at the moment
-
01-28-2014, 02:52 PM #33
Mmmm, toast. Raisin toast? With lashings of butter? Mmmmm Originally Posted by AndrewJM
Neil Miller and AndrewJM like this.Bread and water can so easily become tea and toast
-
01-28-2014, 03:05 PM #34No that's not me in the picture

- Join Date
- May 2013
- Location
- Los Angeles South Bay
- Posts
- 1,340
Thanked: 284
At risk of taking this thread off coarse, raisin toast IS good... Originally Posted by edhewitt
Neil Miller and edhewitt like this.I love living in the past...
-
01-28-2014, 03:35 PM #35
Either double butter, or butter and honey. Originally Posted by RoyalCake
Neil Miller and RoyalCake like this.Bread and water can so easily become tea and toast
-
01-28-2014, 04:27 PM #36Senior Member
- Join Date
- Jan 2014
- Location
- Ukraine
- Posts
- 684
Thanked: 239
Yes, I did itself, except a cup for a small brush. It is made for seven razors. Thanks for warm words.
-
01-29-2014, 02:49 AM #37Member
- Join Date
- Jan 2014
- Location
- Orange County, NY
- Posts
- 60
Thanked: 10
Thanks bud Originally Posted by Cangooner
This was pretty much all the info I was looking for. Now to find some soapstone and sharp tools to poke at it with!Cangooner likes this.
-
01-30-2014, 02:27 AM #38Senior Member

- Join Date
- Aug 2010
- Location
- Between Owensboro and Bowling Green KY
- Posts
- 236
Thanked: 31
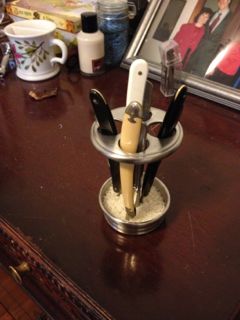
I'm using a toothbrush holder under a glass dome with a wooden base. And a little desiccant thrown in.
-
02-02-2014, 10:37 PM #39Senior Member

- Join Date
- Apr 2006
- Location
- Evanston Illinois
- Posts
- 656
Thanked: 97
I liked this so much I took a page out of JimBC's book. Here is my version: a toothbrush holder under a glass dome, with white rice as dessicant. Originally Posted by JimBC
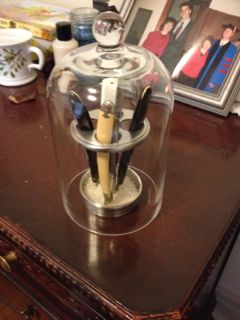 Keep your pivot dry!
-
02-02-2014, 10:53 PM #40Member


- Join Date
- Sep 2013
- Location
- Central Ne
- Posts
- 89
Thanked: 9
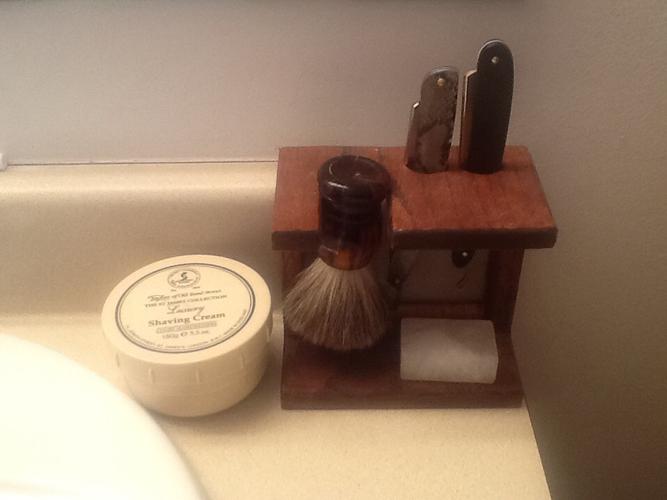
I made this one out of oak a while ago. I left room so if I want to add another brush/razor spot I will need to break out the dremel tool.


 Reply With Quote


