
Results 1 to 10 of 26
Thread: Photographing Razors
 LinkBack URL
 About LinkBacks
-
07-10-2010, 01:39 AM #1This is not my actual head.


- Join Date
- Nov 2009
- Location
- Middle of nowhere, Minnesota
- Posts
- 4,624
- Blog Entries
- 2
Thanked: 1371 Photographing Razors
I've read all the stuff in the wiki, and I'm still photographically challenged when it comes to razors.
I put together a little razor "studio" tonight, with better results than I had been getting, but still not quite what I'm looking for.
So, I thought I'd start a thread about my experiences and how my "studio" is set up and get some feedback from some of the experts.
Mods: I wasn't sure where to put this thread. Feel free to move it to a more appropriate area if needed.
I started out with a simple lightbox setup like the one shown in the wiki, only slightly different. With my three light setup I left the left light uncovered, and covered the right one with a white sheet to reduce the intensity. This gives better shadows than two lights of equal intensity.
Beyond that I've been playing with various lighting angles, positioning the razor different ways in relation to the camera, draping sheets to get whiter reflections on the blades, and anything else I could think of.
I still was not happy with the photos.
Tonight I had an idea, and made a completely new setup. The pictures are more interesting, but still don't do a good job of showing off the blade. I wanted less depth of field, so I opened up the aperture of the lens to f 1.7. It looked good on the camera. Looking at the fullsize picture on the computer, I think that's too open.
I have a wide range of glass, and a DSLR, so any photo buffs that have any advice, I should be able to cover whatever would be needed with the camera. I have a feeling though that the camera is a small part of the equation.
I have trouble with black areas on the blades. The wiki says to orient the blade away from the camera to reduce this, but I still have problems. How do you guys get those nice shiny looking blades to turn out in your pictures?
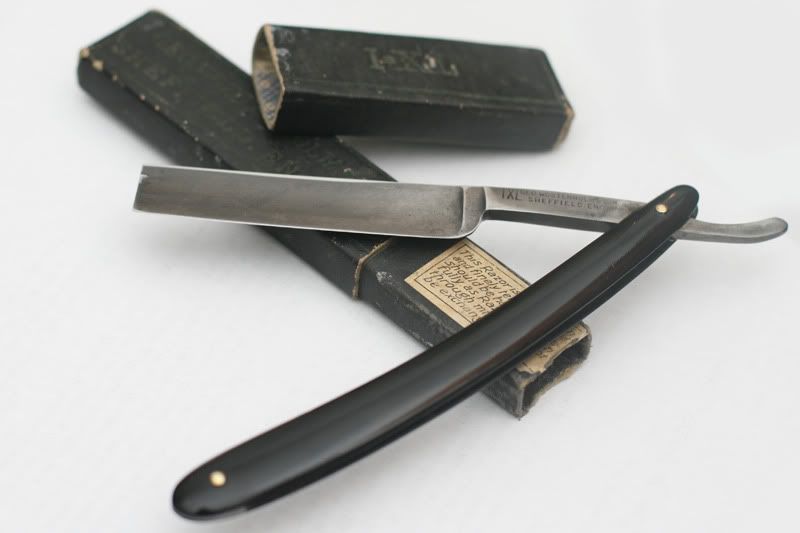
Here are a couple of pics I took tonight, and a picture of the setup I used.
I put the razor on a piece of glass which is suspended on a box with the bottom and back of it cut out. This gave me a nice reflection, and I was able to bottom light the blade with a low intensity light under the glass.
I have some fake flowers stuck into styrofoam as a background. I wanted the background pretty blurry so went with the widest aperture I had available. In retrospect, I think I could use less aperture and just move the flowers back a bit to get the depth of field effect that I'm looking for.
Any advice would be much appreciated!
Strange women lying in ponds distributing swords is no basis for a system of government.
-
07-10-2010, 01:50 AM #2I shave with a spoon on a stick.


- Join Date
- Jan 2009
- Location
- Stay away stalker!
- Posts
- 4,578
- Blog Entries
- 1
Thanked: 1262
This setup works pretty well for me. 'Not using the auto settings and manually setting white balance seems to help a lot.
-
-
07-10-2010, 02:05 AM #3This is not my actual head.
- Join Date
- Nov 2009
- Location
- Middle of nowhere, Minnesota
- Posts
- 4,624
- Blog Entries
- 2
Thanked: 1371
Thanks Ben. What do you do about the black shadowing on the blade?
Strange women lying in ponds distributing swords is no basis for a system of government.
-
07-10-2010, 02:12 AM #4I'm a social vegan. I avoid meet.


- Join Date
- Nov 2006
- Location
- Greenacres, FL
- Posts
- 3,224
Thanked: 603 My DIY Light-Box
Parts List
One 14"x14"x14" UPS shipping carton
Three sheets of 14"x17" tracing paper
2" duct tape
One utility knife
Two goose-neck table lamps w/26W fluorescent bulbs
I found the instructions here.
It took all of an hour to construct. I cut a 1/4" slit across the upper back of the box, through which I pull whichever background I've chosen for that day's SOTD photo (most of my backgrounds are pillowcases, from Target; some are camouflage cloth, purchased from the Barre Army-Navy Store).

 You can have everything, and still not have enough.
I'd give it all up, for just a little more.
-
-
07-10-2010, 03:20 AM #5all your razor are belong to us

- Join Date
- Sep 2009
- Location
- Fresno, CA
- Posts
- 1,368
Thanked: 446
HNSB, do you have a flash for your DSLR? If you do, all you need to do is to back yourself up against a wall and aim that flash behind you. It'll bounce off the walls of the room and illuminate the shot evenly. Personally, I think f-1.7 is was too small for that shot. I try to go for as close to f-3+ to minimize artifacting. Here's one shot this way...
-
-
07-10-2010, 03:39 AM #6This is not my actual head.
- Join Date
- Nov 2009
- Location
- Middle of nowhere, Minnesota
- Posts
- 4,624
- Blog Entries
- 2
Thanked: 1371
That was just with a bounce flash? The lighting is wonderful. Originally Posted by red96ta

Strange women lying in ponds distributing swords is no basis for a system of government.
-
07-10-2010, 03:42 AM #7This is not my actual head.
- Join Date
- Nov 2009
- Location
- Middle of nowhere, Minnesota
- Posts
- 4,624
- Blog Entries
- 2
Thanked: 1371
Well, I've been experimenting a little more. I took some dark green spray paint to my flowers and styrofoam to darken the background a bit.
I also played with different aperture settings to see how they turned out. It seems, that for my setup, f4 puts the razor in good focus and still gives the background a heavy blur.
Here is my most recent attempt with a Joseph Mappin 8/8 wedge:
Strange women lying in ponds distributing swords is no basis for a system of government.
-
07-10-2010, 04:11 AM #8Senior Member

- Join Date
- Aug 2009
- Location
- Butte, Montana
- Posts
- 184
Thanked: 60
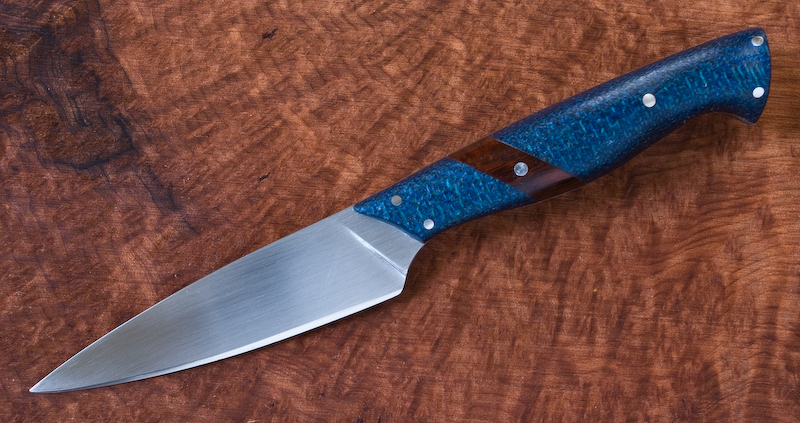
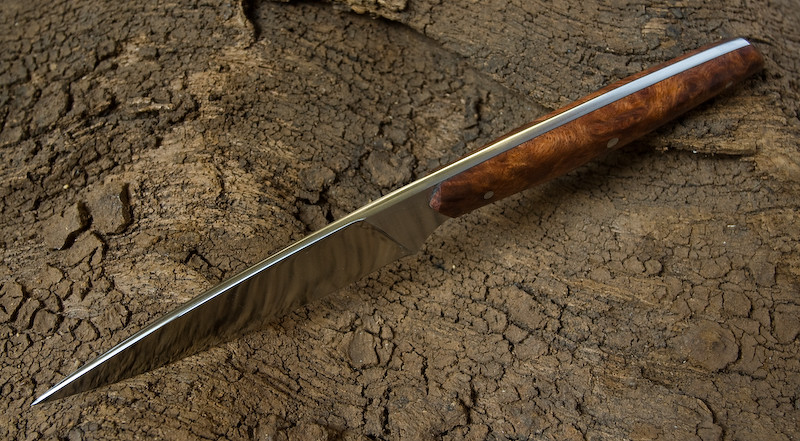
I take a simple approach to my knife and razor photography. Just natural daylight (window light) and a chunk of wood as a background. It's not perfectly consistent, and the light intensity is low, but it's easy and looks good.

The biggest issue with this method is getting enough light on the sensor. The only solution to this is long exposures with a tripod. My exposures are usually about 2 seconds long.
The uniformity of a light box can actually be a hindrance in some situations. The light is (intentionally) flat, and can obscure details like chatoyancy. Window light has its own problems too. It is mostly from one direction, so shadows can be somewhat pronounced. This problem can be easily solved using white reflector cards strategically placed around the subject. By having only one primary light source and one (or two) secondary sources, you can custom tailor the light to accentuate the subject. Simply moving the reflectors around will illuminate shadows, control reflections, and accentuate chatoyancy.
Phillip
-
-
07-10-2010, 06:18 AM #9Member
- Join Date
- Jul 2008
- Posts
- 96
Thanked: 39
There is an interesting article in this months Fine Woodworking about photographing furniture. Mostly about lighting. I found it most helpful as I too have been experimenting with close ups bounce that light.
Marty
-
07-10-2010, 08:53 PM #10all your razor are belong to us
- Join Date
- Sep 2009
- Location
- Fresno, CA
- Posts
- 1,368
Thanked: 446
Yes. The shot was taken using a piece of paper under the razor, then I just backed up to the wall and turned the flash head around so that it shot onto the wall behind me. If you do that, the whole room will become a light box. Originally Posted by HNSB


 Reply With Quote
