I mentioned that.....Was deathly quiet. :rofl2: Oh! I think Tim liked the idea!Quote:
Originally Posted by RezDog
Printable View
I mentioned that.....Was deathly quiet. :rofl2: Oh! I think Tim liked the idea!Quote:
Originally Posted by RezDog
I dont know how to do any of that stuff but cutting them up and melting down sounds like it would be better for getting it all together better.
Crucible steel is a little more complicated and requires some things that not a lot of people have. Hopefully in time I will make it there.
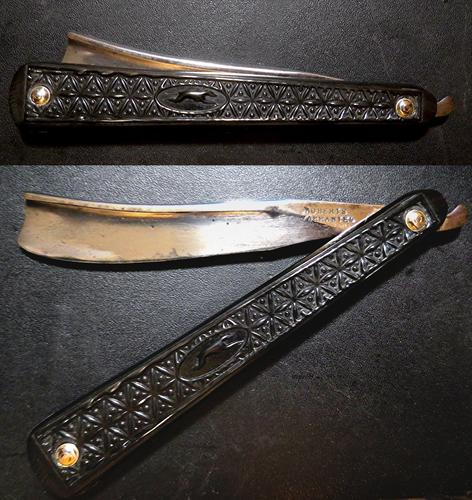
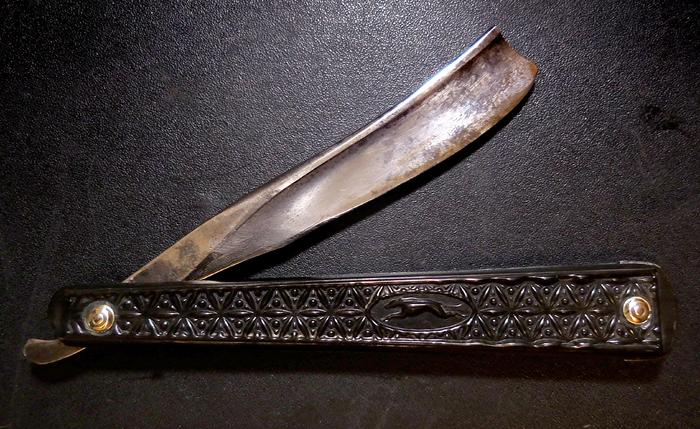
A little explanation first: when I made the greyhound pattern I screwed up in two ways. I didnt design it so that the pinning areas would be blank, and when I sent in the two-up design, I rotated the second image instead of mirror imaging it. That made the read side design read wrong. To continue screwing up, when I fixed this, the die I ordered was about 1/8 smaller than the original. I havent checked this, but Im sure it was my fault. So I have not put any of these together, because they didnt match and I needed to mill a spot out of the design for the collars. I finally decided to soldier on, and throw caution to the wind.
I drilled the holes in the same areas of the design on each of the two dissimilar pieces and then aligned them using the holes and glued them together with rubber cement. All this time I am obsessed with the LENGTH being able to be averaged out. I was ignoring the inherent difference in the WIDTH of the two pieces, and this little factor would bedevil me later.
So I worked on averaging the length, and once semi-satisfied, I took them apart (still not noticing width problem, duh) and using a Dremel mill end, flattened the four areas of the design using the holes as the centers.
Now the real fun began. I was making the wedge from an old 4 Franc French coin, and only burned my finger a couple of times. Everything was fine until Mr. Myopia didnt mark the center and just eyeballed the hole. Well, lets regrind that flat again! Ok, I have just enough extra to barely fit the wedge in with some to match with. Slightly cup the wedge, and here we go. Cut my NS rod. It doesnt want to go into the stainless collars I was mistaking for NS. I get the NS collars and it is a really tight fit. So I finally get the wedge end together and now I notice the problem of the width. I ignore it for the moment. Now at the pivot end, after struggling with the collars, the rod doesnt want to go through the washers. I ream them to 3/32 by hand and thumb. In my rush, I forget to file the pin flat before starting to peen. Oh, well.
I start to grind the excess wedge to match. Can I find a new 1000 grit belt? No, I have no idea where I have organized those belts to. Ok, old belt. NOW the width problem rears its ugly head. I can only remove so much before Im into the design, and the angles are a bit different on the two pieces. I get it close and stop for a polish out to see where Im going to have to do hand filing or sanding. Its not too awful to the untrained eye (me). And the peens arent too awful either, but hardly optimum. So heres where Im at, and will probably stay for a while. Oh, and getting compound out of the design is a real pain. I was using Lemon Oil and Q tips for this photo, but will have to toothbrush it if I take serious photos, and Ill only do that if I can get it more presentable. The blade still needs a little work too. The next one will be better because the sides match on its design. A pitted Frances Dewsnap blade is going into them, but Im going to have to calm down after this disaster before starting that.
Attachment 297986
Attachment 297987
Attachment 297988
You may not feel you have achieved perfection, but what I see does not look as bad as what you are describing. We are our own worst critics. Nice scales. I can understand what makes them so tricky to work with. It is a giant project. It has me in awe. Good work.
I have a real project going on at the same time. I am designing some new dies that will try to mimic the designs from the past instead of being just geometric. It requires a lot of trial and error and a bit of expense, so it will be a while before I know if I'm whistling in the wind, but I do learn from past mistakes....no design where the pins go! I have to imagine my two dimensional designs swelling into the die cavities and becoming 3D. Fortunately I have a filter that gives me a bas-relief preview to some degree. I think my cornucopia will work, but the liberty bust is a conundrum so far.Quote:
Originally Posted by RezDog
Okay that's pretty awesome! Too hard on yourself.
What size of press did you use?
Any chance to see pics of the jig? Or the process?
*On complicated projects a thoroughly developed check-list is necessary.
*For some people (like me), a thorough check-list may be necessary for even simple projects like making breakfast!
Time to take the family to IHOP!
EDIT: I just remembered that you had already posted a while back with more pics, sorry I forget things, have some memory issues.
What you see as a problem, I see see as way better than anything I’ve been able to do so far with much less ambitious scale attempts.
Pretty damn fine work. :tu
https://straightrazorpalace.com/work...sing-horn.htmlQuote:
Originally Posted by MikeT
I really like the geometric pattern.
Truly spectacular. Looking forward to seeing more of your work. I'd love to see a French frameback with such scales.
Oldnick- that is seriously cool and impressive!
As for me, I'm going to get better at drilling out pins one of these days, it is only up from here. ;)
Oh well, at least I learned how to fix my drilling errors last time around. :D
Sonny, if you start by filing the pin flat and then start the hole by hand with a split point drill bit in a pin vice, it gets things started in a controlled fashion.
Thanks Rez! I just placed an order.
I was also able to use what I believe is called a jewelers saw today. I realized while drilling that I had a better tool for the job once I was able to get the scales loose enough.
You know, I'm starting to get a fairly respectable collection of restoration tools, somewhat due to the aiding and abetting of you folks. ;)
Quote:
Originally Posted by sonnythehooligan
If you have a drill press, a centering bit is super useful to get pins out of old scales. They’re made in all different sizes. Also chucking the bit as deep in the chuck as you can get helps too, wanders less. Filing and punching the center makes for easier drilling. Ever since getting some center drilling bits and using a press, I have yet to make a mistake from a wandering drill bit.
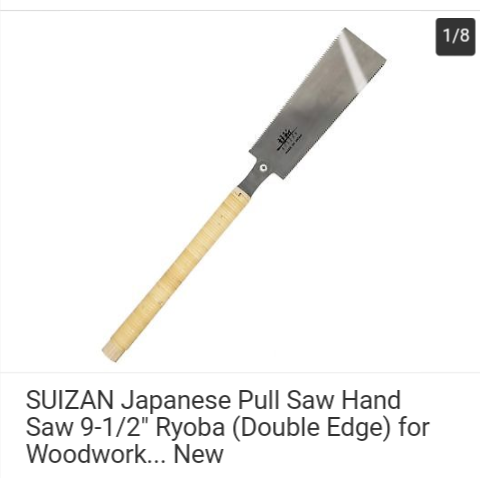
My wife asked me what I want for an anniversary gift. I said a Japanese pull saw.. I was half kidding but then thought it might be really useful to have considering limited space.
Can anyone tell me the best manufacturers?
Perhaps a couple options eg. middle to upper price level?
I assume the really good ones could get a bit pricey..
jfk, that also sounds like an interesting idea.
Any difficulty finding them small enough for our purposes?
Looks like Lowes carrys a 5/64 centering drill bit. I might look into one myself.
Japanese pull saws arevery nice, in part because they are available in very fine tooth and very wide blades, which can be super handy for ripping slabs for scales. I typically have just bought whatever brand Lee Valley has had to offer.
There are numerous options on the style of Japanese pull saw. Just took a looksie online, didn't help much, being that the companies had a dozen sizes and styles.
Some with less width some with more. Some with a frameback spine, some not.
I figure no frameback. Also the wide ones seem like they would have a straight and even cut. So maybe get that style and then some time down the line get a thin width one for more maneuverability.
So now my only question is any specific brand/maker?
I have this one.
Attachment 298024
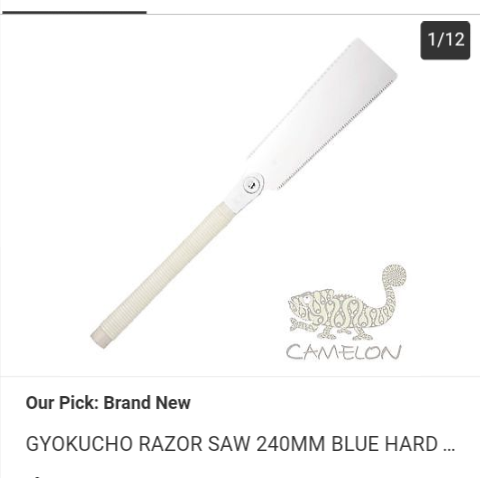
Great saw, thin kerf, straight cuts and very fast cutter on the pull stroke..
Does that one have the 'combo' where one is for ripping and the other for crosscut? :shrug:
Thanks Mike I'll check that one out. Looks like a good price.
Here are two I saw. I don't know if they are good quality or not.
Attachment 298026
Attachment 298027
Yup, 18 and 24 tooth comboQuote:
Originally Posted by cudarunner
I dont havd one of these saws. Why do hou feel you need it Mike T?
He needs it because he who dies with the most toys Wins! :rock:Quote:
Originally Posted by Gasman
LolQuote:
Originally Posted by cudarunner
Okay, well... though the RADical force that nearly consumes me every time I visit SOTD would lead me to agree with this obtuse piece of honesty...
The truth was hidden in my first post.
Space. And time. And let's just throw continuum in there for Flitz and giggles.
No workshop. After work I'm stuck at home with the kids while the wife works. Can get small amounts of work done in pieces. I want to chop up some exotic natural material that I have, and need a very thin kerf to do it.
And the only toys I might win at is the most shorties!
:tameshigiri:
Damn. Now i got to buy one of these. I do have one with a spine. But about 6 inches long by 1.5 wide. Sure cuts slow. I guess when you really want to cut something it it will work. Just dont get in a hurry!Quote:
Originally Posted by cudarunner
So if I were to get something like this: https://www.amazon.com/dp/B01MU9XB1W..._t2_B000CEF5HM
Say I've got a wooden or horn scale slab that's about 6"x2-3", and maybe between 1/4" and 1/3" in width (which many that are sold fall sort of in that size range). Could I put that slab in a vise, draw or scribe a straight line down the middle of it, and rip them, getting a fine enough kerf (if I keep everything nice and straight) that I now have two book-matched scale blanks that are now much closer thickness-wise?
I'm almost ashamed to admit that I have taken rough-cut scales that were as much as .25" thick and thicknessed them on a low-grit grinding belt on a flat platen. This seems like the hard, wasteful (and dusty!) way if the pull saw can save me a lot of that foolishness.:shrug:
That is a good theory Paul. I would say buy the saw and practice with some scrap for a bit. Like many things, splitting a slab with a hand saw takes a little practice. There are all kings of clever ways to rig up guides as well, it makes you less dependant on being able to see the line. I have a nice band saw, so splitting thin pieces off by hand has not been done by me for a very long time, but totally doable by everyone.
Found this video showing construction of a simple magnet jig for cutting thin slices from a slab of wood with a japanese pull saw. Simple and cheap. It looks like it would work great for cutting scale material.
https://youtu.be/aecttavOehg
I want one of those straight's! Just like that one!!Quote:
Originally Posted by MisterClean
I found another comment elsewhere that suggests gluing thin stock to a thicker piece to make cutting the thinner piece easier and safer. I think using double sided tape might also work.Quote:
Originally Posted by DZEC
Attachment 298070
Attachment 298071
It didn't take long to shine this one up a bit. Now I just need to fix the drilling mistakes on the scales from yesterday, do some sanding,, dye them and repin it.
Another big sexy Wosty-Nobody tell Outback Mike!
Nice! I love those frameback Wosty!
Hard to find them in good condition like that.
Awesome! Thank you. Ive been running some ideas through my head on jigs to cut 1/4" blanks down. Still gonna watch some videos to get it just right but every bit of info helps.Quote:
Originally Posted by DZEC
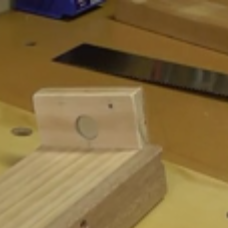
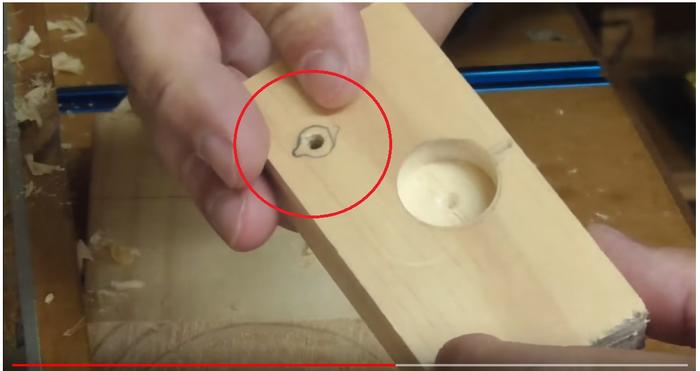
Hey, what was the little hole for?
I must be missing something, like a duh moment.
Attachment 298076
Yeah baby...its a smiler, too. :rock:Quote:
Originally Posted by ScoutHikerDad
In the video he inserts a round magnet into the hole. The magnet holds the pull saw blade firmly against the jig and keeps the blade from wandering while cutting. I saw another jig that used two magnets for cutting longer material.Quote:
Originally Posted by MikeT
I am a bit confused :thinking: I saw the magnet being installed in the 'LARGE' hole but as was asked what about the 'SMALL' hole? Is that also for a magnet?Quote:
Originally Posted by DZEC
See here:
Attachment 298083