I was thinking about a plaid dress, but it might get caught in the wheel ;)
No, haha, I am getting a heavy duty apron, and of course safety glasses, dustmask etc. etc.
Printable View
I was thinking about a plaid dress, but it might get caught in the wheel ;)
No, haha, I am getting a heavy duty apron, and of course safety glasses, dustmask etc. etc.
Looking good. You may want to add a tool rest perhaps.Quote:
Originally Posted by Shaggy8675
Btw, it's a good idea to have a bucket of water standingunderneath the wheel to catch the debris. you'd be surprised about the amount of debris you'll have in that bucket at the end of a day of grinding.
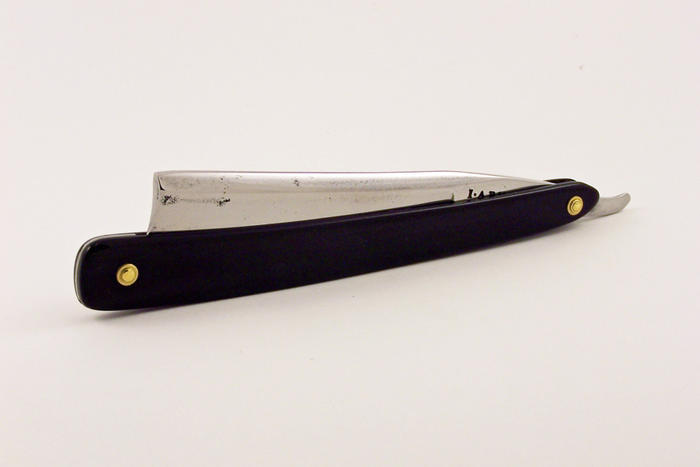
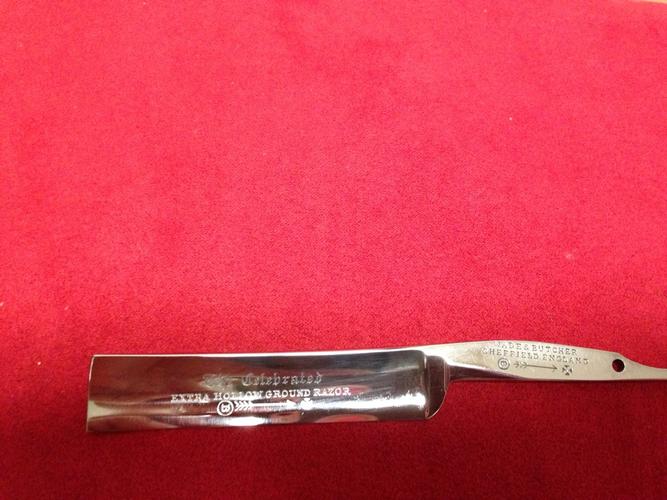
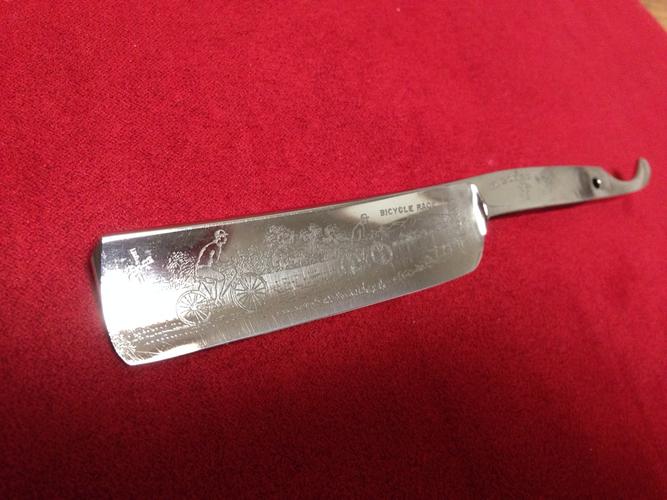
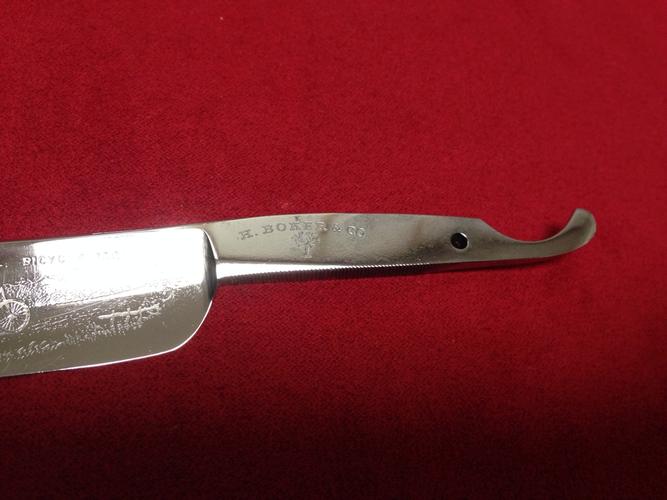
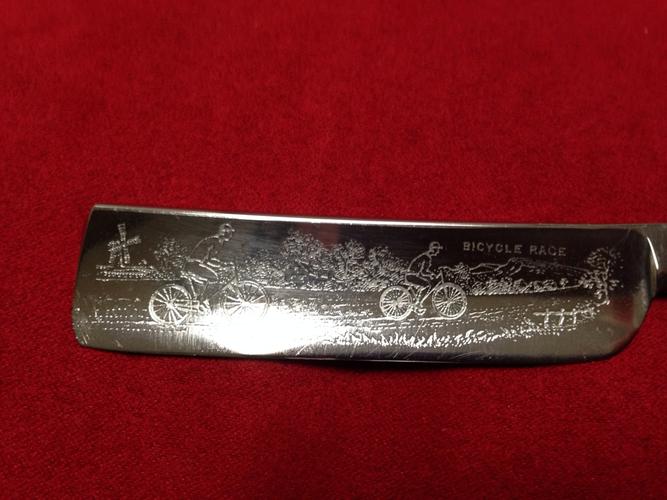
More razor arrived for me to get started on. I am really excited about the Wade & Butcher and the Boker.
Attachment 156842
I am going to make a toolrest. Have to get the parts to make it. Also going to build a platten setup :) As for the water bucket, already have it, as well as a high-powered vacuum cleaner :)Quote:
Originally Posted by Bruno
The platten is a must for sure, the bucket is definitely a nice feature. Personally I don't use a tool rest, they can be nice for some things but I would never use it for the actual hollowing of a blade. It just restricts you too much, I think it can be a handicap.Quote:
Originally Posted by Shaggy8675
Wel, I am going to make one, I need one for the platten for sure to get good 90degree angles when grinding. The hollow grinding will be done free hand.
Finally had the chance to get some steel :) Couple of meters of O1 Toolsteel :)
https://s3.yimg.com/so/7408/12679429...23026ee0_z.jpg
2014-02-21 17.46.30 by Remco van de Sanden, on Flickr
The first part of today's work: finished blades. I took the blades which I posted last week, and then ground them final and cleaned them up.
Attachment 156939
Attachment 156942
Attachment 156940
Attachment 156941
Second part of today: shaping the choppers, chiseling in my marks and heat treating.
I spark tested the edges to check if they had hardened successfully.
Attachment 156965
And the 3d and final piece of today. I forged 4 kamisori blanks from bar stock, and I forged another big humpback from the leftover stock of the other 2. Originally I was going to make it a long monkey tail as well. Then I overheated accidentally, and when I pulled it out of the fire, the tang was noticeably shorter. :o That one is going to be a sheffield style humpback instead. Perhaps with an elongated straight tail. We'll see what happens whan I start shaping.
The kamisori style blades will have a symmetrical grind. They still look rough of course. The bottom one is longer, simply because that was the end piece of my stock. Too long for a kamisori style razor I think. The one with the 2 nubs is the 2nd one I hammered out. That was the point where my arm turned numb and I had trouble even lifting the hammer so my control was lacking.
Hammering out this style blade is good hammering practice, and good learning exercise in getting to know the anvil.
Attachment 156986
Dumb Chit stuff today,custom home builder in my local needs 150 Ebony dowels,3x3/4,they go into a banister in some gizllion $$ home in lake tahoe,BOOring,any work is good work:(
Attachment 156987
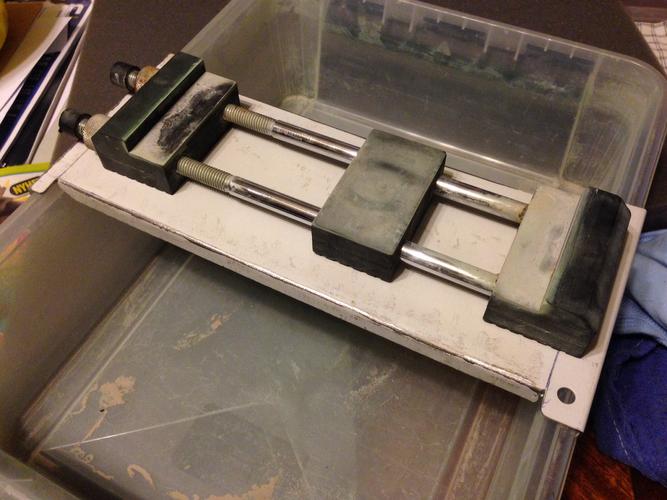
Made me a honing bridge today, gonna drill some holes for the water and final finish tomorrow.
Was going to do some honing and test it tonight, but I cut the tip of my index finger making it, so no honing today :(
Attachment 156991
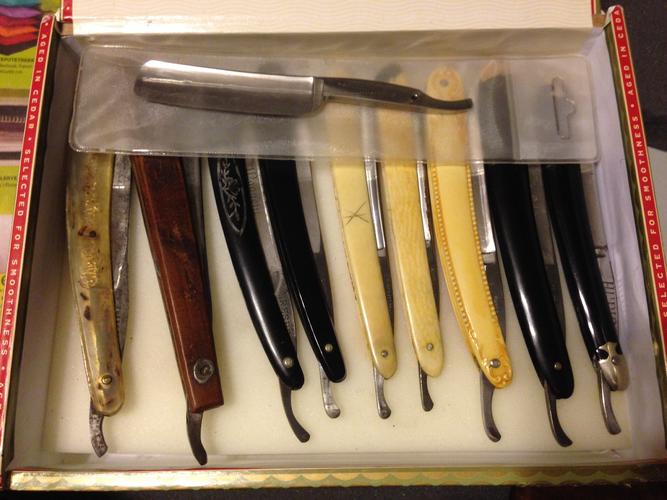
My "to do box":
Attachment 156992
Plus three in progress, but no pics of them yet :)
Just finished an Arnold wedge in Brown hornAttachment 157101Attachment 157102Attachment 157103 A bit of deep pitting that is going to remain.
Looking Good My Friend! :tu
I will be working on this when the postie gets it hereQuote:
Originally Posted by Bruno
Can't wait thanks to Bruno for doing the ground work :tu
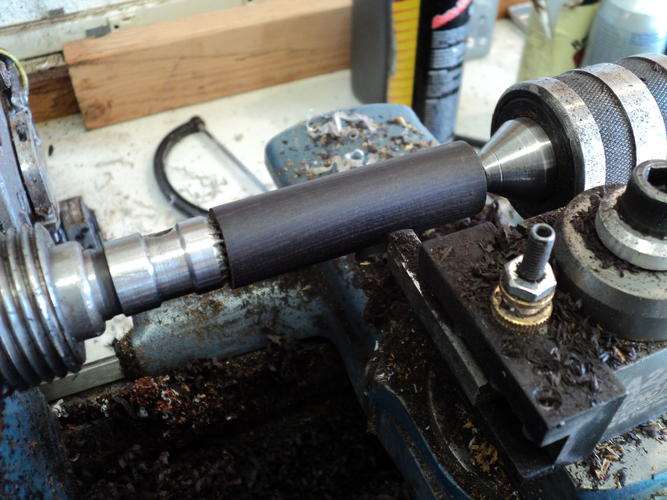
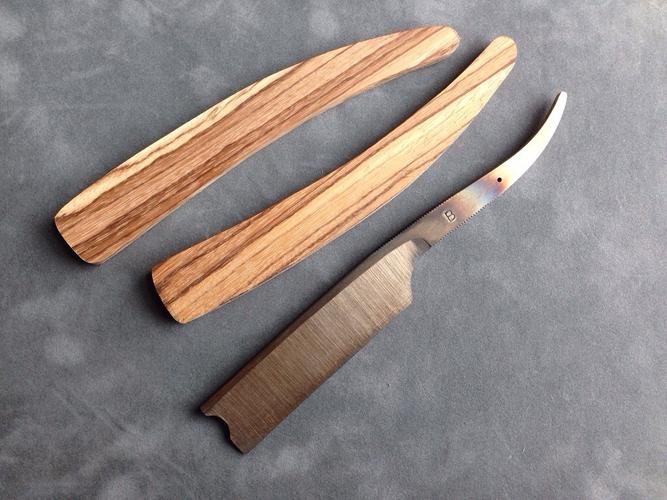
Spend a couple of hours this weekend making my first handmade razor with my newly made beltgrinder :)
Kamisori in my own style, 8/8 with 1/4 hollow.
http://farm8.staticflickr.com/7364/1...3ee119ae_z.jpg
Ready for heat treat
http://farm8.staticflickr.com/7334/1...bbf06168_z.jpg
http://farm3.staticflickr.com/2866/1...20e93cb3_z.jpg
http://farm6.staticflickr.com/5546/1...e4c71881_z.jpg
Hey Shaggy, how about a profile pic of the razor
No problem, I'll make one tomorrow, razor is at my workplace for HT this week.
I really like the looks of that razor shaggy, should be a cool one!
Attachment 157411
Got a second razor in the works. The plan is for it to be somewhere between a 5/8 and 6/8. Almost ready to heat treat. Now I have to drill, stamp my makers mark and take care of some jimping before I heat treat.
Wow, second one looks just as good as your first!Quote:
Originally Posted by bdcoffey
I am working on 16 razors at a time! Lol! I am overwhelm... These 2 i got this weekend! I decided to work on these prior to finishing the other ones! Scales and honing neededAttachment 157443Attachment 157444Attachment 157445Attachment 157446Attachment 157447Attachment 157448Attachment 157449
The wade had a hair crack! I fixed it and now its looking good
Quote:
Originally Posted by Shaggy8675
How thick did you leave the edge? it looks kinda thin but that could be misleading.
The razors looks very nice, but it looks like you've made a frown on the W&B, you also have a heel problem that will need fixing before honing it.Quote:
Originally Posted by robert2286
It's always a good idea to make sure you can put a proper bevel on it before putting a lot of work in a blade :)
The pics are a bit deceiving... The light and all that! The edge is perfectly flat and parallel with the spine... When i grind i use a flat stone and measure as i go... The only thing that worries me a slight bit is the spine thickness... I might have to remove tape after setting bevel and set bevel again and hone with no tape for a better angle
Attachment 157497
Tim Zowada did an article in Blade's Guide to Making Knives called "Making the Using Knife." I love Tim's work and respect anything he says about knife making, metallurgy, etc. so I just had to make myself one.
It's made out of 01 tempered to 61 HRC. The wood is Bocote. I'm proud of the slim bevel (not easy for me to get) and of the copper guard.
About the copper: I recently moved into a house that was built in 1930. Cleaning out some of the trash under the house, I pulled out a bunch of old copper wire. I didn't want to let it go to waste, so I stripped it and cut a bunch of it into smaller pieces then put it in my bench vise and twisted it together to make a thick copper cable. From there, I put it in the forge and forge welded it all together. Then, I took it to the belt grinder and finally the drill press and files.
My wife is using it as her main paring knife:)
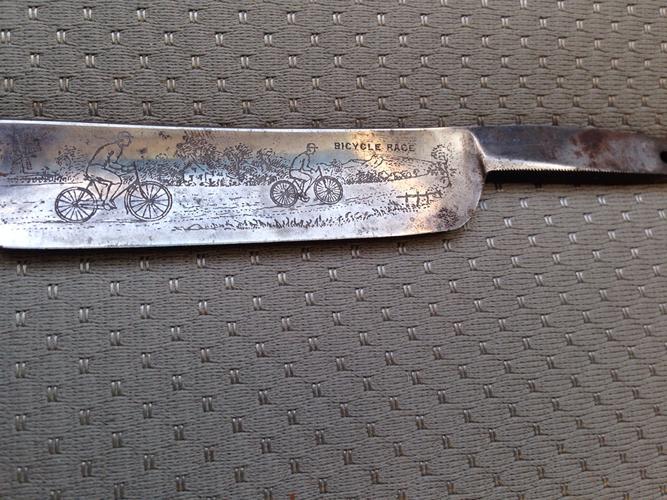
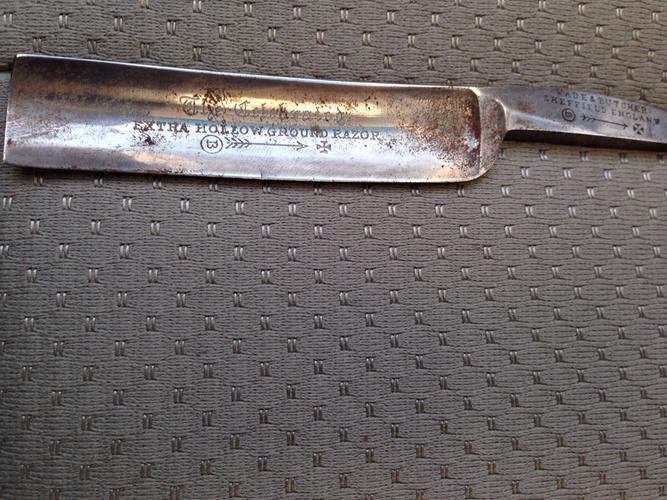
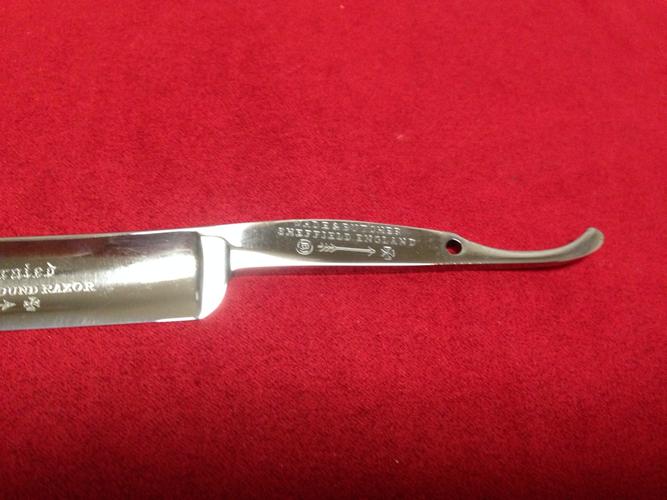
This razor is a near wedge 3/8 at the widest point and I want to shave with it so figured in order to do that the rust has to go and there was quite a bit of it. I also figured it was a good candidate to try something I read here of someone using a drill press as a drum sander since if it got ruined it wasn't really that big of a loss. I wasn't sure if I should post this cause I don't want someone trying it and getting hurt, but since I think we are all adults and will use common sense and good judgement I decided I would. I didn't want to use my drill press cause the torque would just throw the razor or do alot of damage if it grabbed the blade so I decided to use my cordless dremel instead of the corded on I have. I know, I know not a dremel, but I wanted to use something that that didn't have the torque and if too much pressure was applied it would stop the bit instead of grabbing the razor and throwing it. So I cut a strip of 1k wet/dry sandpaper and attached it to a 2" hard felt wheel with double sided tape. The 2" worked nice on this one since it fit perfectly in the hollow. Since I was afraid of heat I would make a pass on the razor and cool it down even though it wasn't even warm. Better safe than sorry. With only 1k sandpaper it removed the rust and alot of surface spots. The maker stamp is quite legible now. There are still alot of deep pits and spots, but the blade is so tiny it would take alot of metal removal to get rid of them it isn't worth it. I just wanted to experiment and only concerned with shaving with it. Now it can go to the hones. I will have to try this on a hollow grind to see how it will work. I will have to mess around with different size wheels for different size razors and different grinds. Now don't get me wrong I am not saying that a dremel is a good thing to use cause so much can go wrong just like with ANY powertool, but I was experimenting on a junk blade. The use of any power tools when it comes to straight razor restoration is dangerous.
Attachment 157580Attachment 157581
Putting the finishing touches on this W&B. First try at making horn scales. Not perfect but better then I thought I would do.
Attachment 157622
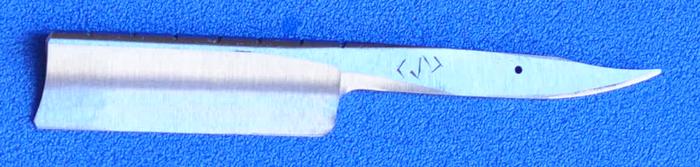
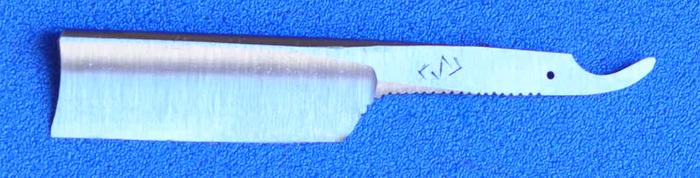
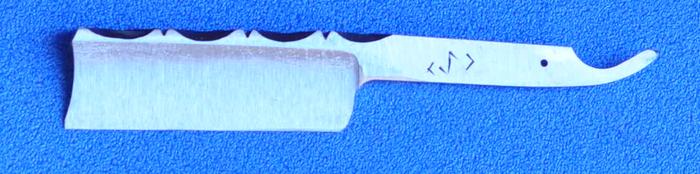
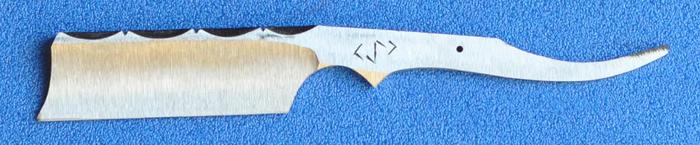
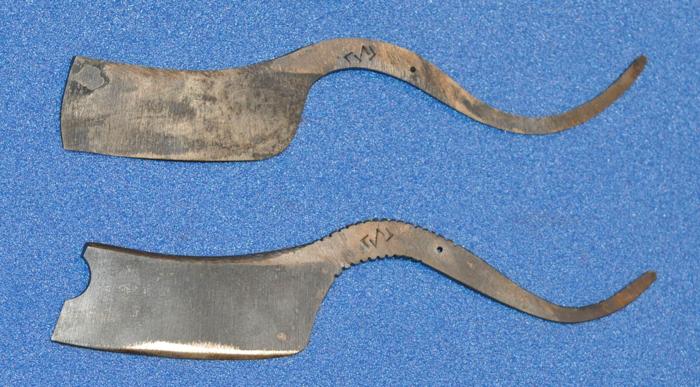
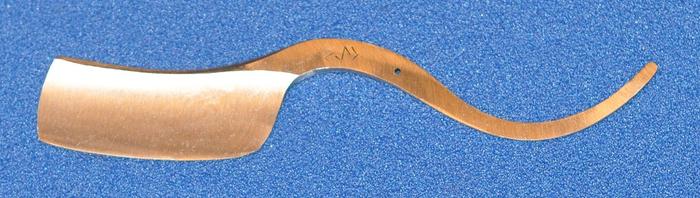
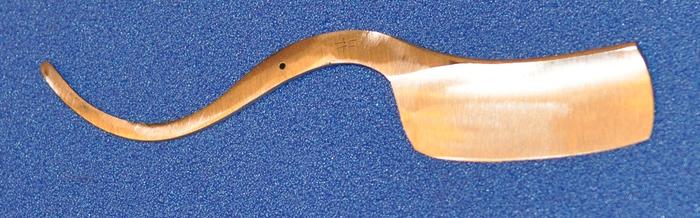
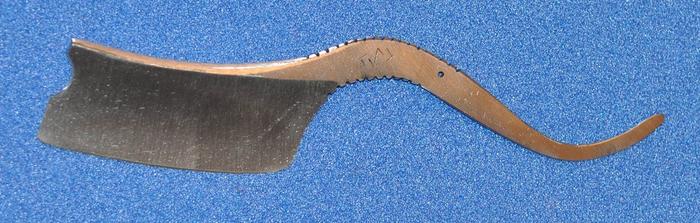
Today's work of the morning. I final ground the 2 choppers.
The round point is 9/8, the alien weapon is 10/8+
Both have a very fine bevel.
Attachment 158022
Attachment 158021
Attachment 158024
Attachment 158023
The afternoon was not as productive. I had a couple of kamisori style razors I wanted to grind, but only could do a little because they were not fully annealed so I'll have to do that again. Then I had 3 monkey tail razors that were under construction and I did part of the grinding, but not all. It was one of those days.... Had to go to the bank, had to pick up the kids from school, had to eat lunch with the mrs (normally I skip lunch on my blade making day and only drink coffee) so all in all I missed a couple of hours which I will make up tomorrow hopefully so that I can heattreat those monkey tails this weekend.
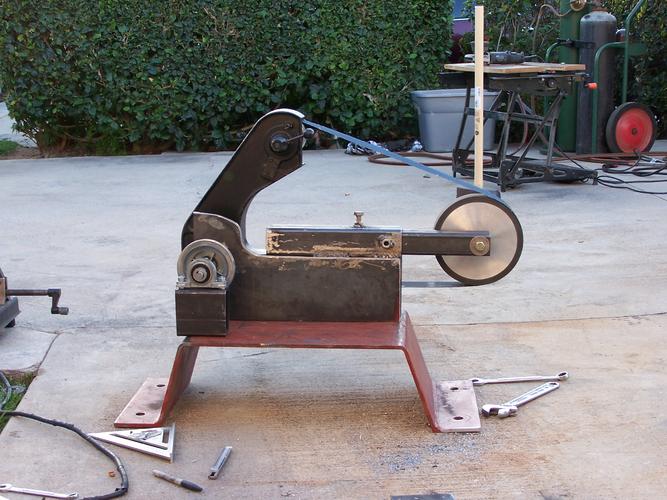
I have been working on a grinder for myself. Took apart my Craftsman 2X42 and turning it into a 2 x 72 . Not sure how it is going to work out using the cast part from the old grinder. I went that way because I like the tracking set up but may pay the price in trying to get it all aligned. The other part of this plan ( to come later) is water cooling. The cast housing should help contain the h2o. I am thinking water recovery and pump system for the end plan.
Attachment 158026
Attachment 158027
Very nice grinder, looking good :)
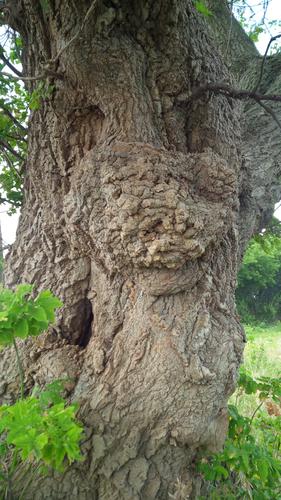
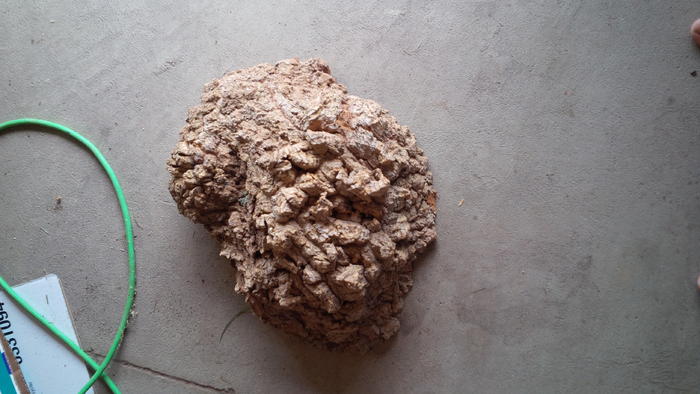
Hacked this off a tree yesterday for future use. Its a box elder tree that's going to be cut up for fire wood very shortly at a friends farm. Hopefully I can score some more hunks. Most of this burl is already dry but ill rough turn it on the lathe, wrap it up, and stick it away for a while until its completely dry.
Attachment 158110Attachment 158111
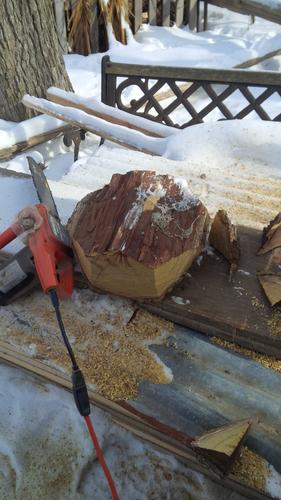
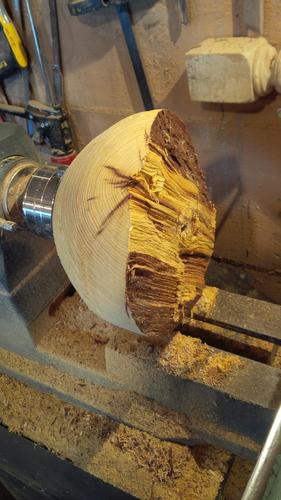
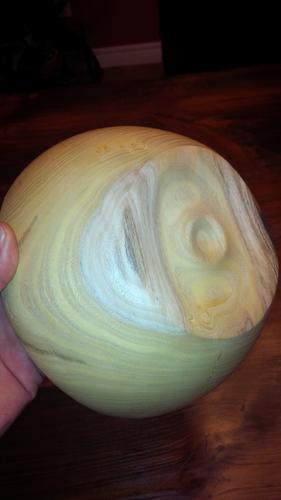
Another project I started today is a Yarn bowl for my cousins wife. I had a big hunk of firewood I got from the same friends farm, which he and I had no clue to what species of wood it was. It's very yellow on the inside, but from age, the outside has turned a dark brown.
Attachment 158112
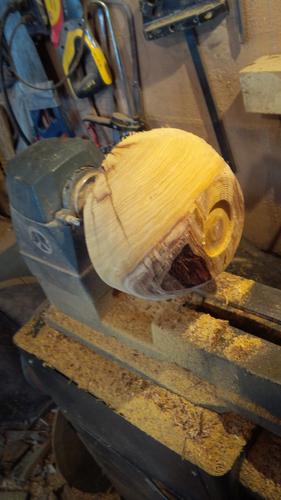
Thought it was an Ash of some sort, but after I got it on the lathe and started to see more of it, turned out to be Osage Orange. I didn't think there was much of these trees growing up here in Canada but apparently there are a few. I was very shocked and happy when I discovered this. Of course, I got this piece of wood back in the late summer, and my friend has burned the rest he had. ( which was a ton!!) Makes me very sad. But, good thing about Osage Orange is it produces some of the highest BTU levels of any wood being burned. I do have another piece, so that makes me a bit more happy.
Attachment 158113Attachment 158114Attachment 158115
Just the start of it so far.
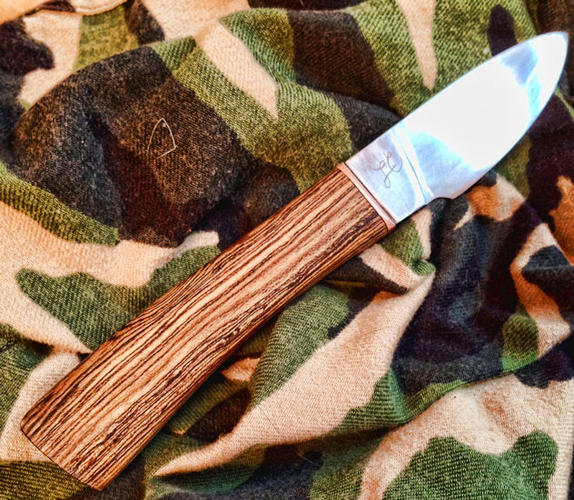
Here is what I have done on the razor I am currently working on. Now for finish grinding.
Attachment 158181
Zebrano wood ?
I believe so.Quote:
Originally Posted by Gipson
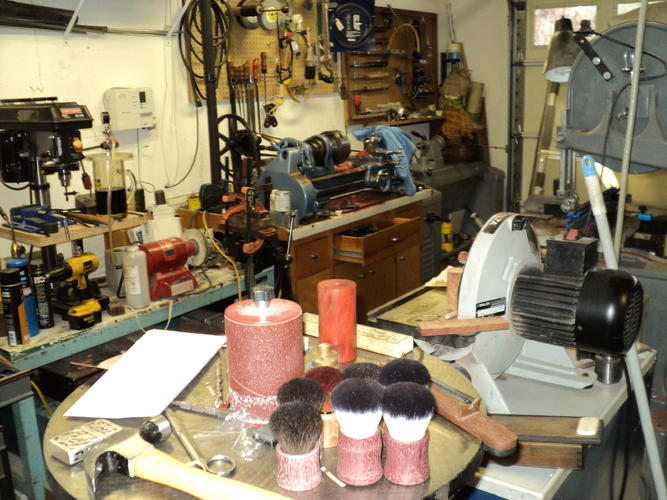
Had to clean my workbench today from my wife...
https://c2.staticflickr.com/8/7298/1...96de2967_c.jpg
_DSC4404 by Remco van de Sanden, on Flickr
But a clean workspace is a productive workspace ;)
https://c2.staticflickr.com/8/7385/1...56a529c6_c.jpg
_DSC4405 by Remco van de Sanden, on Flickr
So I finished my kamisori/file/razor. All it needs is a small buffing on the outside edges of the handle.
Size is 8/8 with a 1/4 hollow grind.
https://c1.staticflickr.com/3/2878/1...e888b7b2_c.jpg
sized_DSC4415 by Remco van de Sanden, on Flickr
https://c2.staticflickr.com/4/3671/1...bcfd2d49_c.jpg
sized_DSC4412 by Remco van de Sanden, on Flickr
Difficult to photograph correctly :(
Turning this
https://farm3.staticflickr.com/2871/...e1f8851e_o.jpg
Into these.
https://farm8.staticflickr.com/7353/...a1af8f14_o.jpg
It's been a very productive day for me!
A clean workspace?? surley you jest:)) my shop is always a mess.
Attachment 158338
I really like those scalesQuote:
Originally Posted by bdcoffey
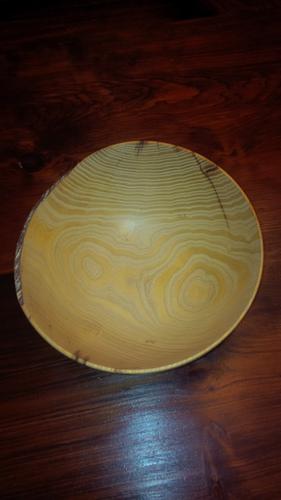
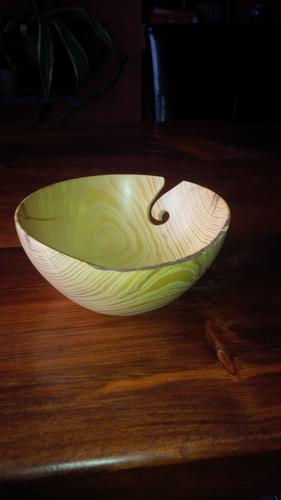
Finished up the yarn bowl today. I think it turned out quite nice. Had to use quite a bit of CA to fill in many different cracks and splits. Makes for a piece with lots of character that's for sure. Finished it up with a few coats of wax, and finished by cutting in the yarn slot. What a beautiful piece of wood this turned out to be. And to think, most of that wood got burned....... such is life.
Attachment 158346Attachment 158347Attachment 158348Attachment 158349