Rez,
I didn't do much all summer. Feels good to get back to some projects.
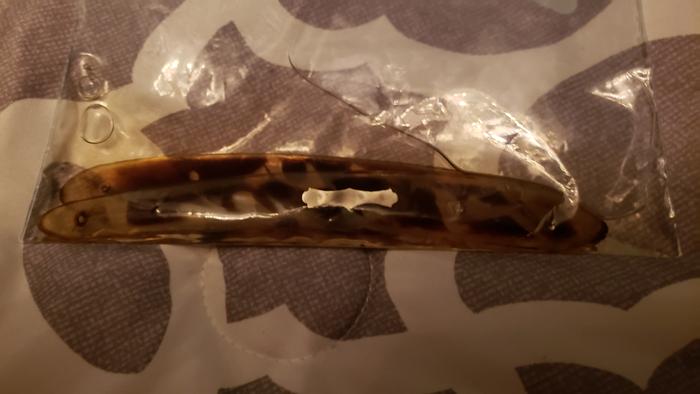
Speaking of which, these have been soaking since yesterday. I have tomorrow off, so I'll try to pin 'em up.
Attachment 312899
Printable View
Rez,
I didn't do much all summer. Feels good to get back to some projects.
Speaking of which, these have been soaking since yesterday. I have tomorrow off, so I'll try to pin 'em up.
Attachment 312899
Put um next to a heat register, or near the heat of your furnace. It speeds up the process some. If they've warped, run a clothes iron over them, to flatten.
make sure to clean the oil off of them first. :rofl2:
There's two things in life that's going to definitely give you trouble. One has tits, the other one has spark plugs. :gaah: :roflmaoQuote:
Originally Posted by cudarunner
:rofl2::roflmao I wish I could double like that:roflmaoQuote:
Originally Posted by outback
Attachment 312908
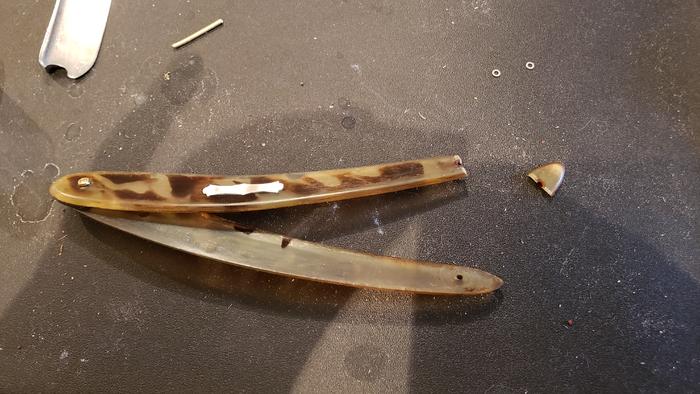
Dang it. Back to the drawing board on this set.
D'oh, that's the worst possible place for a break! I doubt that can be fixed (unless Mike knows how lol!).
(Oh, and check your PM's-I took some more pics of that hone for you).
I was thinking of splicing in a piece from a donor set further down near that bolster, epoxy them together with some ground up horn dust, sanding to get them to match and then dying the scales black.
Not even sure if that would hold since there is still going to be some pressure from the scales bending toward the pivot.
CA that thing. Horn bonds very well with it.
CA usually sets pretty quick, doesn't it?
How long would you wait before testing it?
Minutes....
Do you have any quick set, spray.? (Accelerator). If not give it 5-10 minutes
Do it on a piece of waxed paper, so everything is flat..
Attachment 312912
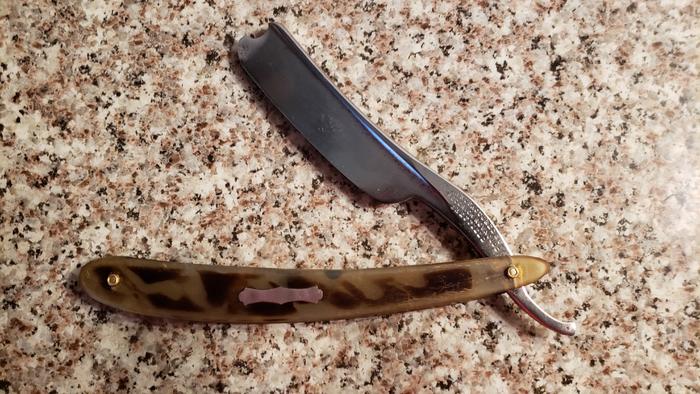
It is holding together fine!
I think if it would have broken any further forward it would have been a problem. However, in this case the pressure of the scales against the tang isn't really near the break. So, the glue ought to be able to hold it in place since the break doesn't have any stress on it.
I can see dying these black after some polishing to hide the crack, but this is good enough for now.
Odd, typically I find a fresh brake to mend almost seamless, with CA.
Before you mentioned CA I was wondering if epoxy would work. It didn't.
What we are seeing there is probably the epoxy I couldn't get out.
I would leave the scales as is if they were mine. They look much better than black and a scar only shows its history.
Damb nabbit.!!! I was hoping u got that, before doing anything to it. Dab a touch of dark brown dye on the area, some day. Can do it while pinned, won't dye the pin or collars.Quote:
Originally Posted by sonnythehooligan
You'll need to get some CA remover, and wipe the scales clear of any CA. CA won't take dye, epoxy will.
You might still see the crack, because of the CA, but you won't see the uglies, from the repair
Anyway!....how'd ya brake um.?!
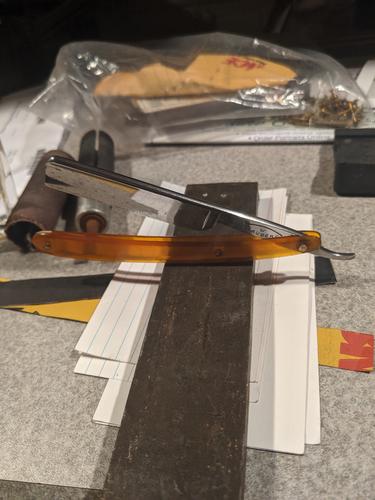
I've got these brass spacers that I wanted to try. The razor wasn't closing down the middle initially so I decided to go with the spacers. That seemed to have taken care of the closing issues, but now the razor was super loose in the scales.
So, I kept trying to tighten up the pin, and probably gave it too much power.
The 2nd time around after the fix I didn't use the washers and definitely took it easy tapping away while pinning.
And it closes perfectly now. Go figure. ;)
Helluva good idea to use the brown dye, by the way. I can see that working!
I did a bit of extra sanding before I pinned it up, so I think I got at least some of the CA that seeped through. I'll hit it with some remover to be sure.
If it comes out too dark or abnormal, you can always sand it and lighten the tone, try to blend it in with the others. :nj
Something I found while working with horn is, sometimes after flattening out old warped scales, the blade doesn't close properly again. So...I heat the scales with my heat lamp, while pinned most of the way, then slip a Popsicle stick through the scales at the wedge, so I have what looks like a T-handle. Then all I have to do is give them a little twist, hold for a bit till they cool down, check if it centers. If so, tap tap tap, till all is set. Ta Daa.!!
I'm thinkin that's how they did it back in the day, with all the bent spine's, tangs, n such. :shrug: it is a pretty simple way to center a blade, without shimming them, or angling a pivot pin through the scales.
Can be done with plastic, as well.
Looks good even if the crack is still visible. I like it as is.Quote:
Originally Posted by sonnythehooligan
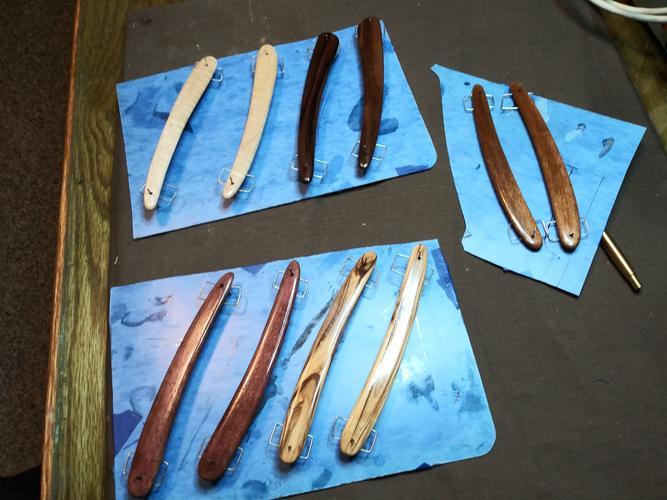
Sanded and first coat...
Attachment 312925
5 sets is too many at one time for me.
You've been busy!Quote:
Originally Posted by Gasman
Damn Jerry, I'm impressed! I need to make a bunch more scales. Looking good though. I admire your industious...ness...:thinking:... I guess that would be, "I admire your industry," wouldn't it?... :hmmm:...WHATEVER. I admire something.:shrug:... And whatever it is I admire the CRAP out of it.Quote:
Originally Posted by Gasman
DISCLAIMER: I wasn't sure where to put this so this seemed like the only logical place.
Hey I found this cool thing in some stuff of my dad's and I thought it was pretty useful for hand sanding.
Attachment 312948
Attachment 312949
It is 1" in diameter and the rubber part is 3 " long.I've never seen one before and I don't know where I'd get another one if I were looking for one but it is the perfect diameter for hand sanding. Plus it seems to be a good diameter for light polish sanding or surface sanding after bluing engravings or stampings inside the hollow. The rubber is stiff and it has a little give to it.
I've never used it for what it was made for at least by putting it in the end of a drill, just for hand sanding. I've also never seen one before and I don't know where I'd find one if I were looking for it. Just thought it was useful.
Alright, one more. Here's that Clauberg with the crack...or not a crack...(I still say it's a crack)
Attachment 312950
Attachment 312951
Attachment 312952
.. but I opted not to reshape the point and "Shwartz" the crack. You can't see any of the gold plating anymore. There were only vague traces of it left. I like those orange scales with the center stabilizer pin.
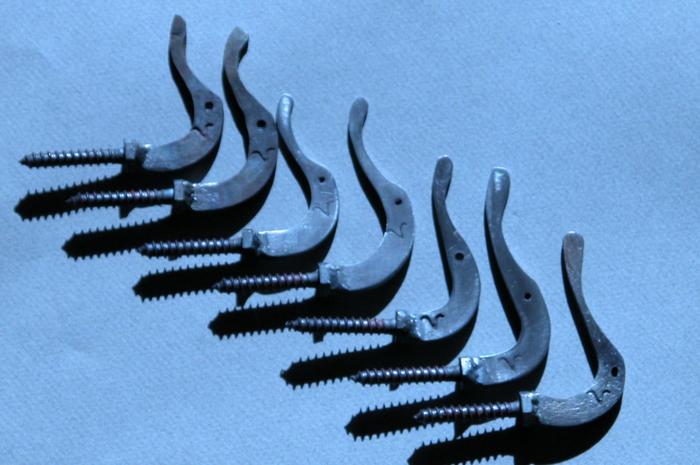
I made a bunch of strop hooks.
Attachment 312994
:tuQuote:
Originally Posted by bluesman7
The first thing I thought of this time of year was a cool bow hanger though.....:D
Forged? Two screw mount?
They look cool.
Yeah forged. Single screw.Quote:
Originally Posted by RezDog
You have done well making them all the same.
Finished the rework of my cast steel blade I did a while back. I made new collars from 00 wide copper washers and support collars from 0 brass washers. I pinned it up with nickel silver rod. I also reworked the wedge into an actual wedge shape and muted the point a bit. I re-set the bevel last night and will finish the hone and give it a test this weekend. I think new collars are an improvement over my first attempt and the wedge is better. Hopefully the tip modification will keep it from trying to bite me.
Attachment 313035
Attachment 313034
Attachment 313033
A marked improvement for certain. It looks good.
Would work best as a contour sander on a drill press..Quote:
Originally Posted by PaulFLUS
Neat hooks, Victor!Quote:
Originally Posted by bluesman7
Finished with my CMON blade. I filled the lettering and lines with black enamel and blued the tang (except for the logo area on the front). The cold blue took well, I'm just not getting a good photo. It's not really clear in the last image, but I blued the top of the tang and sanded away the bluing on the rounded portion to leave just the flat areas blued.
Attachment 313095
Attachment 313093
Attachment 313094
Attachment 313092
I'll be dealing well with the scales next.
Looking very good Jelly.
Bob
Yes. That cmon is looking ready to get dressed for the party.
I need a little help deciding what to do with my CMON scales.
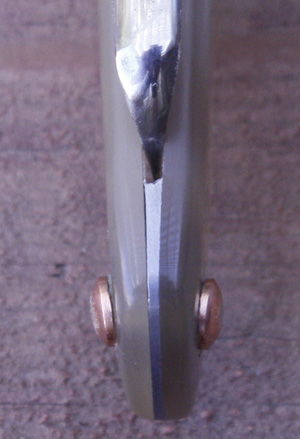
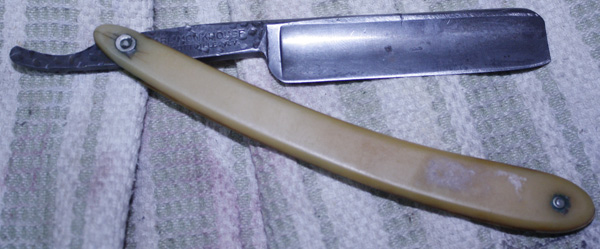
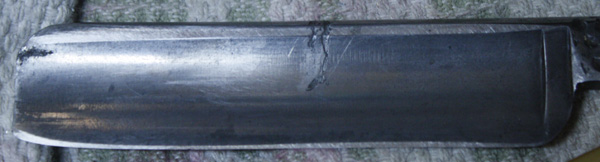
I've got a second one that was part of a lot purchase with OK scales (some stress cracks around the pivot) and an iffy blade. The blade has some significant wear at the toe as well as hone wear on the spine. The front has a weird bit of damage that wraps around to the top of the spine. I don't think it's a crack, more like electrical damage or maybe it's an artifact of forging:shrug: If you think this blade is toast, I'll use the scales for the good blade. If you think it is worth saving I'll probably reinforce the cracked area on the original scales. Pictures of the possible donor below.
Thanks for any advice.
Attachment 313140
Attachment 313139
Attachment 313138 Attachment 313137
Oh, and the test shave this morning with my re-done cast steel blade was quite agreeable. Muting the tip made it much nicer to shave with.
I'd say swap out the scales, if you can do it without breaking them.
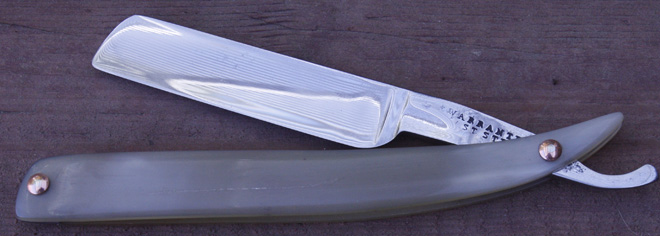
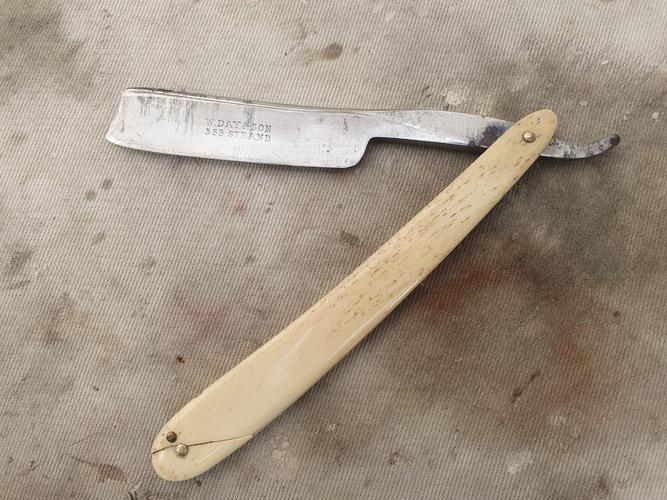
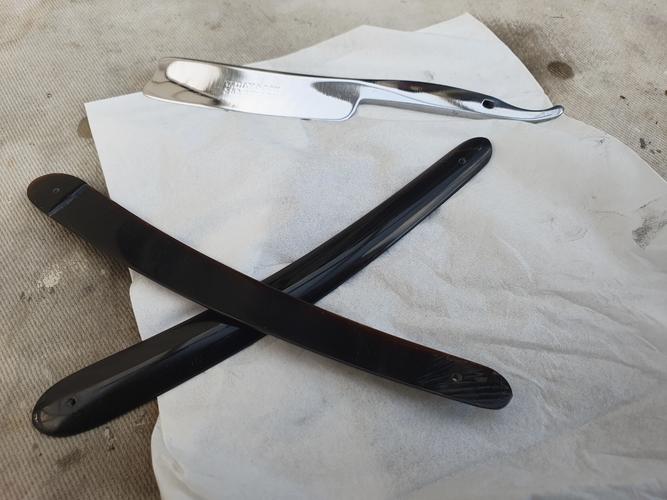
W Day & Sons 353 The Strand. 11/16ths Wedge.
This took me a few hours only, not including the honing.
Salvaged some old scales. The blade has some weight to it considering its so small.
Attachment 313143
Attachment 313144
Attachment 313145
Attachment 313146
Attachment 313147
Attachment 313148