Way to go, mihai! Nice job saving that razor and bringing it back into service in style.
That's a handsome brush Gasman, I'm liking the look of that.
Printable View
Way to go, mihai! Nice job saving that razor and bringing it back into service in style.
That's a handsome brush Gasman, I'm liking the look of that.
I agree. Like a lot of old vintage 'deco era' brushes we see, yet with some size to it.
Great idea! :bow
Is the ring at the base an afterthought, or part of the design?
Very nice handle design, congrats. It looks very Art Deco I think as well, but quite like the look..
:tu
The ring is part of the cup that is around the glue of the knot. It stick out farther than the rest of the cup so I thought it would give a bit more contrast with the black and white layers. I honed up my H.Boker tonight after the restore and with this brush I'll have a NEW shave in the morning. I just hope the razor is sharp enough. ha.Quote:
Originally Posted by sharptonn
Well, it sure feels heavy. For something that is hollow plastic its pretty heavy. I was looking for something to take up space inside and put a little weight to it. I found a 1/2 bolt with two nuts on it fit just right after cutting off the excess of the bolt. About 1/4 below the bottom of the knot. Then filled it in completely with Gorilla Epoxy. Thanks guys.
Richard, it is Tuesday and we would like to remind you that tomorrow is Wedge Wednesday.Quote:
Originally Posted by Geezer
Ah, Wedgenesday! I look forward to it!
Thx!
~Richard
Just to help clear things up a bit. Here is my original post on this brush.
http://straightrazorpalace.com/brush...00t-brush.html
Its an old Ever-ready 100T I fixed up. Should have linked this post in the beginning. Sorry if there was any confusion.
And heres another project I just completed. Pinning Block. 5" Round piece of steal polished up with a 5/64 hole thru it. Found it at a metal shop then cleaned it up a bit and sanded. Not much but I think it will work.
Attachment 255799
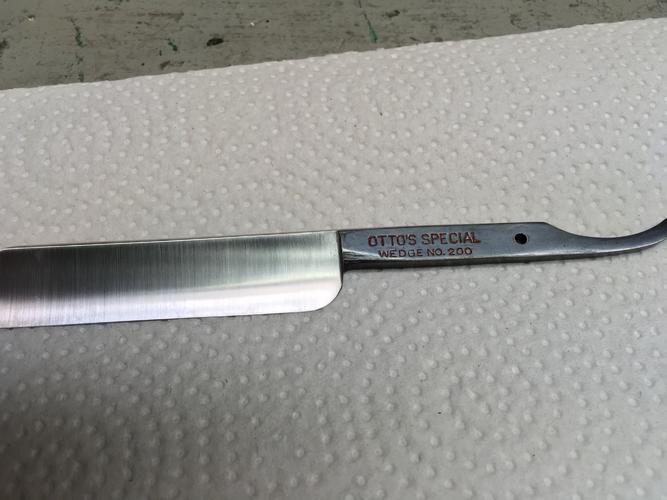
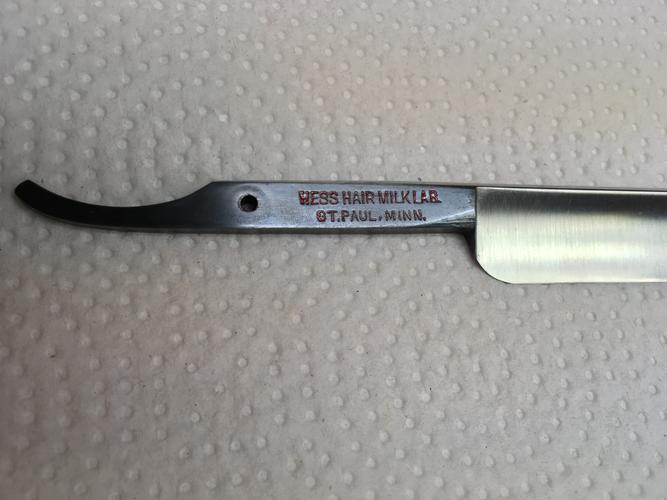
Got the Hess blued on the tang and the letters painted red. It was my first time blueing anything so thanks to all to pitched in with tips on how to do it, much appreciated!!. The letters look more red in person than in the photos. I like how it turned out, I'd say it's about ready to go.
Attachment 255825Attachment 255826
The blueing looks great.!!
To get the red to pop, you may have to do them in white first, then go back over them with red. [emoji6]