
Results 1 to 10 of 14
 14Likes
Thread: dremel marks
 LinkBack URL
 About LinkBacks
-
05-25-2014, 03:45 PM #1Senior Member


- Join Date
- May 2014
- Location
- Canberra, Australia
- Posts
- 257
Thanked: 43 dremel marks
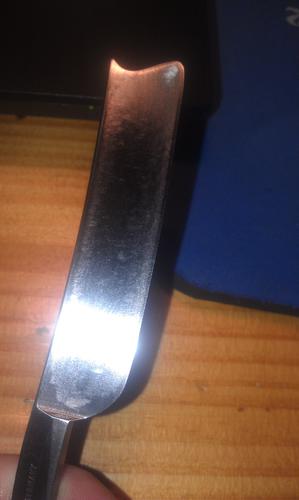
I have just bought a boker no 386.
its not in too bad a condition, no rust, scales clean and whole and the markings sharp and deep.
My problem is it looks like it has been previously 'restored' just very badly. I think it has dremel marks or some other power tool does anyone have any ideas on how to get rid of them? currently i am just working at it with 280grit sandpaper.
sorry the picture isn't great but you get the idea of what i mean
cheers
-
05-25-2014, 04:15 PM #2I'm a social vegan. I avoid meet.


- Join Date
- Nov 2006
- Location
- Greenacres, FL
- Posts
- 3,300
Thanked: 603
Some/many blades display "grind" marks. Given that the "markings are sharp and deep", I'd consider that, before going any further.
You can have everything, and still not have enough.
I'd give it all up, for just a little more.
-
05-25-2014, 04:18 PM #3Senior Member


- Join Date
- Feb 2013
- Location
- Haida Gwaii, British Columbia, Canada
- Posts
- 14,457
Thanked: 4830
I wrap strips of wet dry sand paper around old wine corks and wet sand with WD-40. After I have gotten to 2kgrit I use steel wool and mothers, and then just mothers. Start with a higher grit 1k or 1.5k and drop down or climb up as need be.
It's not what you know, it's who you take fishing!
-
The Following User Says Thank You to RezDog For This Useful Post:
dooey (05-29-2014)
-
05-25-2014, 04:25 PM #4Senior Member

- Join Date
- Mar 2014
- Location
- Romulus, Michigan
- Posts
- 1,352
Thanked: 332
Try sanding in the opposite direction as the marks. Horizontal verves vertical. About 50 strokes, then check for progress, It should lessen the appearence. Then switch to circular sanding motion 50 circles. Alternate as needed. You see I did the same thing, thats how I fixed my Opps . Ok truth is after I did it a second time, I took a dremmel with the steel wool attachment to it on low speed and that fixed it in about 30 seconds.Your choice keep us posted on how things go.
-
05-25-2014, 08:12 PM #5Shave This

- Join Date
- Jan 2014
- Location
- Pickering, Ontario
- Posts
- 1,036
Thanked: 183
I've come to the realization on a couple of occasions that I don't have to be a slave to one method or the other while going through a repetative up and down cycle of hand sanding or a back and forth with the buffer grits to remove scratches missed on previous passes. Sometimes an intervention with the other method with the appropriate grit seems to get things back on track. (just what the comparative grit between the two is still not clear to me but I err on the side of caution) I still think there are places that buffing just won't work well. Originally Posted by ultrasoundguy2003
 Than ≠ Then
Shave like a BOSS
-
05-25-2014, 11:27 PM #6I used Nakayamas for my house


- Join Date
- Aug 2009
- Location
- Des Moines
- Posts
- 8,664
- Blog Entries
- 1
Thanked: 2591
pic is not good enough to see, but all razors have grind marks.
If you can take a pic that shows the blade better I will be able to tell you if the grind marks are Dremel or belt.Haroldg48 likes this.Stefan
-
The Following User Says Thank You to mainaman For This Useful Post:
Wintchase (06-02-2014)
-
05-29-2014, 01:38 PM #7Senior Member
- Join Date
- May 2014
- Location
- Canberra, Australia
- Posts
- 257
Thanked: 43
ok i think i have done an alright job on at least minimising it. just used wd40 and sandpaper from 280-2000. it can only be seen on the right angle and right light. its a pretty schmick razor, its a shame i am giving it to a buddy for his 21st.
cheers for all the helpRezDog likes this.
-
05-29-2014, 01:43 PM #8Senior Member
- Join Date
- May 2014
- Location
- Canberra, Australia
- Posts
- 257
Thanked: 43
and thanks rezdog for the wine corks tip! it makes it a lot easier!
RollinCoal69 likes this.
-
06-01-2014, 05:22 PM #9Senior Member

- Join Date
- Aug 2013
- Location
- St. Louis, MO
- Posts
- 194
Thanked: 31
#0000 steel wool? Originally Posted by RezDog
Joe
-
06-01-2014, 05:45 PM #10Senior Member
- Join Date
- Aug 2013
- Location
- St. Louis, MO
- Posts
- 194
Thanked: 31
Originally Posted by dooey
+1. After hearing this tip on another thread, I ordered 100 wine used wine corks, figured I'd get a variety and see what works best. I'm already using them. I'm alternating between them and two other backing pieces, to see what works best. One backing piece is an ordinary eraser. That's good especially for flat surfaces. The wine cork is especially good for getting into hollows. That's true also of the third backing piece, a hunk of 5/8 thick rubber tubing:
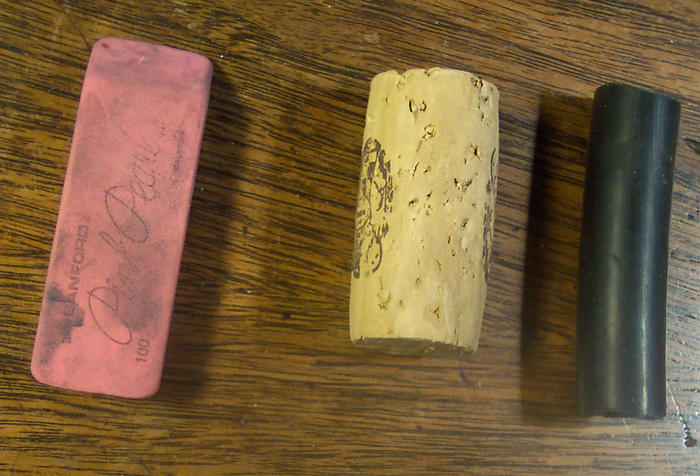
I got the tubing idea from another SRP contributor. I'm still waiting for the 7/8 tubing to come in, but I imagine it will be similar to the wine corks. My larger corks are 13/16, except the ones that are mushroomed shaped. They're wider, but the mushroom bulb gets in the way.dooey likes this.


 Reply With Quote