
Results 1 to 10 of 17
 18Likes
Thread: Where should I begin?
 LinkBack URL
 About LinkBacks
-
06-25-2014, 12:19 AM #1The Razor Talker


- Join Date
- Jun 2012
- Location
- Las Vegas
- Posts
- 623
Thanked: 75 Where should I begin?
Hello everyone!
This will be my first restore. However, I am not quite sure where to begin. I have read pretty much all of the posts and articles on how to restore a blade, but I don't know where to start. I have read all about grinding, buffing, hand sanding, polishing with steel wool. I just don't know what process I should being with on my razor. The razor I am working on is a JA Hellberg Faux-frameback Swedish steel razor. Let me know what you guys all think I should do!
As for tools, I have disc sanders, variable speed grinders, and ways that I could attach buffing wheels. And of course whatever I can purchase at Home Depot for a few dollars.
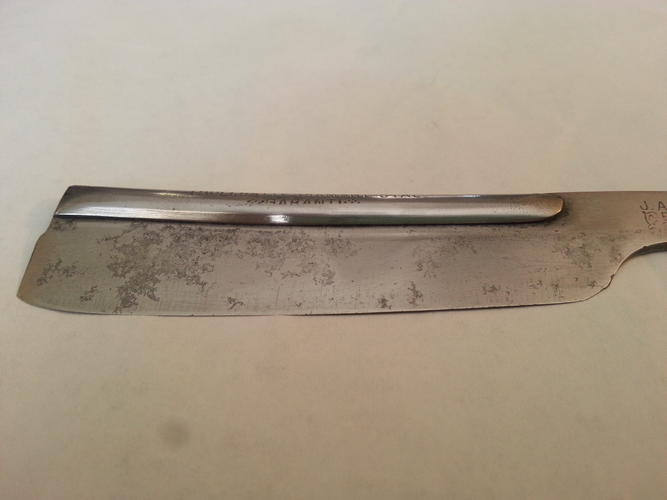
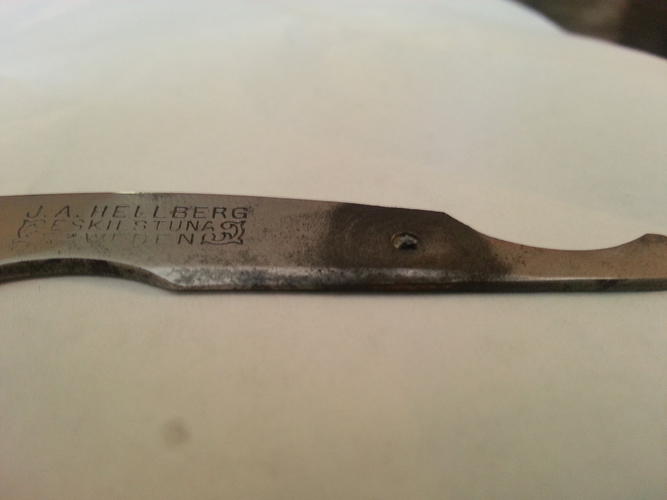
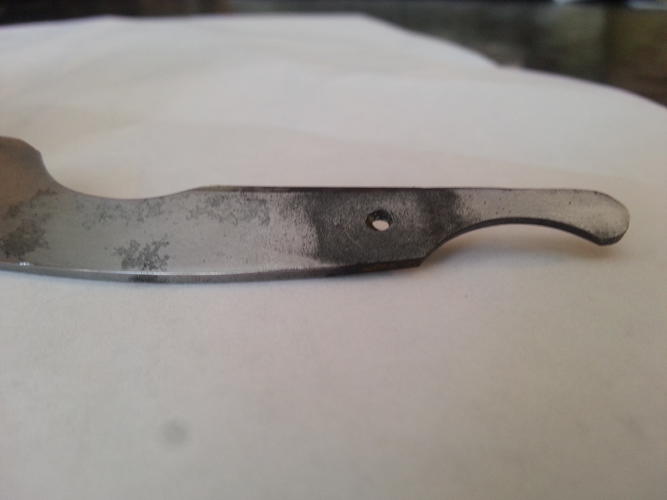
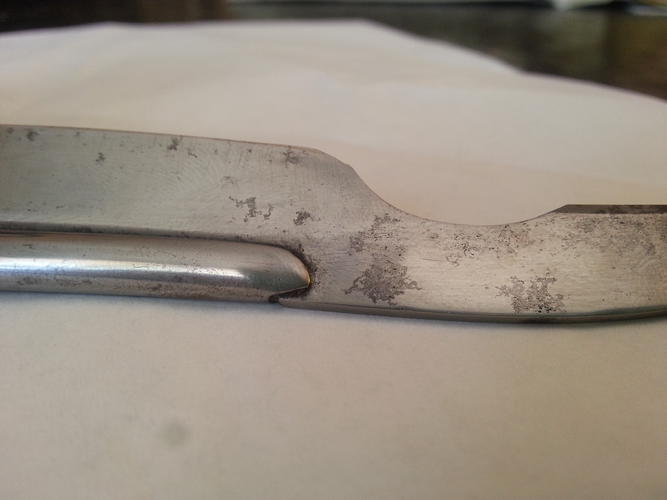
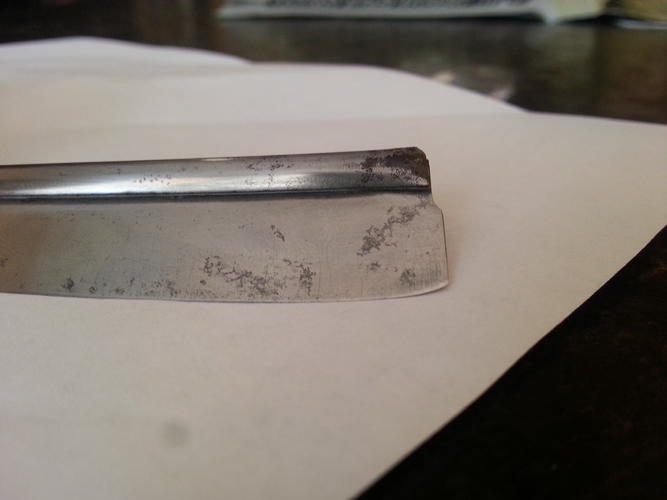
This is what I'm dealing with. Nothing awful at all. Just some discoloration and very minor pitting on the blade. Let me know what you think
Parker
PS: Not worried about scales at this point, just worried about the blade."When governments fear the people, there is liberty. When the people fear the government, there is tyranny." Thomas Jefferson
-
06-25-2014, 12:30 AM #2Incidere in dimidium


- Join Date
- Mar 2012
- Location
- Val des Monts, Quebec
- Posts
- 4,070
Thanked: 1440
Hey Parker - out of curiosity, what kind of look are you going for? Bright & shiny or well used?
IMHO there's no reason to jump to power tools at all if you have the time to do it by hand. There's much less cost and - most importantly - much less potential for catastrophic disaster! All it takes is for the blade to catch on your wheel and it's game over for the blade.
My approach is to start high (in terms of grit - i.e. less abrasive first) as you can always remove more steel later, but it's awfully hard to put back on if you go to far or scratch it deeply. So I generally start with some metal polish and a rag just to clean it up and see where things stand. And then if needed move on to some wet/dry sandpaper, usually starting somewhere around 600. If that doesn't do the trick, I'll try 320, and so on. Then once whatever I wanted to get rid of has been gotten rid of, I work back up through the same progression in reverse: higher grit wet/dry, moving eventually back to the polish and cloth.
One thing that might help on those dark splotches is a pencil lead. Just scribble over the spot with a pencil. The graphite is a mild abrasive that can be handy in dealing with small areas.
Since I tend not to be looking for a mirror finish on mine, I tend not to worry about some stuff that other guys would want to get rid of. It's totally a judgement call.
Oh, and if you want to use a buffer, etc., then by all means go for it. The above is just what works for me, but others get amazing results from buffers.
EDIT - forgot to say - ENJOY IT!sharptonn and parkerskouson like this.
It was in original condition, faded red, well-worn, but nice.
This was and still is my favorite combination; beautiful, original, and worn.
-Neil Young
-
The Following User Says Thank You to Cangooner For This Useful Post:
parkerskouson (06-25-2014)
-
06-25-2014, 12:35 AM #3The Razor Talker
- Join Date
- Jun 2012
- Location
- Las Vegas
- Posts
- 623
Thanked: 75
Looking for more of a worn look, but without the imperfections there are, you know? Just like a satin finish rather than a "razor-mirror." Thanks for the advice! Much appreciated.
"When governments fear the people, there is liberty. When the people fear the government, there is tyranny." Thomas Jefferson
-
06-25-2014, 12:42 AM #4Razor Vulture

- Join Date
- Oct 2010
- Location
- Lone Star State
- Posts
- 26,197
Thanked: 8624
Looks likely! The workshop would be a fine spot to begin! Looking forward to seeing it done!
parkerskouson likes this."Don't be stubborn. You are missing out."
I rest my case.
-
The Following User Says Thank You to sharptonn For This Useful Post:
parkerskouson (06-25-2014)
-
06-25-2014, 01:17 AM #5The Razor Talker
- Join Date
- Jun 2012
- Location
- Las Vegas
- Posts
- 623
Thanked: 75
Just realized this was totally in the wrong place

Mods can change it if you want lol!"When governments fear the people, there is liberty. When the people fear the government, there is tyranny." Thomas Jefferson
-
06-25-2014, 01:21 AM #6Razor Vulture
- Join Date
- Oct 2010
- Location
- Lone Star State
- Posts
- 26,197
Thanked: 8624
Either way, Get to work!
 It has to get done now!
Cangooner and parkerskouson like this."Don't be stubborn. You are missing out."
It has to get done now!
Cangooner and parkerskouson like this."Don't be stubborn. You are missing out."
I rest my case.
-
06-25-2014, 01:25 AM #7Senior Member


- Join Date
- Feb 2008
- Posts
- 32,564
Thanked: 11044
Moved to the Workshop. I'd begin by hand sanding, but I ain't a restorer by any stretch of the imagination.
sharptonn and parkerskouson like this.Be careful how you treat people on your way up, you may meet them again on your way back down.
-
06-25-2014, 01:33 AM #8The Razor Talker
- Join Date
- Jun 2012
- Location
- Las Vegas
- Posts
- 623
Thanked: 75
I plan on starting either tomorrow or Thursday. My uncle is coming into town and it would be a good project for Him, my dad, and myself to work on! I'll definitely go the route of hand sanding as it seems that it is a way safer bet to take.
Last edited by parkerskouson; 06-25-2014 at 01:48 AM.
"When governments fear the people, there is liberty. When the people fear the government, there is tyranny." Thomas Jefferson
-
06-25-2014, 01:36 AM #9Razor Vulture
- Join Date
- Oct 2010
- Location
- Lone Star State
- Posts
- 26,197
Thanked: 8624
You can get by with a lot of hand-sanding on these types. Go longitudinal with finer and up and down with more coarse.
SOMETIMES, the frame can be removed to facilitate cleanup, but keep that thickness with tape at the spine so the frame will fit tightly as tapped back on.parkerskouson likes this."Don't be stubborn. You are missing out."
I rest my case.
-
The Following User Says Thank You to sharptonn For This Useful Post:
parkerskouson (06-25-2014)
-
06-25-2014, 01:53 AM #10Senior Member

- Join Date
- Feb 2013
- Location
- Haida Gwaii, British Columbia, Canada
- Posts
- 14,457
Thanked: 4830
Steel wool and some mag polish will get the black out and leave what pitting there is. Once you have that established you can decide how much of the pitting you want to remove. Trying to get it all can be a bit of a rabbit hole sometimes. You can also use 2K wet paper with WD-40 and "wipe" the blade in one direction to create a satin finish that will hide shallow pitting. As already stated start high and work down if that is what strikes you. I often start at 1K and then try to decide to go up and finish or down to remove pitting before going back up. It's often about what strikes my fancy at the time.
It's not what you know, it's who you take fishing!


 Reply With Quote