
Results 1 to 10 of 34
 81Likes
 LinkBack URL
 About LinkBacks
Hybrid View
-
06-26-2014, 03:38 AM #1Senior Member


- Join Date
- Dec 2012
- Location
- Perth, West Australia
- Posts
- 1,431
Thanked: 497
Great work mate !!....I can appreciate the difficulty factor in this.
You're lucky though, his name is in runes, the inlays are all "straight", I guess "curves" would be far more difficult ?
This tutorial throws up all sorts of possibilities....Thanks for posting Substance likes this.http://straightrazorplace.com/workshop/18504-welcome-workshop-how-do-i-where-do-i-what-do-i-answers-here.html
-
06-26-2014, 04:08 AM #2Senior Member

- Join Date
- May 2014
- Location
- Easley, SC, USA
- Posts
- 1,861
Thanked: 480
Nice Work. I've done wood inlay and can appreciate what you are going through.
They make x-y adjustable drill press vices that you can use as an engraving jig. I haven't seen one for a dremel, but they probably exist.Substance likes this.Some people never go crazy. What truly horrible lives they must lead - Charles Bukowski
-
06-26-2014, 04:39 AM #3Senior Member


- Join Date
- Jun 2013
- Location
- Gladstone QLD AUSTRALIA
- Posts
- 3,246
Thanked: 804
the straight lines was why thought I would give it a try Originally Posted by bongo

I tried to do a free hand spiral in horn I wanted for my Bruno blade when I did it, but gave it up as a bad joke for the inlay and the cut outs LOL
more thinking required for that one stillbongo likes this.Saved,
to shave another day.
-
06-26-2014, 04:59 AM #4Senior Member


- Join Date
- Nov 2012
- Location
- Across the street from Mickey Mouse in Calif.
- Posts
- 5,320
Thanked: 1185
The Engraver's Cafe - The World's Largest Hand Engraving Community
You have to create an account to see the pics but well worth it if you can pass the test. I made a lucky guess and got in :<0)Substance likes this.Good judgment comes from experience, and experience....well that comes from poor judgment.
-
-
07-07-2014, 02:18 AM #5Senior Member
- Join Date
- Jun 2013
- Location
- Gladstone QLD AUSTRALIA
- Posts
- 3,246
Thanked: 804
bit of an update on the progress of this one
so I decided to redo the Rune inlay cut outs etc as I didn't like the lettering as it was so I started again
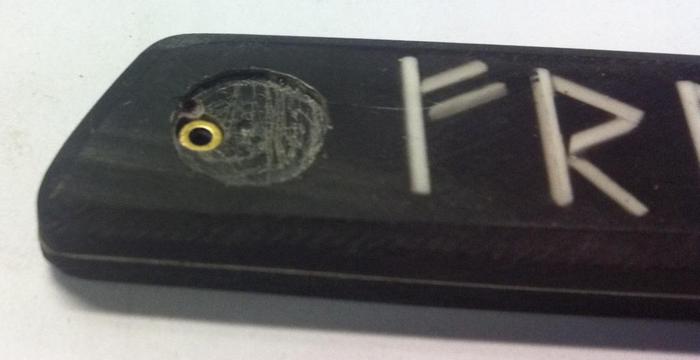
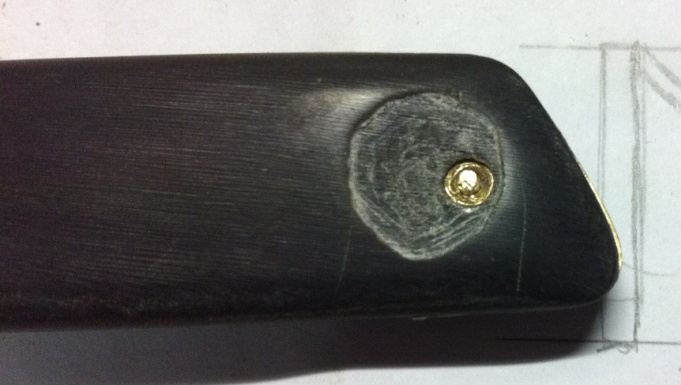
also added some Paua dots, I used a similar process to do these but with a different Ø3mm milling type bit to the recesses
Rune inlays were glued with CA & sanded back flush with Paua shell inlays dots added & glued ready for sanding again
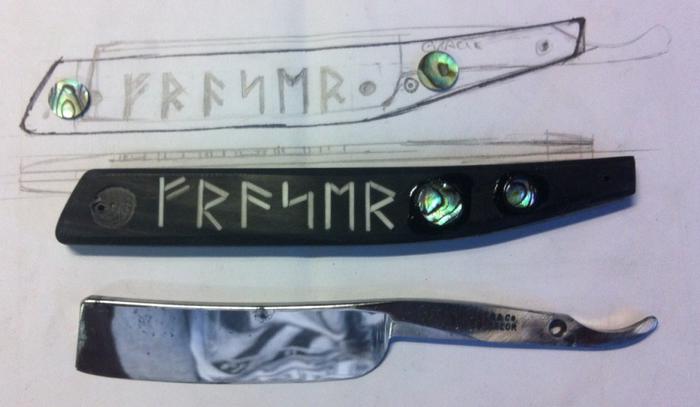
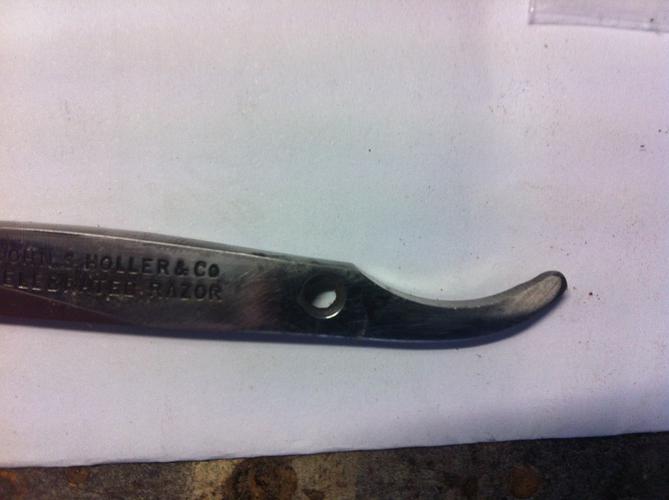
also decided to use a John Holler "Celebrated" 6/8" square point wedge I was waiting on for this project
below is the pinning recess for the wedge pin under the inlay dot with a washer in place
pre assembly of bone wedge with Bass liners wedge
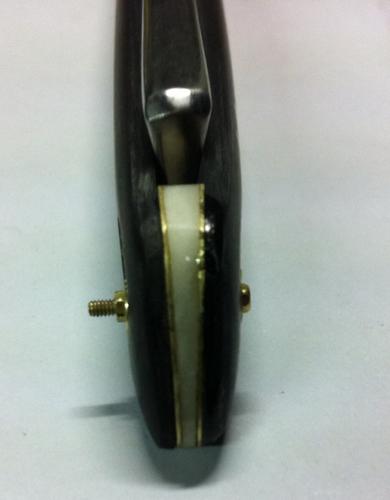
Pre assembly

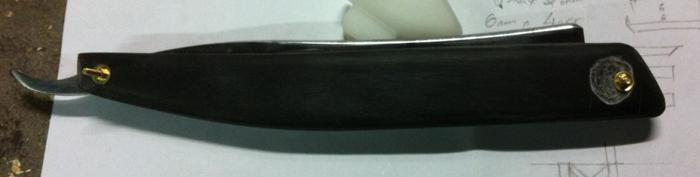
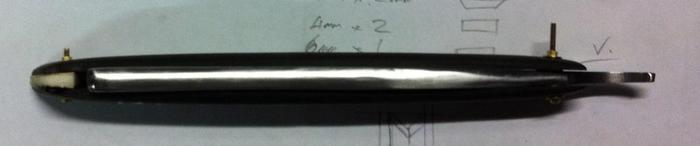
pinning in the wedge recess before glueing the Paua inlay dots to wedge end (looks rather ordinary, but no one ever see it again hopefully)
the wedge end inlays are now drying ready for final sanding & clean up of scales
hope you can follow by rantings LOLSaved,
to shave another day.
-
07-07-2014, 02:26 AM #6Senior Member

- Join Date
- May 2014
- Location
- southern California
- Posts
- 412
Thanked: 38
Holy cow that's awesome Originally Posted by Substance
Substance likes this.
-
07-07-2014, 02:31 AM #7Senior Member
- Join Date
- Jun 2013
- Location
- Gladstone QLD AUSTRALIA
- Posts
- 3,246
Thanked: 804
So while the glues are drying etc, I have started the work on the blade
1st off redrilled the pivot hole with a small rotary grinding bit
Resized the hole using 2 brass tube sizes to fit the 1/16" brass pin
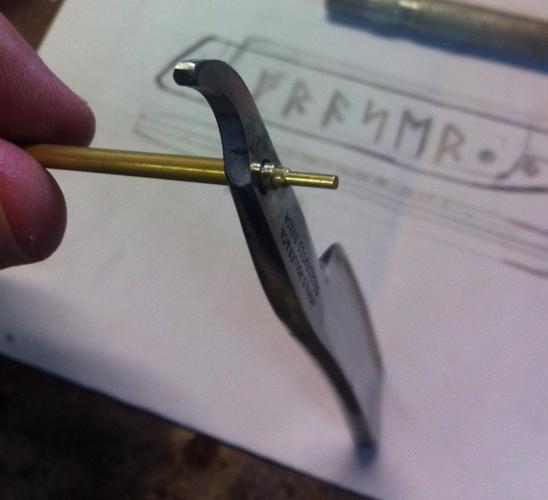
I also use a large centre punch to flare the tube ends so they are fixed into the blade before I sand it all flush
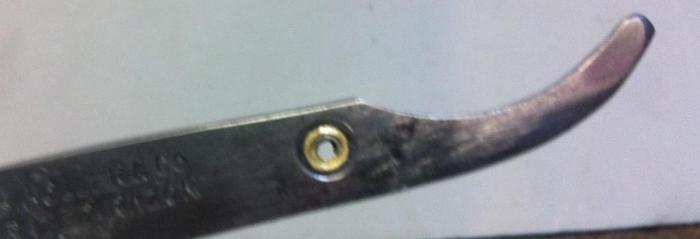
now due to a couple of blemishes on the blade that I have to sand,
I am going to try a matt/satin finish so have starting sanding the blade back to 600 W&D using WD40
and will prgress up from there back to 2000 with the WD40 & see how it comes out
keep yas all posted on thisSaved,
to shave another day.
-
-
07-07-2014, 02:32 AM #8Senior Member
- Join Date
- May 2014
- Location
- southern California
- Posts
- 412
Thanked: 38
Can you show the rotary tool you used to re cut the pivot hole? Originally Posted by Substance
Geezer likes this.
-
07-07-2014, 02:44 AM #9Senior Member
- Join Date
- Jun 2013
- Location
- Gladstone QLD AUSTRALIA
- Posts
- 3,246
Thanked: 804
it was a small greenish blue dremel cone shaped item, it went from about 3mm to 5mm over a 10mm long cone then the normal dremel shaft.
it came in a dremel engraving kit, but I unfortunatley broke it getting a bit keen as I did final sizing it grabbed & broke the tip off
I used it from each side a bit at a time using the dremel drill press set up.Geezer likes this.Saved,
to shave another day.
-
-
07-08-2014, 09:31 AM #10Senior Member
- Join Date
- Dec 2012
- Location
- Perth, West Australia
- Posts
- 1,431
Thanked: 497
Thank you for this Substance, I'm pinching this for my "Tips and Tricks" folder Originally Posted by Substance
 Substance likes this.http://straightrazorplace.com/workshop/18504-welcome-workshop-how-do-i-where-do-i-what-do-i-answers-here.html


 Reply With Quote