
Results 1 to 10 of 34
 81Likes
 LinkBack URL
 About LinkBacks
-
06-26-2014, 03:05 AM #1Senior Member


- Join Date
- Jun 2013
- Location
- Gladstone QLD AUSTRALIA
- Posts
- 3,245
Thanked: 804 DIY cutting Inlay strips & inlay engraving jig
Gday all,
I am trying something different for a Str8 for my son in-lay for his Bday (a new convertee)
so I thought I would add this tutorial of the process I have come up with, so others may be able benefit from it.
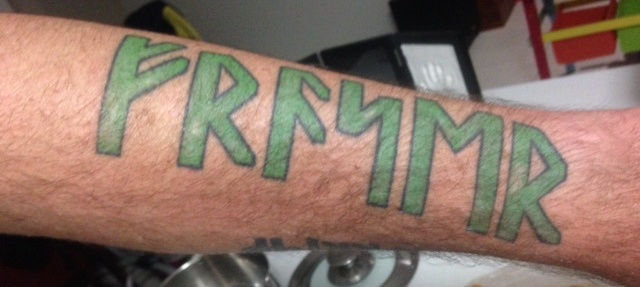
now I wanted to try and add his surname name in Runes as a inlay to the scales as per a tattoo he has.
so my first practice attempts free hand were rubbish to put it nicely, as the runes are made up of straight lines & that just wasnt happening free hand for me,
so back to the drawing board to rethink my process & this is what came out of the mush in my head.
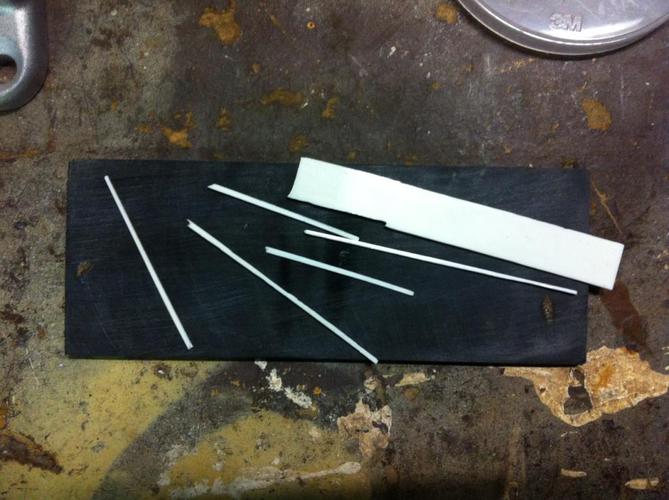
first problem I have a couple of abalone shell strips but not enough & I wanted the inlay to stand out a bit more and wanted to use bone in the black horn scales.
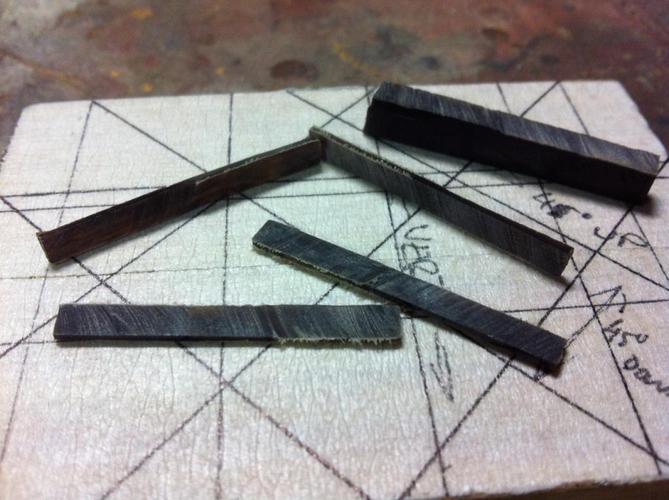
so first cutting inlay strips
I set up the dremel to the recently acquired drill press arrangement I got for my Birthday a couple weeks back, with the diamond cutting disk,
set it at about 1mm off the base.
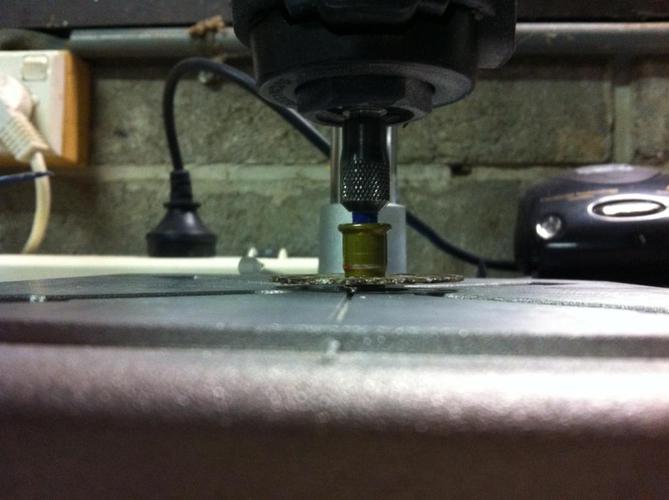
used this to cut down some 1mm bone inlay blank made some nice slices
also used the same set up on a bit of horn for black in pieces.
easy as.
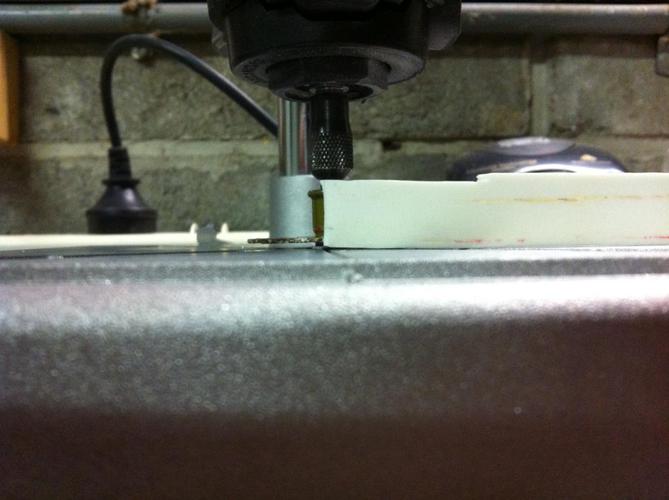
then to the fun bit for how to engrave the scale materials for the inlays
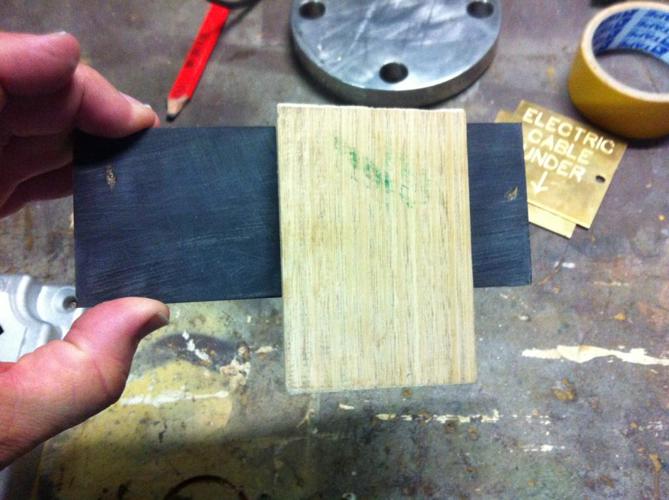
the grey matter thought of the guided sliding jig set up as follows:
I clamped a straight bar to my drill press base that I could adjust to suit the width changes,
then made a sliding block from a piece of wood I taped 1 side & marked the angles for my lines on it
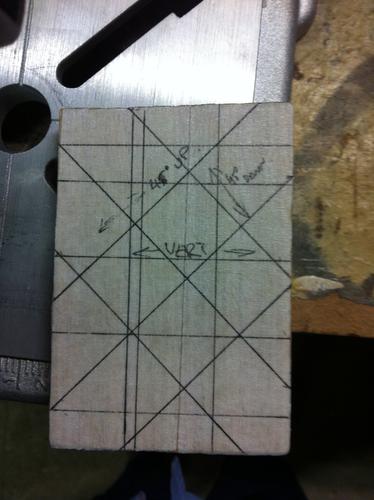
sanded 1 side of the horn blank flat as normal as my inside to ensure the scales are flat
then tapped & marked the design on the horn material.
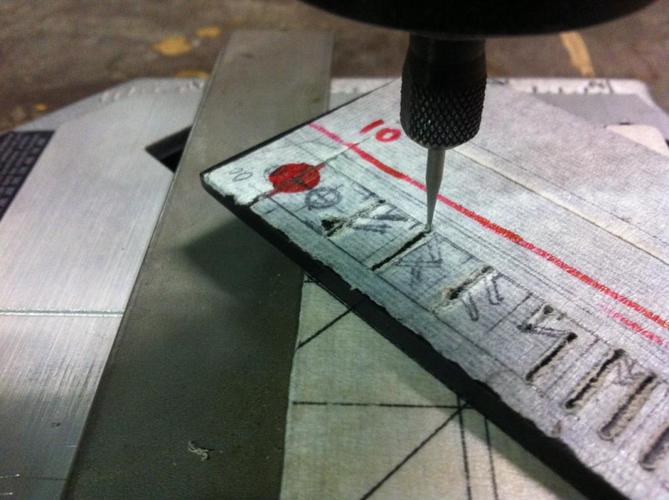
I stuck my piece of horn to the block at the corresponding angles using a small bit of double sided tape
I fitted the 1mm tungsten burr to the dremel,
set the depth gauge stopper on the press to about 1.5mm of movement a bit deeper than the inlay materials so I can shape the scales down to the inlay,
used 1 hand to lower the bit & the other to hold & move the slide block
Attachment 170883
re-adjusted the guide bar to suit each vertical inlay line as I moved across
then removed the horn from my block rotated to the next angle tapped back to the slide block
& repeated for the rest

 Saved,
to shave another day.
-
-
06-26-2014, 03:10 AM #2Senior Member
- Join Date
- Jun 2013
- Location
- Gladstone QLD AUSTRALIA
- Posts
- 3,245
Thanked: 804
it was a bit of fiddling with getting the lines right measuring each time & making sure the guide was straight,
but I now have straight lines engraved into the scales a damn site better than my free handed attempts
now the continued fiddling with the inlay pieces, that will eventually be epoxied into the horn then the usual shaping etc can proceed
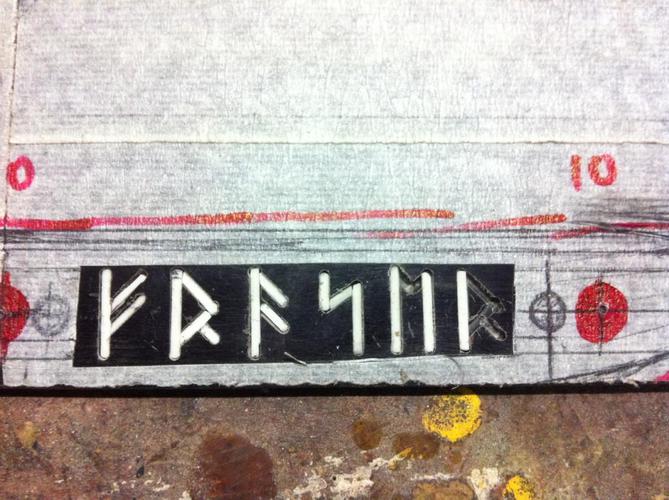
The first test run still some refining of the symbles etc but should work I think
happy shavingLast edited by Substance; 06-26-2014 at 03:14 AM.
Saved,
to shave another day.
-
06-26-2014, 03:18 AM #3Senior Member


- Join Date
- Nov 2012
- Location
- Across the street from Mickey Mouse in Calif.
- Posts
- 5,320
Thanked: 1185
Good thinking. Looks like it worked out fine. He is going to love it !
Substance likes this.Good judgment comes from experience, and experience....well that comes from poor judgment.
-
06-26-2014, 03:19 AM #4Senior Member


- Join Date
- Dec 2010
- Location
- South Florida
- Posts
- 13,530
Thanked: 3530
This is great work,,, beyond me though, I got lost on the 3rd picture.
I can't wait to see the finished product,,,,,Substance likes this.
-
06-26-2014, 03:31 AM #5Senior Member
- Join Date
- Jan 2011
- Location
- Roseville,Kali
- Posts
- 10,432
Thanked: 2027
Lookin good, is that a Tattoo on your arm?
CAUTION
Dangerous within 1 Mile
-
06-26-2014, 03:38 AM #6Senior Member

- Join Date
- Dec 2012
- Location
- Perth, West Australia
- Posts
- 1,431
Thanked: 497
Great work mate !!....I can appreciate the difficulty factor in this.
You're lucky though, his name is in runes, the inlays are all "straight", I guess "curves" would be far more difficult ?
This tutorial throws up all sorts of possibilities....Thanks for posting Substance likes this.http://straightrazorplace.com/workshop/18504-welcome-workshop-how-do-i-where-do-i-what-do-i-answers-here.html
-
06-26-2014, 04:08 AM #7Senior Member

- Join Date
- May 2014
- Location
- Easley, SC, USA
- Posts
- 1,861
Thanked: 480
Nice Work. I've done wood inlay and can appreciate what you are going through.
They make x-y adjustable drill press vices that you can use as an engraving jig. I haven't seen one for a dremel, but they probably exist.Substance likes this.Some people never go crazy. What truly horrible lives they must lead - Charles Bukowski
-
06-26-2014, 04:35 AM #8Senior Member
- Join Date
- Jun 2013
- Location
- Gladstone QLD AUSTRALIA
- Posts
- 3,245
Thanked: 804
no not nime this is his last name "Fraser", I got he daughter to snap it for me on the sly as it will be a suprise for him Originally Posted by pixelfixed

I have portraits of the bride & my 2 daughtersLast edited by Substance; 06-26-2014 at 04:46 AM.
Saved,
to shave another day.
-
06-26-2014, 04:39 AM #9Senior Member
- Join Date
- Jun 2013
- Location
- Gladstone QLD AUSTRALIA
- Posts
- 3,245
Thanked: 804
the straight lines was why thought I would give it a try Originally Posted by bongo
I tried to do a free hand spiral in horn I wanted for my Bruno blade when I did it, but gave it up as a bad joke for the inlay and the cut outs LOL
more thinking required for that one stillbongo likes this.Saved,
to shave another day.
-
06-26-2014, 04:59 AM #10Senior Member
- Join Date
- Nov 2012
- Location
- Across the street from Mickey Mouse in Calif.
- Posts
- 5,320
Thanked: 1185
The Engraver's Cafe - The World's Largest Hand Engraving Community
You have to create an account to see the pics but well worth it if you can pass the test. I made a lucky guess and got in :<0)Substance likes this.Good judgment comes from experience, and experience....well that comes from poor judgment.
-


 Reply With Quote