
Results 91 to 100 of 112
 122Likes
Thread: ebay scales
 LinkBack URL
 About LinkBacks
-
02-10-2015, 03:36 AM #91Senior Member


- Join Date
- May 2014
- Location
- Canberra, Australia
- Posts
- 257
Thanked: 43 i kinda bounce between projects, to what ever grabs my attention at the time, so i have a quite a few on the go. that in-between work and all the other bits of life
 Originally Posted by RezDog
 RezDog likes this.
-
02-10-2015, 06:40 PM #92
Same here......................I have so many blades needing scales. I have plenty of scale material, just need the time to do it. Originally Posted by RezDog
-
03-30-2015, 11:48 AM #93Senior Member
- Join Date
- May 2014
- Location
- Canberra, Australia
- Posts
- 257
Thanked: 43
its been a long while since any progress! but here is some! i hope there are a few people still watching the thread
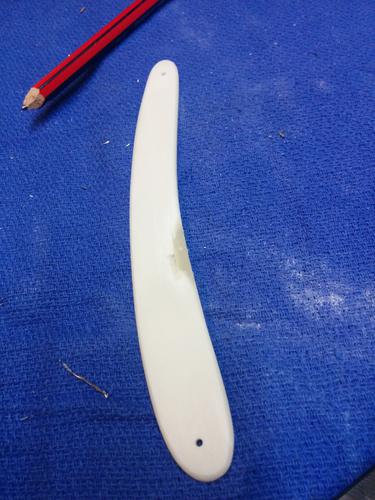
this is the scale that i splintered a bit while shaping it. i used epoxy mixed with some of the powder of the scales from when i was thinning them down. there is a little colour difference but the rest of the fit is pretty seamless.
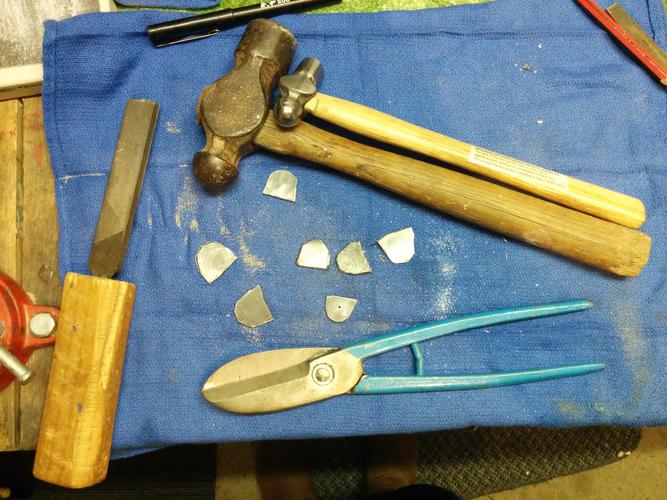
these are the lead wedges cut out. from here i drilled the holes in the wedges and then superglued them onto one of pair for each set of scales. (also made sure that the razor fitted in!) then cut them even closer to the scale shape and then filed them to fit.
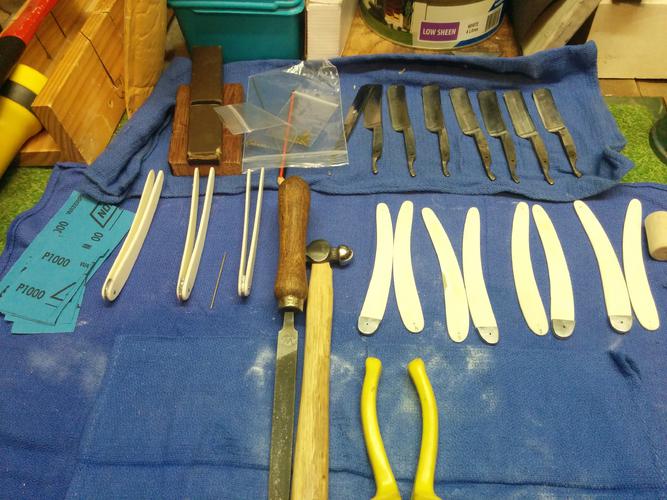
i sanded each of the scales with 800grit and started to pin them together with silver nickel. i rubbed dubbin on the inside of the scale as a part water proofing and part protectant.
all pinned up, filed the wedges to fit exactly and sanded the wedges to 800
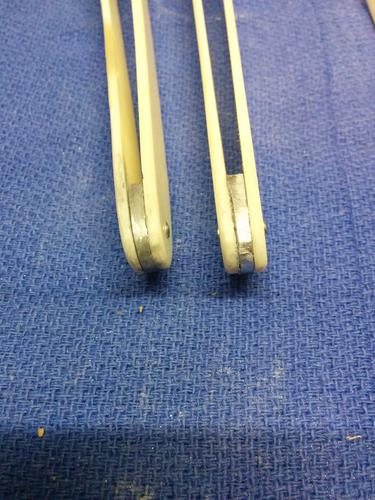
this is 1000 grit on the left and 800 grit on the right. currently hoping that the grey marks from the lead on the scales themselves will come off as i continue sanding.
from here i need to continue sanding them all to 1000 grit, then all of them to 2000 grit and then i will use blue magic polish on them to make the shine! (don't worry i have been running heaps of tests on the spare bone wedges that came with them)
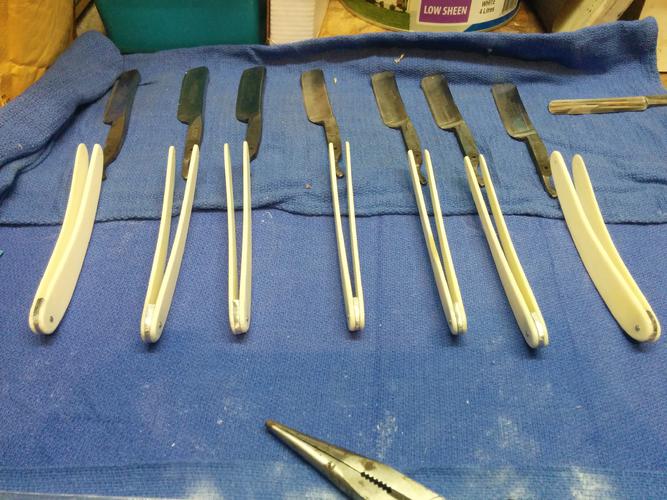
i have done absolutely nothing on the razors themselves. my goal is to have them shiny but not immaculate, i like to see some of the pits and wear on them (just shined up)Last edited by dooey; 03-30-2015 at 12:05 PM.
RezDog likes this.
-
03-30-2015, 12:43 PM #94Senior Member


- Join Date
- Jun 2013
- Location
- Gladstone QLD AUSTRALIA
- Posts
- 3,245
Thanked: 804
Looking good Dooey
The lead should sand off alright
I usually leave the lead wedge a fraction bigger and peen it to fit the scales tighter then sand the final shape to match the scaleSaved,
to shave another day.
-
03-30-2015, 04:30 PM #95
It should be ok as long as the splintered side is on the inside. It shouldn't be very noticeable that way.
-
03-31-2015, 01:44 AM #96Senior Member
- Join Date
- May 2014
- Location
- Canberra, Australia
- Posts
- 257
Thanked: 43
Unfortunately not. I made it worse than the picture that I put up when I first tried to fix it so it is actually through both sides of the scale. Not perfect but it will do. Originally Posted by engine46
I've tried to do something similar, I'm sanding down to fit now. They look nice, I think the lead should clean off, even at 1000 grit.
-
03-31-2015, 04:02 AM #97Senior Member


- Join Date
- Feb 2013
- Location
- Haida Gwaii, British Columbia, Canada
- Posts
- 14,397
Thanked: 4821
There does not look like a lot of taper on the wedges, whack is not important if there is not a lot of taper on the razor tangs. Have you done a test fit with the blades using machine screws? You have come a long way on this project. Some take a little longer to finish than others, and this is a pretty good sized project. Thanks for the update!
engine46 likes this.It's not what you know, it's who you take fishing!
-
03-31-2015, 09:13 PM #98Senior Member
- Join Date
- May 2014
- Location
- Canberra, Australia
- Posts
- 257
Thanked: 43
Many many test fits. Test fit adjustment test fit adjustment test fit adjustment. They fit and work. Yeah big project for myself, doubt I will do anything similar for a long long time Originally Posted by RezDog
Substance likes this.
-
03-31-2015, 09:47 PM #99Senior Member
- Join Date
- Feb 2013
- Location
- Haida Gwaii, British Columbia, Canada
- Posts
- 14,397
Thanked: 4821
You are so very close. the end is near. It will be pretty awesome when you have it done. Nice work.
Geezer likes this.It's not what you know, it's who you take fishing!
-
04-01-2015, 11:07 AM #100Senior Member
- Join Date
- May 2014
- Location
- Canberra, Australia
- Posts
- 257
Thanked: 43
Just need the time to!!
MattCB likes this.


 Reply With Quote

