
Results 1 to 10 of 22
 30Likes
Thread: Making a lead wedge (Pic heavy)
 LinkBack URL
 About LinkBacks
-
01-22-2015, 02:42 AM #1Senior Member


- Join Date
- May 2014
- Location
- Canberra, Australia
- Posts
- 257
Thanked: 43 Making a lead wedge (Pic heavy)
So in one of my other projects I struggled with making wedges and then I got told to use lead wedges, things then became much easier. I couldn't find anything in the library for lead wedges so bumbled around a bit and had a few practice runs. Hopefully I might be able to help out anyone else as clueless as myself. Here is a Picture heavy account on how I made a lead wedge.
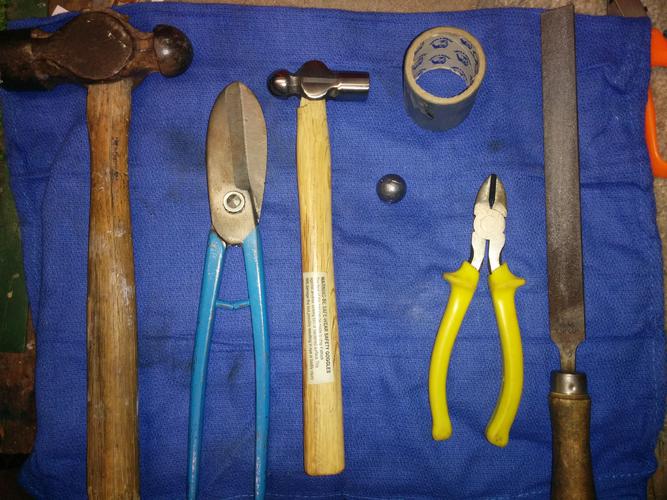
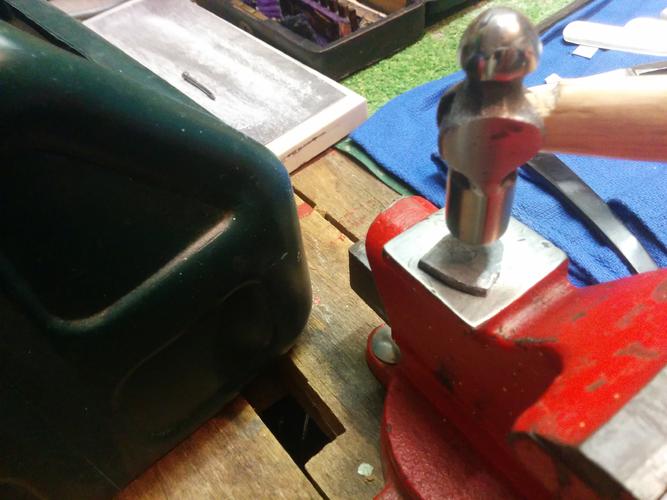
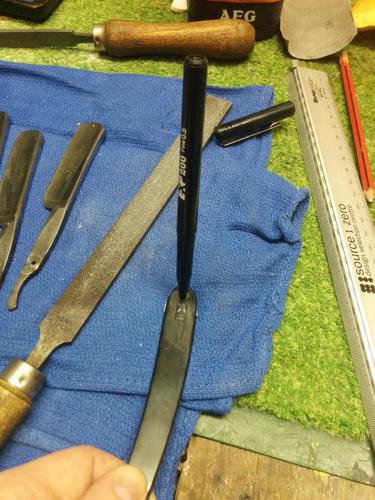
Basic gear I used, hammer, tin snips, peening hammer, duc tape, wire cutters, file, and a lead sinker.
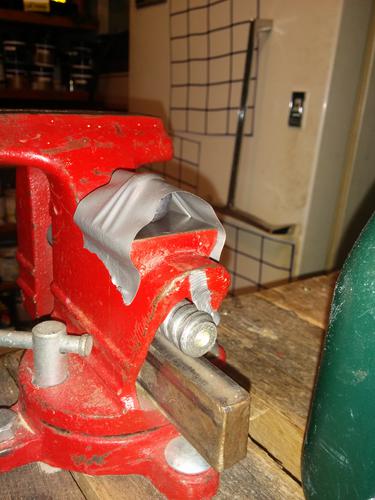
tape the lead sinker to the anvil side of the vice to stop it rolling away
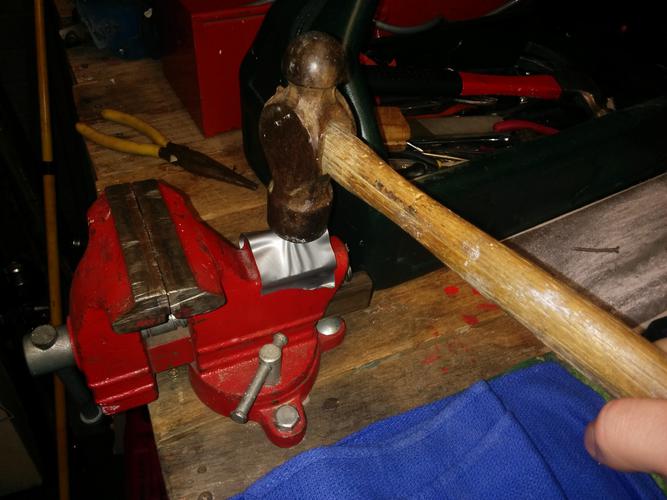
beat the hell out of it with the big hammer!! (the fun part)
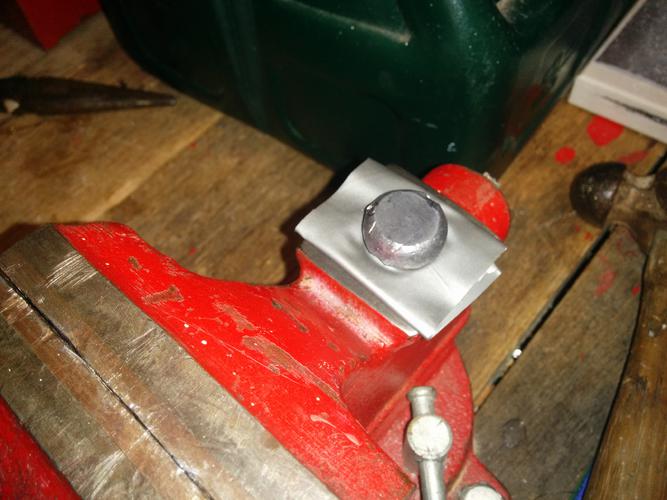
once you have flattened it out a little, double the tape over, so that way you can see what you are doing. continue beating the hell out of it!
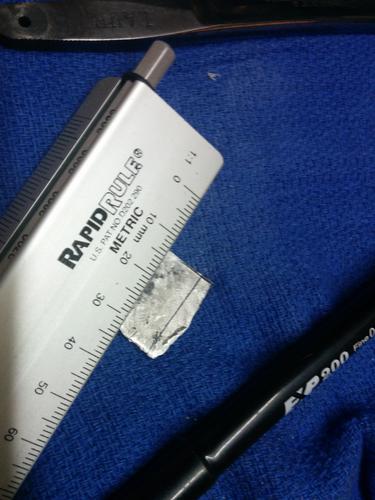
and you end up with a flat disc. don't go to the exact thickness because it will still be thinned out more and its easier to remove (thin) than it is to add more metal.
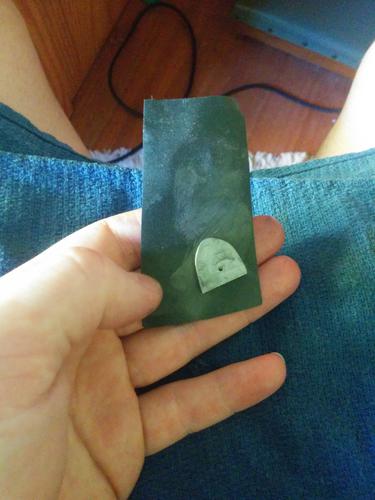
trace around the scale to outline the wedge. felt tips work, sharpies work, pencils not so much.
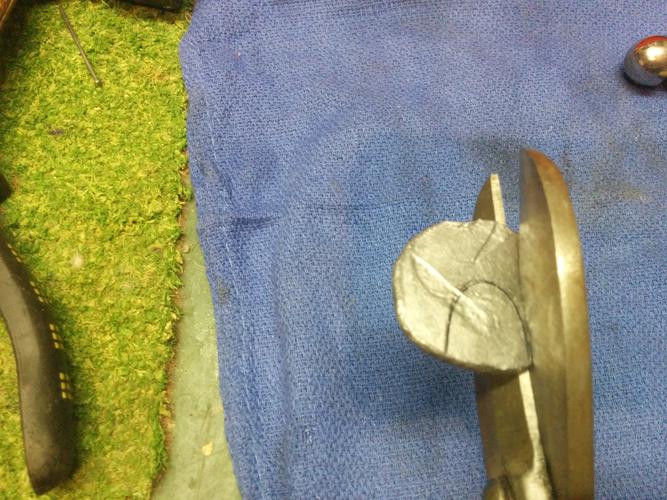
cut out a rough shape with the tin snips (or the wire cutters i found the tin snips were easier and got a flatter cut) you can go pretty much on the line, because it will be tapped out a little more and the wedge will compensate. keep the off cuts you can melt them down for another wedge
using the smaller peening hammer, tape out the angle that you want for the wedge. (note that the wedge will mimic and imperfections in the hammer and the anvil, so have these pretty smooth or you end up with weird dints)
rule a straight edge for the wedge, cut using the tin snips
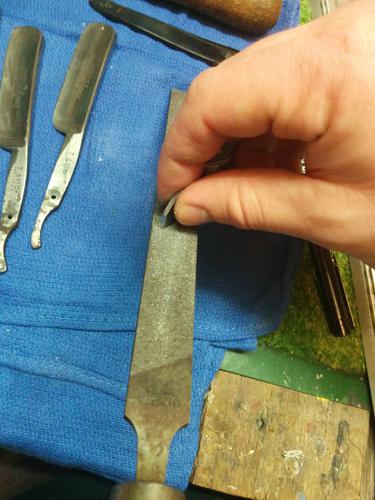
file it flat
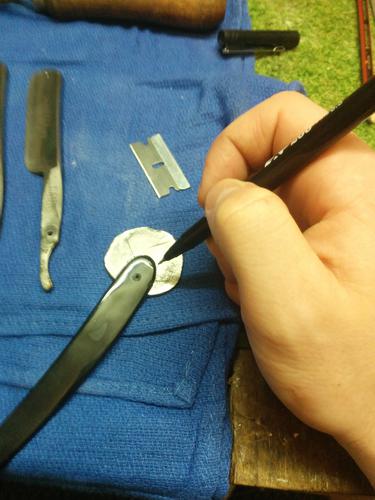
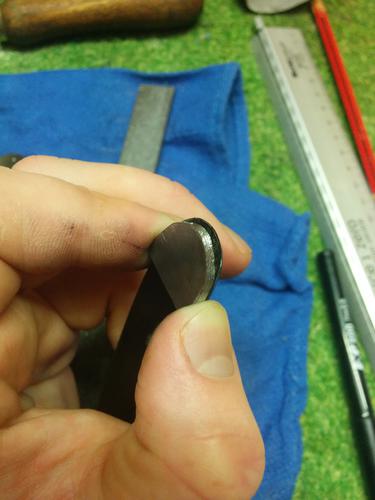
outline the wedge again but this time using a stanley blade (any sharp point does the trick) this leaves a scratch mark the exact size the wedge should be (it can't be rubbed off like the felt tip), help to line everything up and help to know how much more metal you have to remove. cut off excessive amounts and file the rest down to close but not exact.
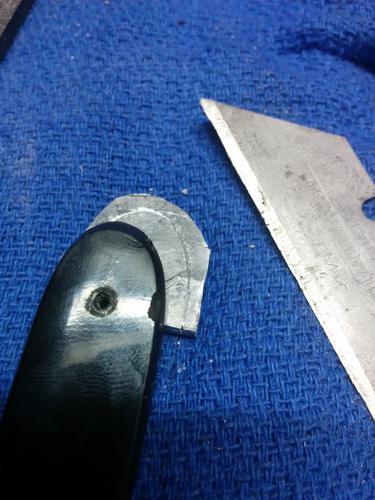
it should be pretty close to the right size, line it up where you want it to fit
mark the hole with the felt tip
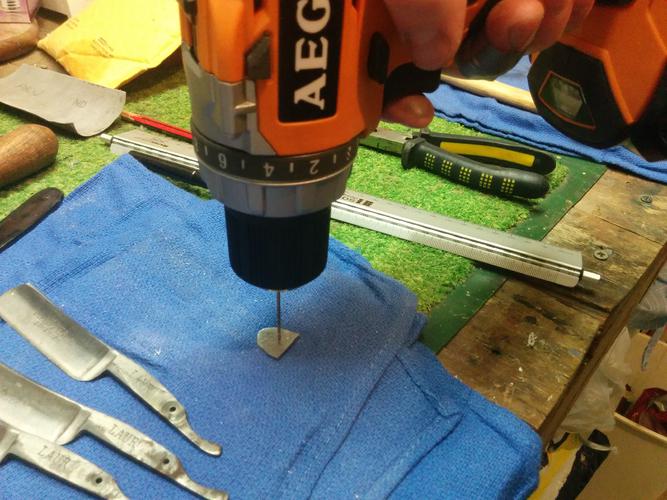
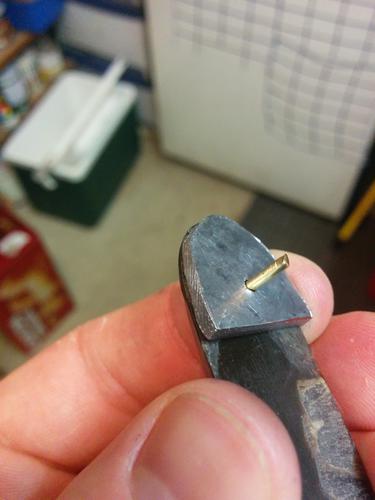
drill the hole out normal pin size (1/16 inch) . you can use the tip of the stanley blade again to put a dint where you want to drill so the drill tip doesn't slip but the lead is soft enough that that doesn't really matter.
-
The Following User Says Thank You to dooey For This Useful Post:
ScienceGuy (01-22-2015)
-
01-22-2015, 02:52 AM #2Senior Member
- Join Date
- May 2014
- Location
- Canberra, Australia
- Posts
- 257
Thanked: 43
line the wedge up on the scales, use test fit screw if you have them ( the ones i had bounced in to the dark corners of the workshop) use double sided tape to secure the wedge to the scales and file down to the scales so it fits perfectly! be careful not to file your scales
take the wedge of the scales and sand the bugger clean, in what ever progression you like. 400 grit is enough to remove file marks, 2000 is a solid polish finish. wet sanding is good because it lessens the flying fine lead particles around.
shine it up with some metal polish i used blue magic. work hard at this because it is a pretty grimy metal.
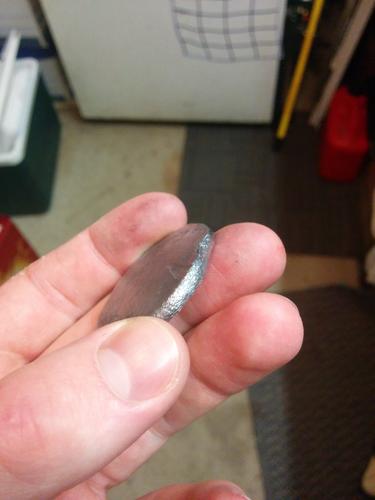
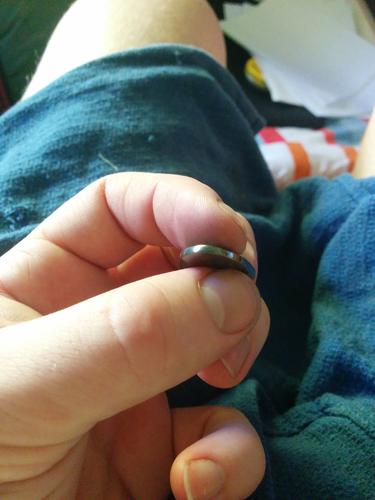
Finally pin that baby in and look at it shine!
whole process for me was about and hour from start to finish (including picture taking time)
Please add and offer suggestions, because i am a novice at this!Last edited by dooey; 01-22-2015 at 02:58 AM.
-
The Following 12 Users Say Thank You to dooey For This Useful Post:
-
01-22-2015, 03:11 AM #3Senior Member


- Join Date
- Feb 2013
- Location
- Haida Gwaii, British Columbia, Canada
- Posts
- 14,451
Thanked: 4829
What an excellent tutorial. I appreciate the extra time it takes. Nice wedges too.
It's not what you know, it's who you take fishing!
-
01-22-2015, 03:30 AM #4Senior Member


- Join Date
- Nov 2012
- Location
- Across the street from Mickey Mouse in Calif.
- Posts
- 5,320
Thanked: 1185
Nice tips. The smashing part is my favorite too :<0)
Good judgment comes from experience, and experience....well that comes from poor judgment.
-
01-22-2015, 03:42 AM #5Senior Member

- Join Date
- Feb 2014
- Location
- Corona De Tucson/Tucson, AZ Area
- Posts
- 270
Thanked: 32
I have been trying to figure out a good way to approach this for a while. Thanks for posting this.
*Insert deep thought/profound statement here*
-
01-22-2015, 03:45 AM #6Senior Member
- Join Date
- Oct 2014
- Location
- Denver, CO
- Posts
- 207
Thanked: 11
Excellent..
-
01-22-2015, 04:42 AM #7Senior Member

- Join Date
- Oct 2010
- Location
- 50 miles west of randydance
- Posts
- 9,685
Thanked: 1354
I like your common sense approach to your problem. I have lead sheet that I melt to make sinkers so my angle of approach is different!

I am surprised that the fear mongers haven't commented yet about the lead. But if you are reasonable in working with it I see no problem.
-
01-22-2015, 04:54 AM #8Greaves is my friend !!!

- Join Date
- Nov 2012
- Location
- N.East OH
- Posts
- 2,297
Thanked: 307
i was thinking the same , it makes me think about all the years of closing lead split shot with my teeth ... Originally Posted by 32t

i have some old duck decoy anchors i use , most of the time i re-use the razors original wedge but if im making a new set i usually get it close , pin it up and het the shape real quick on the belt sander , but i do like your approach and can see where i would use it ..32t likes this.
-
01-22-2015, 05:05 AM #9Senior Member

- Join Date
- Sep 2011
- Posts
- 1,650
Thanked: 1341
I have made wedges like this before, the only thing I would add is to be mindful of the oxidative tendency of the lead you are using. I think many of the old Sheffield wedges were an alloy of lead which did not tend to oxidize easily; some of the wedges I made grew an ugly coating of lead oxide in air after not too long.
sharptonn likes this.
-
01-22-2015, 10:11 AM #10Moderator


- Join Date
- Jul 2013
- Location
- Forest Grove, Oregon
- Posts
- 5,162
Thanked: 1228
Should be in the Library.
gooser likes this."The sharpening stones from time to time provide officers with gasoline."


 Reply With Quote