
Results 1 to 10 of 22
 32Likes
Thread: Travel Strop build
 LinkBack URL
 About LinkBacks
-
08-11-2015, 03:58 PM #1Senior Member


- Join Date
- Apr 2015
- Location
- New Hampshire, USA
- Posts
- 296
Thanked: 83 Travel Strop build
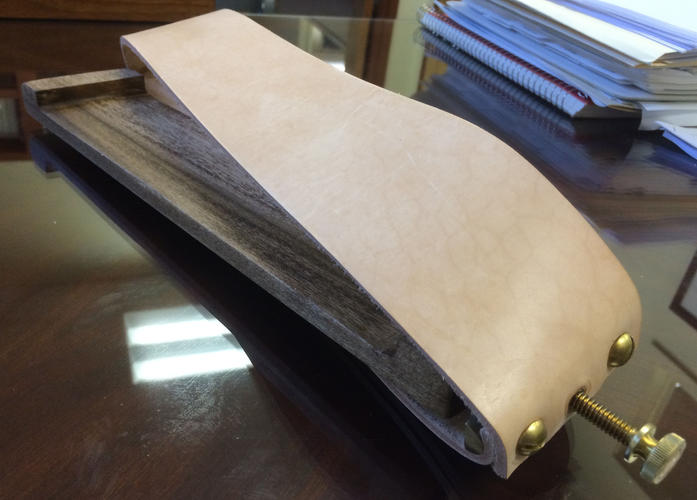
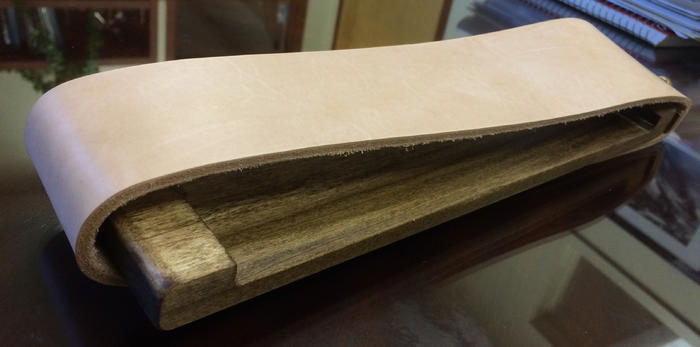
Just finished this travel strop. I saw one on line for around $249 with a cutout for the razor (Wood Straight Razor Case & Leather Paddle Strop | Men's Accessories | Bison Made | Scoutmob Shoppe | Product Detail) by Bison Made and it was very impressive. I really didn't need the cutout as I have a leather pouch for travel for my straight but don't want to throw my SRD English Bridal strop into my suitcase when I travel. I also would rather spend $249 on another straight razor rather than this fine piece of work.
Got some great ideas from http://straightrazorpalace.com/custom-builts-restorations/121881-royal-palmer-weekend-set.html from MikeB52 based on another members recommendation to check it out.
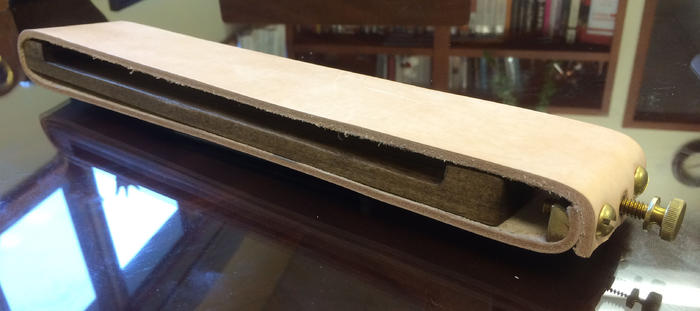
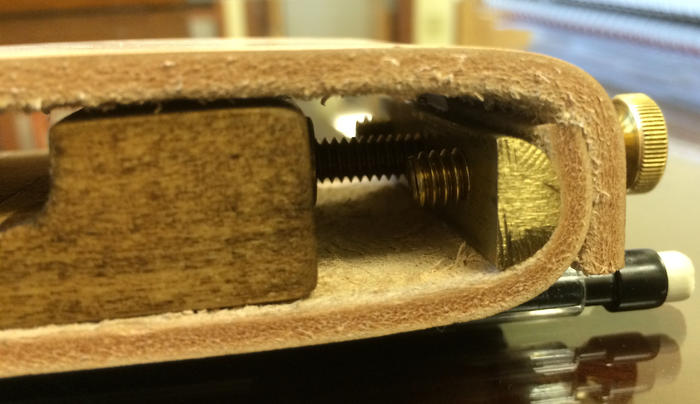
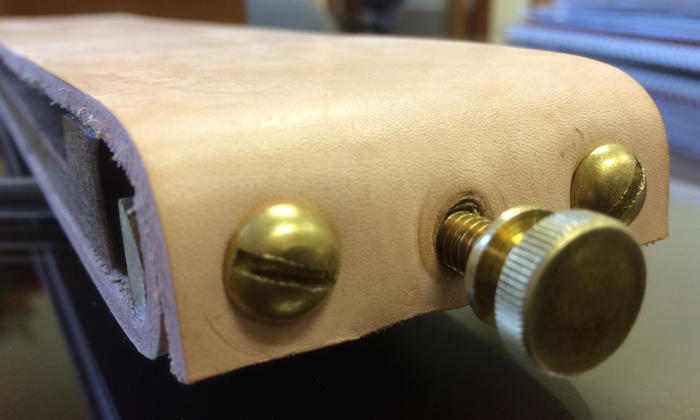
I liked the idea of being able to stretch the leather taut without having to glue it to piece of wood. I can replace it easily if I need to in the future. I liked the brass features of the original but thought the strip of brass or wood for the tightening knob was a little overkill. I opted for a half-round piece of brass and a knurled knob for tightening. There is a brass collet - or cup if you will, set into the wood for the bottom of the tightening screw to sit in while under tension. This keeps the screw from digging into the wood. The wood is a single piece danish oil stained poplar with the middle routed out to provide a little give on the strop while in use - simulating a hanging strop. It also provides a nice pocket for my straight razor in it's leather case. The leather is a strip I found on sale at Tandy Leather. Total cost was about $40.00 with half of that being the leather.
I still have a little finishing to do, trim the screws down that are a little too long and polish the file marks out of the brass. I welcome any and all comments, suggestions and feedback!
Adam
Last edited by aalbina; 08-11-2015 at 07:10 PM.
-
-
08-11-2015, 04:00 PM #2
Thank you for the possibilities! Please post again when you have finished and used the strop for a while.
~RichardBe yourself; everyone else is already taken.
- Oscar Wilde
-
08-11-2015, 04:13 PM #3Senior Member
- Join Date
- Apr 2015
- Location
- New Hampshire, USA
- Posts
- 296
Thanked: 83
I will do that - not much left to do just aesthetics. I will be traveling at the end of the month so it will get a bit of workout. I did try it with my Ralph Aust this morning and didn't notice a difference in the shave from my regular strop so that's a plus. I do tighten it up quite a bit so there is very little give in the strop. I also pull pretty hard on my hanging strop - although it's a 3 inch so I don't really do x-strokes like I have to do on this one. I increased the number of round trips on this little one because it is about half the size of my hanging strop. We'll see how it holds up! Not a bad experiment for $40.00 Originally Posted by Geezer

Adam
-
08-11-2015, 04:21 PM #4Senior Member


- Join Date
- Apr 2012
- Location
- Diamond Bar, CA
- Posts
- 6,553
Thanked: 3215
Nice work, what are the dimensions?
If you paste it, a cardboard sleeve is easy to make and will keep the strop and your clothes clean in your luggage. Just mark the pasted sides, so you do not cross contaminate.
-
08-11-2015, 04:39 PM #5Senior Member
- Join Date
- Apr 2015
- Location
- New Hampshire, USA
- Posts
- 296
Thanked: 83
The wood is 12x2.5, the leather is 2.5 inches wide as well. Add another 1.5 inches for the tensioning screw and OAL is about 13.5 inches. Good idea on the pasting! I'll probably leave it clean - I have a pasted one at home and I don't travel for more than a week at a time so I probably won't need it on the road if I leave with the edge in good shape.
Thanks
Adam
Originally Posted by Euclid440
Geezer likes this.
-
08-13-2015, 01:17 PM #6Senior Member
- Join Date
- Apr 2015
- Location
- New Hampshire, USA
- Posts
- 296
Thanked: 83
I found there was a slight scar in the leather as I was prepping it for use. It feels smooth to my hand (last grit was 2000 in the prep), would it be best to use a different piece? I could probably just flip it over - the other side looks good.
Adam
-
08-13-2015, 02:51 PM #7Senior Member

- Join Date
- Feb 2012
- Location
- West Midlands, UK
- Posts
- 1,263
Thanked: 360
If the scar is just a small indentation then it should not be a problem - if it's a bump or flap, sand it level.
That looks like a nice strop by the way.My service is good, fast and cheap. Select any two and discount the third.
-
08-13-2015, 03:49 PM #8Senior Member
- Join Date
- Jan 2011
- Location
- Roseville,Kali
- Posts
- 10,432
Thanked: 2027
Used to make loom type strops,one thing I would suggest is to chamfer the edges.JMO
MattCB likes this.CAUTION
Dangerous within 1 Mile
-
08-13-2015, 08:43 PM #9Senior Member
- Join Date
- Apr 2015
- Location
- New Hampshire, USA
- Posts
- 296
Thanked: 83
That's great advice. I don't have a lot of leather working tools - is there some easy way to do that?
Adam
Originally Posted by pixelfixed
-
08-13-2015, 09:04 PM #10Senior Member
- Join Date
- Apr 2015
- Location
- New Hampshire, USA
- Posts
- 296
Thanked: 83
OK - great. Yeah it's just a little raised - I sanded it down. Thanks! Originally Posted by UKRob
Adam


 Reply With Quote