
Results 1 to 10 of 33
 123Likes
 LinkBack URL
 About LinkBacks
-
12-26-2015, 02:56 PM #1Senior Member


- Join Date
- Oct 2011
- Location
- Standish, Maine
- Posts
- 816
Thanked: 953 How to make a traditional set of horn scales ... the way I do it.
My last tutorial seemed well received so I thought I'd try another.
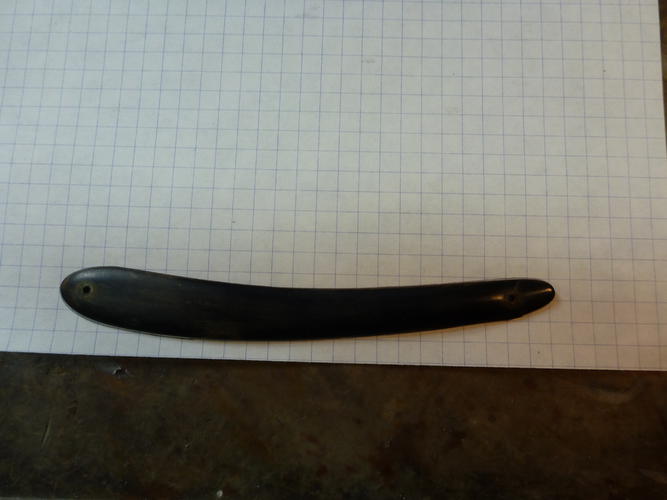
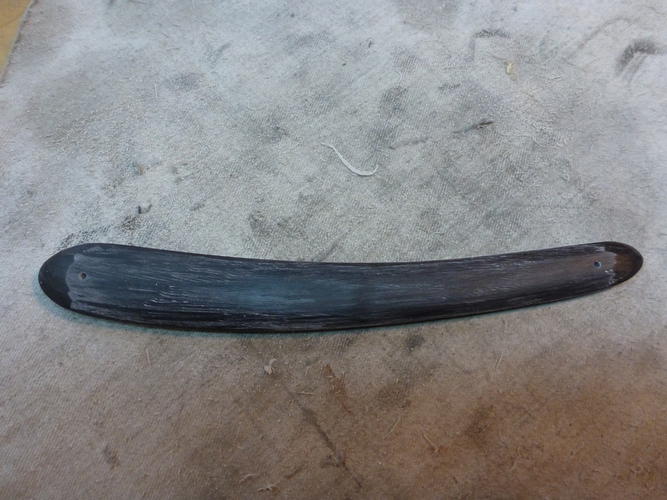
I selected a piece of black horn I received from Masecraft Supply which was nice and flat. It doesn’t always work out that way. If they are not flat on the inside surfaces they need to be. There are a number of ways you can approach this but I recommend you wait until you have band sawed the scales to their basic shape as sometimes they warp after they are cut. I think because some of the natural stress is relieved when it is cut. It’s also easier to flatten 2 small scale halves than a large blank. If I have to flatten the scales then I polish them inside when they are done. It not only gives them a finished look and improves the transparency but I think it helps any water runoff and helps prevent the accumulation of gunk.
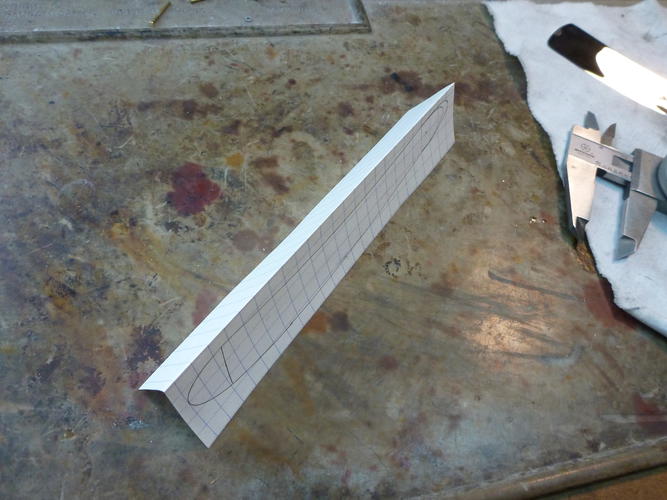
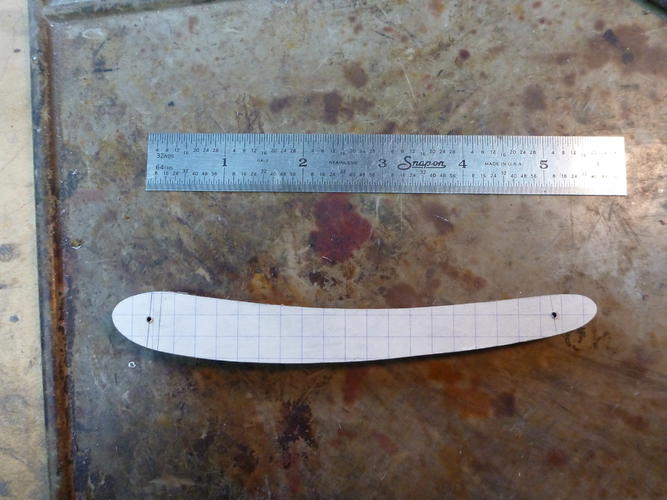
Since this tutorial is geared toward the beginner I’m not going to draw my scales by hand. I have a box full of old scales. I throw just about nothing out. I’ve picked a scale that is pleasing to the eye and not too big or too small for the 13/16 near wedge Wosti.
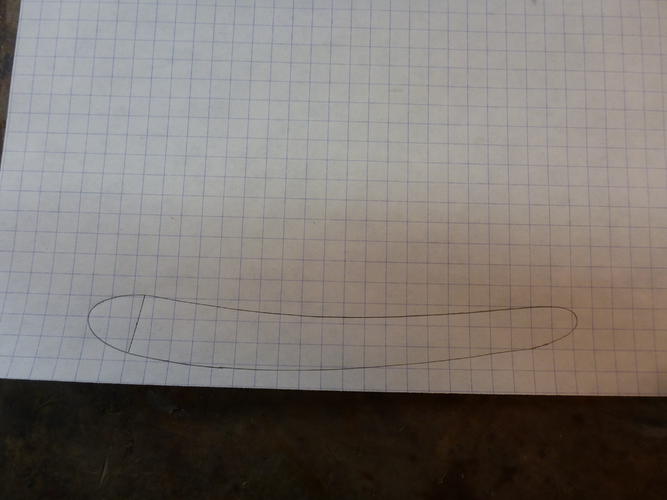
Lay the scale on a piece of paper and trace around. This will have a wedge that is 9/16” long. A very common size based on a large number of wedges I’ve measured. It also looks aesthetically correct. Draw a line on the scales were the wedge will end.
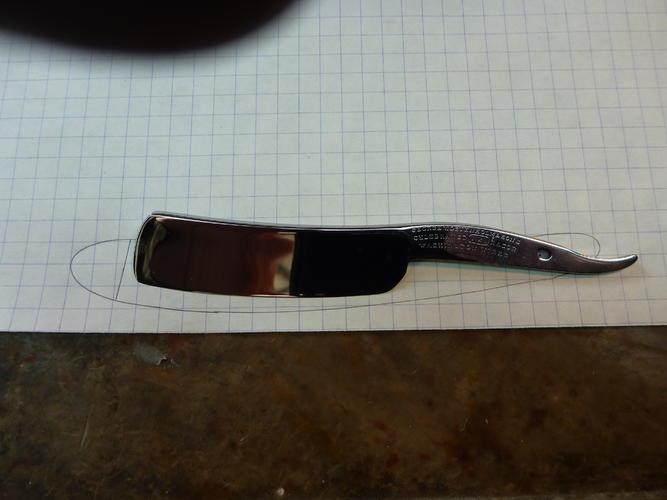
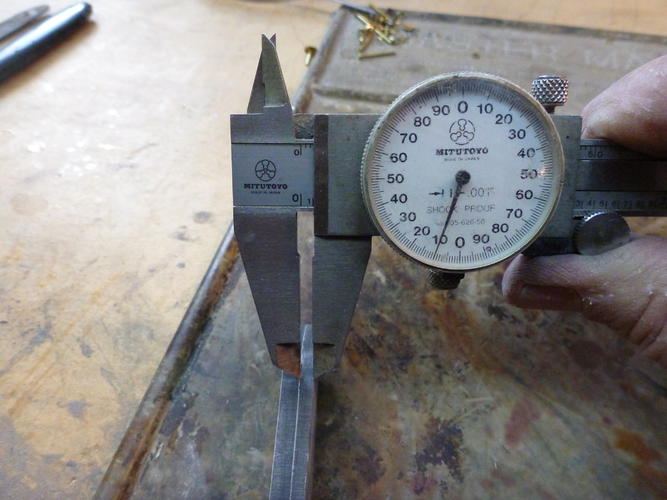
Lay your blade on the drawing. Most folks like the blade tucked up close to the wedge. I like mine 1/16” to 1/8” from the wedge. If you get it closer than that you run the chance the blade will hit the wedge. Some pivot pin holes are large and the blade is going to move around some during the life of the razor. A lot of the older razors had the blade further from the wedge. I recommend you go no more than 1/4".
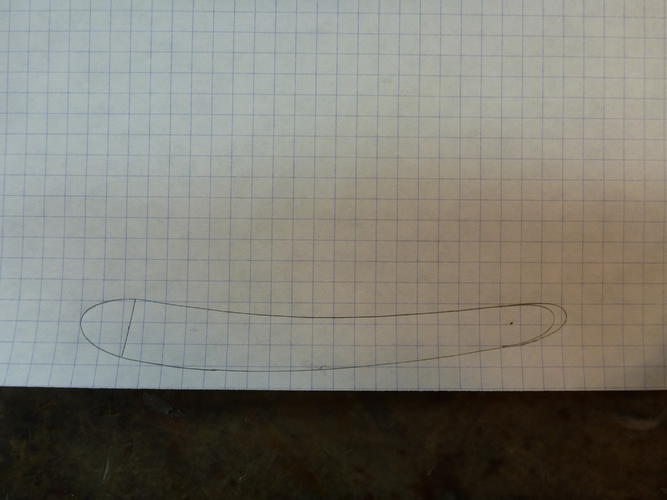
Now that we have located the pivot pin hole on the drawing you can see the scales are too long. A good rule of thumb is the distance ofthe tang hole to the end of the scales is 1/2 the length of the tang. Some tangs are very long so that would be out of place. 1/2” from tang hole to the end of the scales is another good rule of thumb. So slide the pattern scale back until the pivot hole lines up with where you want the pivot pin and redraw the end of the scale.
You need 2 scale patterns so fold the paper in half and cut the pattern out. Take your time, be precise and stay to the inside of the line or the scales will be too fat.
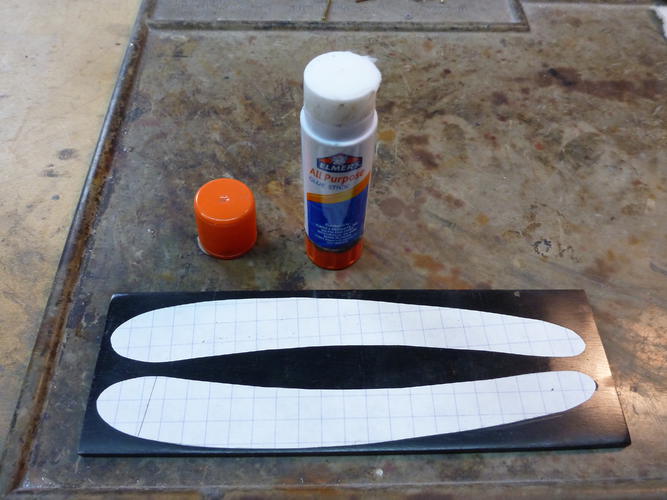
I use an Elmer’s stick glue to glue the patterns to the scale material.
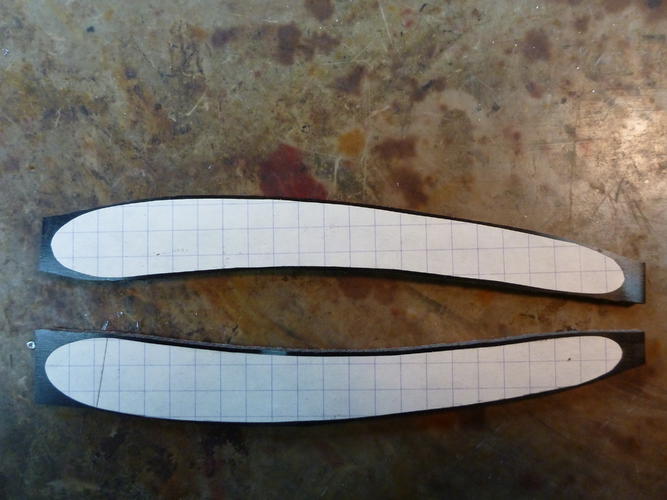
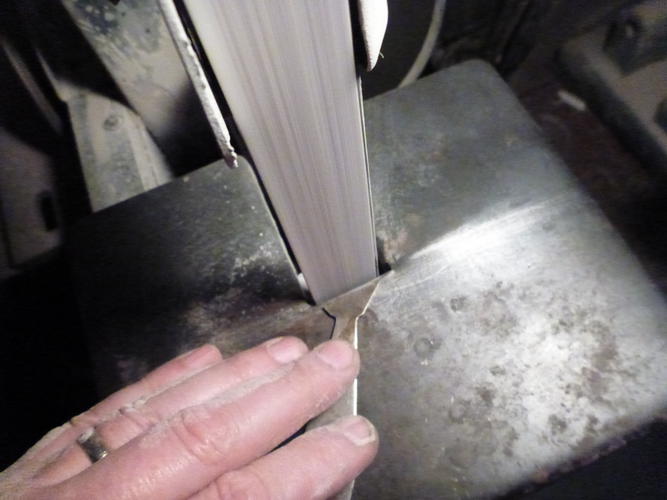
Now over to the bandsaw. Leave about a kerfs’ width as the horn will break out some on the bottom. If you cut right up to the line your finished scales will have broken edges. The 1” x 42” belt sander with 80 grit will make short work of the excess material.
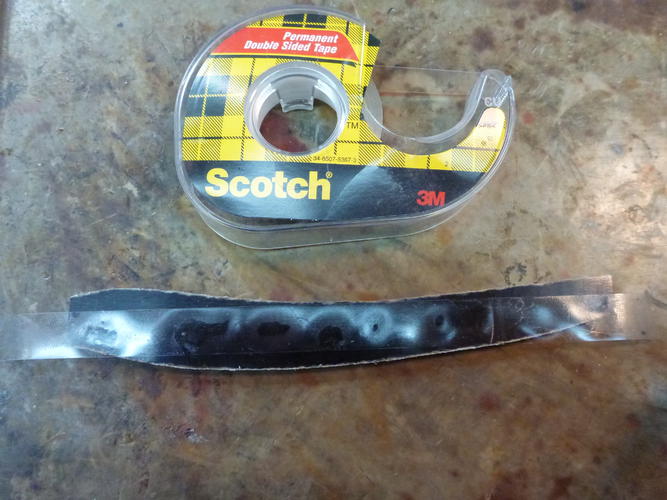
Once the scales are cut out use double sided scotch tape to put them together. Some folks use carpet tape. This is thinner so I like it better. The scales will stay together now until the final polish.
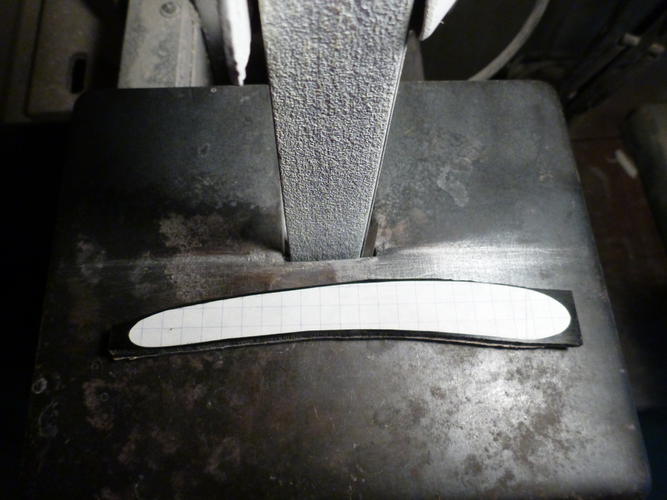
Next it’s over to the belt sander. Take the excess material off right down to the edge of the paper. You don’t want big scales so follow the pattern right to the edge of the paper.
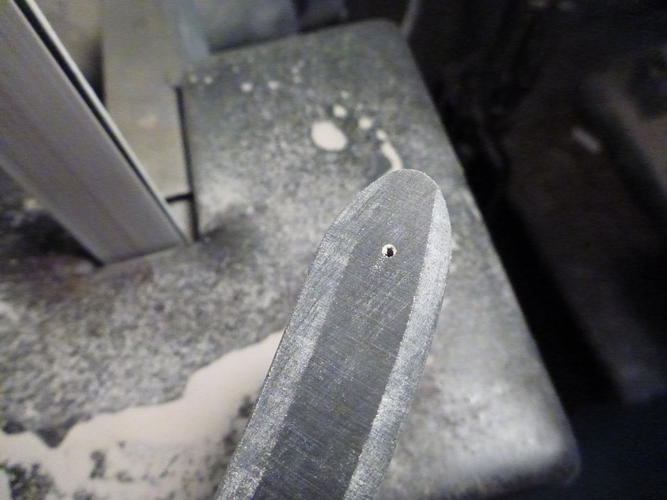
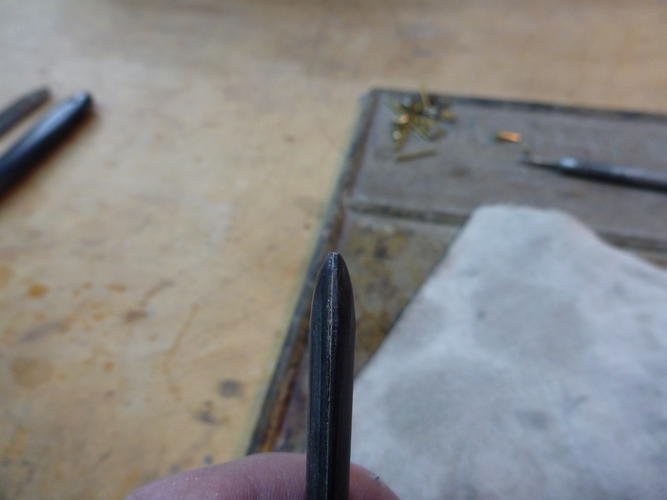
If you are happy with the shape it’s time to drill the pinholes. Mark a point 1/8” behind the edge of where the wedge will be and draw a line. Measure it, divide by 2 to get your pin location. Mark it and use a punch for the drill bit to locate on. I use a scribe and push it into the material rather than a punch and hammer. With some material you might create a crack using a hammer. Use the same method for the pivot pin hole. Get it right. Nothing worse than off center pins.
At the drill press I use a .067 dia. bit. A 5/64 will be OK. I use a tapered reamer later to open the .067 hole more and give the hole some taper. You want the hole bigger than the 1/16” rod so you can close up the scales to the wedge and move things around some to help with centering the blade later.
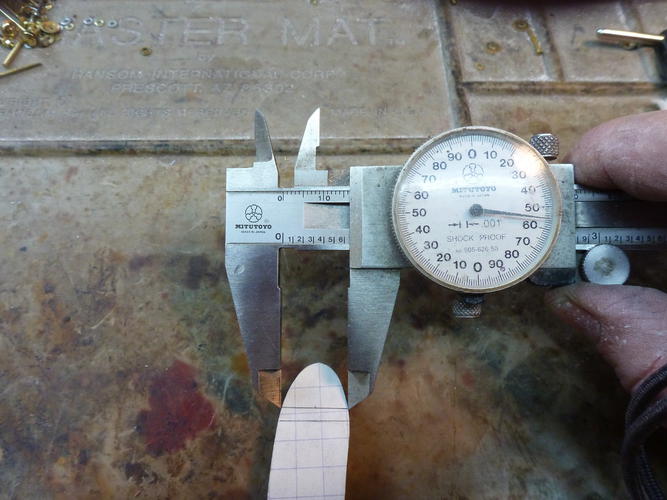
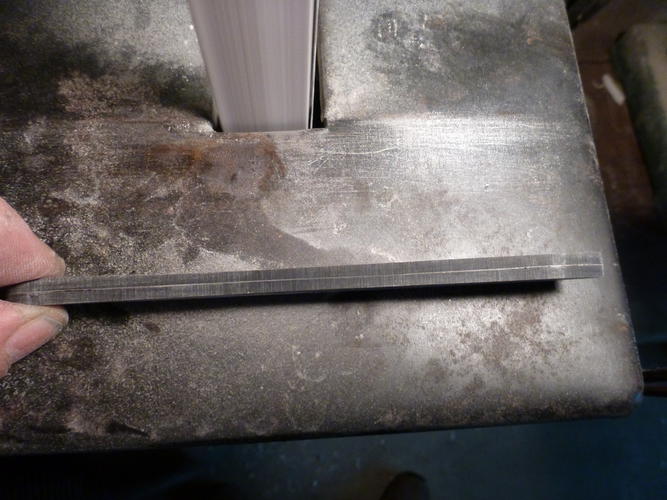
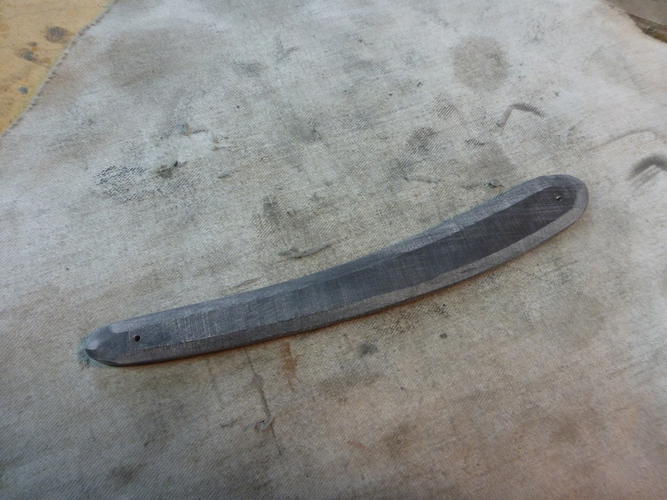
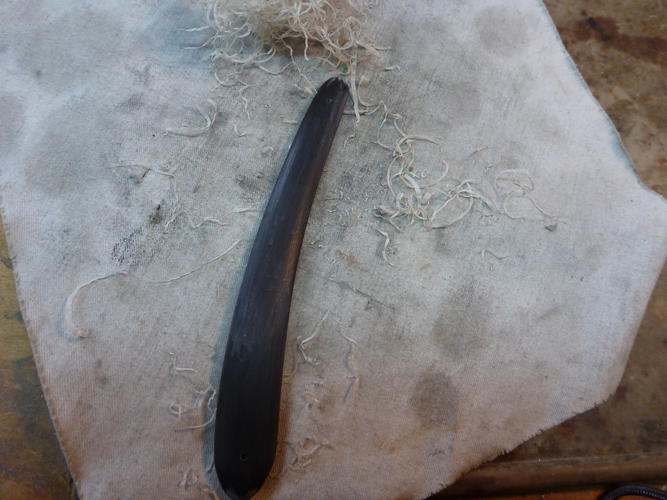
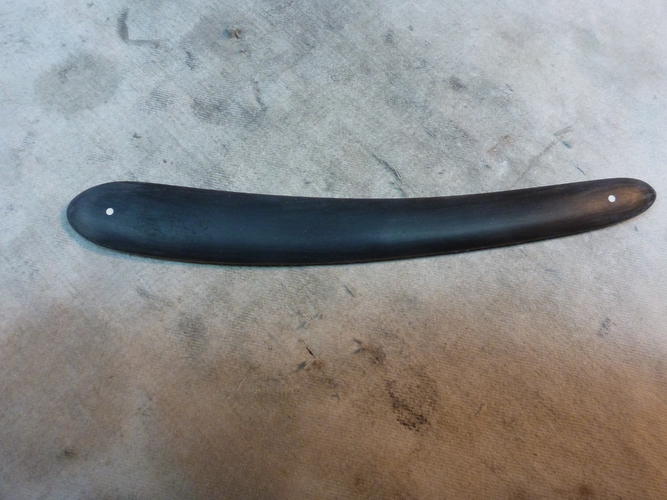
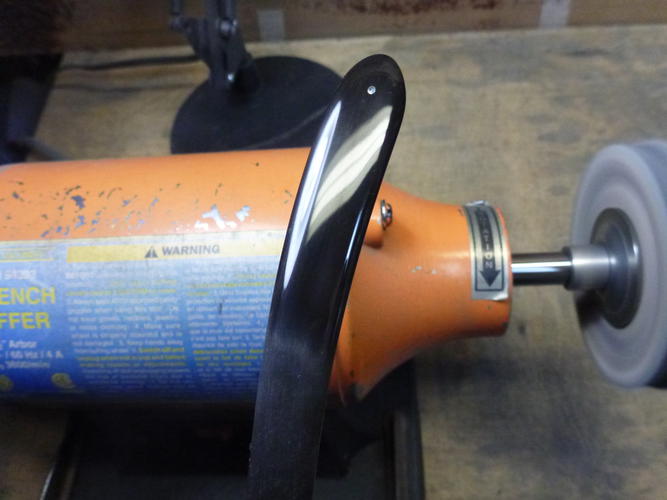
With the holes drilled it's time to thin out the scales on the belt sander. Don’t forget your respirator and I have a dust collector hooked up to my machine. I hold the scales up to the belt and work it back and forth taking no more than 2 passes before I turn it over and make another pass. I take one side down to final thickness at a time. You want no more than .120 thickness. I’ve measured a ton of scales and they average .120 to .110. .120 on a large blade, say a 1” chopper, and down to say .095 on a smaller blade. For this I chose .110 and after finish polish it measured .105. You can thin these out on other types of sanders but I have the most control with this and it’s fast with an 80 grit belt.
Check the scales as you remove material. They will get hot and can warp. If they do, bend them back straight. If they are warped your blade will not center.

This part is sort of difficult to explain. It would be easier in a video. I hold the edge of the scales to the belt at a high angle and make 2 passes along each edge. Cutting to about half the thickness of the scales to the edge.
Last edited by karlej; 12-27-2015 at 12:35 AM.
-
The Following 21 Users Say Thank You to karlej For This Useful Post:
BobH (12-26-2015), celticcrusader (12-21-2018), cheetahmeatpheonix (06-30-2019), ChopperDave (12-26-2015), Euclid440 (12-26-2015), Gasman (04-12-2020), Geezer (05-24-2016), HCpawpaw (02-25-2017), markbignosekelly (12-26-2015), Matheus (12-27-2015), MattCB (12-26-2015), MikeB52 (12-26-2015), Phrank (12-26-2015), Raol (12-26-2015), sharptonn (12-26-2015), Substance (12-27-2015), Thug (12-26-2015), tinkersd (02-01-2017), Walterbowens (12-27-2015), Willisf (12-26-2015), xiaotuzi (08-04-2016)
-
12-26-2015, 03:24 PM #2Senior Member
- Join Date
- Oct 2011
- Location
- Standish, Maine
- Posts
- 816
Thanked: 953 How to make a tradition set of horn scales ... the way I do it. PART 2
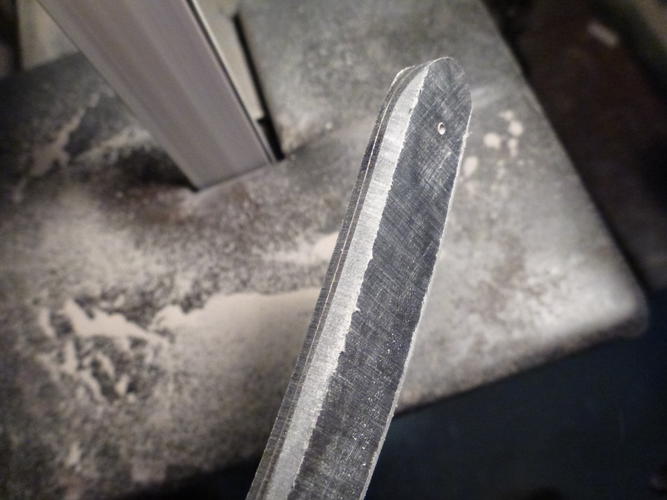
The next pass is one each at about 45 degrees which meets up with the line of the previous cut.
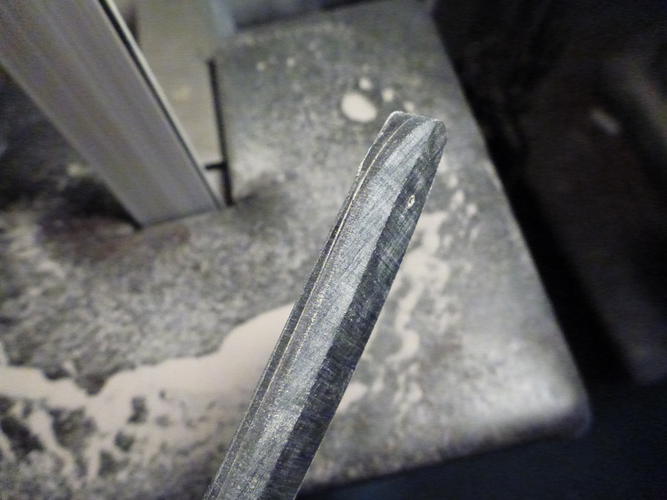
Now back to the edge again at a high angle as before going as close to the edge as you dare say within .010 but do not go over the edge. You will ruin the finished lines of the scales. It can be corrected but it takes more work. The last pass around the scales are almost flat against the belt.

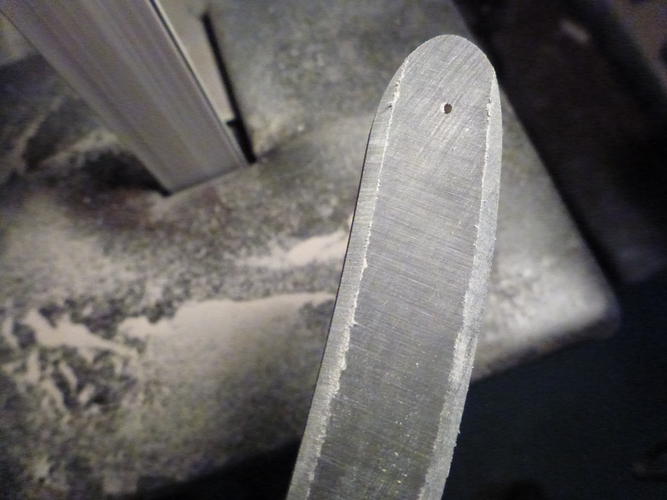
Lastly dress the ends down tapering from just behind your pin holes just up to the edge. As before do not go over the edge or you will destroy the lines of the scales.
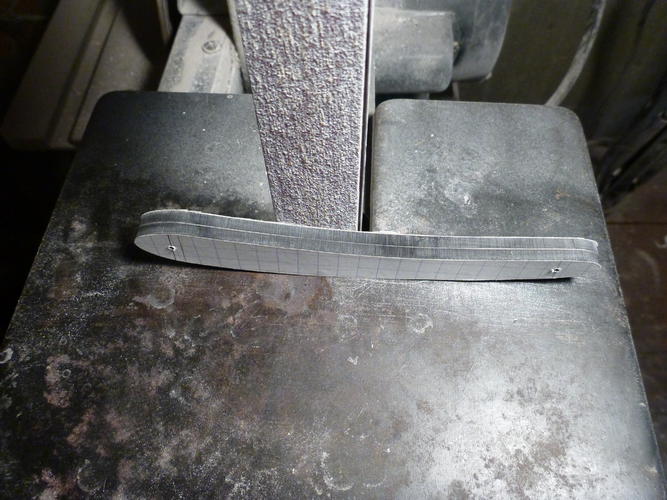
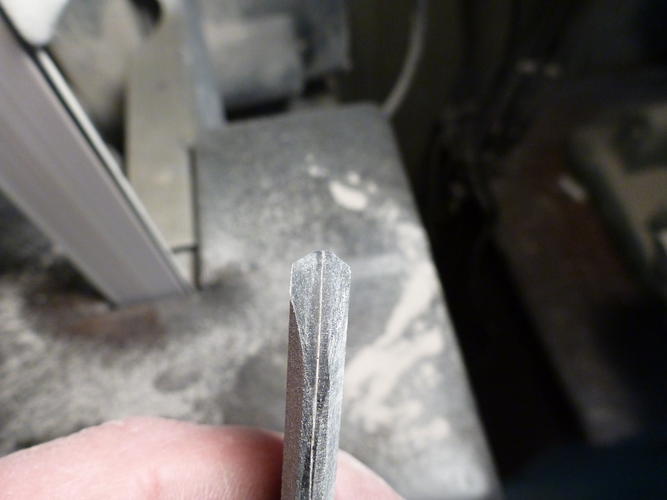
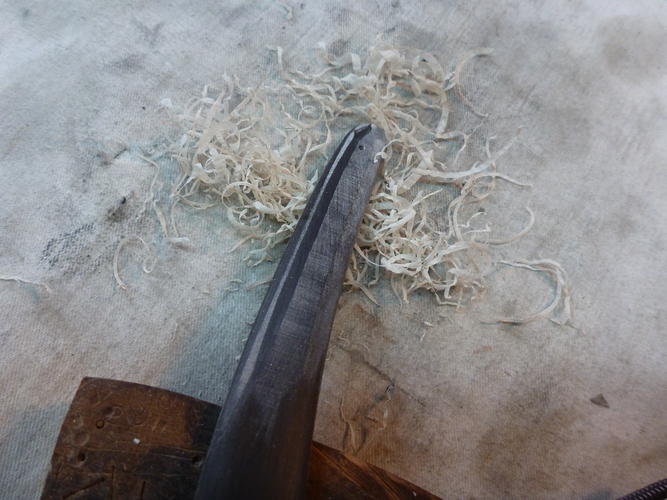
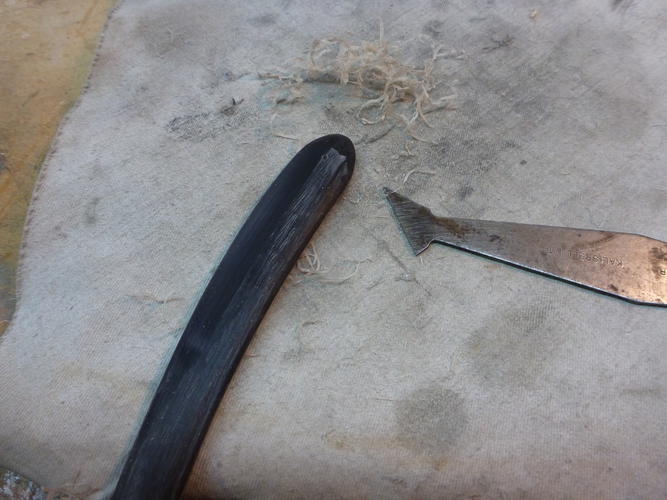
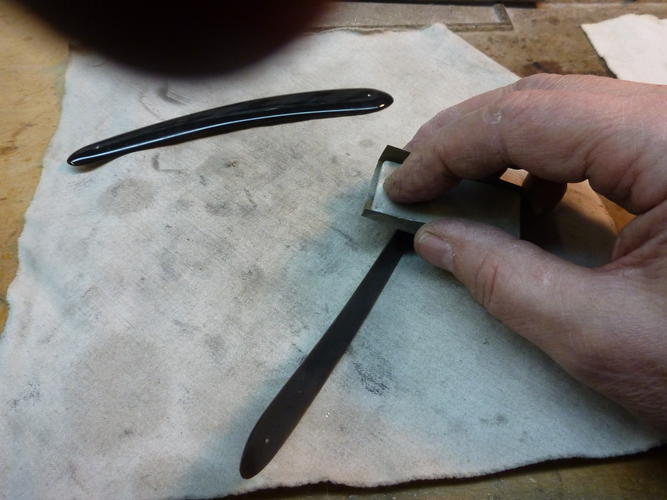
This next step is a real time saver and saves a ton of sanding. I use a scraper to shape the scales at this point. A quick touch on the belt sander creates a burr on the scraper’s edge that cuts smooth and efficiently.
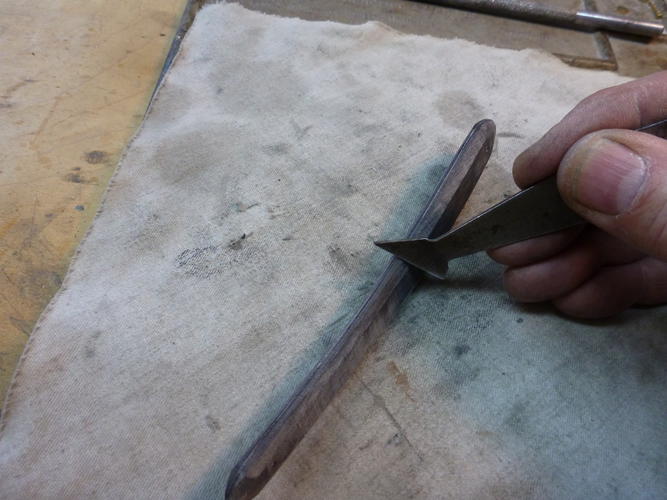
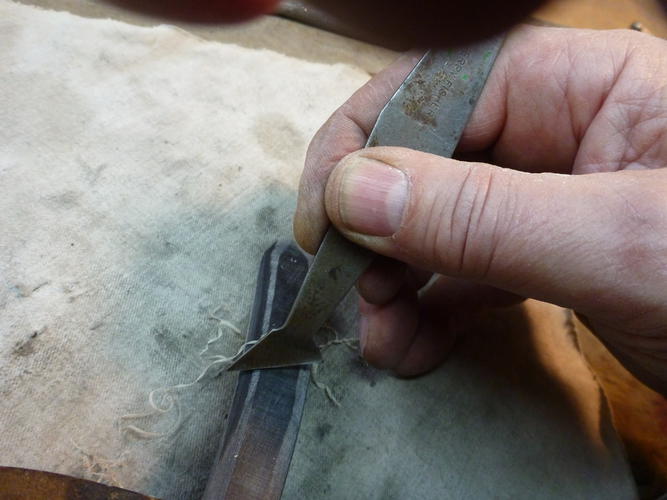
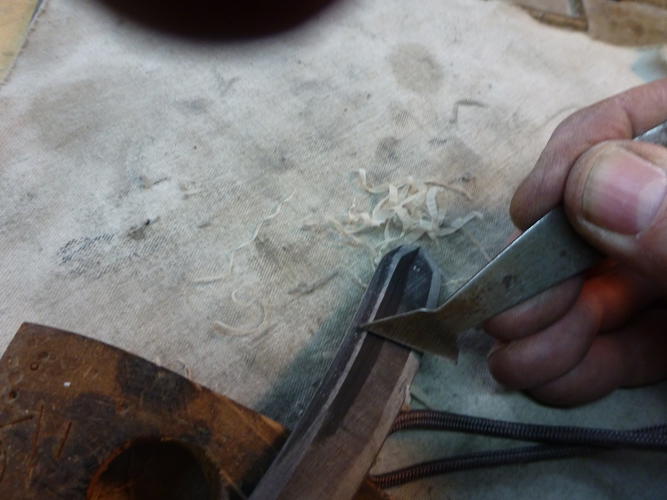
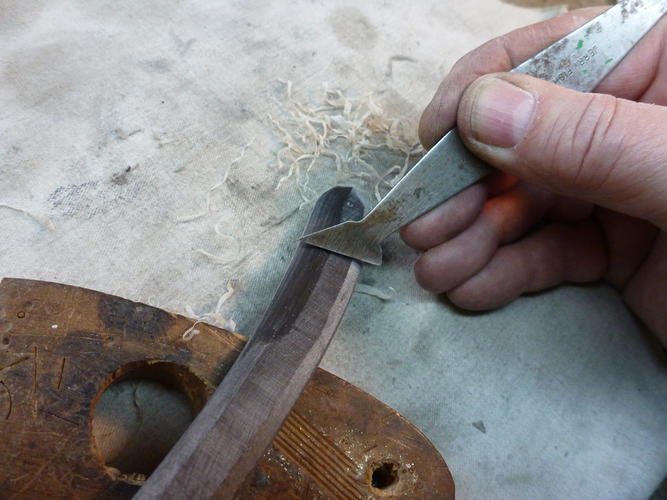

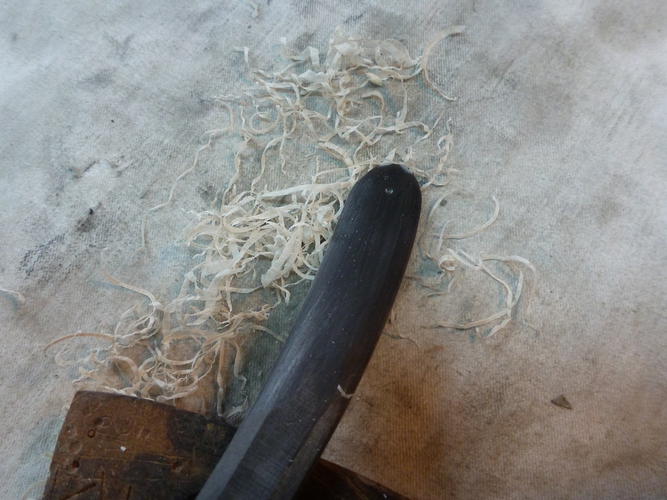
Before there was sandpaper this is what the old timers used. As you can see in the photo, I do half a scale side at a time working from the edge toward the center. Don’t go over the edge. We are working the facets created by the sander into a gradual curve.
-
The Following 21 Users Say Thank You to karlej For This Useful Post:
1oldDago (09-16-2016), BobH (12-26-2015), celticcrusader (08-05-2019), cheetahmeatpheonix (06-30-2019), ChopperDave (12-26-2015), Ernie1980 (12-26-2015), Euclid440 (12-26-2015), Gasman (04-12-2020), Geezer (05-24-2016), markbignosekelly (12-26-2015), MattCB (12-26-2015), MJC (12-27-2015), Phrank (12-26-2015), Raol (12-26-2015), sharptonn (12-26-2015), Substance (12-27-2015), Thug (12-26-2015), tinkersd (02-01-2017), Walterbowens (12-27-2015), Willisf (12-26-2015), xiaotuzi (08-04-2016)
-
12-26-2015, 03:54 PM #3Senior Member
- Join Date
- Oct 2011
- Location
- Standish, Maine
- Posts
- 816
Thanked: 953 How to make a traditional set of horn scales ... the way I do it. PART 3
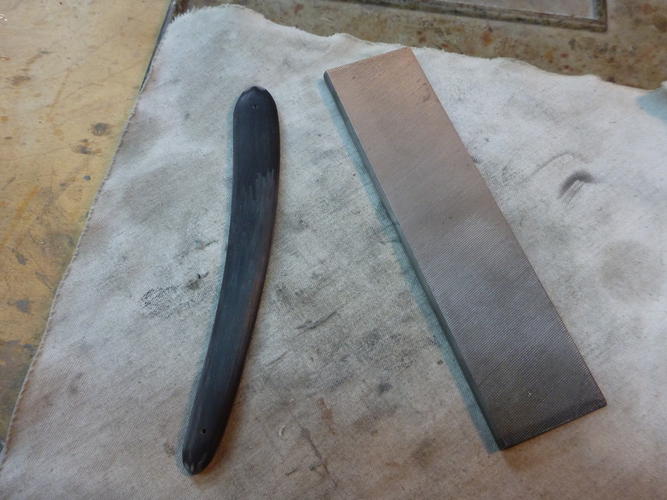
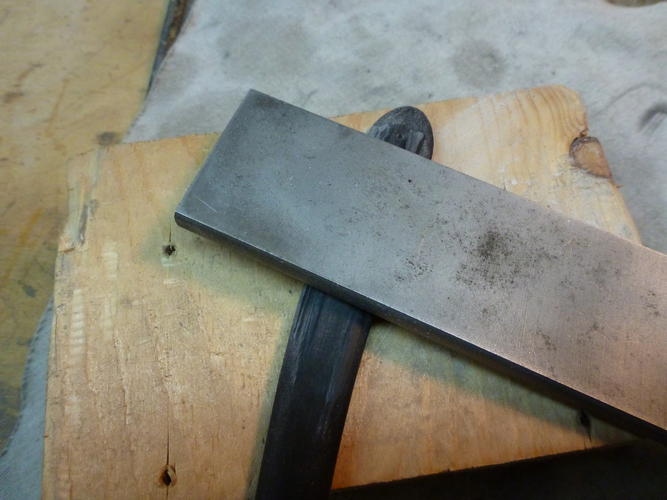
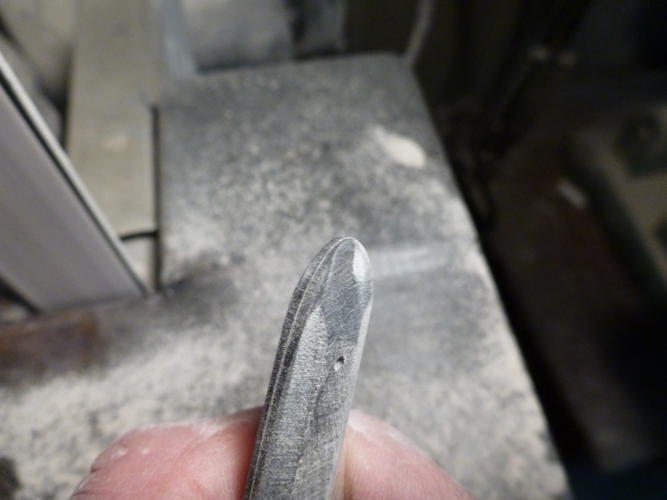
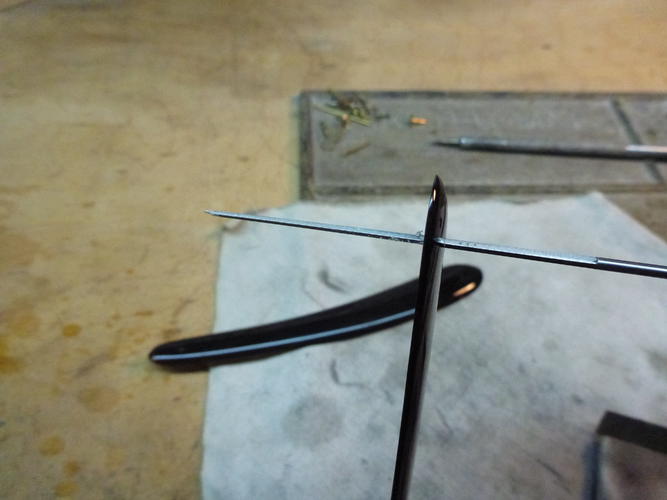
With the scales sort of smoothed up I use a single cut draw file (any single cut file will do) working along the length of the scales about half a side at a time like with the scraper. This draw filing will straighten out any high/low spots in the scales created by the belt sander. You can easily see these in the photos once you start filing because you scraped the scales smooth.
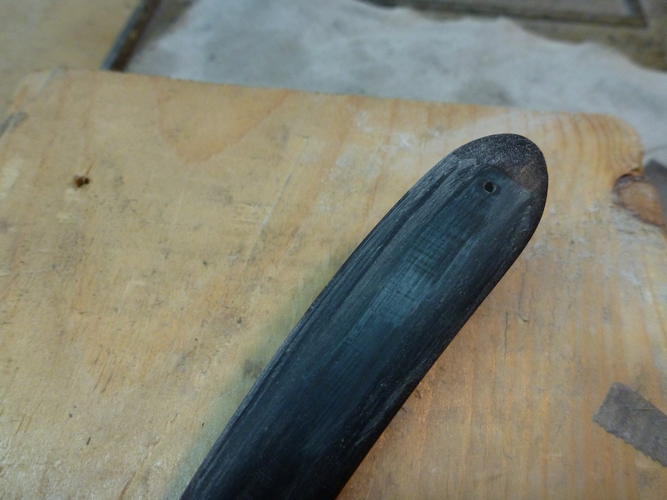
Once the draw filing is done use the file to shape the ends of the scales. Work from just behind the pin hole to the edge. Once again don’t go over the edge. You want a long gradual line here not just an abruptly rounded over end. Now scrap the scales a second time to remove all the file marks. When finished you should have nice smooth true surfaces. This is much faster than sanding and you do not have to contend with removing deep scratches.
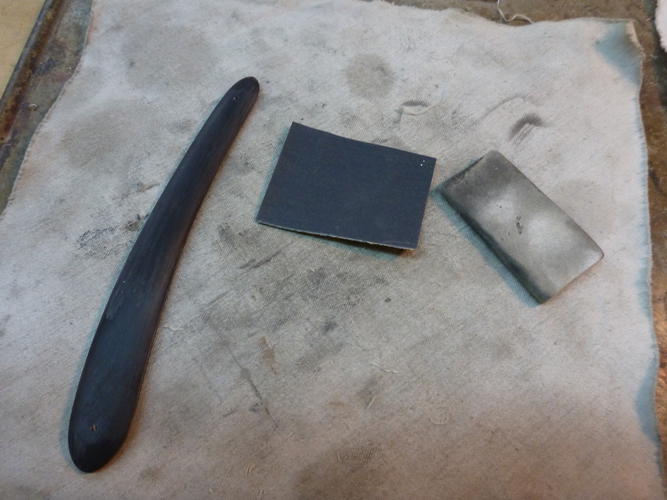
The sanding is next. You only need 4 grits. Start with 320 wet/dry paper. No need for courser. The scraper cuts very smooth. I choose wet/dry because the glue holding the grit is better and it cuts faster. I use it dry. You might want to wear a dust mask during this. You can do it wet but I don’t like the mess. The paper is backed with a piece of hard felt. Don’t use your fingers. You can create waves in the surface because your fingers are too soft. Plus it’s hard on the fingers. Sand lengthwise on the scales. Now you can sand to the very edge of the scales to remove the last of the belt sanding marks. Don’t spend any more time on the very edges than what is necessary to remove the sanding marks. You do not want to change the lines of the scales you’ve worked so hard to keep. Like a pretty woman everything is curves. No straight lines.
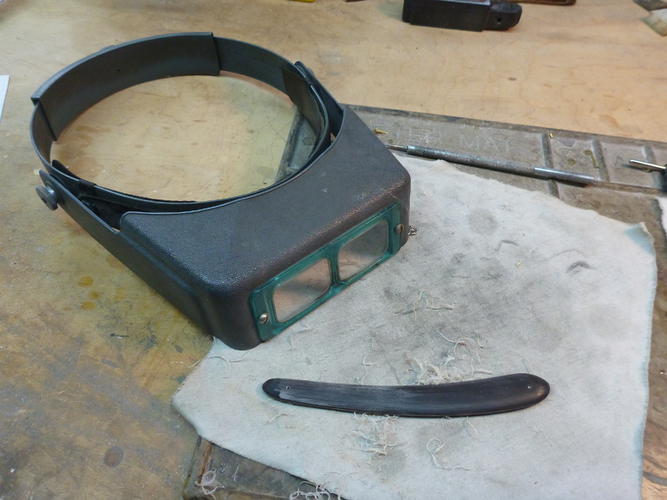
400 grit followed by 600 grit and last 1200 grit. I do this sanding process wearing 3 power magnifiers. I also use a shop light to create shadows as I work so I can see any scratches or irregularities that need to be removed. I rarely have to come back and remove scratches after buffing.
Last edited by karlej; 12-26-2015 at 05:26 PM.
-
The Following 25 Users Say Thank You to karlej For This Useful Post:
1oldDago (09-16-2016), ajkenne (12-26-2015), BobH (12-26-2015), ChopperDave (12-26-2015), Ernie1980 (12-26-2015), Euclid440 (12-26-2015), Gasman (04-12-2020), Geezer (05-24-2016), markbignosekelly (12-26-2015), MattCB (12-26-2015), MikeB52 (12-26-2015), petercp4e (12-26-2015), Phrank (12-26-2015), puketui41 (12-27-2015), Raol (12-26-2015), RezDog (12-26-2015), sharptonn (12-26-2015), sloanwinters (04-01-2019), Spiros (04-08-2016), Substance (12-27-2015), Thug (12-26-2015), Walterbowens (12-27-2015), Willisf (12-26-2015), Wolfpack34 (12-27-2015), xiaotuzi (08-04-2016)
-
12-26-2015, 04:00 PM #4Senior Member

- Join Date
- Dec 2013
- Location
- Texas
- Posts
- 1,568
Thanked: 269
Thank you! Horn is one material that I have never used to make scales, but I bought a couple of pieces and intend of giving it a try soon and this helps a lot!
karlej likes this.
-
12-26-2015, 04:09 PM #5Senior Member


- Join Date
- Apr 2012
- Location
- Diamond Bar, CA
- Posts
- 6,553
Thanked: 3215
Karlej, great post, lots of good detail, and good photos, thanks for posting.
You can make multi photo post of more than 10 photos, by posting 10 photos, then replying to you own post and posting another 10 photos and keep replying and adding until you are done. All the photos and instruction will then, be connected and in order and there is no limit to how many photos you can post this way.
Moderators can rearrange and join the two posts together for you and probably will once they see it later today.
Great work, keep posting, this is sticky material.
Marty
-
12-26-2015, 04:13 PM #6Senior Member
- Join Date
- Oct 2011
- Location
- Standish, Maine
- Posts
- 816
Thanked: 953 w to make a traditional set of horn scales ... the way I do it. PART 4
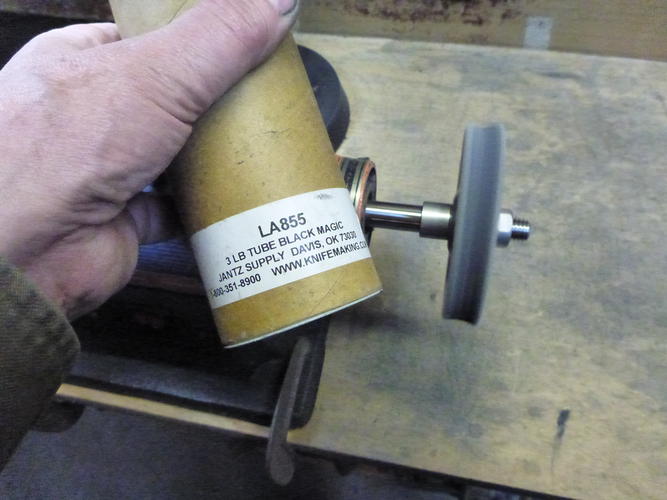
Now the fun part is buffing to bring out the beauty of the horn. I use a stitched spiral sewn cotton 4” or 6” wheel with Jantz’ Black Magic. I like this because it’s not greasy and polishes quickly. I’ve tried a half dozen different greaseless compounds and I find this best for me. Last I buff with Jantz’ Pink Scratchless on the same type of wheel. The scales now shine like a piece of black glass.
This whole process takes me about 2 hours from paper pattern to final polish. But since you are just starting out time is of no consequence.
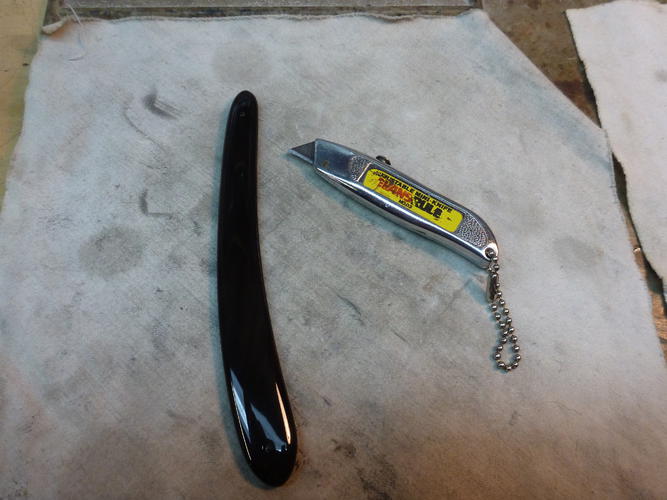
All that is left is to separate the scales, I use a small box cutter, and remove the tape and residual glue. I use automotive bug remover made by 3M for this. There is a product called Goo Gone that works but it leaves and oily film on the scales. The edges of the scales can be very fragile and I break them with a piece of 1200 grit paper along the inside edge of the scales. Stay away from the area where the wedge will go. You want that sharp crisp edge. Note the use of a tapered reamer to remove foreign matter from the pin holes.
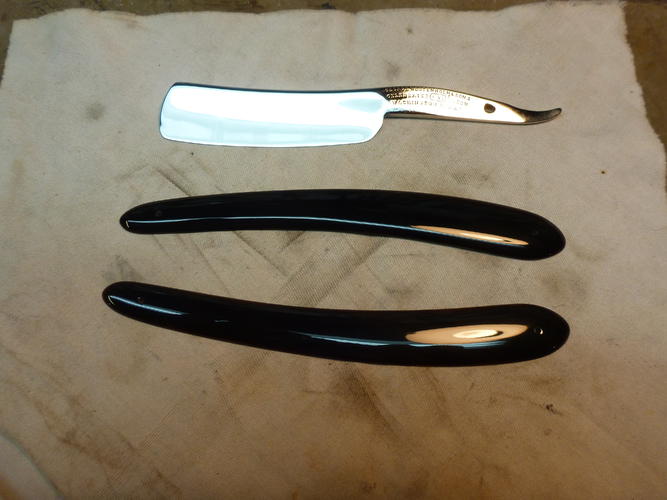
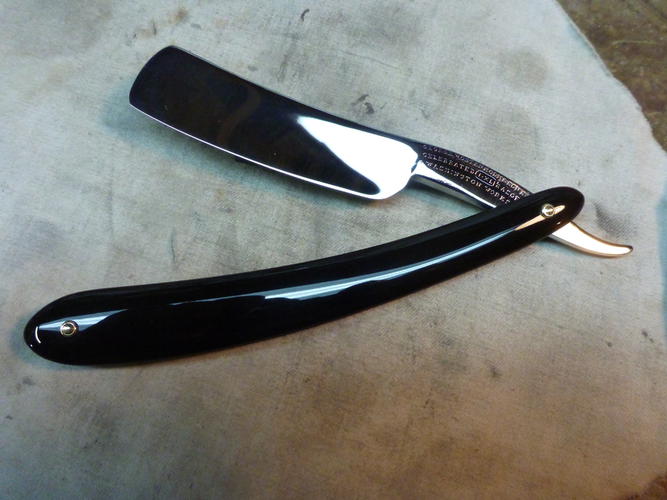
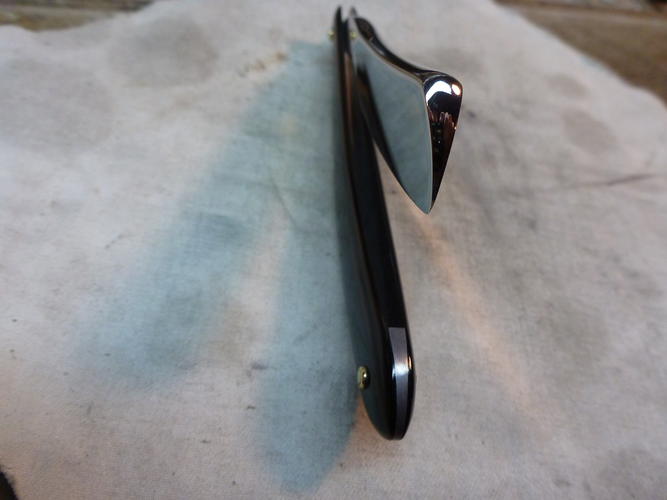
You are done and so is this tutorial. Too long I fear. Nothing left but to fit your wedge and pin the razor.
There is more than one way to skin this critter but my hope is this saves some major pitfalls for those just starting out particularly with the poorly proportioned, thick and clumsy looking scales with off center pins placed too close to the ends of the scales. Unless you get crazy with the wedge the razor will balance nicely in the hand in the center of the tang.
For you folks with experience making scales, my hope is there is something in this tutorial for you too and you enjoy reading it as much as I did putting it together.
Regards,
Karl
Last edited by karlej; 12-27-2015 at 12:43 AM.
-
The Following 30 Users Say Thank You to karlej For This Useful Post:
1oldDago (09-16-2016), ajkenne (12-26-2015), BeJay (12-27-2015), BobH (12-26-2015), cheetahmeatpheonix (06-30-2019), ChopperDave (12-26-2015), DeObfuscate (12-27-2015), Druid (05-24-2016), Gasman (04-12-2020), Geezer (12-26-2015), HCpawpaw (02-25-2017), Kavik79 (08-10-2020), mainaman (12-26-2015), markbignosekelly (12-26-2015), MattCB (12-26-2015), MikeB52 (12-26-2015), MJC (12-27-2015), nightcap (03-19-2017), Phrank (12-26-2015), Raol (12-26-2015), RezDog (12-26-2015), sharptonn (12-26-2015), Slawman (04-07-2017), Steel (02-02-2017), Substance (12-27-2015), Thug (12-26-2015), Walterbowens (12-19-2016), Willisf (12-26-2015), Wolfpack34 (12-26-2015), xiaotuzi (08-04-2016)
-
12-26-2015, 04:26 PM #7Razor Vulture

- Join Date
- Oct 2010
- Location
- Lone Star State
- Posts
- 26,167
Thanked: 8617
Nice work! Looking forward to seeing the progression!
karlej likes this."Don't be stubborn. You are missing out."
I rest my case.
-
12-26-2015, 04:28 PM #8Senior Member
- Join Date
- Apr 2012
- Location
- Diamond Bar, CA
- Posts
- 6,553
Thanked: 3215
What do you make your scraper from?
Cabinet scrapers are not that expensive, but I have had good luck just filing straight the end of a putty knife and rolling a burr on one edge, you dont need much. Putty knives are not that hard but will hold and edge long enough to scrape a pair of horn scales smooth.
You can even file to a curved shape and roll a burr, but not really needed, sandpaper will smooth out transitions easily. Nice tip, great post.karlej likes this.
-
12-26-2015, 04:29 PM #9Razor Vulture
- Join Date
- Oct 2010
- Location
- Lone Star State
- Posts
- 26,167
Thanked: 8617
Looks great! Thanks for all the pics!
karlej and cheetahmeatpheonix like this."Don't be stubborn. You are missing out."
I rest my case.
-
12-26-2015, 04:30 PM #10Senior Member
- Join Date
- Oct 2011
- Location
- Standish, Maine
- Posts
- 816
Thanked: 953
I tried replying to my own thread but I still could not post anymore pictures so I took the long way around the barn. I also hope the moderators can put the whole thing together in one thread.


 Reply With Quote