Results 81 to 90 of 92
Threaded View
-
04-18-2018, 07:23 PM #1
 Cloning celluloid scales: a work in progress
A while back (sorry, Joshua, sometimes it takes me a bit to get to projects like this) a forum member asked me if I had a scale template for Case Temperite blades.
I recalled I have one that needed rescaling too, and thought I might have some scales in my scrap bin.
Well, the scales I had are that variety of transparent yellow celluloid that rots steel like nobodyís business. In fact, I had two pair of them (without a razor). One of the pairs had already shrunk and become horrible. Both were badly warped.
Unrelatedly, I had also bought some casting supplies thinking Iíd try and clone some scales at some point. So I told Joshua Iíd get right on it and try to make some replicas.
A month passed while shiny things distracted me, but, like I usually do, I found my way back.
The first thing I had to do was straighten out the scales.
Ladies and gentlemen, I am a professional DO NOT TRY THIS AT HOME.
So I put the good pair into my scale-flattening device (a pair of metal plates bolted together with springs so I donít have to retighten as whatever is in it flattens), and stuck that in the toaster oven for ten minutes.
I repeat.
Do not put celluloid scales in the toaster oven, especially transparent celluloid scales.
But if you absolutely have to, low, low temperature is what you want. I cooked them at 160 degrees, and it worked. They went back to dead flat. The downside is that it accelerated their rot.
So I used TAP Plasticís Silicone RTV molding material to make a mold of them.
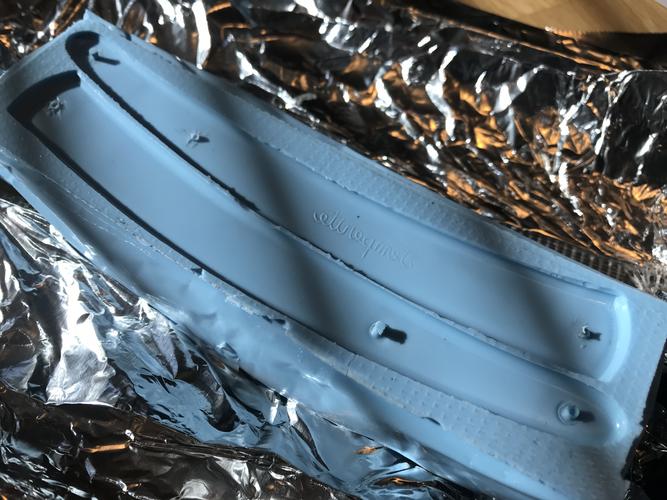
The first attempt didnít quite work. I placed the scales too close together, and I didnít adequately seal the bottom, so some got under. That meant part of the wall separating the two halves tore so I couldnít get a good impression off it.
Knowing where Iíd gone wrong, I made a second casting, this time being more careful about positioning.
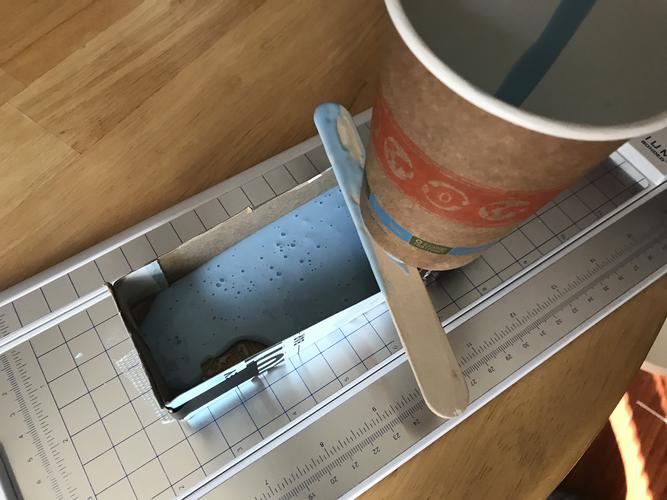
(What you see there is my easy bubble-removal system ó put the mixed silicone into a paper cup with a hole in the bottom and let that slowly pour into the mold, the bubbles come out in the stream on the way down and everything works nicely)
End result
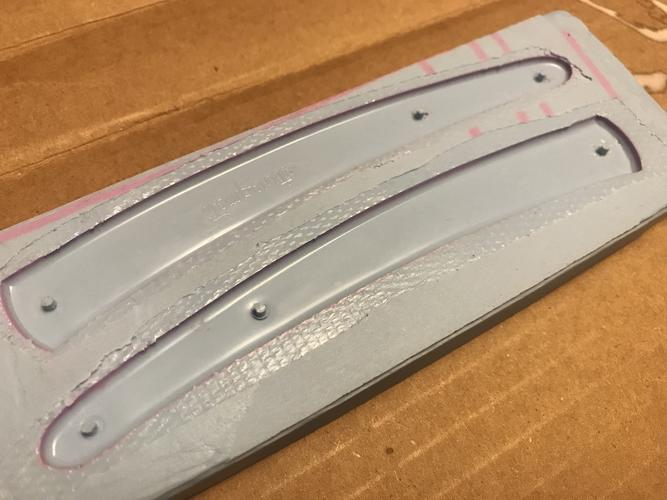
Now, Iím almost certainly going to need to do a third mold of the scales, but first I need to get some wax I can use to fill in the marks where the pins were removed, but I figured it would be a good idea to start with the easiest method since next I need to see if the casting material is good for scales and what I can do with it once itís cast.
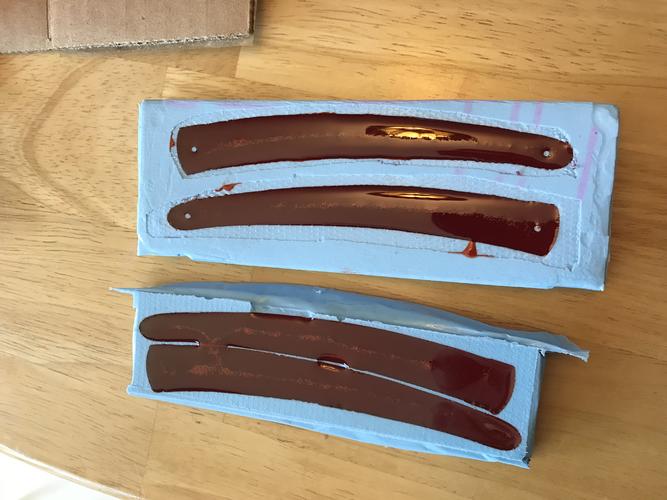
(This is a picture of the second attempt at pouring scales).
I used the Ďbadí mold as well as the good so Iíd have one pair of scales I could do various possibly destructive experiments on and another I could just use if those experiments pan out.
The first attempt at a pour ... did not go well. I looked at the wrong mixing instructions, and I mixed in my dye before adding the hardening agent, which screwed up the mixing ratio. The result of that was a material with the consistency of pitch and me spending 90 minutes trying increasingly desperately to get it. OFF. MY. HANDS.
The secound attempt is working as expected, but still needs to fully cure (it takes about 72 hours for the material to hard cure). In the meantime, the Ďexperimentí scales show about what I can expect.
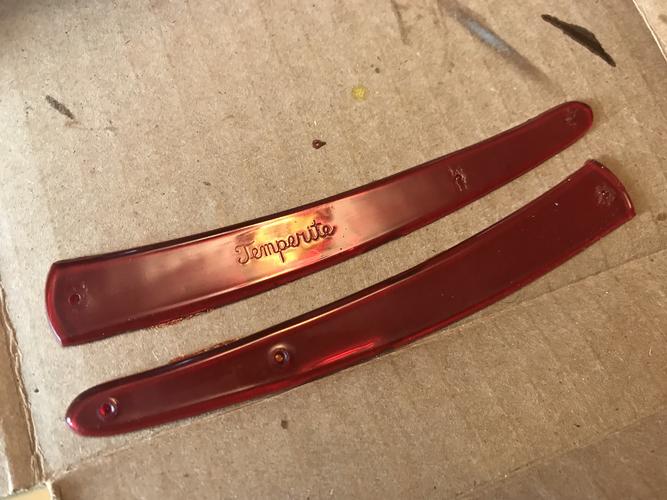
Theyíre still a little soft though. :P
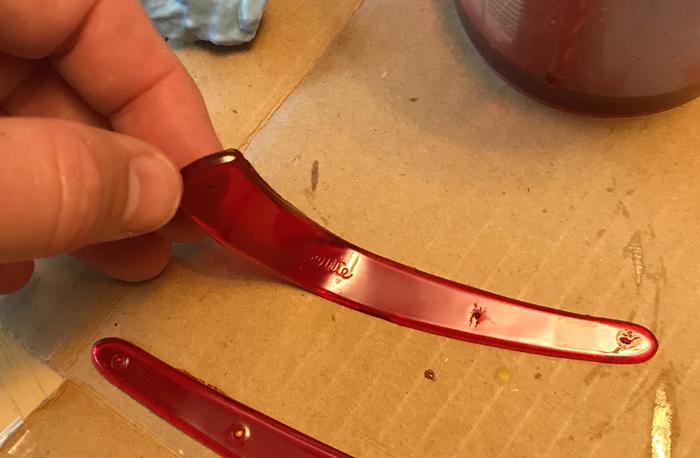
(Thatís aftert 24 hours).
Also noteworthy ó the original scales were that golden yellow color. My first resin attempt was red because that was the only color dye I had (my plans for casting scales didnít originally involve cloning those honey-colored ones).
This second attempt, I tried using food dye. And it worked! Except that the yellow food dye turned this lovely ruby-red. Oh well.
Iíve got the proper yellow dye for the final results, but thatís pending the full cure on these to see if it will be structurally sound enough for use.
Iíll update this thread as I go.
Down the road, I want to try brass embedments (Dubl Duck style), and also pearlescent casting, which I have the pigment for. But that must all wait until I have validated TAP Plasticís ĎEasyCastí resin for the purpose of scales. Based on the samples in the store, I think itís gonna work great.
One huge benefit of the mold and casting materials Iím using here ó no shrinkage.-Zak Jarvis. Writer. Artist. Bon vivant.
-
The Following 22 Users Say Thank You to Voidmonster For This Useful Post:
32t (04-19-2018), BanjoTom (04-20-2018), Benz (04-18-2018), BobH (04-18-2018), DZEC (04-18-2018), easyace (04-19-2018), Gasman (04-18-2018), HARRYWALLY (04-20-2018), JP5 (04-18-2018), markbignosekelly (04-23-2018), Matt1222 (04-19-2018), MedicineMan (04-19-2018), MisterClean (04-21-2018), MrZ (04-19-2018), nipper (04-19-2018), Oldnick (04-19-2018), outback (04-19-2018), petercp4e (04-19-2018), randydance062449 (04-20-2018), RezDog (04-18-2018), sharptonn (04-18-2018), tintin (04-18-2018)


 178Likes
 LinkBack URL
 About LinkBacks


 Reply With Quote