
Results 1 to 10 of 92
 178Likes
 LinkBack URL
 About LinkBacks
Hybrid View
-
04-28-2018, 08:11 PM #1Captain ARAD.


- Join Date
- May 2011
- Location
- Pacifica, CA
- Posts
- 2,474
Thanked: 2226
Preliminary tests with the Smooth-On epoxy makes me think I got it.
Having a couple of bum molds is handy, since it gives me scales to do destructive experiments on. In this case, I got impatient and demolded the two unusuable molds.
The scales were still a bit rubbery, but it just felt like they were going to harden up nicely. So I threw caution to the wind and stuck them and a pair of the previous resin in the toaster oven at 150 for an hour.
The Smooth-On scales, once cooled to room temperature, are the exact same hardness & flexibility of the original celluloid.
The previous resin, even after 4 days and cooking in the toaster oven, are unusably soft.
The new material is marginally workable at this stage of curing. It can be cut with a hobby knife and sanded, but I was unable to polish it back up to the freshly demolded luster.
Also noteworthy, with just a few moments of vigorous polishing with a microfiber cloth, the heat will make them quite flexible again. They seem to return to their original shape when they cool though. So that, and more dye (as the color is a bit weak in this batch) are the next tests before I sign off on this material, but I feel like this stuff can be made to work one way or another. (It might require pressure casting though)sharptonn likes this.-Zak Jarvis. Writer. Artist. Bon vivant.
-
04-29-2018, 07:41 PM #2Captain ARAD.
- Join Date
- May 2011
- Location
- Pacifica, CA
- Posts
- 2,474
Thanked: 2226
Smooth-Ons Epoxacast 690 can probably be a winner for this project.
I still need to mix up a batch with more dye in it to be sure it works (the other expoxy cured closer to right the less dye it had in it), but these have more or less passed all my other tests.
What does that mean? And what are we looking at in the pictures?
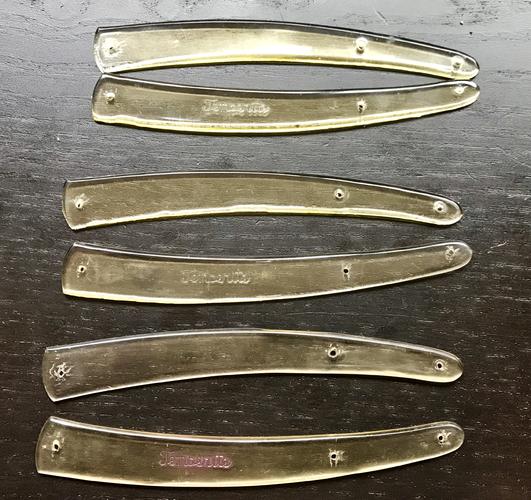
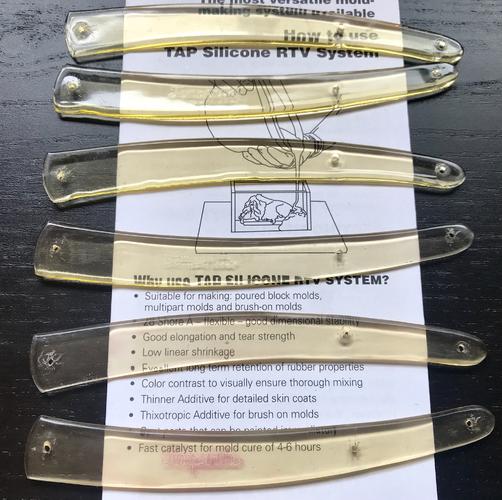
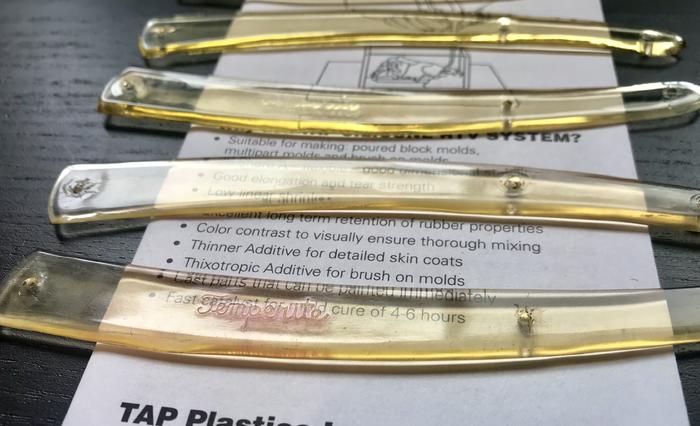
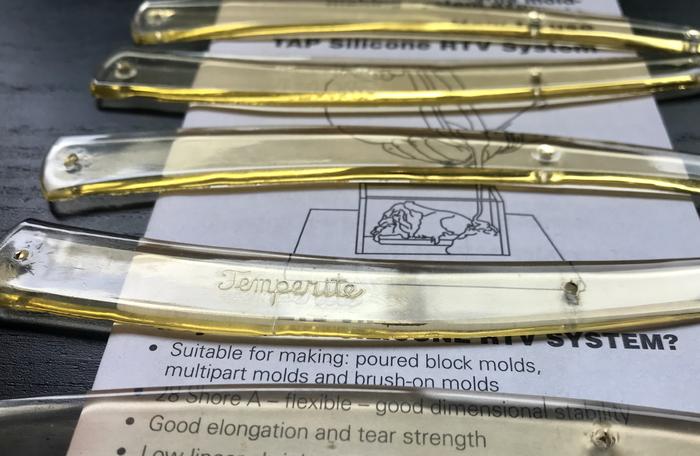
First of all, there are three different sets of scales from 3 diferent molds, one of which cannot cast complete scales because theres a chunk missing from it. That means that scales from that defective mold are a little too thin an have a few odd distortions on the back side (or what would be inside on an assembled razor).
The scales from the incomplete mold are the ones I did the most experimenting with. I heated them in the toaster oven to speed their cure, Ive painted the logo with the only paint I had available (pink nail polish from earlier etching experiments, which also meant I could test the material against acetone), and I sanded the living hell out of them then polished them on the buffer.
What I learned is at even near-full cure, this material is functionally workable. It isnt ideal by any stretch, but it can be sanded and repolished using micromesh and Mothers polish on a rag wheel.
In a strange twist, polishing them on the buffer is easier than doing it with a microfiber cloth, and the reason is:
With a 6 rag wheel on my buffer, the rotation of the wheel brings a lot of air through. With a very light touch, its possible to polish the scales and keep them cool via convection, wheras polishing by hand the scales absorp all the friction energy and heat up.
If they go above about 115 degrees, they go rubbery, and if they get much hotter than that, they can be deformed. Its really easy to bend them back into shape with gentle heat, but this is an important thing to know about.
When theyre not being heated up, they feel almost exactly like the original celluloid.
One of the things thats obvious from this round is that I need to make better molds, and that probably means largely completely recreating the originals scales instead of making a mold off them. All my copies look like perfect copies of slightly damaged scales, which is... uh... not exactly what I had in mind.
But I think Ive got the materials part close enough. I can work with this stuff, and as long as folks know about the heat issue, I think things will be fine. I mean its not like celluloid doesnt have the same problem!
Remember that pair of Shapleigh scales I sent you, Tom?-Zak Jarvis. Writer. Artist. Bon vivant.
-
The Following 3 Users Say Thank You to Voidmonster For This Useful Post:
cudarunner (04-29-2018), sharptonn (04-29-2018), tintin (04-30-2018)
-
04-29-2018, 07:50 PM #3Skeptical Member


- Join Date
- Nov 2016
- Location
- Colorado Springs
- Posts
- 10,486
Thanked: 2186
The heat thing seems a little low to me. If it could withstand a little more heat would be better but your very close. Ive been following along and your doing great with this. Congrads on getting this far. Soon you will have it all figured out and will be popping out scales left and right.
 Voidmonster likes this.It's just Sharpening, right?
Jerry...
-
The Following User Says Thank You to Gasman For This Useful Post:
Voidmonster (04-30-2018)
-
04-29-2018, 11:30 PM #4Razor Vulture

- Join Date
- Oct 2010
- Location
- Lone Star State
- Posts
- 25,888
Thanked: 8590
Nice work, Zak! Way to stick with it!
You definitely have the mold thing going-on. They all look super! Voidmonster likes this.
-
The Following User Says Thank You to sharptonn For This Useful Post:
Voidmonster (04-30-2018)
-
04-30-2018, 04:11 AM #5Captain ARAD.
- Join Date
- May 2011
- Location
- Pacifica, CA
- Posts
- 2,474
Thanked: 2226
The temperature thing isn't as bad as it sounds, and I'm hoping that given 3-4 days and a really solid cure, it will be even less of an issue. Originally Posted by Gasman

If not, I suppose I'll have to move to pressure-casting and one of the urethane resins.-Zak Jarvis. Writer. Artist. Bon vivant.
-
04-30-2018, 12:40 PM #6Senior Member


- Join Date
- Feb 2015
- Location
- Duluth, GA - Atlanta OTP North
- Posts
- 2,546
- Blog Entries
- 1
Thanked: 315
Glad those batch is looking more hopeful. I always thought of acrylic as being harder and didn't realize you could get acrylic resins that would be so soft after curing. I guess most of those acrylic resins are manufactured in pressure tanks.
Did clay/wax not work for filling the scratches in the originals? Are you going to need something harder like CA?Voidmonster likes this.- Joshua
-
The Following User Says Thank You to JP5 For This Useful Post:
Voidmonster (04-30-2018)
-
04-30-2018, 07:48 PM #7Captain ARAD.
- Join Date
- May 2011
- Location
- Pacifica, CA
- Posts
- 2,474
Thanked: 2226
I jumped the gun with the mold that featured corrections to the scales and poured resin in before it was fully cured. So when I took the resin out, chunks of mold came with it. Originally Posted by JP5
I haven't tried CA, but I suspect it'll dissolve the celluloid.
There's a freshly poured mold on a much more comprehensively corrected pair of scales. Gonna give that a full two days to cure and then I'll see where we're at.
With another day of time, the Epoxacast 690 is set up really rigid (but not brittle). Hot tap water will make it flexible though. Meh. It does return mostly to its original shape when it cools though, and that same heat flexibility means it's also really easy to straighten back out... But I think this does mean I'm going to have to move to the urethanes.-Zak Jarvis. Writer. Artist. Bon vivant.
-
The Following User Says Thank You to Voidmonster For This Useful Post:
JP5 (05-01-2018)


 Reply With Quote