Results 1 to 10 of 39
Thread: Replacing scales
Hybrid View
-
06-27-2019, 04:00 AM #1
 Replacing scales
I realise my query has probably been answered many times already in the Forum but as a newcomer, and with a welter of information to trawl through, I wonder if someone can point me to the appropriate thread/s that might help me.
I recently bought a number of old razors on EBay and a few of them need a serious tidy-up. A couple have broken or damaged scales and being a long-time tinkerer I'm inclined to want to try and replace them (the scales). I'm assuming that it's not sacrilege to perform this refurbishment of 'low cost' vintage razor.
My questions are -
1. Where is the best place to look for replacement scales. And, apart from size and sympathetic matching are there any other things to be aware of?
2. How is the 'pivot' pin usually removed? (Is it punched?)
3. Where do you buy new pins? And how are they installed.
If a video exists, showing all this I'd be grateful to learn of it.
Thanks.The trouble with the world is that the stupid are cocksure and the intelligent are full of doubt. (Bertrand Russell)
-
06-27-2019, 04:48 AM #2At this point in time...


- Join Date
- Jun 2007
- Location
- North Idaho Redoubt
- Posts
- 27,196
- Blog Entries
- 1
Thanked: 13250
Okay I moved this thread to the "Workshop"
At the top of this Sub Forum is a stuck thread
https://sharprazorpalace.com/worksho...wers-here.html
This literally has everything in is about Working on SR's
Also YouTube
"gssixgun Pinning Scales"
You will find my channel and tons of info,,,, from there it will have links to Brad's Vids and Charlie's vids among others
Read and watch then ask questions
Welcome to SRP"No amount of money spent on a Stone can ever replace the value of the time it takes learning to use it properly"
Very Respectfully - Glen
Proprietor - GemStar Custom Razors Honing/Restores/Regrinds Website
-
The Following User Says Thank You to gssixgun For This Useful Post:
Phanta (06-27-2019)
-
06-27-2019, 05:30 AM #3Senior Member


- Join Date
- Feb 2013
- Location
- Haida Gwaii, British Columbia, Canada
- Posts
- 14,457
Thanked: 4830
There is also a few other threads.
https://sharprazorpalace.com/worksho...-halves-5.html
https://sharprazorpalace.com/worksho...ml#post1580885
Also there is a ton of information in the what are you working on thread.
If you are uncertain you can post questions in the what are you working on thread and you will get a bunch of answers there.
Your choice of material will get you more specific answers. Horn, bone and ivory are more traditional but there are a lot of guys doing amazing work with wood and then there is all the more modern kirinite, acrylic, acrylester, G-10 and micarts as well.Last edited by RezDog; 06-27-2019 at 05:34 AM.
It's not what you know, it's who you take fishing!
-
The Following User Says Thank You to RezDog For This Useful Post:
Phanta (06-27-2019)
-
06-27-2019, 10:51 AM #4

Depending on what material your scales are made from, there's also information in the "what are you working on" thread, for bone, ivory, and horn. Especially within the last year.
Mike
-
The Following User Says Thank You to outback For This Useful Post:
Phanta (06-28-2019)
-
06-27-2019, 11:48 AM #5

If your looking to buy scales its a bit of luck involved as razors are not all made the same. Most of what you will find here is DIY. Its not hard to do and not a lot of tools are needed. It just takes time and there are a lot more little things to consider that one would think so go slow, read the links and be sure to post your ideas and questions in the workshop. Good luck.
It's just Sharpening, right?
Jerry...
-
The Following User Says Thank You to Gasman For This Useful Post:
Phanta (06-28-2019)
-
06-28-2019, 02:51 AM #6

A good place to start is with the scales on the blade, you can trace around them and make a paper template that you can later transfer to your desired scale material. Another good place to start is with a quality razor that’s in good order. Open and close the razor and watch what the scales do, how the wedge is shaped as well as the tang. There is a far bit of geometry that goes into a good set of scales. Once you have an understanding of how they work and why things are shaped the way they are it will make your first few rescales go fairly well.
Keep us updated, we’re here to help.
-
The Following User Says Thank You to jfk742 For This Useful Post:
Phanta (06-28-2019)
-
06-28-2019, 06:01 PM #7Senior Member


- Join Date
- Apr 2012
- Location
- Diamond Bar, CA
- Posts
- 6,553
Thanked: 3215
One often overlooked dimension is the thickness of the scale, less than 1/8th inch, thinner is better also remember the scales should be under tension at all times, so material comes into play. Thick scales make honing, shaving and especially stropping difficult and ungainly. Add large pins and the razor quickly becomes awkward.
The good news is, un-pinning and pinning is relatively simple and inexpensive, cut your pins from brass or nickel rod. If you buy or make your own scales and want to learn to pin and un-pin, practice pinning tongue depressors to your razor. You can also practice different un-pinning techniques, I drill or file pins depending on if I am trying to save the scales.
If you are replacing broken scales filing off the pin tops with a good file is quick and easy. There are lots of good post and videos on pinning. Pinning with brass is easy, so practice with brass first. You will learn a lot by doing, pinning your razor with tongue depressors a couple times will make the actual pinning much less stressful.
Making scales, horn is probably the easiest to work with simple hand tools, saws, files, scraper and sandpaper. The least expensive wood or plastic, a thrift store clipboard will make several scales, great for making scale templates.
-
The Following 2 Users Say Thank You to Euclid440 For This Useful Post:
Phanta (06-28-2019), ScoutHikerDad (06-28-2019)
-
06-29-2019, 05:46 AM #8Senior Member


- Join Date
- Apr 2012
- Location
- Diamond Bar, CA
- Posts
- 6,553
Thanked: 3215
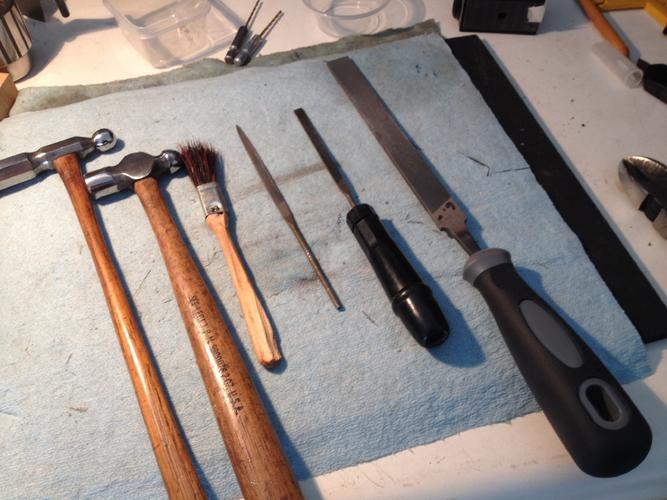
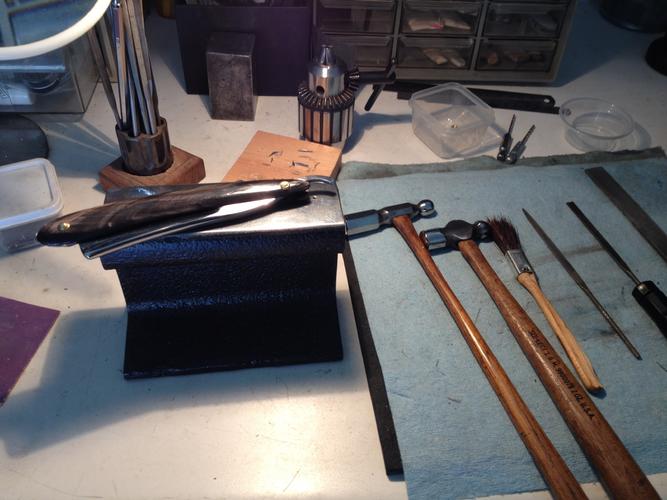
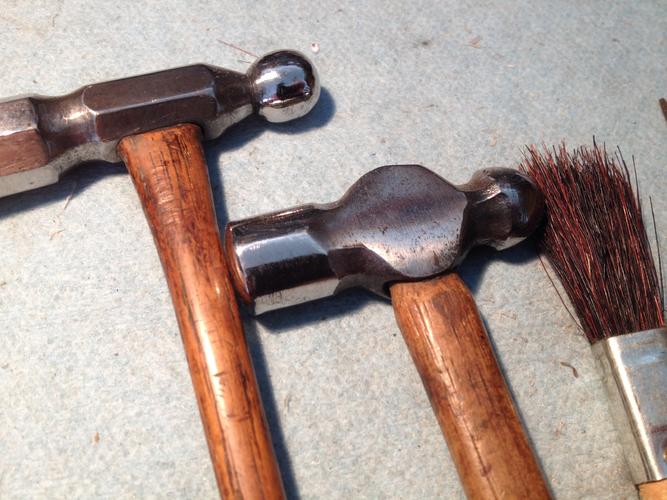
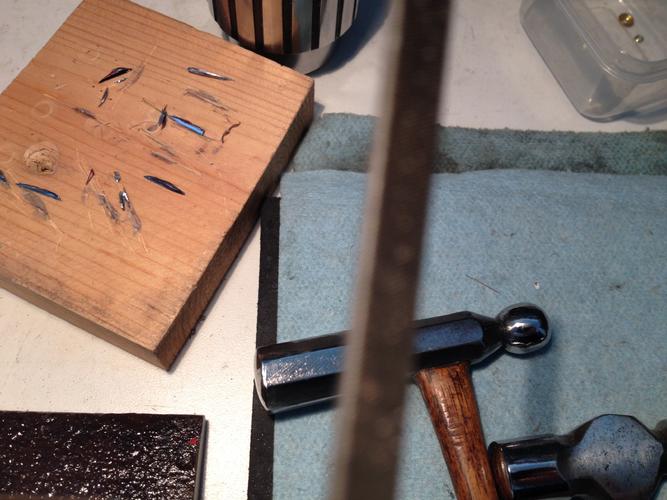
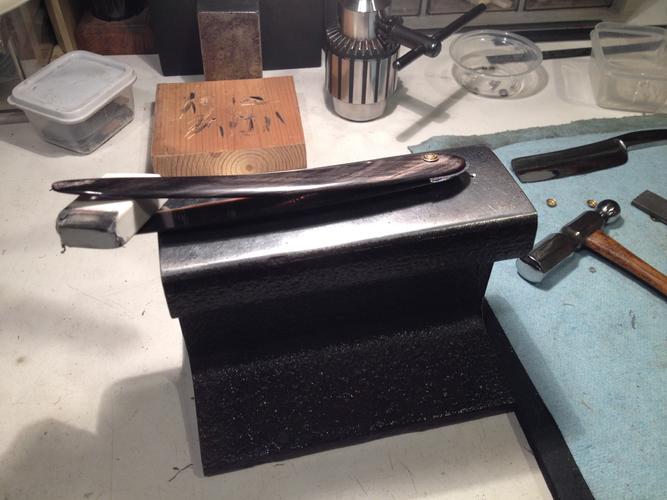
If you sand smooth the face and ball end, then polish with a buffer or with metal polish to a bright finish, you will get a smoother finish on the peen.
A lighter hammer does move metal slower and develop a smoother finish with less risk of bending the pin. I use a 2 and 4 oz hammer, making light taps. Doming the hammer face also helps to shape the metal and gives much more control.
Also doming flat washers make a spring and when peened will keep the pin under tension on both sides, they also fit curved scales better than a flat backed solid collar. I use washer from Micro Fastener and dome them with a dappling block.
Here are two hammers I use most. Note the polish and convex hammer faces. While smooth polished hammer faces will make a smooth near polished peen, you can also file, sand and polish pins to smooth even pin faces.

-
The Following 5 Users Say Thank You to Euclid440 For This Useful Post:
boz (06-30-2019), cheetahmeatpheonix (06-30-2019), JOB15 (09-17-2019), ScoutHikerDad (06-29-2019), STF (09-11-2020)


 95Likes
 LinkBack URL
 About LinkBacks


 Reply With Quote
