
Results 41 to 50 of 66
 143Likes
Thread: W&B 8/8 FBU shorty project
 LinkBack URL
 About LinkBacks
Threaded View
-
09-17-2019, 02:18 AM #1Senior Member


- Join Date
- Feb 2019
- Location
- Salida, CA
- Posts
- 600
Thanked: 94 W&B 8/8 FBU shorty project
There seemed to be some interest in this when I posted about it in Show and Tell, so I decided to do it in it's own thread to keep things together and easier to find. This isn't a tutorial (I'm still fairly new to restoration) and it won't be quick. I don't plan on rushing this, I'm just going to post my progress and questions similar to the what are you working on thread. Hopefully, I'll pull this off and you'll enjoy the journey.
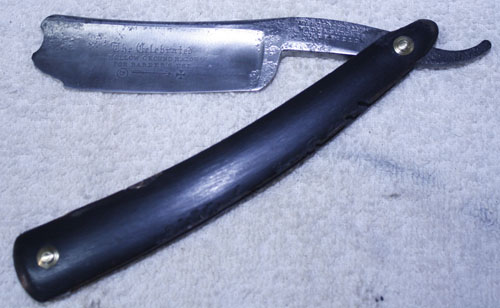
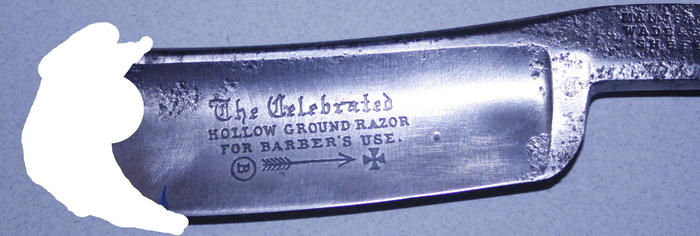
I picked this up specifically for making a shorty and was pleasantly surprised to find it was an 8/8, not a 7/8 as it was listed. It's not a beauty queen and has some uh, lets say character. My goal is to make this functional and comfortable to use.
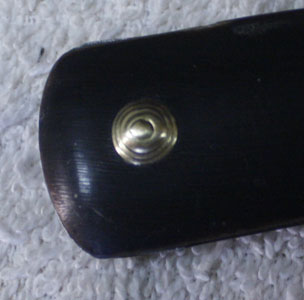
Here's what I'm starting with
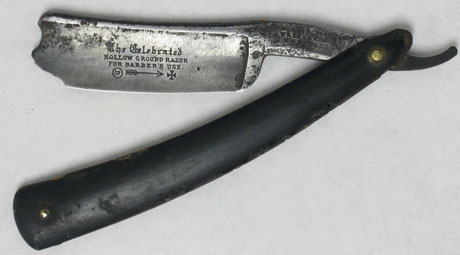
I liked the idea of a rat rod kind of style, but the bug bites in the scales are a bit uncomfortable in use. I'm planning on sprucing them up a bit for comfort. So far I've done a basic clean up with scraping and steel wool. The collars look pretty good and I hope I can save them.
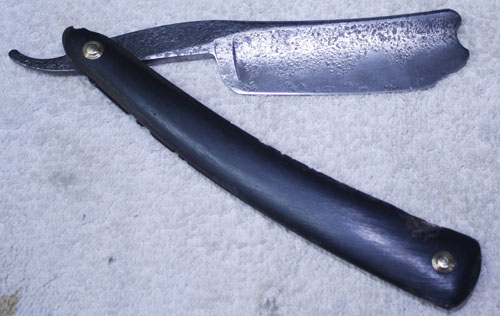
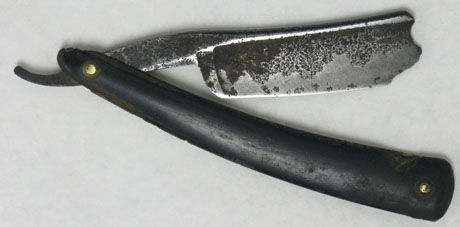
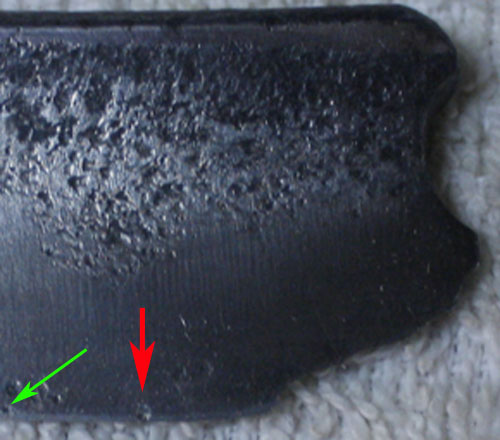
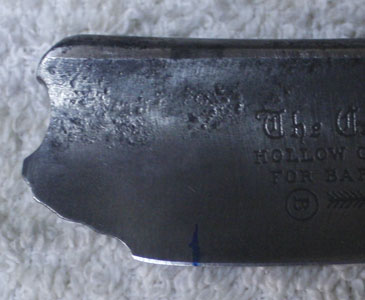
I've also set a rough bevel. There was a pit I was worried about that made it into the edge. So at this point I think I'll need to make it shorter than I had initially planned to get the pit out. I considered taking material off the edge, but it looks like I'll run into more pits higher up and chase them until the blade is a lot less than 8/8. Right now the edge is clean, except for this one pit. You'll see what I'm talking about in the pictures below. The first is the pit marked by the red arrow. The green arrow is some of the pits I think I'll get into if I try and remove it with high angle honing. The second picture is where the pit is located relative to the front of the blade.
Here's my initial idea for the new tip. This is just an approximation I did with the eraser tool in photoshop. I've traced the original tip and am going to use it as a template. If anyone has a better idea for dealing with this pit I'm all ears.
Next up is removing/repairing the scales and some light sanding of the blade to smooth the texture out a little.ScoutHikerDad and RezDog like this.O'Toole's commentary on Murphy's Law: Murphy was an optimist.


 Reply With Quote