
Results 1 to 10 of 66
 143Likes
Thread: W&B 8/8 FBU shorty project
 LinkBack URL
 About LinkBacks
-
09-17-2019, 02:18 AM #1Senior Member


- Join Date
- Feb 2019
- Location
- Salida, CA
- Posts
- 600
Thanked: 94 W&B 8/8 FBU shorty project
There seemed to be some interest in this when I posted about it in Show and Tell, so I decided to do it in it's own thread to keep things together and easier to find. This isn't a tutorial (I'm still fairly new to restoration) and it won't be quick. I don't plan on rushing this, I'm just going to post my progress and questions similar to the what are you working on thread. Hopefully, I'll pull this off and you'll enjoy the journey.
I picked this up specifically for making a shorty and was pleasantly surprised to find it was an 8/8, not a 7/8 as it was listed. It's not a beauty queen and has some uh, lets say character. My goal is to make this functional and comfortable to use.
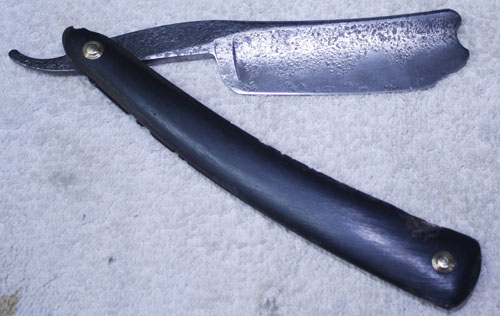
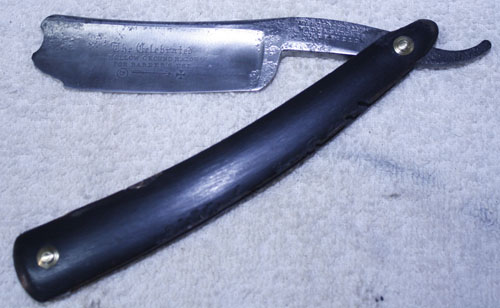
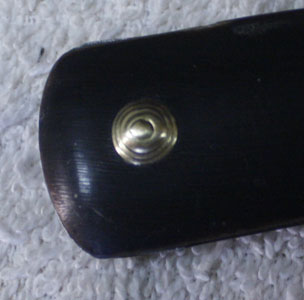
Here's what I'm starting with
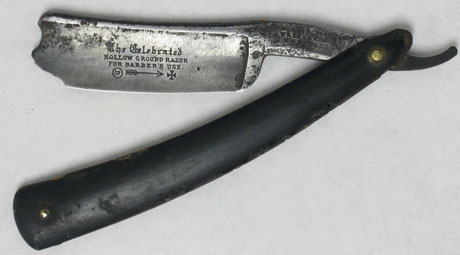
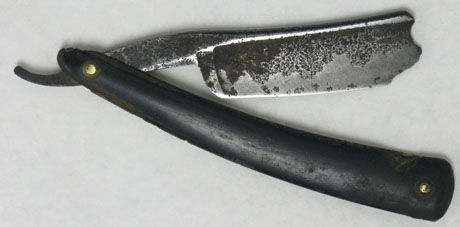
I liked the idea of a rat rod kind of style, but the bug bites in the scales are a bit uncomfortable in use. I'm planning on sprucing them up a bit for comfort. So far I've done a basic clean up with scraping and steel wool. The collars look pretty good and I hope I can save them.
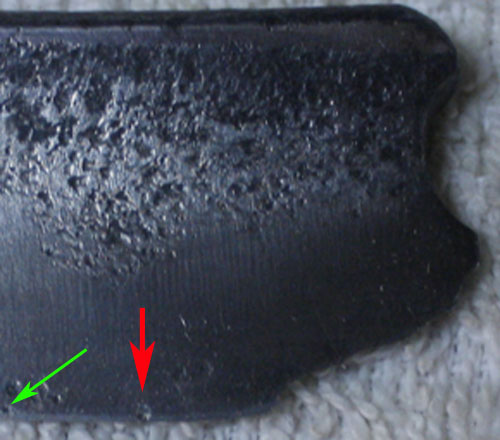
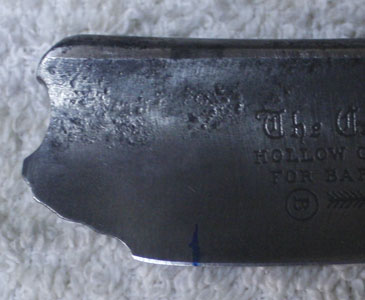
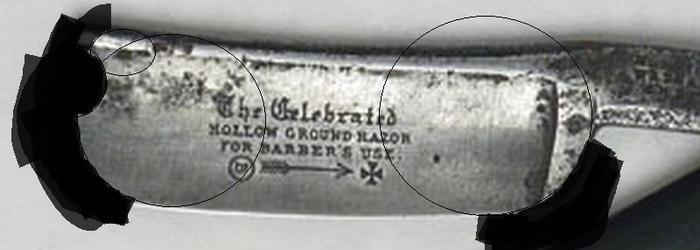
I've also set a rough bevel. There was a pit I was worried about that made it into the edge. So at this point I think I'll need to make it shorter than I had initially planned to get the pit out. I considered taking material off the edge, but it looks like I'll run into more pits higher up and chase them until the blade is a lot less than 8/8. Right now the edge is clean, except for this one pit. You'll see what I'm talking about in the pictures below. The first is the pit marked by the red arrow. The green arrow is some of the pits I think I'll get into if I try and remove it with high angle honing. The second picture is where the pit is located relative to the front of the blade.
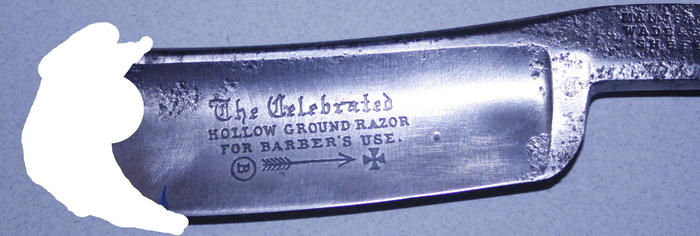
Here's my initial idea for the new tip. This is just an approximation I did with the eraser tool in photoshop. I've traced the original tip and am going to use it as a template. If anyone has a better idea for dealing with this pit I'm all ears.
Next up is removing/repairing the scales and some light sanding of the blade to smooth the texture out a little.ScoutHikerDad and RezDog like this.O'Toole's commentary on Murphy's Law: Murphy was an optimist.
-
09-17-2019, 02:50 AM #2Senior Member


- Join Date
- Feb 2016
- Location
- San Antonio, TX
- Posts
- 1,845
Thanked: 429
Good luck to you. I hope things work out for you. I personally would add this blade to my collection for wind chimes. Too much work for such a small return. But that's just me...... Originally Posted by JellyJar
 Semper Fi !
John
-
09-17-2019, 05:03 AM #3Senior Member


- Join Date
- Apr 2012
- Location
- Diamond Bar, CA
- Posts
- 6,553
Thanked: 3215
Paint or photo editor works for design work. But for actual work make a cardboard template, by tracing the blade onto poster board. Now make your mods based on your paint model, then trace on to the actual blade with a black sharpie using the cardboard template.
You can make adjustments to your cardboard template until you are happy with the design and match the notch exactly if you want.
Fill in the part to be removed and the black will give you a good look of what it will look like on the actual blade. I usually make 3-4 templates before I am satisfied.
The heel will need correction, so this is a good time to match the heel shape to the toe shape. You want to move the corner of the edge well forward of the stabilizer. You may have to make adjustment to the toe curve to match the heel.
Cool project. bluing the blade would be cool.
-
09-18-2019, 03:19 AM #4Senior Member
- Join Date
- Feb 2019
- Location
- Salida, CA
- Posts
- 600
Thanked: 94
Thanks for the luck. For me the return is the process of the job, so the amount of work is somewhat irrelevant to me. 40 hours for one razor or 40 hours for 10 razors, all the same enjoyment. Originally Posted by Johntoad57
O'Toole's commentary on Murphy's Law: Murphy was an optimist.
-
09-18-2019, 03:28 AM #5Senior Member
- Join Date
- Feb 2019
- Location
- Salida, CA
- Posts
- 600
Thanked: 94
Thanks for the tips. I traced the original onto card stock. I'll do a couple more tracings for playing with. Funny you should mention bluing. A friend at work found this gunsmithing video about converting rust to bluing using boiling water. Originally Posted by Euclid440
I was going to post it later, but seems like as good a time as any. Looks like the original rust bluing method without a steam cabinet. 212 Fahrenheit shouldn't mess with the temper, but the blade is fairly thin so He actually gets to the process around 7:30.
O'Toole's commentary on Murphy's Law: Murphy was an optimist.
He actually gets to the process around 7:30.
O'Toole's commentary on Murphy's Law: Murphy was an optimist.
-
09-18-2019, 03:28 PM #6Senior Member
- Join Date
- Apr 2012
- Location
- Diamond Bar, CA
- Posts
- 6,553
Thanked: 3215
I have had good luck using hot water from the faucet, my shop sink is 8 feet from the water heater and set a bit higher than most, so my hot water is hot.
I just soak in hot water for a few minutes, changing the water so it remains hot, then heating some white vinegar in a container of hot water, kind of a double boiler, a plastic shoe box of hot water and smaller tray of vinegar.
I degrease with mineral spirits and spray carb cleaner. Drop in the blade while the blade is hot, mine gets too hot to touch and vinegar is warm. Check it after a few minutes, it does not take long.
I use this process when I want to darken rust spots and usually buff the good steel, but you can control the look by how long you leave in the vinegar and how you buff. I spray down with Kroil to stop rust and wipe, or sand or just buff.
I have also use it on knife blades when I want a molted vintage looking bluing. If you want the “bluing” to stick well and etch more even, how well you sand the blade will determine how the finish looks, a good even stria, 1k finish works well.
If you don’t like it, 600 will easily remove it, it is not a durable finish like bluing. If you just want to blue the pits, cold gun blue works well also just make sure it is clean.
-
The Following User Says Thank You to Euclid440 For This Useful Post:
JellyJar (09-19-2019)
-
09-19-2019, 01:57 AM #7Senior Member
- Join Date
- Feb 2019
- Location
- Salida, CA
- Posts
- 600
Thanked: 94
Wow, lots of good tips in there. Thanks that'll be a big help when I get to that stage.
O'Toole's commentary on Murphy's Law: Murphy was an optimist.
-
09-21-2019, 05:18 AM #8Senior Member
- Join Date
- Apr 2012
- Location
- Diamond Bar, CA
- Posts
- 6,553
Thanked: 3215
You could probably save another ¼ to ½ inch of blade length if you play around with the design of the cut.
Here is a remake, I did removing the least amount from the tip and reshaping the heel, so it will hone without the stabilizer in the way.
 JellyJar likes this.
-
09-21-2019, 05:44 PM #9Senior Member
- Join Date
- Feb 2019
- Location
- Salida, CA
- Posts
- 600
Thanked: 94
I've been playing around with some sketches after tracing the blade. The problem is, I've got to get it back to the blue sharpie mark on the edge where the pit is located on the back. Maybe more of a smile? I'll throw some ideas up when completed.
Euclid440 likes this.O'Toole's commentary on Murphy's Law: Murphy was an optimist.
-
09-21-2019, 05:57 PM #10Senior Member
- Join Date
- Feb 2019
- Location
- Salida, CA
- Posts
- 600
Thanked: 94
I managed to unpin the razor without destroying the collars

One collar was stuck to the pin so I took it to work where I have better tools for dealing with small things. Got the collar off no problem and noticed the insides were pretty corroded. We have a solution at work that cleans up corrosion really well and is quite gentile. It works best when heated. I put the collars in the solution and headed to the hot plate. For whatever reason, I decided to throw the wedge in with it (it also works well on lead). I got distracted by a phone call and when I came back I realized the hot plate had been set to nuclear. The collars were swimming in molten lead.
  I think the collars can still be saved but clearly a new wedge is in order. I think the universe wants me to practice my wedge making. Not catastrophic but frustrating. A couple of swipes with some sandpaper would have been fine for the wedge, ah well.

Lead coated collars, this will be a bit of a PITA.MrZ likes this.O'Toole's commentary on Murphy's Law: Murphy was an optimist.


 Reply With Quote