Results 11 to 20 of 41
-
11-10-2008, 03:39 AM #11At this point in time...


- Join Date
- Jun 2007
- Location
- North Idaho Redoubt
- Posts
- 27,188
- Blog Entries
- 1
Thanked: 13250
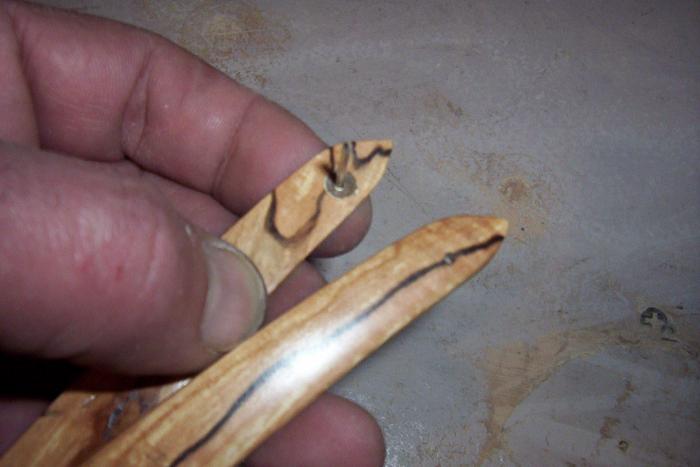
Pins go in from the show side to the reverse side...
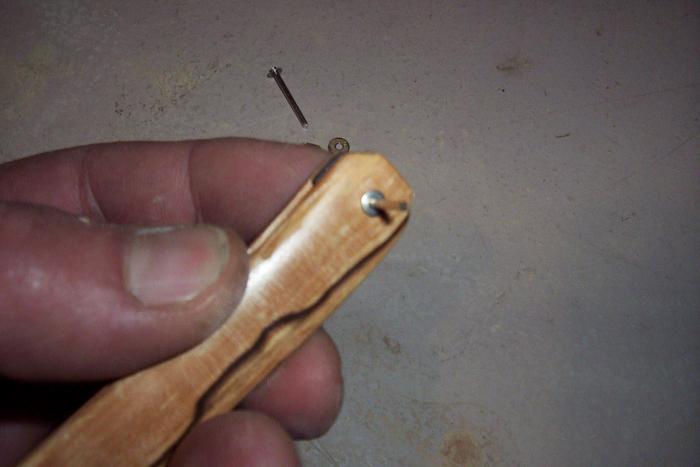
I always pin the wedge first then the middle (if applicable) and finally the pivot...
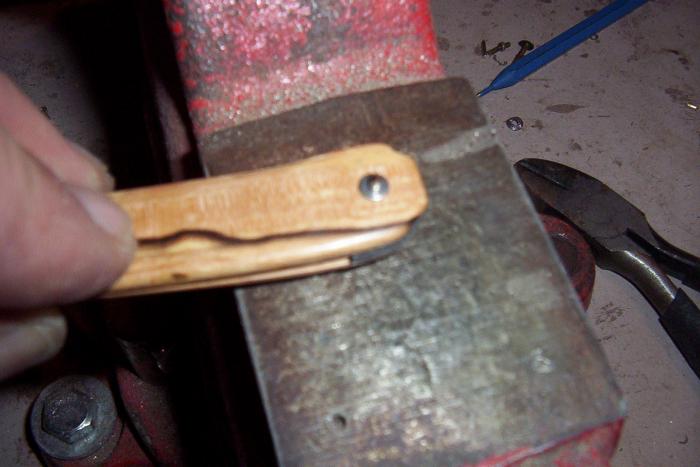
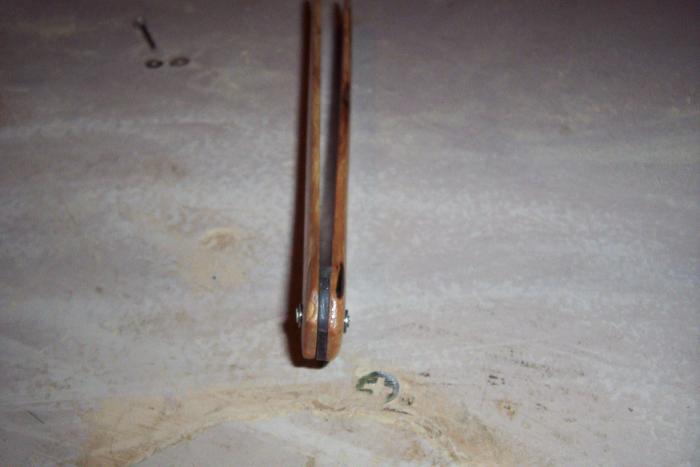
Again the pins go in on the show side..
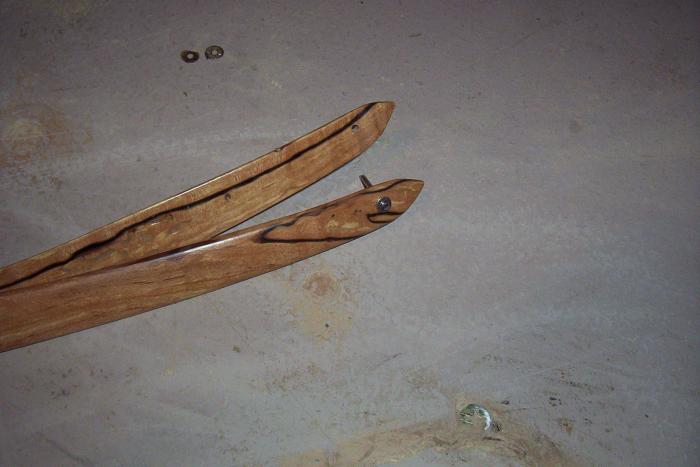
Don't forget the bearing washers if you are using them...
Last edited by gssixgun; 11-10-2008 at 07:32 AM.
-
-
11-10-2008, 04:01 AM #12At this point in time...


- Join Date
- Jun 2007
- Location
- North Idaho Redoubt
- Posts
- 27,188
- Blog Entries
- 1
Thanked: 13250
Bearing washer, razor, bearing washer....
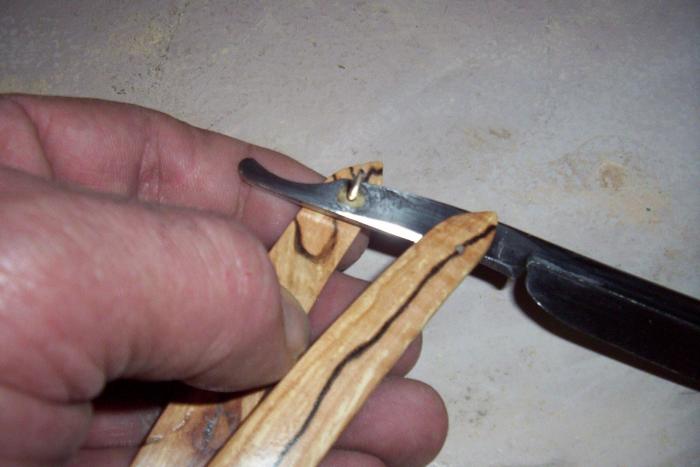
Don't mess up now, this is the end of the journey, be extra careful peening the pivot pin, if you leave this pin to long, you stand the risk of a bent pin, to short you have to make a new pin...
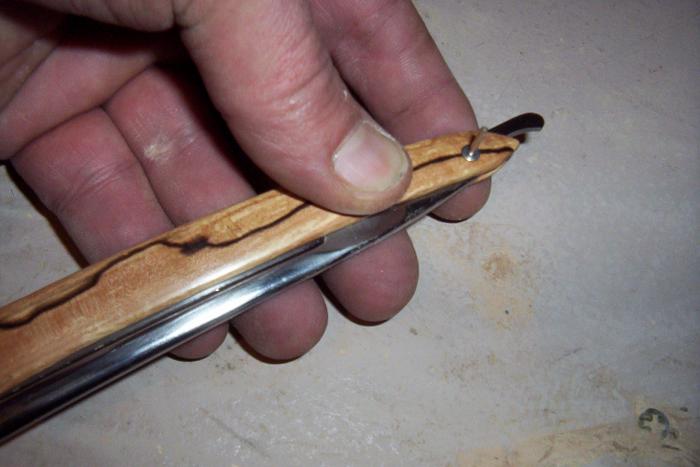
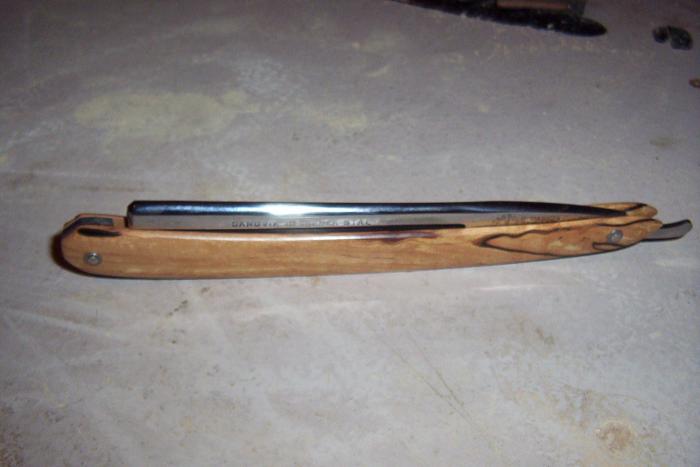
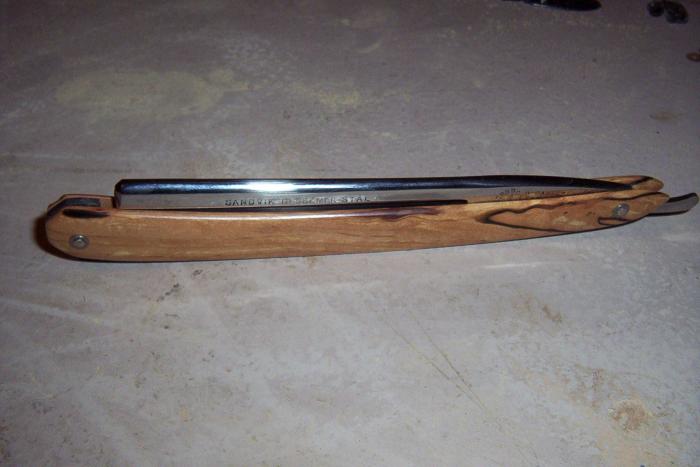
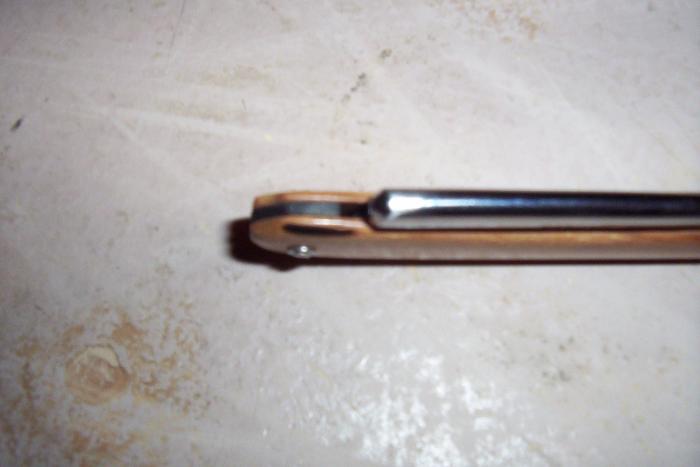
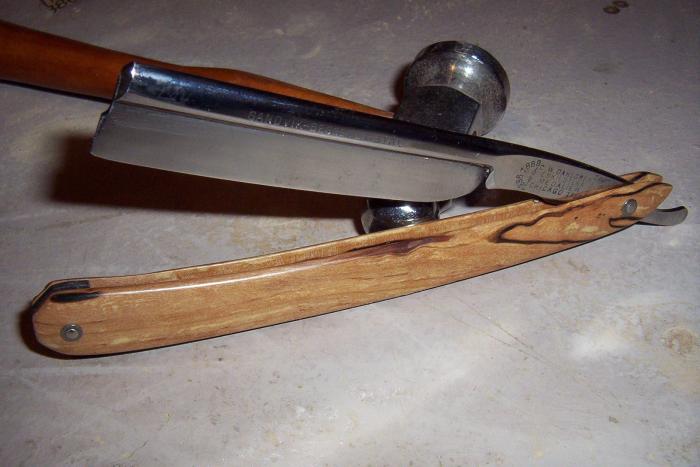
A completed razor, some final hand polishing on the blade, then it is ready for the hones......
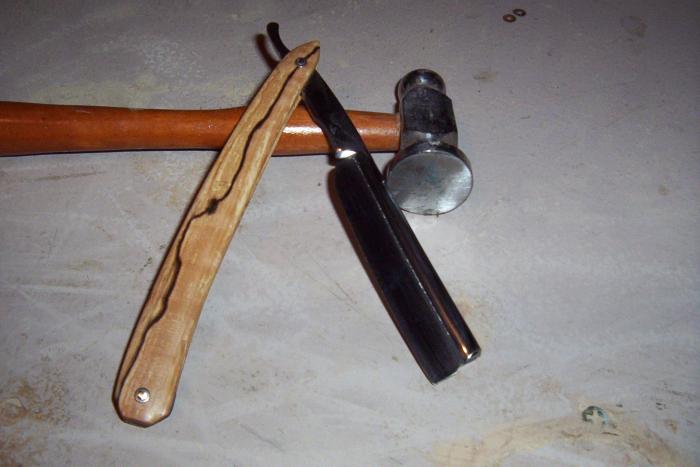
Last edited by gssixgun; 11-10-2008 at 07:39 AM.
-
The Following 57 Users Say Thank You to gssixgun For This Useful Post:
AaronX (11-10-2008), awk5 (11-12-2008), badboris (05-02-2009), ben.mid (11-10-2008), Blue (04-09-2010), Brando (04-11-2010), cassady (02-06-2009), Chreees (07-28-2013), coachmike (11-10-2008), DeathMetalDremel (04-10-2010), Detach (11-10-2008), dooey (09-13-2015), Earthdawn (11-10-2008), FatboyQ (04-02-2014), FloorPizza (11-10-2008), fred8785 (10-01-2010), gounthar (11-25-2008), greenbriel (03-16-2012), gromowski45 (02-23-2016), heck (11-21-2009), Howler80 (10-05-2015), huntmol (11-21-2009), icedog (11-10-2008), Indesio (08-21-2011), Jared13 (02-24-2016), JetHed (04-11-2010), JimmyHAD (11-10-2008), JimR (05-02-2009), JoelLewicki (03-31-2014), joke1176 (11-10-2008), Lancer (11-11-2008), mahaney (04-15-2012), MisterDarcy (01-08-2010), Morty (04-09-2010), Neils1304 (05-12-2015), niftyshaving (04-17-2010), Noswad (04-12-2010), nurse42312 (11-10-2008), prezdead (04-18-2010), Quagmire53 (01-03-2014), quinlan (07-04-2010), RADisorder (04-03-2013), ri7ani (11-19-2009), ryanjewell (12-09-2011), Scipio (11-19-2009), Scorpius010 (12-19-2014), ScottGoodman (11-21-2009), sidneykidney (11-10-2008), spazola (11-10-2008), Storsven (10-11-2012), str8fencer (11-14-2010), StraightRazorDave (11-10-2008), TOB9595 (05-01-2009), tomandjerry00 (03-29-2009), Utopian (11-10-2008), vulcano (11-12-2008), yoshida (11-28-2009)
-
11-10-2008, 04:26 AM #13

All I have to say is wow....I'm not a huge fan of the framebacks, but you certainly did make that razor look sharp (pun intended)! Keep up the great work,
Dave
-
11-10-2008, 11:39 AM #14< Banned User >

- Join Date
- Apr 2008
- Location
- Newtown, CT
- Posts
- 2,153
Thanked: 586
Thank you Glen. Thanks for the tutorial and thanks for the work you did on my razor! It looks awesome!
You just gotta love that spalted curly apple.
I hope you don't mind, I'd like to add a safety note here. Spalting is a product of the decay process. Spalted woods display those patterns because of fungus eating its way through the grain lines. The sugars in the wood react with the fungi causing the various color patterns. Once dried, the fungus becomes dormant, not dead. If the fungal spores get wet, they may very well resume growth. This can happen in the wood, or it can happen in your respiratory system. It is always wise when sanding to wear some sort of filter mask or respirator. However, when sanding spalted wood, consider it a must. There have been documented cases of severe respiratory infections due to inhalation of fungal spores while sanding spalted woods.
Brad
-
-
11-10-2008, 11:55 AM #15

Excellent job Glen. Thanks for posting the process.

-
11-10-2008, 01:41 PM #16Senior Member

- Join Date
- Jul 2008
- Posts
- 115
Thanked: 11
excellent post Glen, thank you very much for sharing it with us.
best wishes,
Mark....
-
11-10-2008, 02:31 PM #17

Glen, as usual, awesome job! I'd like to know a little more about how you go about doing the wipe-on poly with the inside of the scales and the wedge. Do you coat the entire inside of the scale (once or more)? Do you coat the wedge prior to installation? Do you pin the wedge end and then coat all of it as a unit?
I know I have my method, but I'm always willing to learn - and I think this could be of great use to the other neophyte restorers like myself
Again, your willingness to share information is a credit to you, good sir.
Mark
-
11-10-2008, 04:01 PM #18At this point in time...


- Join Date
- Jun 2007
- Location
- North Idaho Redoubt
- Posts
- 27,188
- Blog Entries
- 1
Thanked: 13250
Glen, as usual, awesome job! I'd like to know a little more about how you go about doing the wipe-on poly with the inside of the scales and the wedge. Do you coat the entire inside of the scale (once or more)? Do you coat the wedge prior to installation? Do you pin the wedge end and then coat all of it as a unit?
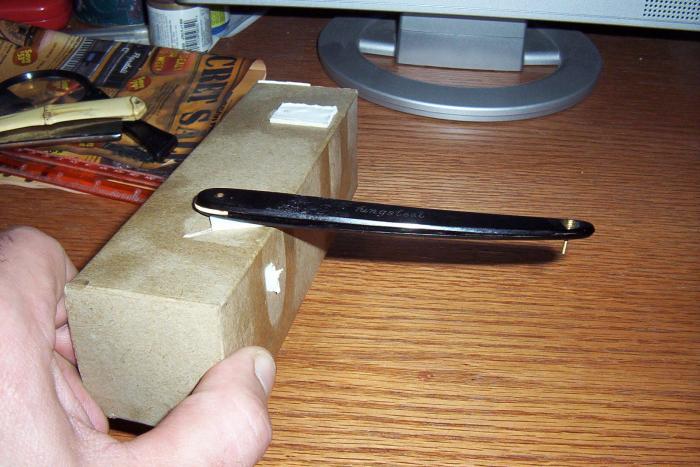
First thing I do is 3 coats of finish on the inside, after that really dries, I put two pieces of double side tape on the edge of what ever mailing box is in the room at the time.... I stick the scales to the box where the wedge would go, and then start the process of doing the outside coats with a box to hang unto and the scales securely attached to it.... This is for wipe on finishes....As you can see this box gets used alot....
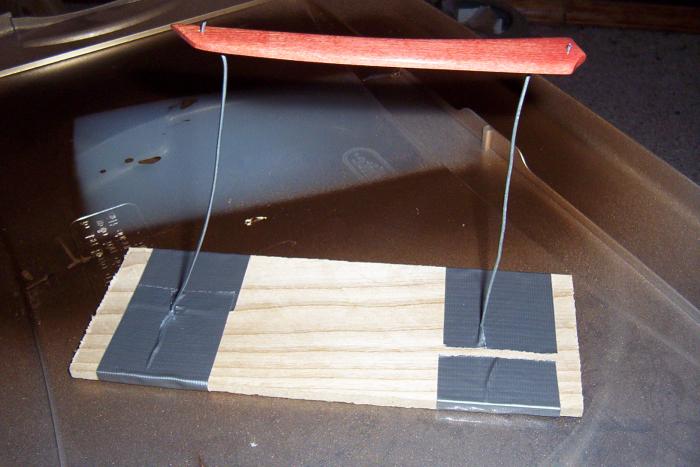
For spray on finishes, again I do at least 3 coats on the inside, before I get the outside started.. I made some holders for the scales for spray finishes.. Just a piece of wood and some stiff wire...
As to the wedge end ??? Yes the wedge is coated to as I do the outside, I do 3-5 coats depending on the finish I am using, this is for wood/bone wedges...
I know I have my method, but I'm always willing to learn - and I think this could be of great use to the other neophyte restorers like myself
Again, your willingness to share information is a credit to you, good sir.
MarkLast edited by gssixgun; 11-10-2008 at 04:05 PM.
-
11-10-2008, 04:21 PM #19

Really helpful posts here. Thanks for imparting your knowledge!
-
11-10-2008, 04:33 PM #20Senior Member

- Join Date
- Apr 2008
- Location
- Boston, MA
- Posts
- 1,486
Thanked: 953
shouldn't this be a sticky? I want to be able to find this in three years when I'm finally read to think about doing this.


 14Likes
 LinkBack URL
 About LinkBacks


 Reply With Quote
