
Results 11 to 20 of 50
 46Likes
 LinkBack URL
 About LinkBacks
-
01-13-2011, 04:45 PM #11Poor Fit

- Join Date
- May 2010
- Posts
- 4,562
Thanked: 1263
Thanks Glen...very informative and helpful as always

-
01-13-2011, 06:05 PM #12Senior Member


- Join Date
- Oct 2010
- Posts
- 26,211
Thanked: 8626
I have been working on some metal lined scales of pearl and ivory . I would like to put a hard, clear finish on them as I complete them. Does anyone have experience using CA on something like this, or should I use urethane or something else? I appreciate this thread very much!

-
01-13-2011, 06:18 PM #13Senior Member

- Join Date
- May 2007
- Location
- Concord, NH
- Posts
- 1,287
Thanked: 274
Great information. Thanks, Glen. I can't wait to see those pics.
-
01-13-2011, 07:52 PM #14Senior Member


- Join Date
- Apr 2010
- Location
- Yakima, Wa
- Posts
- 1,955
Thanked: 494
Oh, come on Glen, are you telling me that I am the only person in the world who leaves their CA uncapped because I can go through it long before it dries?

Butch, I have used CA in my vacuum setup. It works great, but it can vaporize and it will ruin a filter. in fact the first time I did it I had to keep replacing the filter until I figured our to place a bladder over the CA then suck out the air over the bladder. This gets VERY messy. There is also a large cost involved in playing with CA.
dnjrboy, I don't have the experience that many do, but when I CA scales I will form the wedge first, then take it apart to CA the scales. I will first apply a thin coat or two to where the wedge will sit then sand it off using a flat surface to get a proper fitting. Once the scales are done I will usually CA over the wedge and scales, then once cured I will sand down to the original level of the scales thus releasing the wedge from the sclaes and leaving a finish on the wedge. I hope that made sense.
Honestly as of late I have been using up scraps from my stabilized woods for wedges and I final sand the wedge when I final sand the scale finish.
Thank you Glen for posting this as I still forget to use acetone now and then. For those who don't use acetone on dry woods I had trouble a few months ago with a cherry that acetone fixed.
-
01-13-2011, 11:08 PM #15Senior Member

- Join Date
- May 2009
- Location
- Gippsland, Victoria, Australia
- Posts
- 230
Thanked: 51
Thats pretty cool - always wanted to know how you guys got those beautiful finishes, thanks for sharing with us. Very similar approach to what I use when turning pens and brush hands etc, except I use something else for the final cutting (which name eludes me at the moment). Might try the turtle wax on my next pen and see how it goes....would be a hell of a lot cheaper than what I use at present.
-
01-14-2011, 05:18 AM #16At this point in time...


- Join Date
- Jun 2007
- Location
- North Idaho Redoubt
- Posts
- 27,202
- Blog Entries
- 1
Thanked: 13250 Some pics
These are some pics in process..
The first pic is exactly what I was talking about, an untouched application of CA just kinda on there huh nothing really special about putting the CA on the special come in how smoothly it comes off
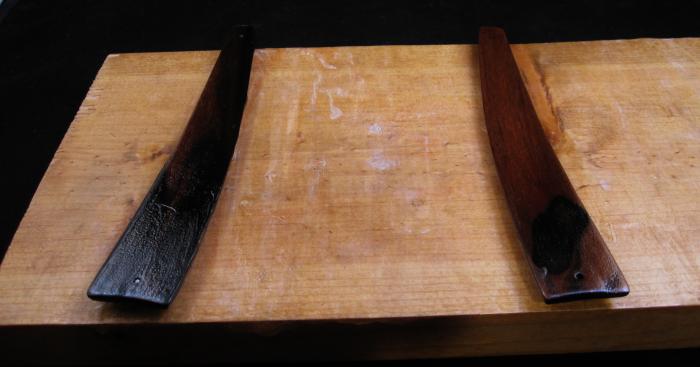
The second pic here is after a rough sanding at 320... Note the shiny spots those are actually low spots in the finish... this is only after 3 applications though so that is good enough for #4... The one thing to note is that any drips/drops must come off before you progress to the next application.. I check with touch between applications low spots no big deal high spots not a good thing... Be extra careful sanding along the edges Hehehehe
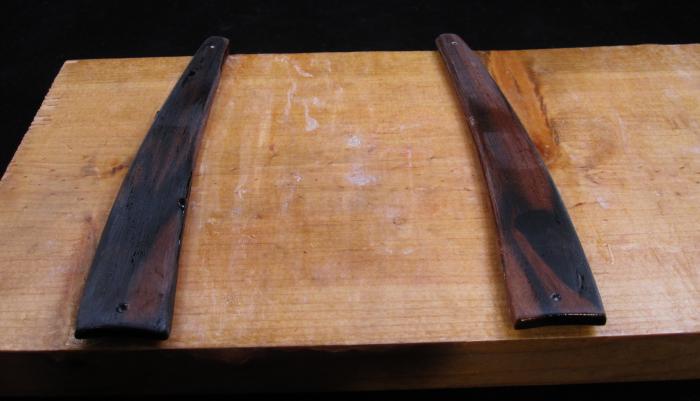
I'll take some more as it progresses,, This is Gorilla Glue BTW...
Hint: Those scales are held on to that scrap wood with some double sided tape the cushion kind so they are about 1/8 inch off the wood, makes it really easy to work with...Last edited by gssixgun; 01-14-2011 at 05:39 AM.
-
01-14-2011, 05:49 AM #17The Great & Powerful Oz

- Join Date
- May 2008
- Location
- Bodalla, NSW
- Posts
- 15,638
Thanked: 3751
Now that hint alone is worth the price of admission . Originally Posted by gssixgun

I think I just read about every mistake I ever made with CA
The white gleam of swords, not the black ink of books, clears doubts and uncertainties and bleak outlooks.
-
01-14-2011, 07:55 AM #18Senior Member

- Join Date
- May 2009
- Location
- Reno, NV
- Posts
- 282
Thanked: 124
Nice idea for the tape to hold off the wood.
I'll echo Glen's note about watching the edges while sanding. The sides of the scale, at least for me, can be a pain to get as nice as the face. Make sure you get your glue wrapping around the edge and onto them on ever application.
I stopped worrying about finger covers with CA a while back when I realized two things. First the glue does not cure when it touches itself the same way t does on flesh. Get a dry layer of glue on your finger and you can spread more layers around like nothing. Secondly the more layers you build up on your fingers, and they do build up, it just does not immediately stick to the scales the way bare flesh does, the thicker it ends up becoming which makes it much easier to peel off your fingers. You can easily get a whole finger pad's worth of glue off in a single peel after about five spreadings and no skin with it either!Havachat45 likes this.
-
01-14-2011, 08:18 AM #19Junior Member
- Join Date
- Aug 2010
- Posts
- 2
Thanked: 3
Thanks a lot for these CA finishing hints ! And also for the pictures, it helps a lot !
I'm wondering exactly the same... Originally Posted by dnjrboy

All tips will be VERY appreciated !
-
01-14-2011, 05:30 PM #20At this point in time...
- Join Date
- Jun 2007
- Location
- North Idaho Redoubt
- Posts
- 27,202
- Blog Entries
- 1
Thanked: 13250
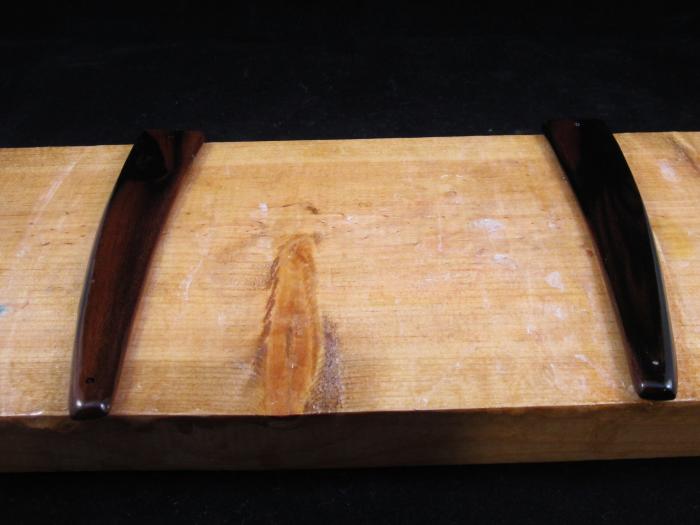
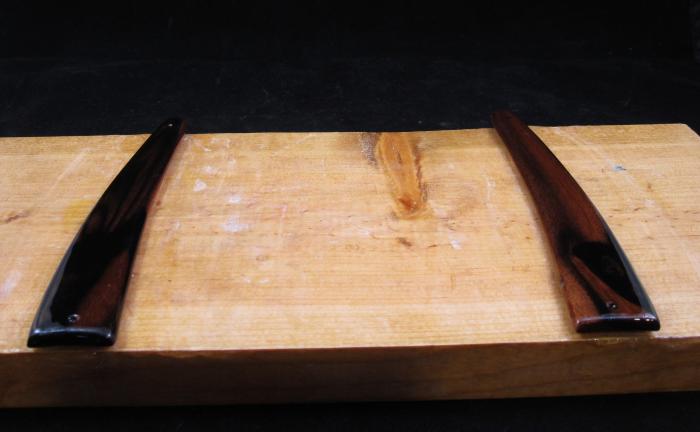
Here are some from this morning after another 2 applications now at 4
BTW Normally this can be done way faster, about 1 hour between Med coats and about 20 minutes between thin coats for a total of 1 hour for each application, wet to dry... Maybe 6 hours most of which is drying time
My day yesterday consisted of getting up at 4:30 to fire up the big tractor and 3 hours of clearing the road of snow, putting on 1 application of CA going to the real job getting home to another 3 hours more of clearing the road sanding and putting on another application and finally sleeping hehehe....
Is it Spring Yet ????
You can see even in these pics that the finish is starting to even up more and more...


 Reply With Quote