Results 1 to 10 of 30
Thread: First restore
Hybrid View
-
01-25-2012, 11:22 AM #1
 First restore
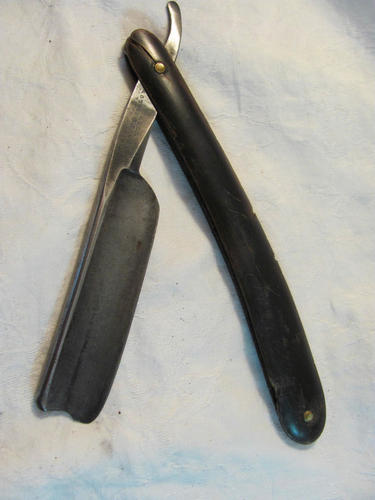
Ok, working on my first restore. Currently sanding/polishing the blade. The old horn scales are too far gone. I have some cellulose tortoise shell blank on the way.
However, the blank is 4mm thick. You know of an easy way to make it thinner? Most of my tools are hand tools...
Thanks,
Jeff.
-
01-25-2012, 11:59 AM #2..mama I know we broke the rules...


- Join Date
- Feb 2010
- Location
- Toronto, Ontario, Canada
- Posts
- 2,895
- Blog Entries
- 8
Thanked: 993
3m wet dry sandpaper, a glass plate (just like for lapping), and patience.
Or...find a buddy who's got a power sander and give him a six pack while you work.
-
01-25-2012, 02:10 PM #3

I had to thin some hardwood spacers (lignum vitae) that were not far off in dimension from razor scales. I used sandpaper too but added "handles" to the pieces I was reducing. The handles were strips of wood that ran the length of the spacer and probably helped put even pressure from end-to-end as I sanded. I used some Scotch double-sided tape for photo mounting to hold the handles in place and a safety razor blade to split them off after I finished.
-
01-27-2012, 06:38 AM #4

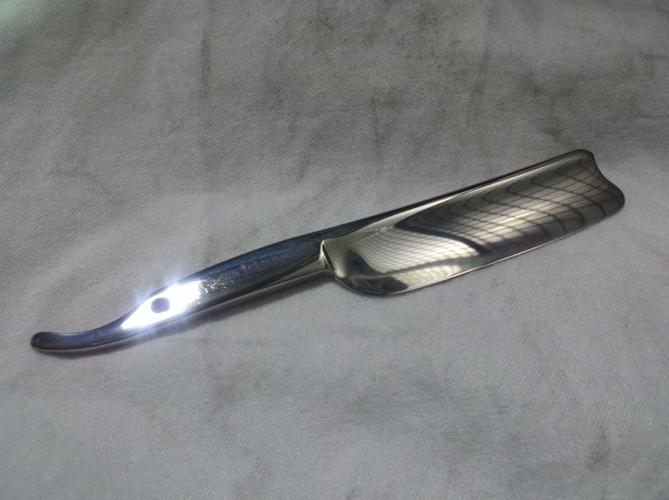
Ok, mostly done with the blade. Hand sanded, partly with orbital 400, 800, 1000, 1500, 2000, then Royal Blue metal polish.
Before and after:


-
01-27-2012, 06:40 AM #5

Should be receiving my Tortoise celluloid in a few days.
-
01-27-2012, 08:30 AM #6
-
01-27-2012, 10:48 AM #7

Well, that should not be a problem as I don't have a fast belt.... This restore will be mostly hand tools and elbow grease!
Also the Razor is marked "American Knife Co. Plymouth Hollow Conn". That puts it between 1850 and 1875 as the town changed it's name in 1875. It could have been used in the American Civil War! Cool huh?
-
01-27-2012, 01:15 PM #8..mama I know we broke the rules...


- Join Date
- Feb 2010
- Location
- Toronto, Ontario, Canada
- Posts
- 2,895
- Blog Entries
- 8
Thanked: 993
Jeff, the blade looks great! How many hours of sanding do you figure it took you to arrive at this point?
-
01-28-2012, 08:27 PM #9

Perhaps 4 or 5 hours total.
-
02-03-2012, 03:03 AM #10

Jeff, for me it is what feels comfortable to hold. As you shave the scales will sit between your fingers. If it feels comfortable, then it should be fine. My personal preference is probably on the thinner side.
For example this is a set I am currently making. I normally find that the pivot end is normally narrower than the wedge end.
StuLast edited by Str8Raz0r; 02-03-2012 at 03:06 AM.


 8Likes
 LinkBack URL
 About LinkBacks


 Reply With Quote

