
Results 11 to 20 of 25
 4Likes
Thread: Blade Geometry Help Required
 LinkBack URL
 About LinkBacks
-
05-09-2012, 07:57 PM #11Junior Member

- Join Date
- May 2012
- Posts
- 15
Thanked: 1
Again many thanks for all your support and advice, it is most apreciated!
Although this site needs to stop giving me ideas, I love all your custom blade designs, and as a result I've just bought a Gold Dollar to make my mistakes on (£2.50 delivered ), & 2x sheffield steel blades to reclaim / modernise <£30 all in and I have a few ideas for mixing the latter with a bit of carbon fibre.
Anyway, I love the look, and tradition that surrounds the Kamisori, and would love to try one first, but my wife would use the Kamisori in un-mentionable ways if I went out and spent the best part of £200 to try it, she better not read this as the new blades could end up the same!
This way I get to have a go at making something very traditional looking, but in a modern way, designed & made by me, will hopefully shave well and will be something I can pass on to my newborn son when he gets older. If it turns out pants, then I havn't lost a great deal of cash, and will still look good in my new collection.
As for the steel, after looking around O1 steel might be the better choice for the first batch (I plan on making 5 in the first match), from what I can see, I can harden and temper it relativley easily at home? (Bohler could be a good source, thanks for the heads up)
Will update in the morning with model and some of my ideas.
cheers.
Dave
-
05-10-2012, 08:19 AM #12Junior Member
- Join Date
- May 2012
- Posts
- 15
Thanked: 1
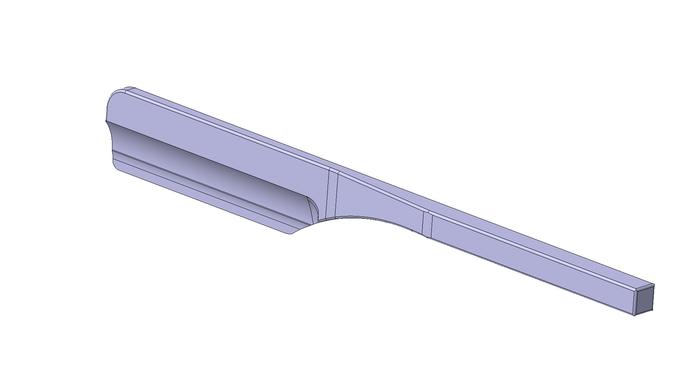
Ok as promised here are some images of what I'm proposing:
Thinking on this overnight, I will go for O1 tool steel, as it will be much easier as my first attempt. If it works then I will progress onto more exotic stainless steels, at a later date
first off here is the 'blank' which I will heat treat. (what are your suggestions for edge thickness for this stage?)
I have made sure I will end up with a 17° cutting edge, and the COG of the blade is bang on dead centre, so it should have a nice ballanced feel.
and below are some configurations I'm considering:
This one will be polished all over with a 'parachute cord' handle / tang wrap:
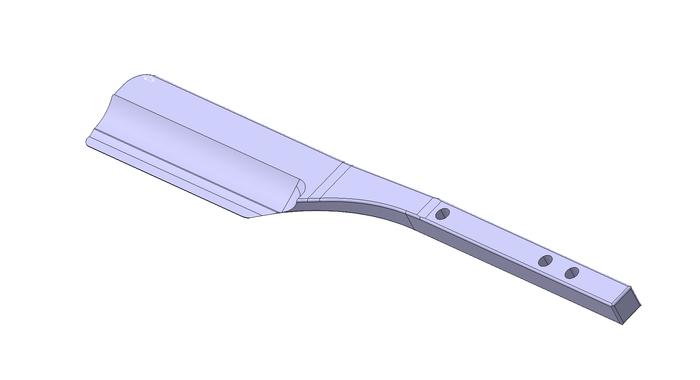
This one will have a polished blade, satin finished elsewhere, with a carbon wrap applied to the tang, and carbon inlay details in the spine.
And finally, this one will be as above, but with viton O rings applied to recesses in tang, and the FWD hole details left open.
All comments good and bad are much appreciated.
Regards
Dave
-
05-10-2012, 10:26 AM #13
Your designs share a common flaw.
The part of the spine that touches the stone when honing HAS to be free from the rest of the construction.
With this I mean that if you lay the blade on the stone, only the spine should touch, regardless of the exact position of the razor. The tang should never touch the stone.
If you don't design your razor like that, the following will happen:
1) you start honing and remove metal, both from the spine and the edge
2) you will never position the razor exactly the same during your honing strokes.
3) the part of the spine that is not always on the stone will wear down slower than the rest
4) if that part of the spine is then positioned on the stone instead of off it, the spine and edge contact with the stone will be wonky.
5) the blade will wobble during honing, the bevel of the edge will get a slightly different (variable) angle and the razor will never get sharp.
This will make a major difference during honing and maintenance.
Common ways to solve this are to make the spin just a fraction thicker than the tang, or creating a fuller between the tang and the spine. Or something else. You want the spine to be free on the stone (within reason of course) without being hampered by the rest of the blade.
Thickness pre-HT should be 1 to 2 mm.Til shade is gone, til water is gone, Into the shadow with teeth bared, screaming defiance with the last breath.
To spit in Sightblinders eye on the Last Day
-
05-10-2012, 10:33 AM #14
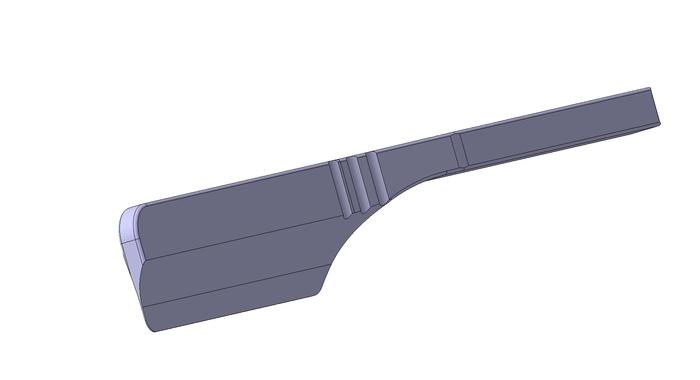
To clarify my suggestion of a fuller as a possible solution, look at this:

This was one of my first prototypes, and it had a problem around the shoulder.
So I used my dremel to grind 2 fullers that separated the spine from the tang.
That way, the spine and the edge can lay on the stone, and if the spine wears down over time, the fuller between the tang and the spine insures that the spine will wear down evenly, thus allowing the edge to always have the same contact with the stone.
The wear is of course very little over time, but with razor edges we're talking about micrometers, and if there is a wobble in the spine, there will be wobbling around the edge. Since the wear is so small, another obvious solution would be to have the spine a hair thicker than the tang at the junction between spine and tang.
-
05-10-2012, 11:12 AM #15Junior Member
- Join Date
- May 2012
- Posts
- 15
Thanked: 1
Thanks for the advice Bruno, I see what you are saying.
I have left clearance to the tang, so when honing there is plenty of clearance between the full edge and the corresponding spine contact so the tang should not interfere.
I'm not sure if this OK then, as from what I can see, the clearances are not too disimilar, to the clerances between the edge and shoulder on a traditional straight?
-
05-10-2012, 09:22 PM #16
If you look closely at a traditional straight (without hone wear) you'll notice that the spine is a hair thicker than the tang.
If the spine and edge are on the hone, you can slide the tang over the stone and it won't make contact.
On razors with bulky shoulders that cannot slide over the stone, the tang usually tapers from the spine in a way that the first bit of the spine near the shoulders doesn't touch the stone.
And on smiling razors the geometry is a bit different of course, but the same principles still apply -> even with small differences in individual honing strokes and wear over time, the part that touches the stone should always be the same.
-
05-11-2012, 12:05 PM #17Junior Member
- Join Date
- May 2012
- Posts
- 15
Thanked: 1
Cheers Bruno, again advice is taken on board.
Billet of 6x20mm O1 tool steel has been ordered, just need to finish up the blank design so I can get it to the machine shop. (£9.60 for a 500mm length)
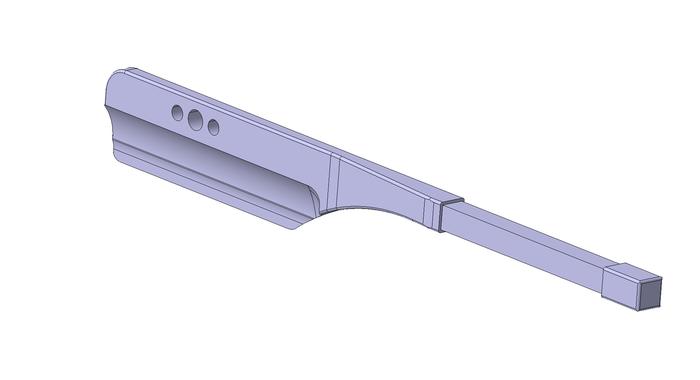
I have made a few mods based on the recmendations, and here is the lastest incarnation.
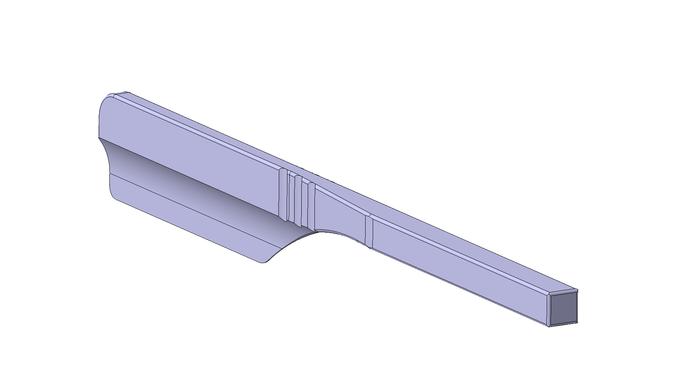
As suggested I will leave a 1.5mm thick edge on the blank before heat treatment and I will apply a Ø5" shallow grind to the back face, and will ensure I get a cutting angle of ~17°.
I don't want to ruin the overall look I was going for with the tang, nor increase the amount of machining required (less likely to get the homer made!) so I have taken the front face grind all the way out and also added some fullers. Is this more like what is required? or do I need to re-think the whole tang?
Many thanks.
DaveLast edited by ScouseDave29; 05-11-2012 at 12:07 PM.
-
05-11-2012, 12:26 PM #18
Hey Dave,
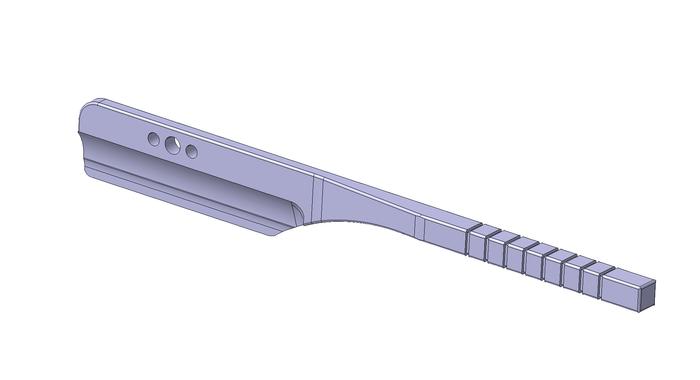
That will work just fine. After you make the fullers, you have 2 ridges between the blade and the tang, according to those pics.
If you file them down just a hair so that they can freely slide over the honing surface without touching it, you will have a very good clearance between the spine and the tang, and you should be able to maintain the razor without any issues.
Btw, since the back of the blade is on the hone as well, you need those fullers on that side as well. You pic doesn't show if they are there or not, so I thought I'd mention it explicitly.
 :
:
Be sure to post pictures of your progress.Til shade is gone, til water is gone, Into the shadow with teeth bared, screaming defiance with the last breath.
To spit in Sightblinders eye on the Last Day
-
05-11-2012, 01:32 PM #19Junior Member
- Join Date
- May 2012
- Posts
- 15
Thanked: 1
Once again cheers Bruno,
Yeah those fullers are indeed on the reverse side as it does the job on that side as you described & helps the aesthetics considerably.
Really excited about this little project now, just need to get the blanks cut so I can get the heat treatment sorted, then I can play around with the design.
-
05-17-2012, 05:00 AM #20Senior Member

- Join Date
- Feb 2011
- Location
- Eastern Washington, USA
- Posts
- 284
Thanked: 54
You will enjoy shaving with your "own" blade. Gives a sense of accomplishment that relatively few ever know. Glad you chose a well known, quality steel for your first razor, the 17-4 would have been a major disappointment. It was never intended to hold an edge. I would recommend making at least one traditional ground blade out of the bunch. You wont need to change the overall design. Unsolicited advice, sorry.
There is some info on the kamisori geometry on the forum. I am going to study it well when I do a kamisori grind. I am thinking that centuries of experience beat my own enthusiasm. I made my first razor out of an old file and it is a real ugly piece but when sharp it shaves pretty well. It is near to a kamisori, it shaves a little different than the western grind. My goal was to do a test blade to see if I could even grind a razor.
Take your time and have fun.
JeffLast edited by TURNMASTER; 05-17-2012 at 05:06 AM.


 Reply With Quote

