
Results 1 to 10 of 15
 5Likes
 LinkBack URL
 About LinkBacks
-
12-10-2012, 09:51 PM #1Member


- Join Date
- Oct 2012
- Location
- Ohio
- Posts
- 51
Thanked: 4 Pinning ... not going that well. Please help.
I am re-pinning a Thistle and it is taking forever. All of the videos that I've watched the restorer was finished in no time. I am following the instructions that is in the Wiki and I think something is wrong.
What I have done so far is peen one side of the 1/16" nickel-silver rod with a washer already on it ... put both sides of the scales and the wedge together and cut the excess off so that 1/16" was remaining on both sides (maybe less). Next, I have started to peen the both sides as evenly as I can tell, but it seems to be taking too many taps with my ball peen-hammer. I am also paying close attention to hit the pin just off center with the hammer so I don't crack the scales. As well as moving the scales around in a circular motion against the hammer strikes.
Is there something to make the pin flare out easier?
-
12-10-2012, 10:01 PM #2Senior Member


- Join Date
- Sep 2008
- Location
- Crossville, TN
- Posts
- 1,711
Thanked: 304
Check out hte following video;
gssixgun straight razor repair pinning wmv
Peening is a slow process. It is nothing to tap a pin 100 times or more per side since you are using very light taps.
-
12-10-2012, 10:10 PM #3Senior Member

- Join Date
- Sep 2011
- Location
- Nova Scotia
- Posts
- 265
Thanked: 30
Hard to say without pics.
What weight hammer are you using?
I few ideas though:
Assuming that you left enough pin exposed on both sides, try just a TINY bit more vigour with your hammer strokes. Basically just bounce the peen of the hammer off the edge of the pin to form a dome. I know you've read this all before, I'm just being sure.
The other thing that makes a difference sometimes is what you are resting the opposing side of the pin on while you hammer it.
I has to be hard (Anvil) and have NO give at all because that will absorb all the kinetic energy from your hammer strokes.
That's just my initial thoughts.
Hope they help.Through the mud and the blood, to the green fields beyond.
-
12-10-2012, 10:26 PM #4Member
- Join Date
- Oct 2012
- Location
- Ohio
- Posts
- 51
Thanked: 4
I'm using a 4 oz. hammer.What weight hammer are you using?
I unfortunately do not have an anvil, so I am using another hammer.The other thing that makes a difference sometimes is what you are resting the opposing side of the pin on while you hammer it.
I has to be hard (Anvil) and have NO give at all because that will absorb all the kinetic energy from your hammer strokes.
I have seen that video ... thanks Glen, nice video ... wish I had a workshop like that!Check out hte following video;
gssixgun straight razor repair pinning wmv
I would say I've probably hit each side at least 300-400 times ... no joke.Peening is a slow process. It is nothing to tap a pin 100 times or more per side since you are using very light taps.
If I cut the rod too short, wouldn't it take less time to make a tight fit? Also cause a tiny dome over the washer? Instead of covering 3/4 of the washer.Assuming that you left enough pin exposed on both sides, try just a TINY bit more vigour with your hammer strokes. Basically just bounce the peen of the hammer off the edge of the pin to form a dome. I know you've read this all before, I'm just being sure.
-
12-10-2012, 10:42 PM #5Senior Member

- Join Date
- Jan 2011
- Location
- Roseville,Kali
- Posts
- 10,432
Thanked: 2027
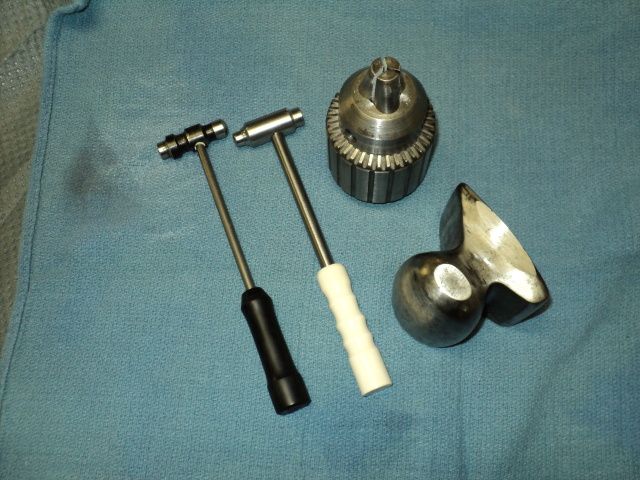
Pinning is not rocket science guys,all you are doing is making a rivit.If you do not have a 2/3 oz. hammer, a table spoon will work,you need a pce of steel to use as an anvil,I use a body working dolly that I have ground some flat surfaces on, 4 bux at any car parts store,I cut my pins about 1/2 in.long,I chuck them in a 3 jaw jacobs,file and chamfer. put a washer on peen till it is just slightley mushroomed.
Install the pin,With flush cut side cutter,trim to about a 16th,install washer,Lay the side that is semi pinned on your anvil (any pce of steel will work) Start tapping, do not use any force,let the hammer fall with no more than gravity,you want it to bounce on the metal.Start with the flat side of the hammer, when the washer is held in place, go to the peening side of the hammer and continue rolling over the edge.
When done and the blade is under tension and centerd at the wedge, your finished.
you can at this point using a leather punch, punch a hole in some masking tape, a tad larger than the pin, apply and sand the pin finished.
I make my own peening hammers with a radius the same as a table spoon, the store bought ones I find to be more acute for razor pinning,works for me.
-
The Following User Says Thank You to pixelfixed For This Useful Post:
regularjoe (12-11-2012)
-
12-10-2012, 11:22 PM #6Member
- Join Date
- Oct 2012
- Location
- Ohio
- Posts
- 51
Thanked: 4
Thanks for the advice guys. I finally got the wedge pin tight, now I'm working on the pivot pin.
... How would you tighten the pins after you sand them? Obviously I'm talking about years down the road when things get loose.When done and the blade is under tension and centerd at the wedge, your finished.
you can at this point using a leather punch, punch a hole in some masking tape, a tad larger than the pin, apply and sand the pin finished.
-
12-10-2012, 11:42 PM #7Senior Member
- Join Date
- Jan 2011
- Location
- Roseville,Kali
- Posts
- 10,432
Thanked: 2027
a few more taps,some tape,couple strokes with 800 grit,your back to home base again Originally Posted by mhenson

-
12-10-2012, 11:51 PM #8Member
- Join Date
- Oct 2012
- Location
- Ohio
- Posts
- 51
Thanked: 4
So I just watched that video again and I noticed what I think I did wrong. I left 1/16" on BOTH sides of the scales. Glen states that he barely feels the pin above the scales.
 baldy likes this.
-
12-11-2012, 12:00 AM #9Just a guy with free time.
- Join Date
- Oct 2011
- Location
- Mid state Illinois
- Posts
- 1,448
Thanked: 247
Pixel..3 jaw chuck thing...pure awesome. Thank you for that. I've been holding onto one I pulled off an old burnt out combo lathe/jigsaw thing, with the idea that there HAD to be a use for it. Now to go digging, and see where I "stored" it. Thanks again!
-
12-11-2012, 12:56 AM #10< Banned User >
- Join Date
- May 2012
- Location
- Forest Park
- Posts
- 282
Thanked: 44
Here's a trick. 1/16" of rod sticking out past the washer will take you forever to peen tight. You need 1/32" sticking out. Just barely. It takes me roughly 30-40 taps with a 4oz ball peen hammer to get tight rivets. Also - I use a table vice for the first side of the rivet - clamp in the rod, slide a washer on there, make sure the rod sticks out 1/32" past the washer, and peen. You can use more force with this first one because there's no risk of bending the rivet since it is in a vice.
Tylerbrycen likes this.
-
The Following User Says Thank You to sheffieldlover For This Useful Post:
mhenson (12-11-2012)


 Reply With Quote