Page 4 of 6 FirstFirst 123456 LastLast
Results 31 to 40 of 59
Like Tree113Likes

Thread: Making triple stacked washers old school

  1. #31
    Hones & Honing randydance062449's Avatar
    Join Date
    May 2005
    Location
    Saint Paul, Minnesota, United States
    Posts
    7,974
    Thanked: 2204
    Blog Entries
    1

    Default

    I gotta bookmark this one.
    Geezer likes this.
    Randolph Tuttle, a SRP Mentor for residents of Minnesota & western Wisconsin

  2. #32
    Fatty Boom Boom WW243's Avatar
    Join Date
    Jul 2012
    Location
    Rockville
    Posts
    3,258
    Thanked: 638

    Default

    ScienceGuy...amazing stuff and I'm hoping you get interested in bolsters some day.
    "Call me Ishmael"
    CUTS LANE WOOL HAIR LIKE A Saus-AGE!

  3. #33
    Historically Inquisitive Martin103's Avatar
    Join Date
    Aug 2011
    Location
    Upstate New York
    Posts
    5,780
    Thanked: 4249
    Blog Entries
    1

    Default

    Quote Originally Posted by ScienceGuy View Post
    I know this is an old thread, but we just found this image and I wanted to compile it here. This is from Perret's book from 1771 (L'Art du Coutelier) and shows the method at the time for making these - stamping a reverse single die into the receiver of a sheet of lead (which I saw in a video somewhat recently but didn't click until just now).
    Interestingly Zak aka Voidmonster, sent me a pm to translate the text affiliated with that picture, here it is.

    -The picture 15 represent how to punch the collars (rosette) from gold, silver and white metal, stamped and punched on a piece of lead of 15 pounds on top of the anvil, 1 or 2 hammer hits needed then the collar is embeded in the lead and removed with the little tool (metal pin) R on the picture. Afterwards it is put in case S on picture, where we keep different assortment of collars.

    The other tools pictured are punch making tools, F16, f17, f18, meaning to fabricate your own punches for different collars etc.

  4. The Following 2 Users Say Thank You to Martin103 For This Useful Post:

    Geezer (12-04-2013), ScienceGuy (10-09-2013)

  5. #34
    Captain ARAD. Voidmonster's Avatar
    Join Date
    May 2011
    Location
    Pacifica, CA
    Posts
    2,474
    Thanked: 2226

    Default

    I've made some progress on this front, inspired by the story of that lead sheet in Perret's illustrations.

    A while back, I did some tests and was able to get okay results, but I didn't have a drill press, and it was a horrible pain in the butt to get precise pin-holes, then even harder to get precise cut pieces.

    The way it works, though, is I use one of ScienceGuy's die-stamps and impress it into a block of bismuth/tin alloy (because lead ain't such a dandy workmate when you're machining it). That makes a formed receiver for the die, then you just impress the die into a sheet of brass over the receiver.

    Well, I wanted to do this more serious-like. I'd done some more tests involving all kinds of silly stuff like filling a 1/2" nut with molten solder. It worked, but it was lacking in elegance.

    At this point, I have a drill press, so I thought it would be interesting to chuck up the die and spin it into the brass. My initial tests were encouraging. One of our light switches is dying, so I had to go to Home Despot anyway, so I also grabbed a steel rod and a steel tube that fit over it. I cut stuff down to size, grabbed some of my bismuth solder and got to work.

    Name:  019fbec389cfb0fbf3219bc925ef56e47be77c293d.jpg
Views: 338
Size:  30.9 KB

    I put the rod in a vise, sheathed the tube about 3/4 of the way over it, and put my solder into the little 'cup'.

    Name:  01fdf764efa8b7a9ffda3462fd9b77f41f7633c376.jpg
Views: 336
Size:  49.2 KB

    The mighty power of propane (in the form of a blowtorch) melted that down so I had this:

    Name:  01301a494b688b4577558d9341e9d7362ab783a22f.jpg
Views: 332
Size:  38.6 KB

    (well, it took a little more solder than was in that first pic, but you get the idea.)

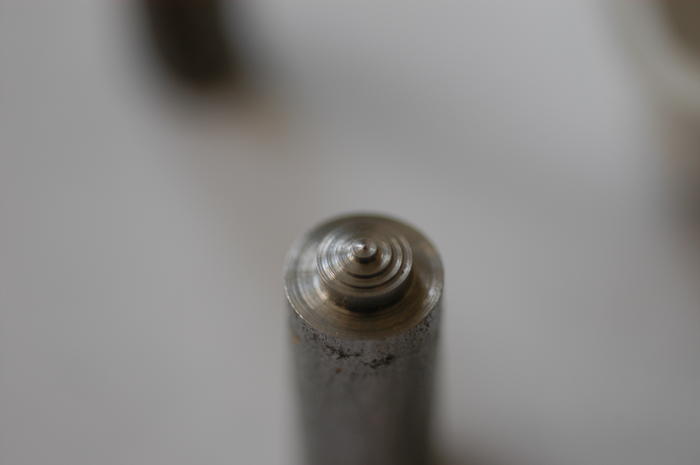
    I flattened it down, drilled a large pilot divot, and prepared to use the punch to shape the bismuth in the end of the tube. Using the drill press to push down and spin the receiver onto the die, I got this:

    Name:  014d44652e4e7f764aa1f0ba01dda319aa3dadd5cf.jpg
Views: 354
Size:  37.7 KB

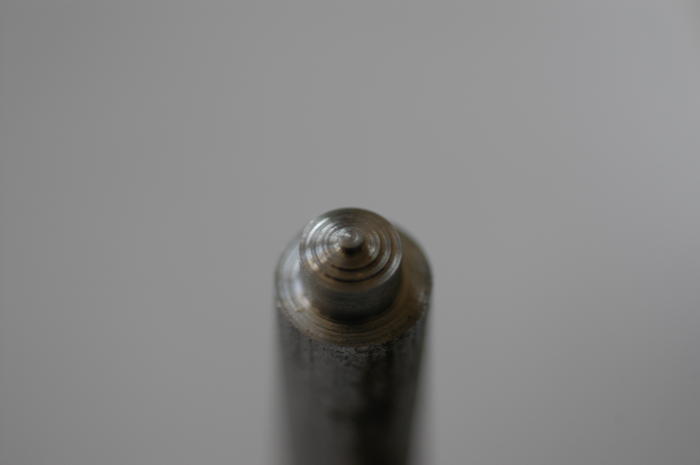
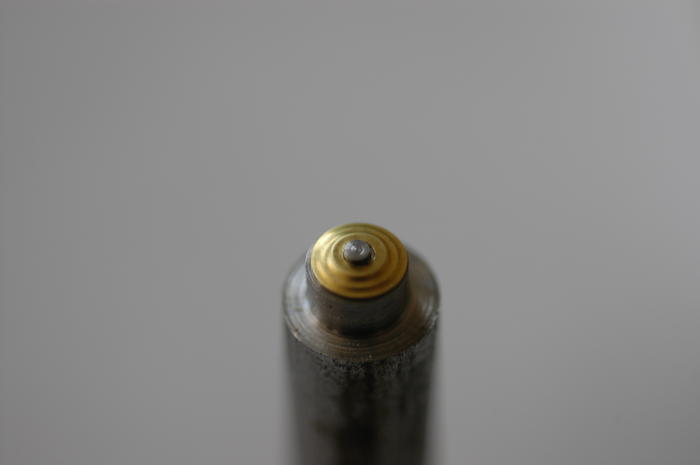
    Initially I thought I'd be able to spin the receiver on the brass to form it and polish it, but that just flattened the receiver into a formless mush and made an ugly dome. So I went back to spinning the punch.

    That got me this:

    Name:  0108f479cb1e6390552c8d06914afc20ace291083f.jpg
Views: 331
Size:  43.4 KB

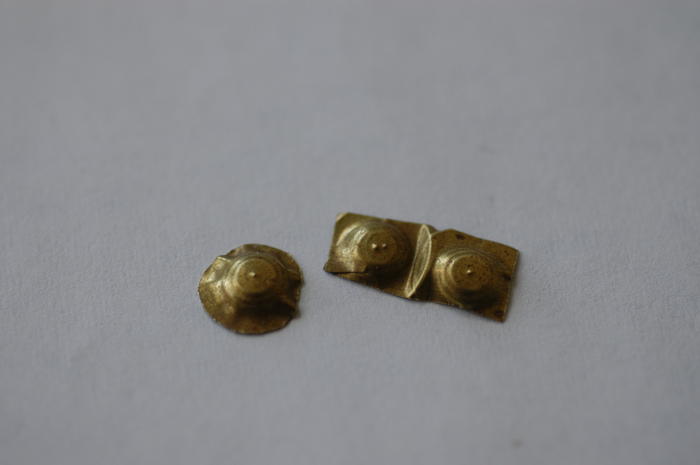
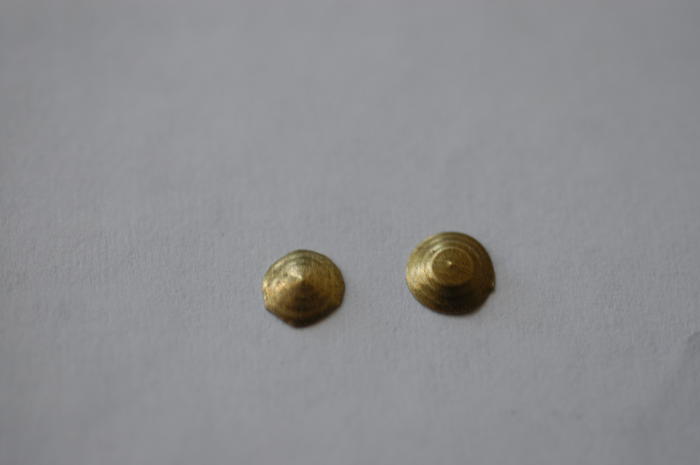
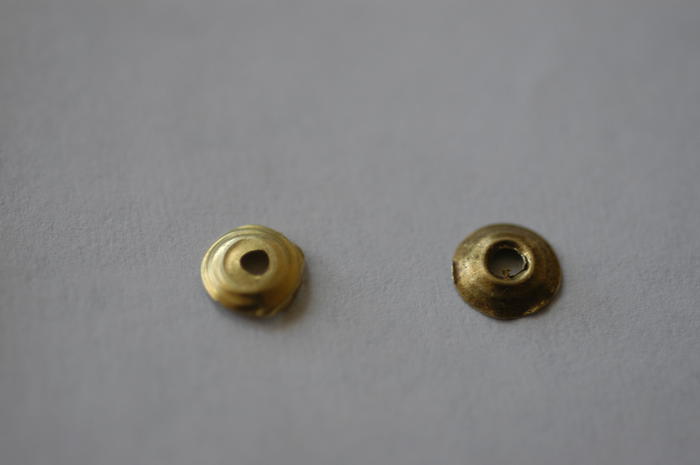
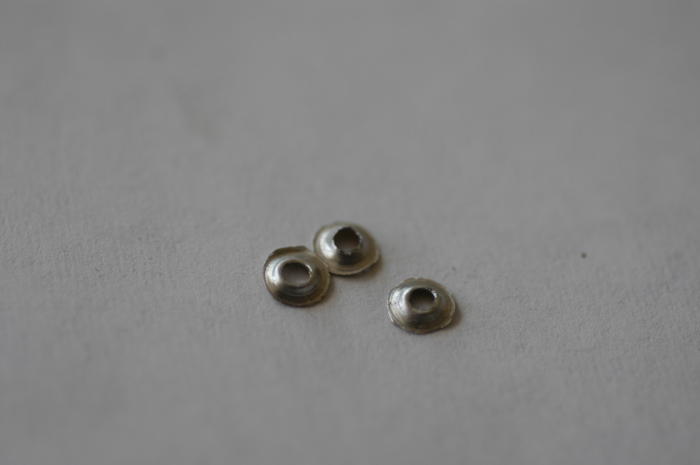
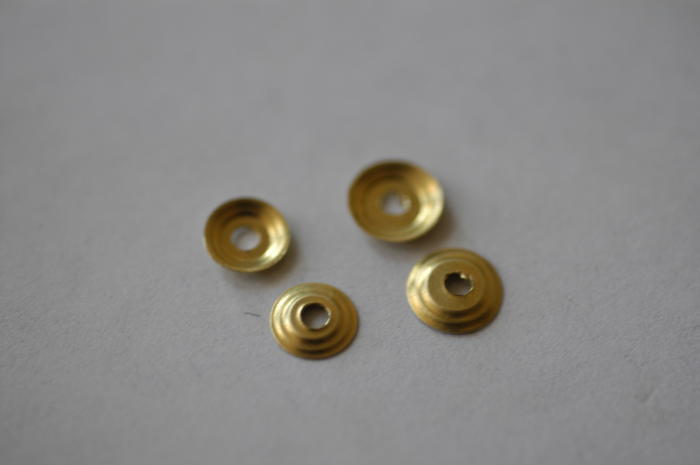
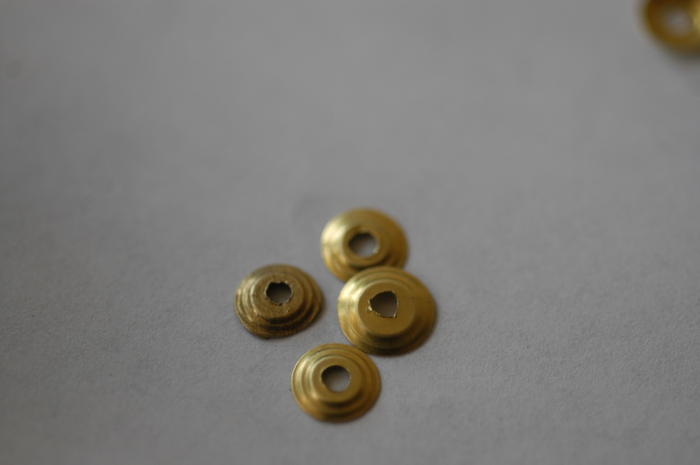
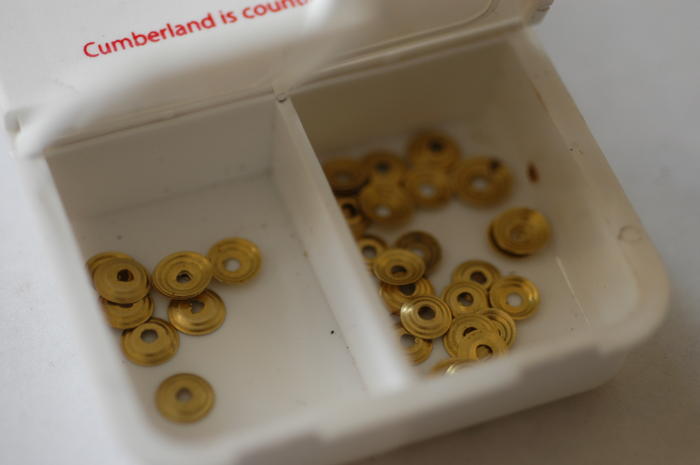
    I proceeded to use the drill press to drill out all the little nubs, then I took the punch and receiver from my hand-held power-punch, stuck the receiver in my vise and the punch in the drill press and used that to cut all the forms out. It works much, much cleaner than the hand tool for some reason. Having done this a few times before, I put some electrical tape over the bottom so all my parts wouldn't fall on the floor. And here is the end result.

    Name:  017d2faf8fb26e4f52e1cde6676e49c31f88f02347.jpg
Views: 314
Size:  43.2 KB

    Name:  01d8640f2448d1f8163c1e26aaedc2bfffcc4321d0.jpg
Views: 336
Size:  37.0 KB
    -Zak Jarvis. Writer. Artist. Bon vivant.

  6. The Following 6 Users Say Thank You to Voidmonster For This Useful Post:

    32t (01-19-2014), Double0757 (01-26-2014), Geezer (01-17-2014), JoeLowett (01-17-2014), JP5 (05-08-2015), Wolfpack34 (02-07-2014)

  7. #35
    Captain ARAD. Voidmonster's Avatar
    Join Date
    May 2011
    Location
    Pacifica, CA
    Posts
    2,474
    Thanked: 2226

    Default

    Oh! I forgot to mention!

    The down side of using a soft metal as a receiver is that it's good for one, maybe two presses before it loses its virtue. Sadness! Also, a huge pain when you're using a big block of metal.

    This setup I made though, is awesome. When the receiver no longer has good definition, just press the two bits together while the drill press is running to 'refresh' it.

    So in practice, it work something like this:

    Take a sheet of brass, stick it between the two parts while the press is running and press.

    Get out the superglue and put your finger back together, then use PLIERS to hold the sheets....

    Ahem.

    Press metal, press receiver, press metal, press receiver. You can go pretty quick this way. It took me about 1 minute to make all the ones in the picture. Rechucking for actual drilling, then again for the cutting just takes a moment. The whole process is pretty quick.
    Geezer and Euclid440 like this.
    -Zak Jarvis. Writer. Artist. Bon vivant.

  8. The Following User Says Thank You to Voidmonster For This Useful Post:

    JoeLowett (01-17-2014)

  9. #36
    Senior Member JoeLowett's Avatar
    Join Date
    Jul 2012
    Location
    Long Island, NY
    Posts
    718
    Thanked: 142

    Default

    Those look really, really good. It's funny how it takes a very large group of generally smart men years of experimentation to rediscover a simple task that was once a common, menial task which had since been forgotten. Those look as good as the ones from 150 years ago!.. nice work!!!
    Geezer likes this.
    ......... Making Old Razors Shine N' Shave, Once Again.
    -"Sheffield Style"

  10. The Following User Says Thank You to JoeLowett For This Useful Post:

    Voidmonster (01-17-2014)

  11. #37
    Captain ARAD. Voidmonster's Avatar
    Join Date
    May 2011
    Location
    Pacifica, CA
    Posts
    2,474
    Thanked: 2226

    Default

    Quote Originally Posted by JoeLowett View Post
    Those look really, really good. It's funny how it takes a very large group of generally smart men years of experimentation to rediscover a simple task that was once a common, menial task which had since been forgotten. Those look as good as the ones from 150 years ago!.. nice work!!!
    Yeah... Tell me about it!

    Next on my plate is pressed horn. That's sure to be loads of fun!
    Geezer likes this.
    -Zak Jarvis. Writer. Artist. Bon vivant.

  12. #38
    Senior Member JoeLowett's Avatar
    Join Date
    Jul 2012
    Location
    Long Island, NY
    Posts
    718
    Thanked: 142

    Default

    Quote Originally Posted by Voidmonster View Post
    Yeah... Tell me about it!

    Next on my plate is pressed horn. That's sure to be loads of fun!
    Yea let me know when you figure that one out.... All though there is a very compelling video I think Richard posted not too long ago with Japanese craftsman making a pair of tortoise she'll glasses from stock.

    The molded, formed and connected pieces of material with little more then small amounts of steam, heat and pressure. I'm sure it works off of a similar concept..... The trick is making the mold to press the material into, that may prove somewhat difficult.
    ......... Making Old Razors Shine N' Shave, Once Again.
    -"Sheffield Style"

  13. #39
    The Great & Powerful Oz onimaru55's Avatar
    Join Date
    May 2008
    Location
    Bodalla, NSW
    Posts
    15,602
    Thanked: 3748

    Default

    Pressed horn discussion moved to it's own thread here:
    http://straightrazorpalace.com/works...ssed-horn.html
    Voidmonster and Martin103 like this.
    “The white gleam of swords, not the black ink of books, clears doubts and uncertainties and bleak outlooks.”

  14. The Following 2 Users Say Thank You to onimaru55 For This Useful Post:

    Geezer (01-18-2014), Voidmonster (01-26-2014)

  15. #40
    Senior Member DennisBarberShop's Avatar
    Join Date
    Dec 2013
    Location
    Kentucky
    Posts
    1,840
    Thanked: 124

    Default

    Got a guy making me some punches like the op, absolutely love this thread, very helpful
    Voidmonster likes this.

Page 4 of 6 FirstFirst 123456 LastLast

Tags for this Thread

Posting Permissions

  • You may not post new threads
  • You may not post replies
  • You may not post attachments
  • You may not edit your posts
  •