
Results 51 to 59 of 59
 113Likes
 LinkBack URL
 About LinkBacks
Threaded View
-
01-06-2013, 07:26 PM #1Senior Member


- Join Date
- Sep 2011
- Posts
- 1,650
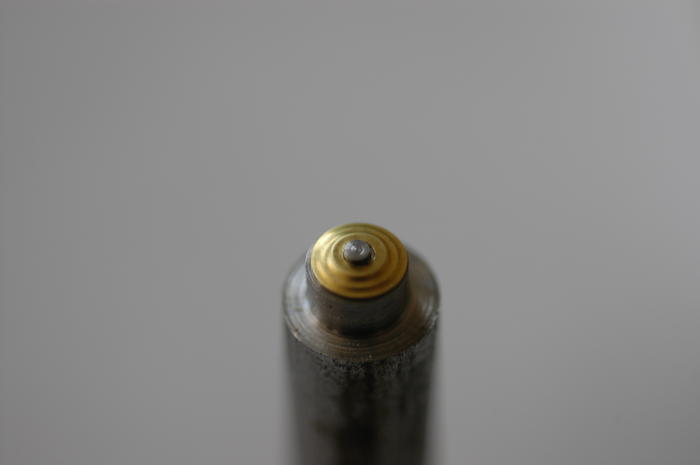
Thanked: 1341 Making triple stacked washers old school
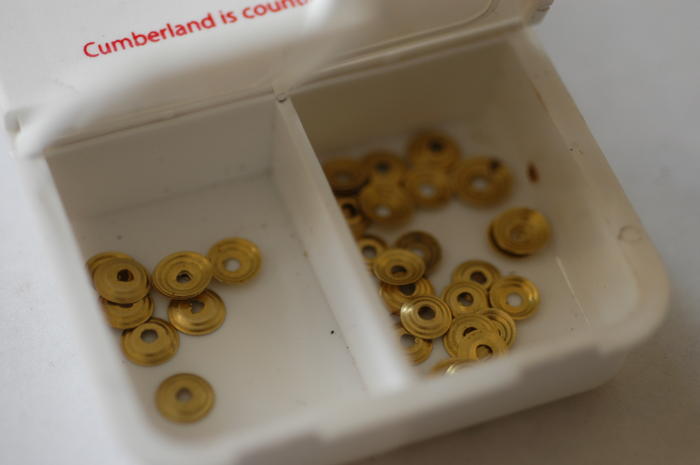
Hi all, this has been a work in progress for a long while and I finally got all the kinks worked out, so thought I'd write up a post (it's long). I've been trying to replicate the authentic triple stack style washers. I wasn't happy with actually stacking the brass washers and wanted to see if I could make them out of stamped brass sheet like they used to.
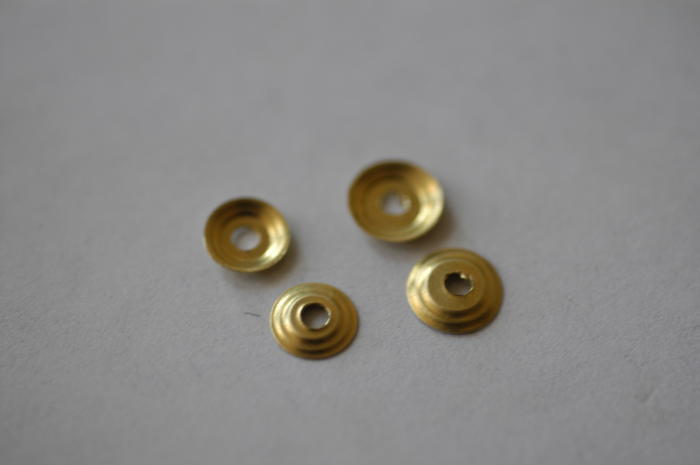
I wanted to make a 2-part pressure die, but didn't have the tools to machine the female end, so I started by just making the male die on the lathe. They were just in the shape of the washer. Then I punched the shape into brass sheet, cut out the circle, and drilled the hole. The results were ok but not great:

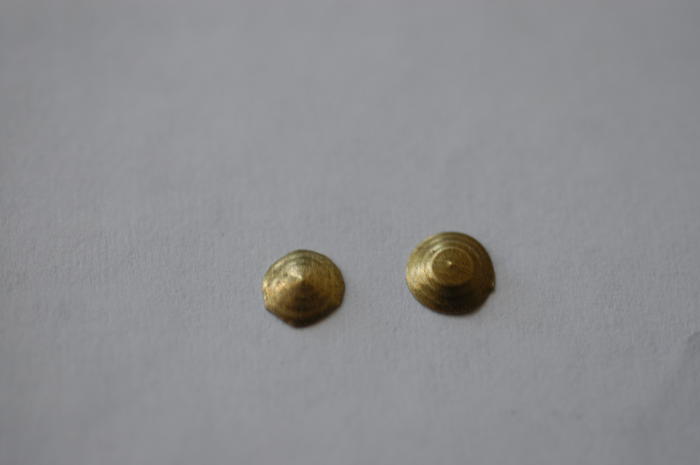
The main problem was in the definition of the edges on the stacks, and the problem was getting the right surface to punch into. I tried pine, maple, styrene, hard rubber, and a lot of other things. Eventually I found the right surface at a block of hard maple with 2 layers of duct tape on top. Then the problem was cutting out the washers and drilling a hole that was actually centered. I got around this by making a sharp edge on the die to deal with the cutting part, and decided to pre-drill the brass sheet and made a new die that had a raised part in the middle to fit into the hole. With the right surface, this worked like a charm. They're time consuming to make, but I think they're the best replications of these I've seen.
Here's two variations of the dies:
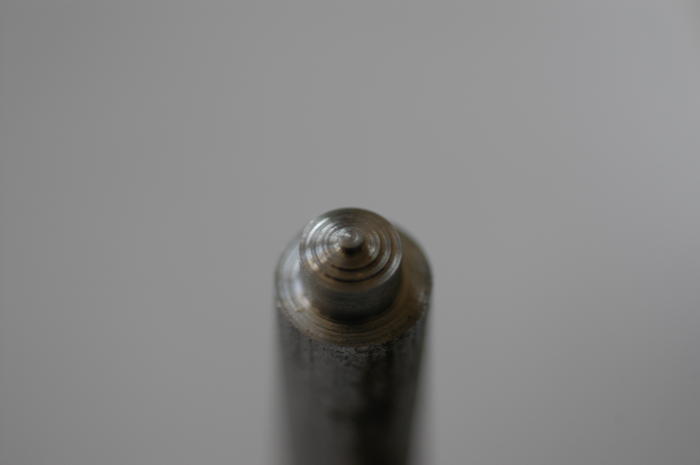
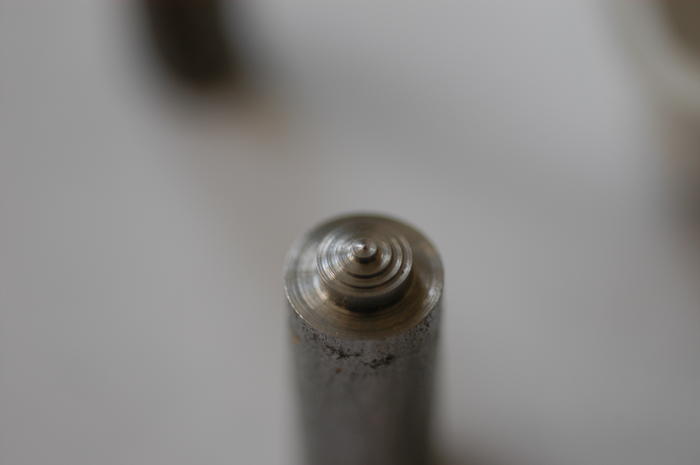
And with a respective collar, so you can see how the pin in the middle fits through the hole:
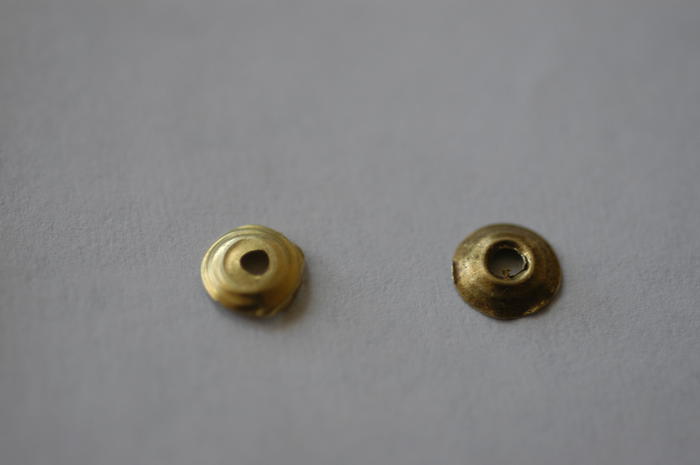
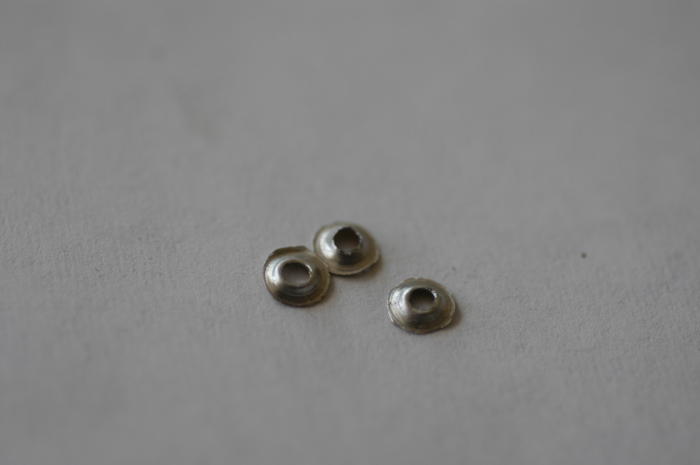
So really the only purpose of the die is to punch out a circle and shape the edges of the stack. Next I made a different die (not pictured) to punch out some aluminum under-collars. Aluminum doesn't like plastic deformation so it's no good with this die set, but is ok for the simple support collars underneath the decorative brass. Here are a couple of them. They're supposed to be steel but I couldn't find any thin sheet lying around.
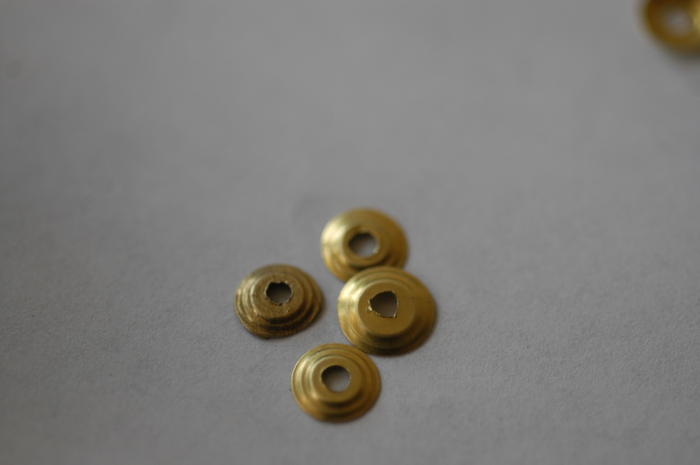
So anyway, after all that, I got a little overzealous and made a ton. Here are the final results:
More in the next post, I think I ran out of picture space.
-
The Following 10 Users Say Thank You to ScienceGuy For This Useful Post:
Geezer (01-06-2013), Gipson (01-18-2014), lz6 (10-08-2013), Sandycrack (01-13-2014), Shaggy8675 (01-06-2013), spazola (01-07-2013), Tarkus (01-06-2013), Voidmonster (01-06-2013), Wolfpack34 (02-07-2014), WW243 (01-30-2014)


 Reply With Quote