
Results 141 to 150 of 151
 33Likes
Thread: Air hammer?
 LinkBack URL
 About LinkBacks
-
01-05-2016, 05:55 AM #141Tumbling down the rabbit hole...


- Join Date
- May 2011
- Location
- Calgary, AB
- Posts
- 445
Thanked: 27
https://vimeo.com/150755504
That's more like it!
-
01-11-2016, 01:39 AM #142Tumbling down the rabbit hole...
- Join Date
- May 2011
- Location
- Calgary, AB
- Posts
- 445
Thanked: 27
My wife bought me a blacksmithing weekend course for Xmas! Awesome!
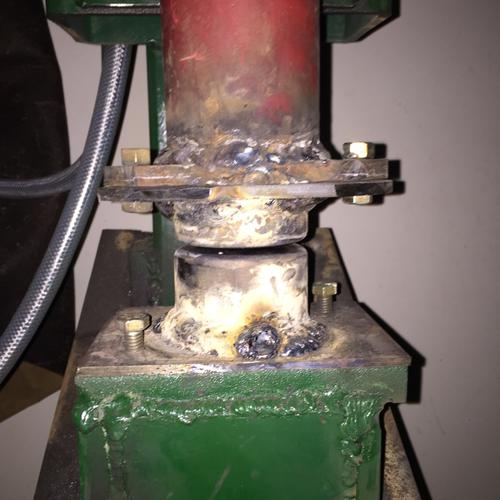
Finished the flatter dies. Top is flat; bottom is gently crowned.
 Substance likes this.
-
01-11-2016, 02:15 AM #143Tumbling down the rabbit hole...
- Join Date
- May 2011
- Location
- Calgary, AB
- Posts
- 445
Thanked: 27
I bought stainless bolts and nyloc nuts for the top die. I'll have to use thread lock and a lock washer in the bottom (the anvil is drilled and tapped to hold down the die.
I suppose there might be just enough width to make up some sort of die holder but already I have dies with base plates of different thicknesses.
-
01-16-2016, 11:45 PM #144Tumbling down the rabbit hole...
- Join Date
- May 2011
- Location
- Calgary, AB
- Posts
- 445
Thanked: 27 Air hammer?
Hitting... Hitting harder!
https://vimeo.com/152029740
To be honest, I will echo earlier advice: spend the time and money on an anvil and hammer rather than fuss with this mess.
And if forge welding is part of the process, stick with coal or charcoal rather than gas.
This hammer is starting to work, but needs a lot of pressure to hit hard. Partly that's because it is trying to push upward as soon as it passes the switch. I will need to get a needle valve on the up exhaust so I can run it wide open. It hits the top otherwise, and I don't have a spring yet for protection.
Bottom line: I seemed to hit harder with a six pound hammer than this thing hits with 35 or more pounds and a killer air compressor.
I will mix and match the dies to see if I can focus the energy a bit.Substance likes this.
-
The Following User Says Thank You to Atchbo For This Useful Post:
bluesman7 (01-17-2016)
-
01-17-2016, 01:13 PM #145
Have you seen this:
That's an air hammer, and it hits faster and harder than I could. In the video, Gudy is using it to make sure everything is welded together properly before putting it through the rolling press. A decent air hammer should be an improvement over a hand hammer.Substance likes this.Til shade is gone, til water is gone, Into the shadow with teeth bared, screaming defiance with the last breath.
To spit in Sightblinders eye on the Last Day
-
01-17-2016, 02:59 PM #146Senior Member

- Join Date
- Aug 2014
- Location
- East Central Illinois
- Posts
- 782
Thanked: 101
You can't forge a square corner on round dies. Most things forged by blacksmiths have more or less square corner. The round dies are pretty much a one trick pony, pushing metal out in all directions. Go with the rectangle shaped dies & you can use tooling to get the same effect as the round dies which won't be to often.
If you can find the Clifton Ralph videos on power hammers you will learn a lot. Cliff was a blacksmith in the steel mills in Gary Indiana He is a master on a 12,000 Lb. Steam hammer or a 25 Lb. Little Giant. Not all of what Cliff teaches in the videos will help you. They are mainly about mechanical hammers But the meat of how to use a hammer & tooling is the same no matter what the power source. Hope this helps & good luck with your project.
Dave H.
-
01-17-2016, 03:59 PM #147Tumbling down the rabbit hole...
- Join Date
- May 2011
- Location
- Calgary, AB
- Posts
- 445
Thanked: 27
Thanks. I will check him out. I was just testing out the action on the hammer by trying to forge down the head on a railroad spike. My hammer needs a foot control but I have been procrastinating.
If part of the trouble is that it's a bit misaligned I may have to take the hammer off and drill new holes for the guide plate at 90* from the way it is now (allowing the clevis to work in the direction of the misalignment). I originally did it this way thinking that if the bolts ever broke, the hammer would swing to the side rather than outward.
-
01-18-2016, 10:03 PM #148Tumbling down the rabbit hole...
- Join Date
- May 2011
- Location
- Calgary, AB
- Posts
- 445
Thanked: 27
It also just occurred to me that with just one switch it's hard to get any glide, as it's almost always fighting itself. May go back to two switches but closer together than before.
I knew that the controls were going to be fussy on something homemade.
-
01-19-2016, 06:21 AM #149
That is correct. Anything homemade that needs to run on auto is going to take an effort to behave just right.
-
01-31-2016, 01:04 AM #150Tumbling down the rabbit hole...
- Join Date
- May 2011
- Location
- Calgary, AB
- Posts
- 445
Thanked: 27
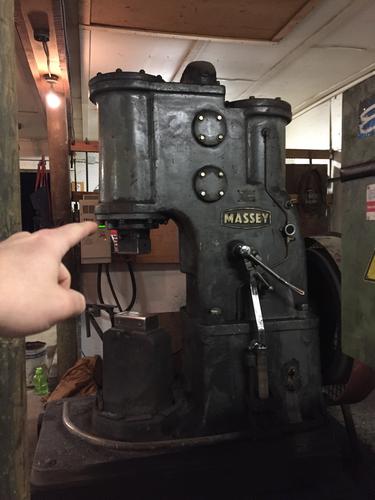
Now that's a hammer!


 Reply With Quote

