
Results 101 to 110 of 151
 33Likes
Thread: Air hammer?
 LinkBack URL
 About LinkBacks
-
11-07-2015, 08:13 PM #101Tumbling down the rabbit hole...


- Join Date
- May 2011
- Location
- Calgary, AB
- Posts
- 445
Thanked: 27
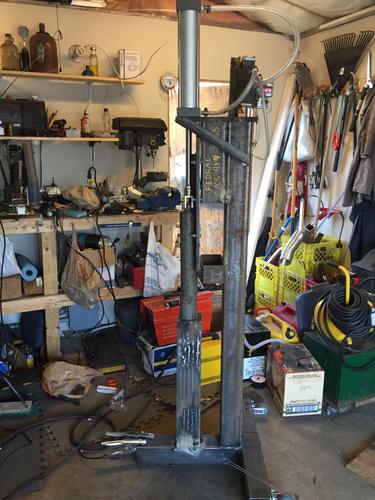
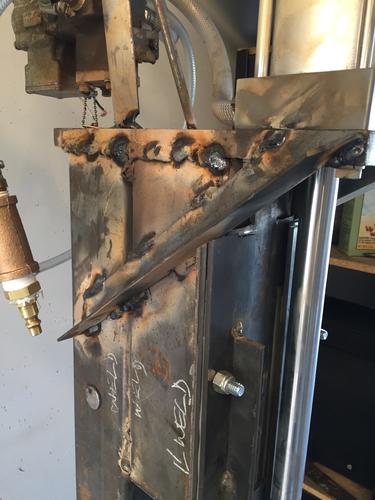
Today I welded until I ran out of electrodes. THen I switched to MIG until I ran out of wire. That's a good day.
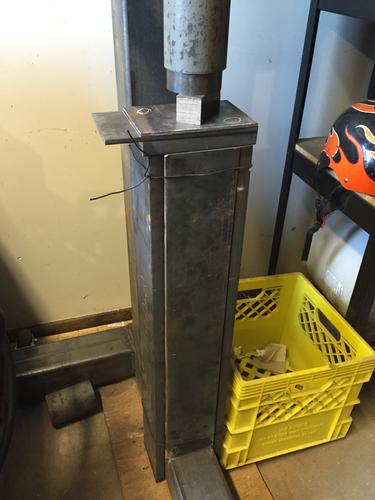
This hammer started out with the potential to look good. Over time it's taking on a bit of a 'git'er'done' kind of look. I will post more pics soon; I forgot my phone to get some peace in the garage.
-
11-07-2015, 10:04 PM #102Tumbling down the rabbit hole...
- Join Date
- May 2011
- Location
- Calgary, AB
- Posts
- 445
Thanked: 27
 Substance likes this.
-
11-08-2015, 09:45 PM #103Tumbling down the rabbit hole...
- Join Date
- May 2011
- Location
- Calgary, AB
- Posts
- 445
Thanked: 27
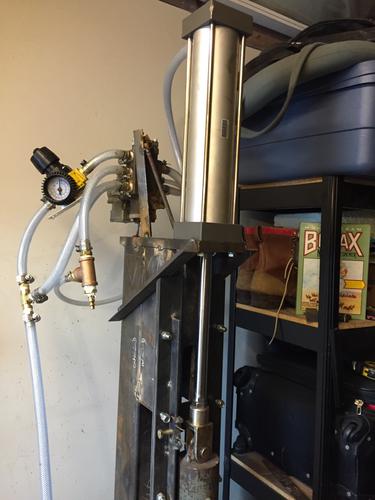
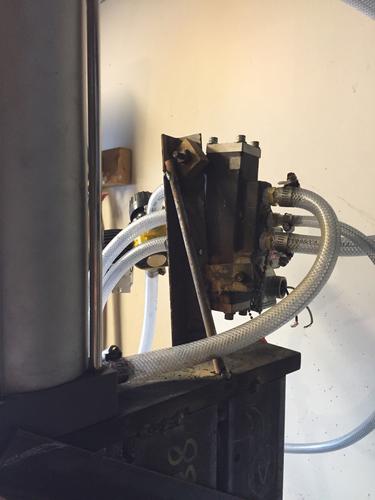
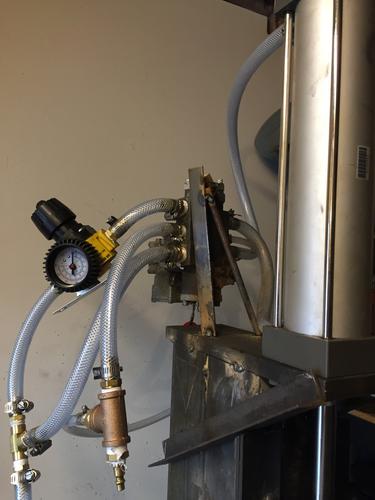
Almost there!
One piece of hose to replace...
Added several pounds today.
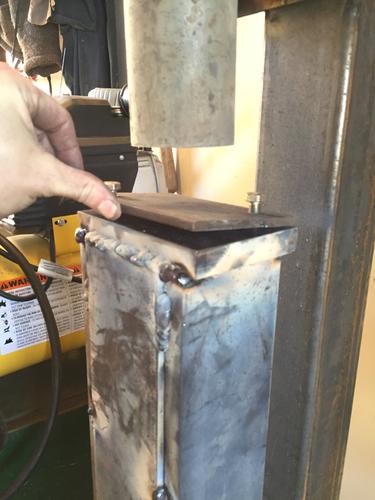
I'm going to see if tapatalk lets me do a poll. Not sure whether to weld on this 4140 round as a tup die or not. Round or rectangle for sow die?Cangooner likes this.
-
11-08-2015, 10:41 PM #104Senior Member


- Join Date
- Jun 2013
- Location
- Gladstone QLD AUSTRALIA
- Posts
- 3,245
Thanked: 804
great work mate love the progress
& I love that you have done this all yourself
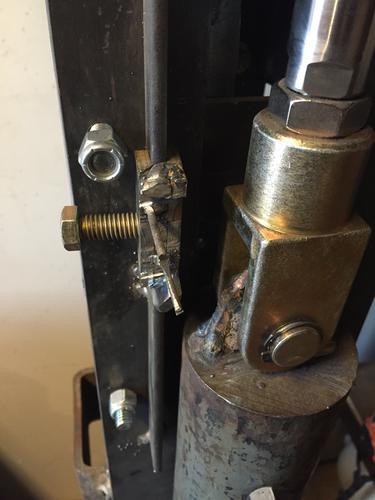
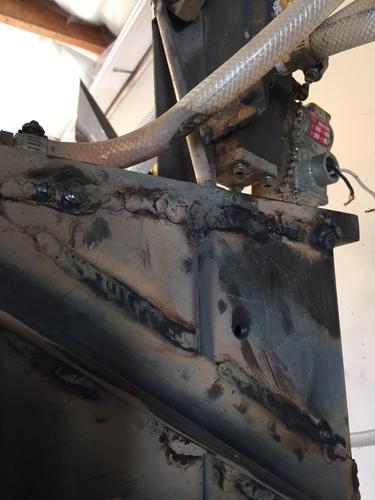
but as a 1st class Welder by trade, I hope you are using a 4816 or 4818 class of electrode for that pelican sh!t holding it together,
sorry mate no disrespect to you, this is just my tradie coming out, and I would hate to hear the welds failed while you are hammering away on something & you got hurt.
don't underestimate the repetitive forces at play here & regularly check for cracking.
a good quality 1/4" bead 1" long is good for a 1 ton force max
look forward to seeing this beast in action in a video when it is up & runningSaved,
to shave another day.
-
11-08-2015, 10:42 PM #105Tumbling down the rabbit hole...
- Join Date
- May 2011
- Location
- Calgary, AB
- Posts
- 445
Thanked: 27
Uh, 6011 was my friend.
Substance likes this.
-
11-09-2015, 06:04 AM #106Senior Member
- Join Date
- Jun 2013
- Location
- Gladstone QLD AUSTRALIA
- Posts
- 3,245
Thanked: 804
I thought it looked like a cellulose rod (this would be a 4111 in Aus) not a low hydrogen 7016/7018 (high tensile rod) but should have the penetration then hopefully,
a single pass with a 6011 can be brittle & prone to cracking due to the lower tensile strength.Saved,
to shave another day.
-
11-09-2015, 11:02 PM #107Tumbling down the rabbit hole...
- Join Date
- May 2011
- Location
- Calgary, AB
- Posts
- 445
Thanked: 27
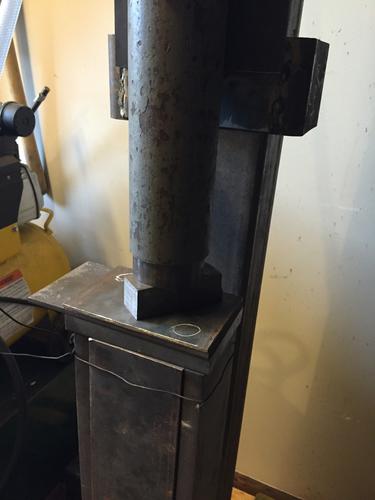
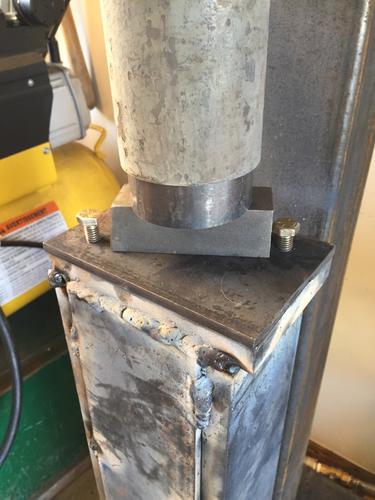
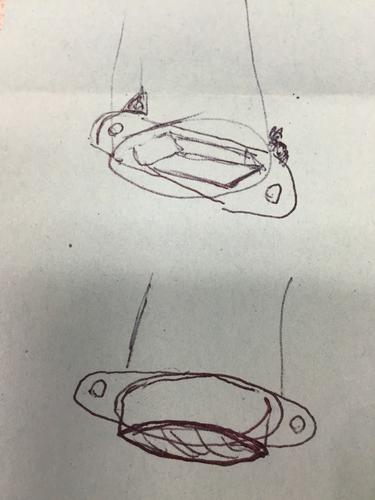
Do you guys think having tup die holders like this would be dangerous? It's probably best to weld the top die right on, or bolt into the meat of the hammer, but this is my idea:
-
11-10-2015, 06:21 PM #108Senior Member

- Join Date
- Aug 2014
- Location
- East Central Illinois
- Posts
- 782
Thanked: 101
As I have said before, round dies on a power hammer aren't good for much. they will leave a rounded mark in with every stroke of the hammer. Rectangle dies with parallel faces is the way to go. DO NOT weld dies to the hammer. There are cases where different shaped will fit a certain purpose. Put the biggest die that will fit both top & bottom. There are several methods & designed ways of attaching the dies. Do some research. There is a lot of info out there on home built air hammers. Check it all out before attaching your dies! Best to you brother, looks like you have some good ideas. One thing to remember about any power hammer is it is trying to tear itself apart all the time it is in use. Proper lubrication & constant checking of moving parts is so important I can't stress it enough.
Dave"Slawman"Huffman
-
11-10-2015, 06:29 PM #109Tumbling down the rabbit hole...
- Join Date
- May 2011
- Location
- Calgary, AB
- Posts
- 445
Thanked: 27
Thanks, Slawman. The bottom die will be on a plate and bolted down to the anvil. I haven't come across anything specific to my tup die, which is why I was asking. Bigger hammers use great sliding tup die systems but mine is a round 3.5" diameter so there isn't room for a sliding system (that I have come up with, anyway).
If you have any links or photos, they would be greatly appreciated. The only other thing I can think of (if welding them on is unsafe) is to remove material from the hammer itself and use a taller sow die.
Sorry if I am shooting in the dark; I am shooting in the dark!
-
11-10-2015, 06:54 PM #110Senior Member
- Join Date
- Aug 2014
- Location
- East Central Illinois
- Posts
- 782
Thanked: 101
I guess one thing to think about is how big of a die will fit with the ram guides you have. Another thing I have been thinking about is a comment you made about not needing to grease or lube the ram guides. Sorry but that won't work. any forging hammer I have ever been around was coated in grease & oil. There is a good reason for that.
Back to the top die. I think you can figure out a way to get 4 mounting bolts in the ram to hold a die holder.to make the die holder I would go with four 1/2" grade 8 bolts & use at least 1/2" thick plate for the die holder. Counter sink the bolt holes in the holder & use cap head bolts so nothing sits above the bottom of the die holder. Hope that makes since. As others have said I think you need a spring so the ram does not crash onto the cylinder if the controls do not work right. You want it safe for your boy's to run.
The down fall of many home built hammers is they are to complicated. Follow the KISS method. It works for me.
I was a Blacksmith for about 15 years till carpal & cubital tunnel problems got to bad & I gave it up. When we move I am looking to get a 100 Lb Little Giant mechanical hammer to forge razors & knife blades & also do some pattern welded stock to use & sell. Now if I can get a good deal on a self contained air hammer I might go with that. Most important have FUN ;-)


 Reply With Quote