
Results 11 to 20 of 58
 84Likes
 LinkBack URL
 About LinkBacks
-
03-02-2010, 08:30 PM #11Shaveurai


- Join Date
- May 2009
- Location
- Rowley Regis, England
- Posts
- 487
Thanked: 126
Hi Butch,
I kinda get the rotational thing for grinding smilers (I think).
But I'm struggling to visualise the tipping the heel and toe into the grinder. Would be good if you could get those visuals up or recommend some good links on the net to see it deomonstrated??
Joey

 Originally Posted by L R Harner

-
04-15-2010, 03:36 PM #12aka shooter74743


- Join Date
- Sep 2009
- Location
- SE Oklahoma/NE Texas
- Posts
- 7,285
- Blog Entries
- 4
Thanked: 1936
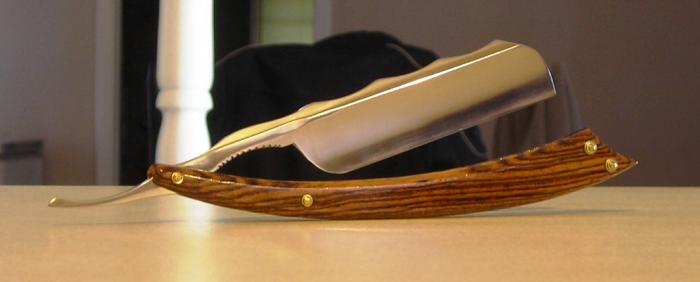
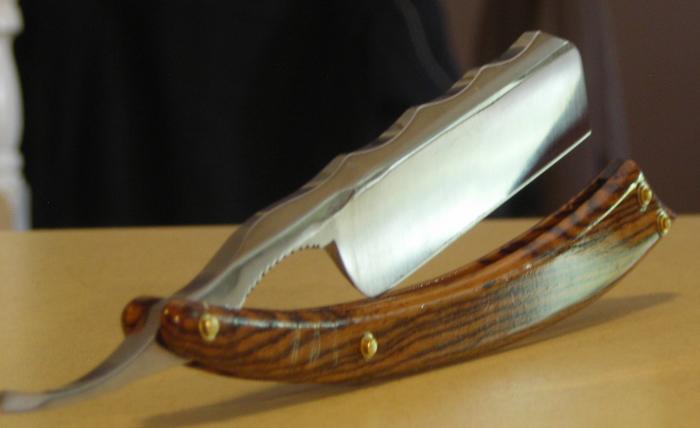
Finally! Still need to touch up the pin heads, need to hit the scales with some 2000 & polish them, and then hone it up. I have been looking forward to shaving with this razor for quite some time. Thank you all for your advice and help. I am quite pleased with it...except for the orange-peel on the scales, which should come out as soon as the laquer is hard.
Comments & recommendations are welcome, besides: I know you guys aren't bashful
 Southeastern Oklahoma/Northeastern Texas helper. Please don't hesitate to contact me.
Thank you and God Bless, Scott
-
The Following User Says Thank You to ScottGoodman For This Useful Post:
ejmolitor37 (01-16-2016)
-
04-15-2010, 04:27 PM #13Senior Member
- Join Date
- Jan 2008
- Posts
- 701
Thanked: 182
nice work
cant wait to here abut how is shavesScottGoodman likes this.
-
The Following User Says Thank You to L R Harner For This Useful Post:
ScottGoodman (04-15-2010)
-
04-15-2010, 05:44 PM #14Senior Member
- Join Date
- Feb 2008
- Location
- Greenville, SC
- Posts
- 231
Thanked: 40
Great work! Very clean lines. Let us know how it shaves!
When should we post the thread for the group buy on these?
-
The Following User Says Thank You to SR-CMT For This Useful Post:
ScottGoodman (04-15-2010)
-
04-15-2010, 06:51 PM #15aka shooter74743
- Join Date
- Sep 2009
- Location
- SE Oklahoma/NE Texas
- Posts
- 7,285
- Blog Entries
- 4
Thanked: 1936
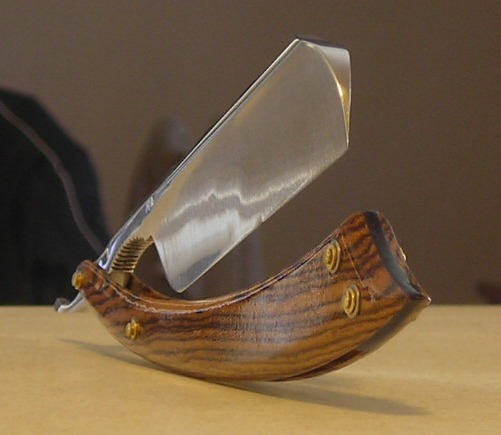
Honed it up & really took my time. Had to spend a little time on getting the "shop ding" out of the center of the edge as you can see a little in the photo's. I spent two hours on this one blade & the stones. 50 strokes on the pasted canvas & 100 on the strop. I've been anticipating this shave for a while & had a two day growth going, which is when I usually get my best shaves...though I usually shave daily.
I went thru my normal shave routine & went at it with a good & warm (I use a candle warmer on my pre-heated bowl) Mitchels Wool Fat lather. First pass on the face was WTG & on the neck was ATG. Second pass was entirely ATG. Third is only my difficult areas of the chin and either side of the adams apple, ATG. Followed up with cold wash cloth, alum block, and aftershave.
How was the shave? As smooth as a sheffield. The 1/2 wedge just mowed down everything & the edge retention of the 1095 steel was as good as any boker that I have used. Butch, you put a great scald on it on the heat treat!
What would I do differently? First is the way that I shaped the spine at the toe. Without any material over the edge at the toe, I can see where this razor will end up with some butterknifing over the years from honing (I'll follow up with a pic to show my point). After I noticed uneven wear while honing, I did my best to keep the wear even, but to no avail. Second is I ground down the tang a little thin at the thumb notch. There was a little warping during heat treat and the blade wouldn't center in the scales, so instead of working with my scales as I should have, I wanted to take the warp out by removing more material from the blade. Lession learned.
I would like to pay special thanks to Dave, Butch, & Mike for your for your assistance and knowledge in this adventure. Without you it wouldn't have happened. I'm hooked now...
ScottAlanQ likes this.Southeastern Oklahoma/Northeastern Texas helper. Please don't hesitate to contact me.
Thank you and God Bless, Scott
-
The Following User Says Thank You to ScottGoodman For This Useful Post:
Del1r1um (04-30-2010)
-
04-15-2010, 07:07 PM #16aka shooter74743
- Join Date
- Sep 2009
- Location
- SE Oklahoma/NE Texas
- Posts
- 7,285
- Blog Entries
- 4
Thanked: 1936
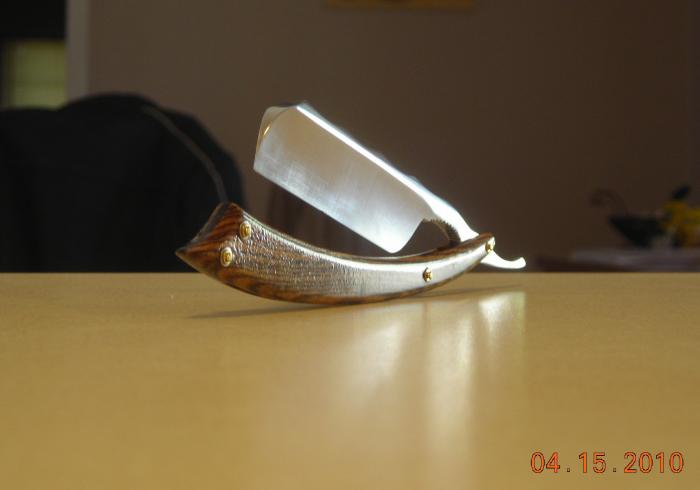
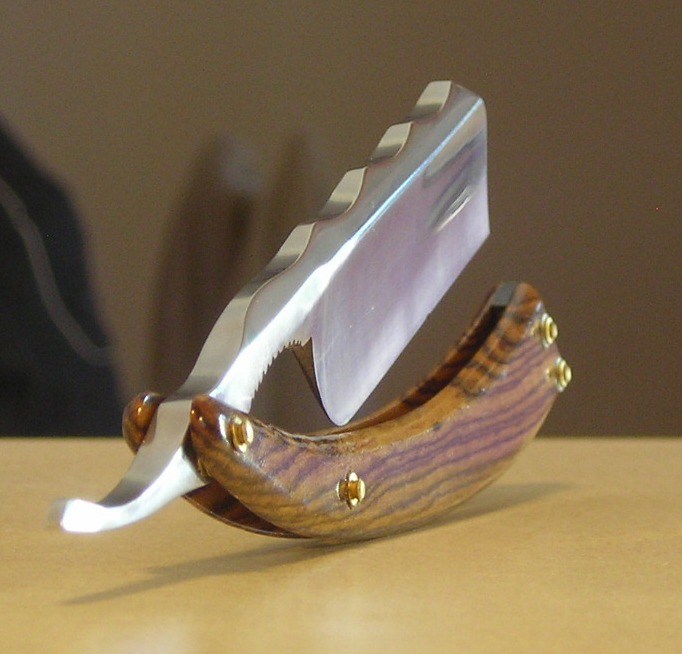
Hone wear mentioned above. I know it's minimal now, but just wanted to show you what I was talking about when talking about the design/grind flaw:
 Southeastern Oklahoma/Northeastern Texas helper. Please don't hesitate to contact me.
Thank you and God Bless, Scott
-
04-15-2010, 07:31 PM #17Shaveurai
- Join Date
- May 2009
- Location
- Rowley Regis, England
- Posts
- 487
Thanked: 126
Wow, major league impressed am I.
Love the spine work and scales.
How did you do the final grind?ScottGoodman likes this.
-
The Following User Says Thank You to Deckard For This Useful Post:
ScottGoodman (04-15-2010)
-
04-15-2010, 07:40 PM #18aka shooter74743
- Join Date
- Sep 2009
- Location
- SE Oklahoma/NE Texas
- Posts
- 7,285
- Blog Entries
- 4
Thanked: 1936
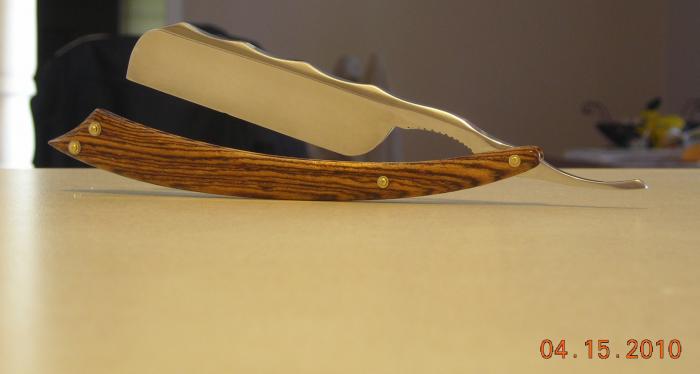
Spine work was done on the bench sander, notice the radius is the same as the wheel...
Final grind (actually all of the hollowing) was done by hand on one of those Sears Craftsman wet grinders. I didn't trust myself on going very hollow and I'm glad I stopped where I did.
I bought the plans to make a real knife grinder the other day & will start scrounging up some stuff for it soon...then I can really make a mess of things!!!
Thanks for the praise, I'm rather proud of it myself.Last edited by ScottGoodman; 04-15-2010 at 07:43 PM.
Southeastern Oklahoma/Northeastern Texas helper. Please don't hesitate to contact me.
Thank you and God Bless, Scott
-
The Following User Says Thank You to ScottGoodman For This Useful Post:
Deckard (04-15-2010)
-
04-15-2010, 09:35 PM #19Senior Member


- Join Date
- Oct 2009
- Location
- Silicon Valley, CA, USA
- Posts
- 3,157
Thanked: 852
One comment: Originally Posted by shooter74743
Sign it!
Nice job....ScottGoodman likes this.
-
The Following User Says Thank You to niftyshaving For This Useful Post:
ScottGoodman (04-15-2010)
-
04-15-2010, 11:49 PM #20aka shooter74743
- Join Date
- Sep 2009
- Location
- SE Oklahoma/NE Texas
- Posts
- 7,285
- Blog Entries
- 4
Thanked: 1936
Wish I could, would have to have a professional engraver with diamond tips at this point...that steel is HARD. I've got a engraver like you would put your name on tools with and it wouldn't even make a mark in it!
Last edited by ScottGoodman; 04-15-2010 at 11:52 PM.
Southeastern Oklahoma/Northeastern Texas helper. Please don't hesitate to contact me.
Thank you and God Bless, Scott


 Reply With Quote