
Results 51 to 60 of 155
 47Likes
Thread: Is this microchipping...
 LinkBack URL
 About LinkBacks
Threaded View
-
12-26-2015, 09:02 PM #1Senior Member


- Join Date
- Dec 2014
- Location
- Southern NH
- Posts
- 562
Thanked: 41 Is this microchipping...
I have a Union Cutlery Spike, which is one of my favorites. I got it from the classifieds and shaved about 20 times, before needed to touch it up, due to some dings (it was back when I first started shaving and trying honing). I was able to get it back to being comfortable to shave with and put it back into my rotation. I probably did 30-40 shaves with the razor, before it started to get a bit uncomfortable - pulling and increased irritation.
Now that I know a bit more on honing experience (did a minor restoration/honing of a JA Henckels with help from folks on the forum), I'd like to tackle "correctly" honing this razor to get it back to shave ready state.
Here are some really close up shots of the edge (the guide lines in the background are 1mm):
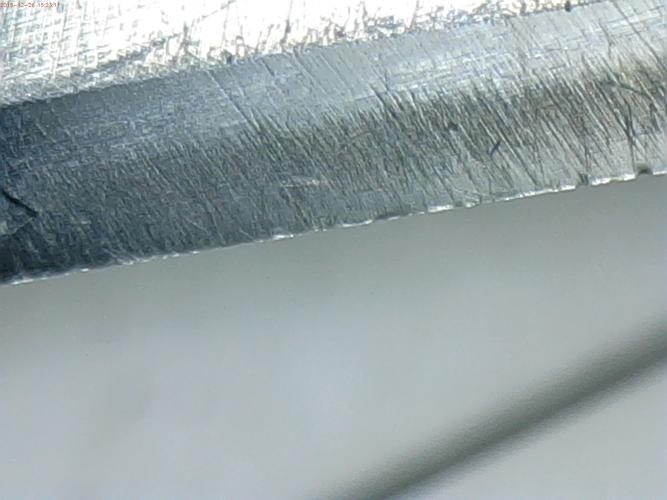
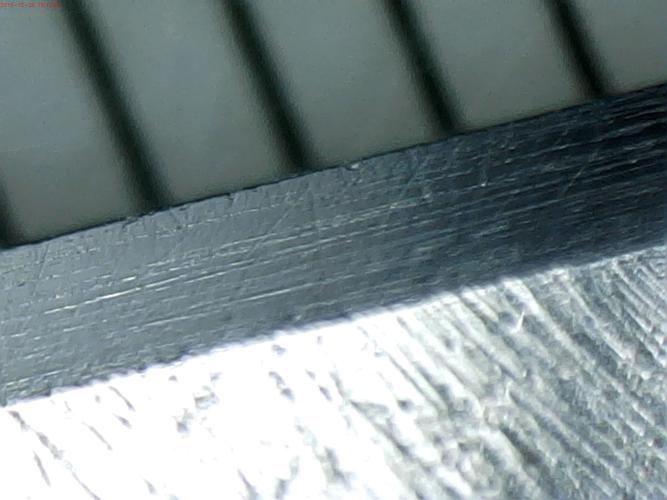
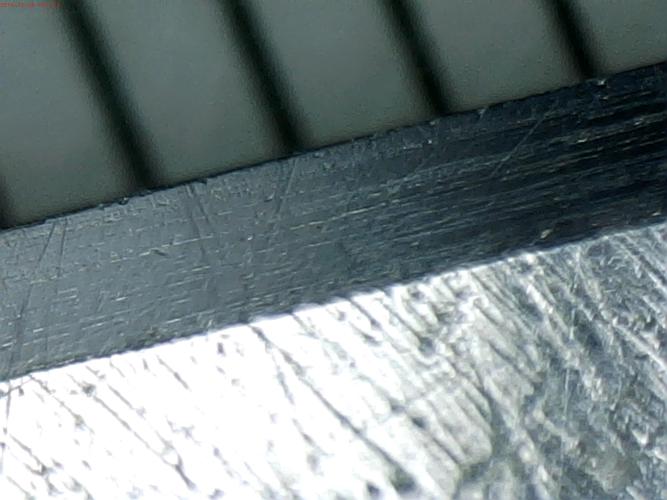
Is what I see on the very edge microchipping?
I see several other "issues" with the edge. One, is that at places, it looks like there parallel stria - but it is not very deep at all. Two, there are some places were deeper stria are going all the way to the edge. And three, there seems to be places, like in the first shot, where there is a rougher surface for part of the edge (maybe honing wasn't hitting all of the bevel?).
I was wondering what approach I should take at bringing this back to sharpness. I have a 1/4/8K Norton, and a 12K Naniwa SS to work with.
I was thinking, regardless of what hone I use, to ink the bevel and see how well the coverage (because of picture #1). I'd like to get rid of the deeper stria as well.
Should I go as far as setting the bevel, or is there some intermediate level I can drop to, for this razor (4K? 8K?).
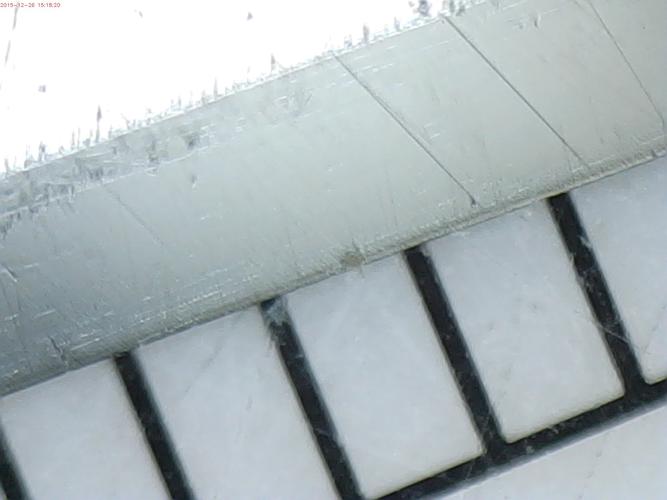
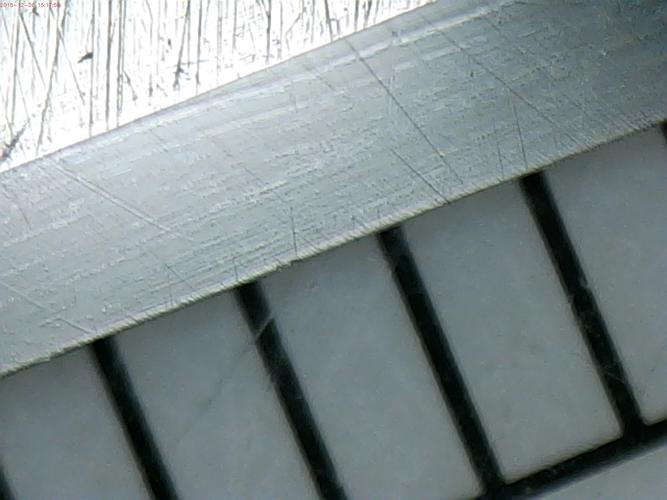
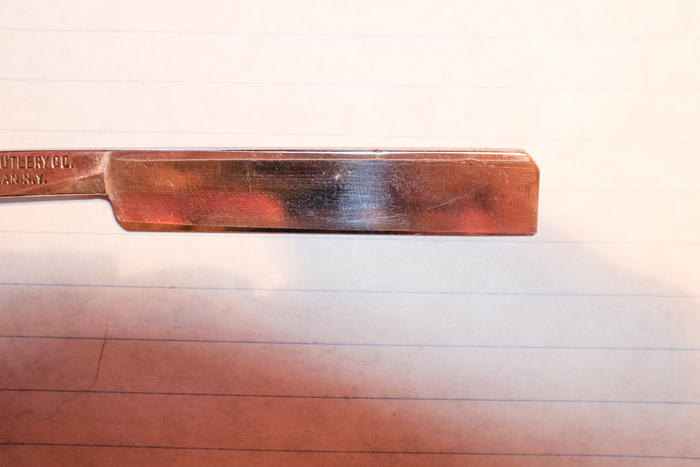
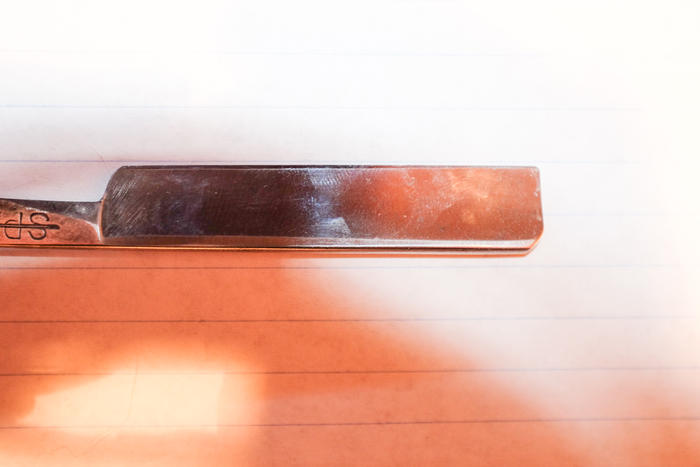
The spine has moderate wear. The edge is not totally flat, but there is a high spot, about 1/3 of the way from the toe (one can see light under the edge at the toe and heel, when the blade is perpendicular to my dia-sharp diamond plate. Visually, you can see that the height (width?) of the blade is smaller at the heel than the toe.
Here's some shots showing the wear, just so that there is a clear picture of the blade:
Wondering what peoples' thoughts are.Regards,
PCM


 Reply With Quote