Results 21 to 30 of 65
-
03-30-2019, 05:18 PM #21Junior Member

- Join Date
- Mar 2019
- Posts
- 21
Thanked: 0
Hmm, I could see that and the higher grits are polishing the scratches to make them stand out more.
Do you know if anyone compiled a resource on scratch patterns expected off particular stones that I could use as a reference. Googling hasn't turned up anything for non-finishing stones.Last edited by jag213; 03-30-2019 at 05:25 PM.
-
03-30-2019, 05:32 PM #22Senior Member


- Join Date
- Feb 2018
- Location
- Manotick, Ontario, Canada
- Posts
- 2,808
Thanked: 559
This thread has a lot of good pics.
https://sharprazorpalace.com/honing/...ggestions.html
Lots of excellent mentoring advice from Euclid440. This should be a must read for a newbie honer.David
“Shared sorrow is lessened, shared joy is increased”
― Spider Robinson, Callahan's Crosstime Saloon
-
The Following User Says Thank You to DZEC For This Useful Post:
jag213 (03-30-2019)
-
03-30-2019, 08:02 PM #23Junior Member

- Join Date
- Mar 2019
- Posts
- 21
Thanked: 0
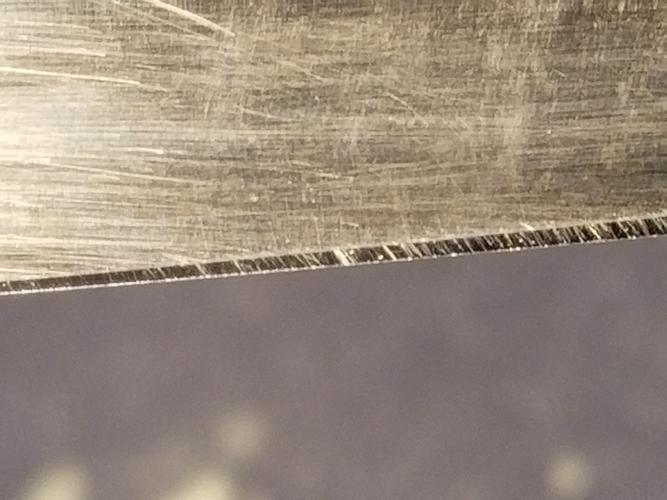
Following the advice in that link. I went back to the 4k and did 30ish heel following strokes so the only striations are around 45 degrees to the edge. You can see that here
Next I switched to the 8k until the slanted striations went away and then did 50ish strokes on the 12k. Surprisingly when I went to look at the edge again I had vertical striations back which you can see here.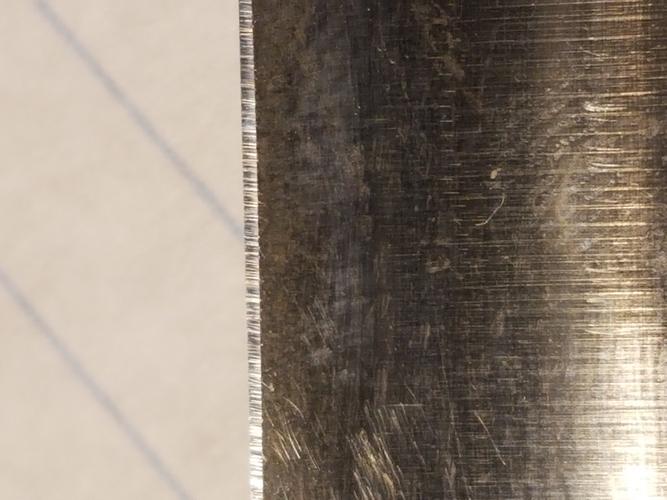
However I don't know how deep these striations are since they can only be seen at a certain angle to the light and go away at any other angle. This is the same photo at a slightly different angle where you can see a couple remaining 45 deg striations that didn't get honed out, but not many vertical striations.
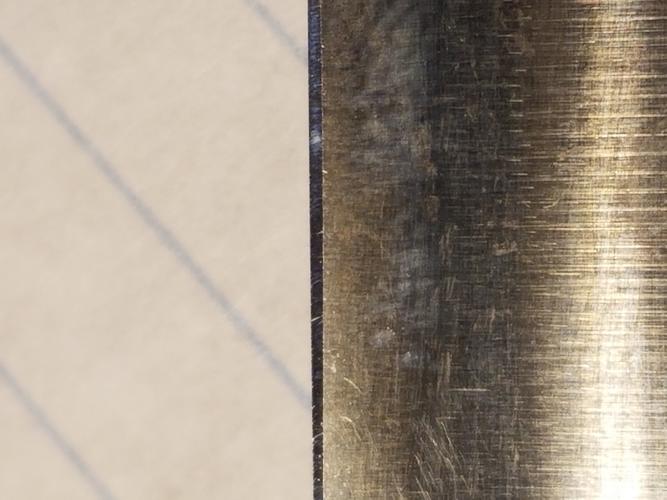
I tried to shave with this razor and it was actually pretty comfortable, much more than the shave with the edge in my original post. Even though both showed visible vertical striations.Last edited by jag213; 03-30-2019 at 08:26 PM.
-
03-30-2019, 09:11 PM #24Senior Member


- Join Date
- Apr 2012
- Location
- Diamond Bar, CA
- Posts
- 6,553
Thanked: 3215
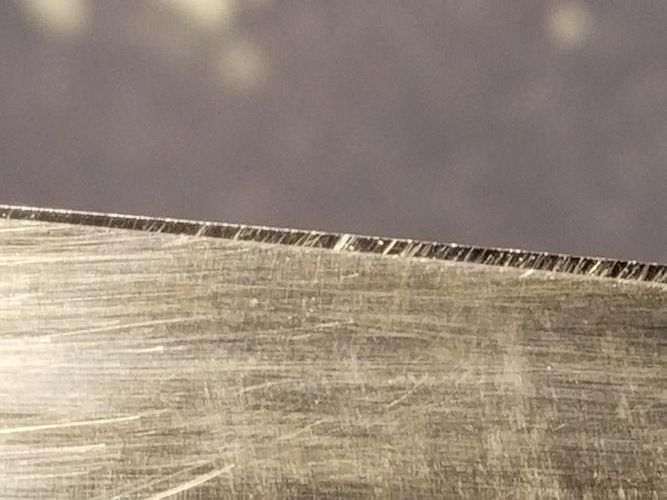
So, first if you are going to take photos for comparison, photograph the same spot, so you can do a comparison. With a colored sharpie mark the belly of the blade from edge to spine as a registration mark for aligning the photo.
You are not spending enough time on the stones. Your bevel is still not set. No need to kill the edge just hone it. I hope you are taping the bevel.
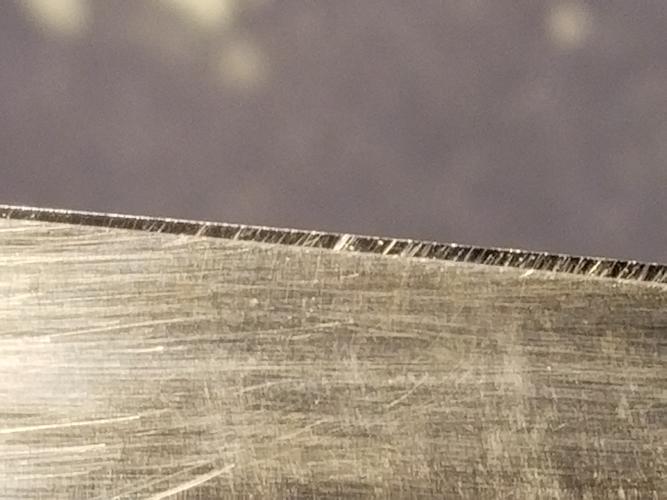
All those scratches are from the 1k, they are the same stria, that has never been removed. Here is your pic from post 19 and from post 23, the stria are identical. I flipped the photo from post 23 note the identifying scratch mark in the belly of the blade.
BTW, those are factory grind marks on the bevel of the Mora, not your 8k, and the bevels are not meeting at the belly of the blade.
You are now mostly honing to the edge, but still not all the way, see bottom of the edge on the 3rd photo of post 23.
More time on the 1k and 4k. Set the bevel fully on the 1k and remove all the 1k stria with the 4k.
-
03-30-2019, 09:45 PM #25Junior Member

- Join Date
- Mar 2019
- Posts
- 21
Thanked: 0
Woops I uploaded the wrong photo before so those are actually the same photos, one is just rotated.
I am confused on how I can hone the edge if the bevel isn't set since I was always under the impression that a bad bevel meant hones weren't reaching the edge, but were rather just polishing upper parts of the bevel. For this razor, I lightly butterknifed the edge before and then set the bevel on my 1k to the point where I could shave arm hair on the different sections of the edge. When you say the bevel isn't set do you mean the shape of the bevel is off, or that it is still too roughly finished. I've marked my edge with a marker and run it up and down my 8k to make sure I am hitting the hone along the entire edge.Last edited by jag213; 03-30-2019 at 09:52 PM.
-
03-30-2019, 10:45 PM #26Senior Member


- Join Date
- Apr 2012
- Location
- Diamond Bar, CA
- Posts
- 6,553
Thanked: 3215
Setting a bevel is,1. The bevels are made completely flat in a single plane, 2. The bevel plane is of the proper angle, (bevel angle) and 3. The bevels meet at the edge, fully from heel to toe. Until you have all 3 you do not have a fully set bevel.
That is why Hair Test are so un-reliable, they are subjective. Most people take a swipe at a hair and if it does not cut, so they take another swipe, then another with more pressure, eventually it cuts hair and they call it good.
Well why did it not cut the first time? Most probably the bevel was never fully set. Setting a bevel creates the edge, if you don’t have an edge you are polishing two slabs of steel that are close to each other but not touching.
The most conclusive bevel set test is to look at it, straight down on the edge. If light reflects back at you, (shiny spot) that is where the bevels are not meeting. Stay on the 1k until they meet, and no light reflects back.
As you progress up the hones the edge will get straighter, at 8k is should be super straight.
You are not honing to the edge, look at the white line at the edge in photo 23, that is where the edge is not meeting, all of the steel on the bevel needs to be removed on the whole bevel, for the hone to reach the edge. (A single plane)
It might be helpful to strop after the 1k on linen then look at the edge, it will remove any flashing/burr, so you get a better look at the steel.
Go back to (My Second try at Honing), post 34 is probably what your edge looks like. Post 42 is almost there, Post 51 is fully set.
If you go back and read the whole thread, it will clear up all the issues you are having, you are not the first. Once you learn to set and recognize a fully set bevel you are 90% there, the rest is just polishing without buggering the edge up.
-
03-30-2019, 10:55 PM #27

Keep at it, you’re doing well. Setting a bevel correctly is one of the toughest parts of honing.
The stria you see at different angles is what I look for, then look for out lying sized stria, the last photo you posted you can see 3 different sized scratch patterns and the edge is twinkling, though that could be dust but more likely small chips left from the lower grit 1k hone. Whatever the scratch is 1k or 12k they leave a serrated edge, that’s why it’s so important to remove all previous grits scratches before moving up.Last edited by jfk742; 03-30-2019 at 10:58 PM.
-
03-30-2019, 11:10 PM #28Junior Member

- Join Date
- Mar 2019
- Posts
- 21
Thanked: 0
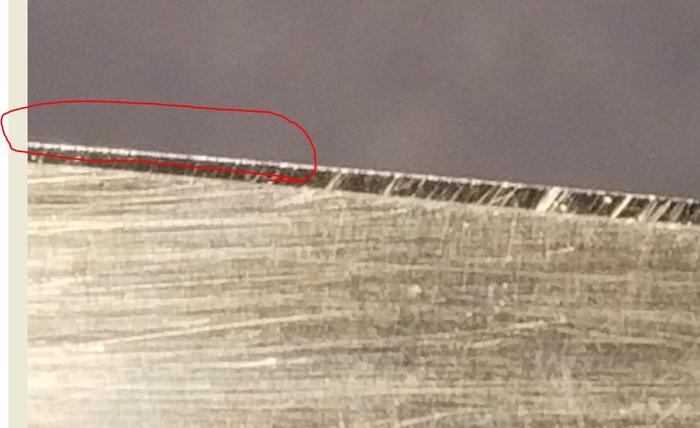
Are you talking about this white line? I believe that is just crude left over from the stone (probably the 4k). These aren't the best pictures cause I am pushing the zoom limits on my phone to take them. However, I am not seeing any glints when I look down my bevel
Last edited by jag213; 03-30-2019 at 11:14 PM.
-
03-30-2019, 11:44 PM #29

The bevel also appears narrower at the white line. If so, the razor could be slightly warped, hence, parts of the blade will not contact as well. The white line is a result of 2 separate planes reflecting light differently.
Also you mentioned earlier of feeling a hard particle on the 8k during honing . This is a red flag that the surface is compromised.The white gleam of swords, not the black ink of books, clears doubts and uncertainties and bleak outlooks.
-
03-30-2019, 11:48 PM #30Junior Member

- Join Date
- Mar 2019
- Posts
- 21
Thanked: 0
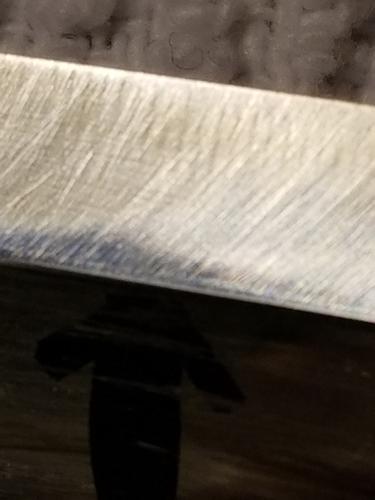
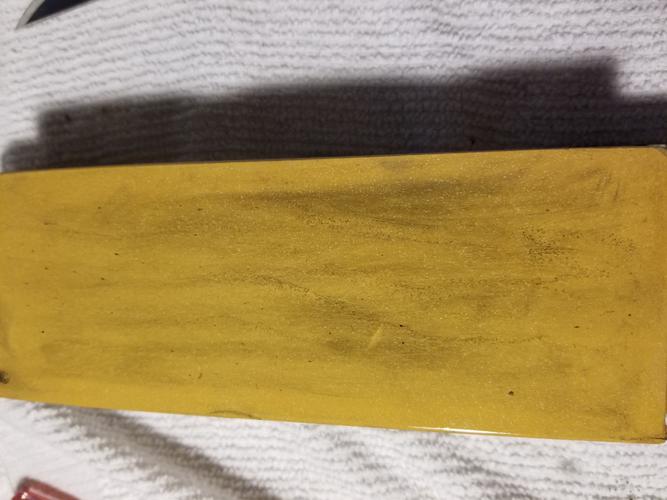
I am still not convinced my 8k is fine though. Here are more pictures of me rubbing my knife on it with noticeable visible scratches being seen in the after photos
Before
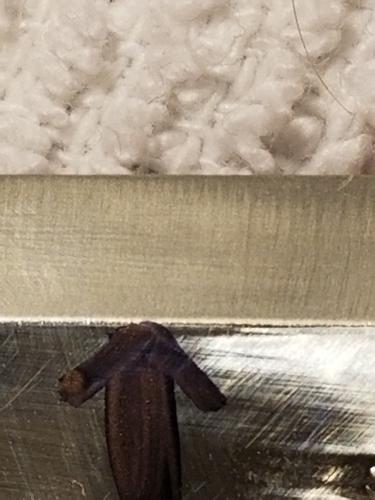
After
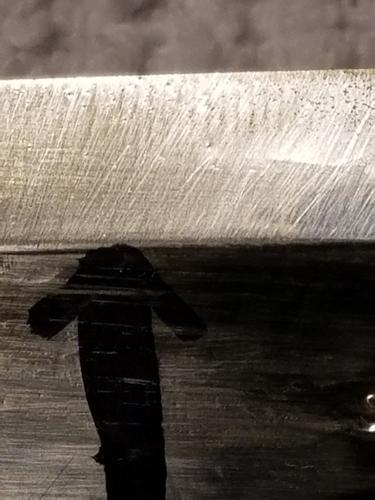
I am also getting these small dot-like metal concentration spots on the stone which can't be rubbed off without lapping it.


 62Likes
 LinkBack URL
 About LinkBacks


 Reply With Quote

