
Results 871 to 880 of 1052
 1162Likes
 LinkBack URL
 About LinkBacks
-
01-01-2016, 05:48 PM #871Senior Member


- Join Date
- Sep 2011
- Location
- Perugia, Italy
- Posts
- 1,924
Thanked: 469 Friday 1 January 2016
Friday 1 January 2016
Friday 1 January 2016
New Year's Day Shave
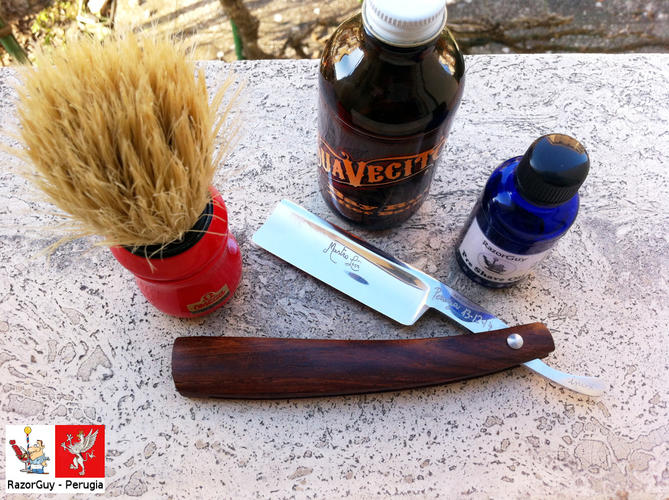
Everytime I shave I always think a lot about what to pick for shaving. Which razor - this is easy as I usually end up picking a Mastro Livi - which soap or cream, which aftershave, which brush. Everytime I shave I always think I have too many soaps and I really mean this. I think I now have about one hundred different soaps, to which are added the ones I personally make. For this reason, everytime it is very hard to pick one but I have to make a decision. This time I opted for this Geo. F. Trumper Spanish Leather Shaving Cream and I admit I liked it, fragrance in particular. I also opted for this very special Mastro Livi razor, a very limited edition of which have been made just three of them. It was in fact made in occasion of the meet up we had with a bunch of fellow wet shavers in Perugia at Mastro Livi's laboratory one year ago - 13.12.2014 is the date of the meet up, 13 december 2014 - and this is the razor made for celebrating that event. A great straight razor made of stainless steel, a super performer, super smooth and velvety, for an impeccable shave.
- Pre-Shave: RazorGuy Pre-Shave Oil
- Soap: Geo F. Trumper Spanish Leather Shaving Cream
- Brush: Omega Bristle Brush #49 Red
- Bowl: Bamboo Bowl
- Strop: Mastro Livi Medium Loom Strop "Coramella Italiana" and Hand Palm
- Razor: Mastro Livi "Perugia 13.12.14", 15/16 Full Hollow, Spanish Point
- Post-Shave: Alum Block
- Post-Shave: Argan Oil
- After Shave: Suavecito Bay Rum
The RazorGuy - StraightRazorChannel on Youtube and Google+
-
01-05-2016, 09:47 AM #872Senior Member
- Join Date
- Sep 2011
- Location
- Perugia, Italy
- Posts
- 1,924
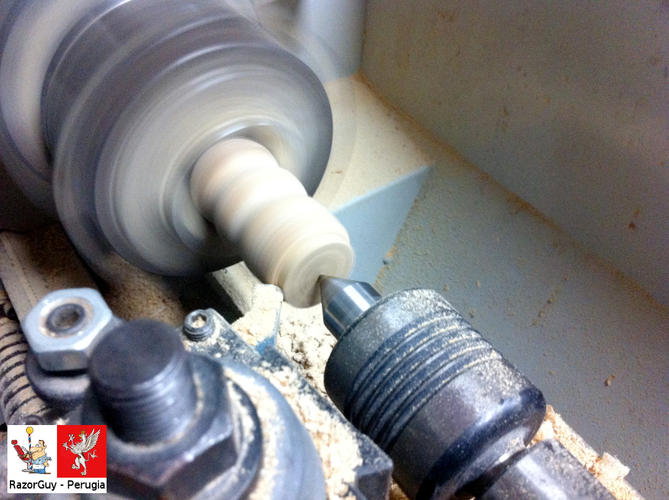
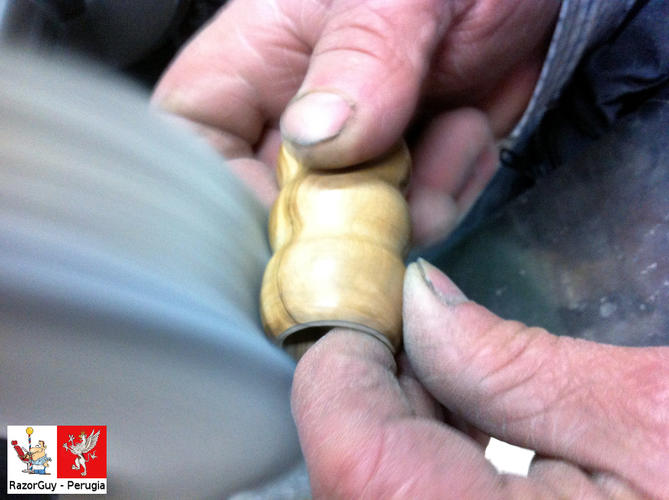
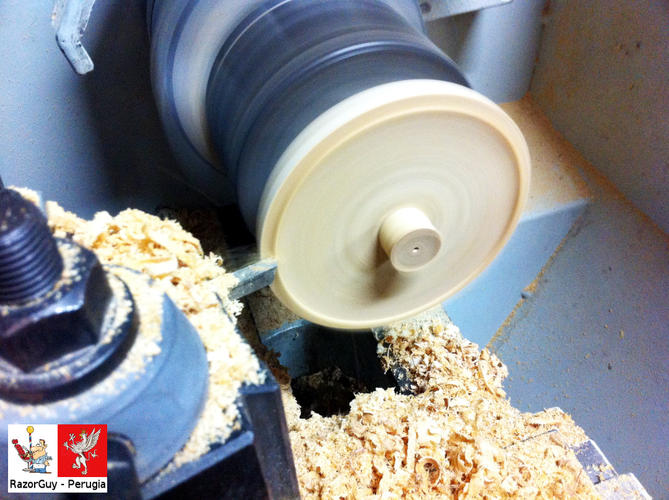
Thanked: 469 The Making of a Soap Bowl and Badger Brush

Shaping the brush handle
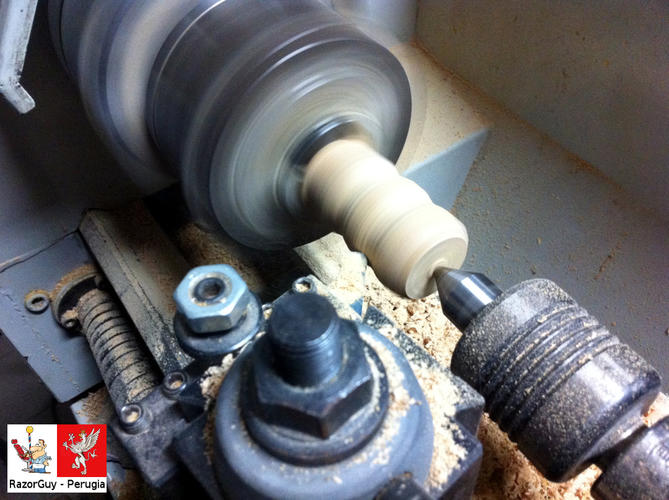
Shaping the brush handle
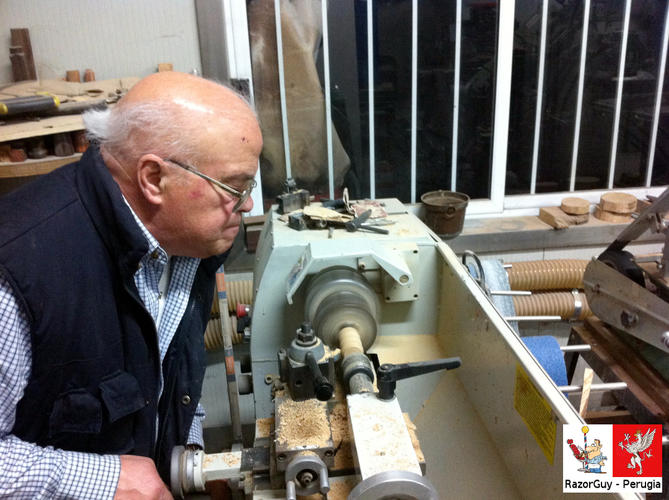
Mastro Livi at the lathe making the brush handle
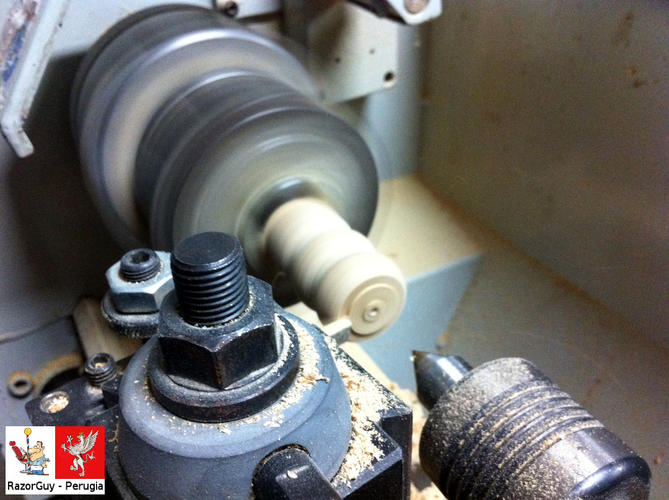
Refining the bottom of brush handleThe RazorGuy - StraightRazorChannel on Youtube and Google+
-
01-05-2016, 04:27 PM #873Senior Member
- Join Date
- Sep 2011
- Location
- Perugia, Italy
- Posts
- 1,924
Thanked: 469 Tuesday 5 January 2016
Tuesday 5 January 2016
Traveling with a CarboInox
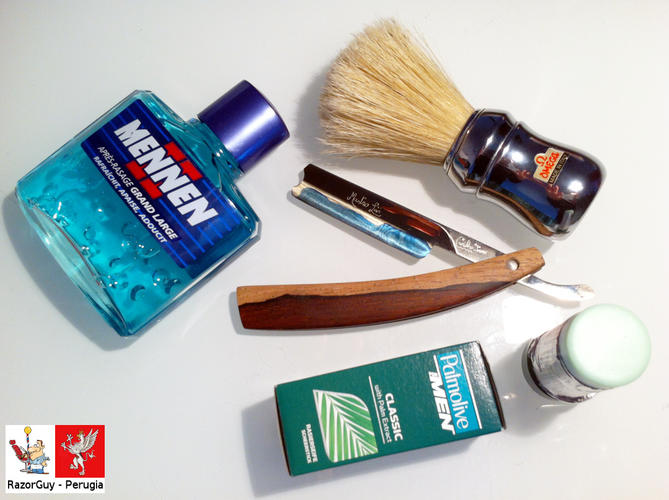
On the road again and this time I brought with me this Mastro Livi CarboInox, the first one of the three I have in my collection and made with this special Mastro Livi Damsascus by combining temperable stainless steel and Mastro Livi carbon Damascus. The result is of absolute beauty: the charm of blue twisted Damascus and the bronze colored stainless steel give the blade an absolutely elegant and classy style. For this shave I also used one of the most classic shaving soap around - Palmolive Classic Stick - very cheap and however excellent for its price, and this Mennen Blue, an aftershave I recently bought in Belgium and it turned out to be an excellent product, lovely fragrance and cooling effect. Very good shave!
- Pre-Shave: RazorGuy Pre-Shave Oil
- Soap: Palmolive Classic Shaving Stick
- Brush: Omega Bristle Brush #48
- Strop: Mastro Livi Travel Loom Strop and Hand Palm
- Razor: Mastro Livi CarboInox, 6/8 Full Hollow, Barber's Notch
- Post-Shave: Alum Block
- Post-Shave: Umbria Extravirgin Olive Oil
- After Shave: Mennen Blue
The RazorGuy - StraightRazorChannel on Youtube and Google+
-
01-07-2016, 11:34 AM #874Senior Member
- Join Date
- Sep 2011
- Location
- Perugia, Italy
- Posts
- 1,924
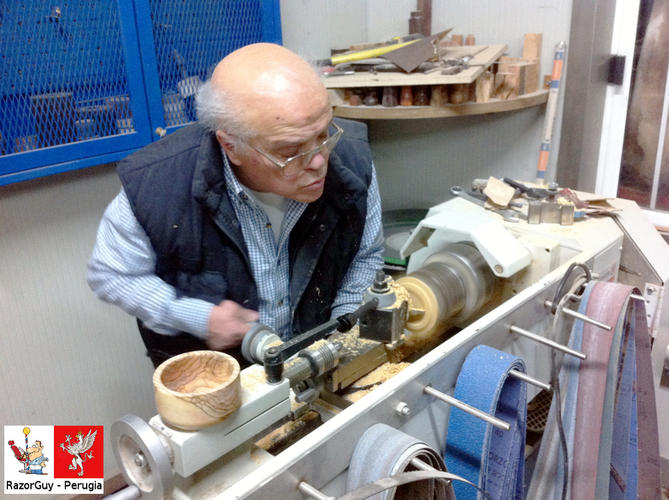
Thanked: 469 The Making of a Soap Bowl and Badger Brush
Shaping the olive wood brush handle
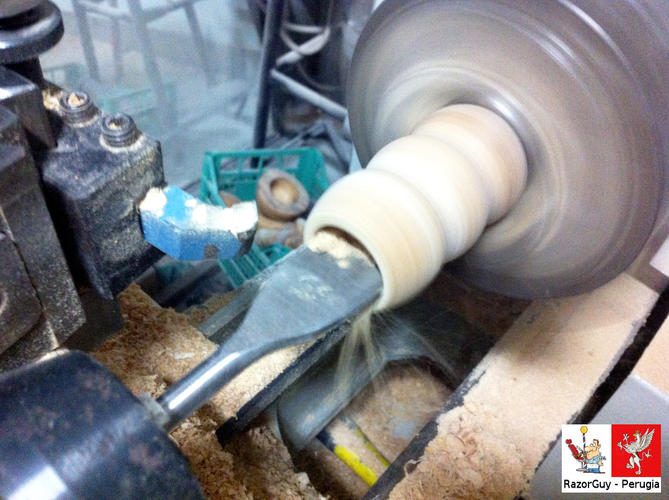
Drilling the hole for the loft
Mastro Livi refining the brush handle
Mastro Livi polishing the olive wood brush handle
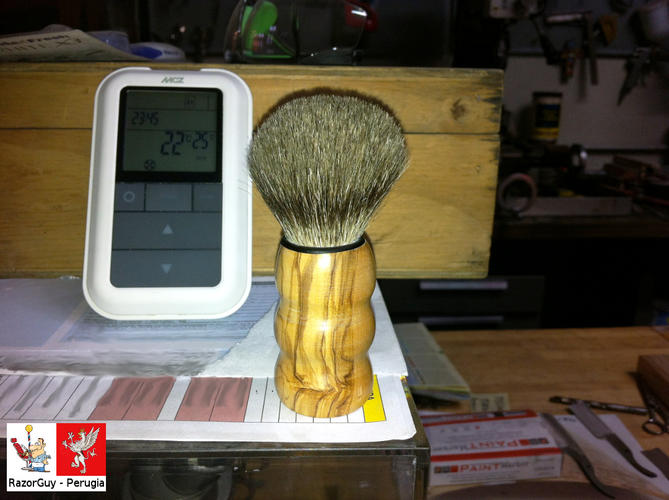
The finished badger brush with olive wood handle matching the bowlHARRYWALLY and engine46 like this.The RazorGuy - StraightRazorChannel on Youtube and Google+
-
-
01-07-2016, 10:44 PM #875Senior Member
- Join Date
- Sep 2011
- Location
- Perugia, Italy
- Posts
- 1,924
Thanked: 469 Mastro Livi School 6: Kamisori
Mastro Livi School: A practical course on using and maintaining your straight razor. From understanding a straight razor to honing and shaving.
Part Six: Kamisori. Types of kamisori and its parts. How to use a kamisori for shaving. Care, cleaning and keeping of kamisori.markbignosekelly and engine46 like this.The RazorGuy - StraightRazorChannel on Youtube and Google+
-
The Following User Says Thank You to razorguy For This Useful Post:
engine46 (01-12-2016)
-
01-08-2016, 10:59 AM #876Senior Member
- Join Date
- Sep 2011
- Location
- Perugia, Italy
- Posts
- 1,924
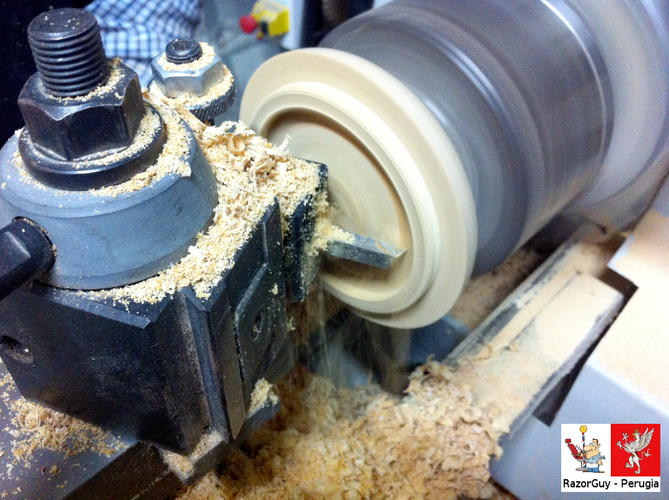
Thanked: 469 The Making of a Soap Bowl and Badger Brush
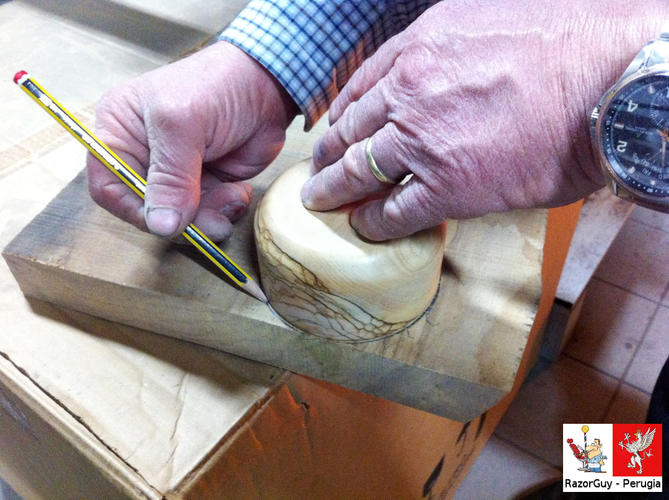
Mastro Livi drawing the profile of the bowl lid on a board of olive wood
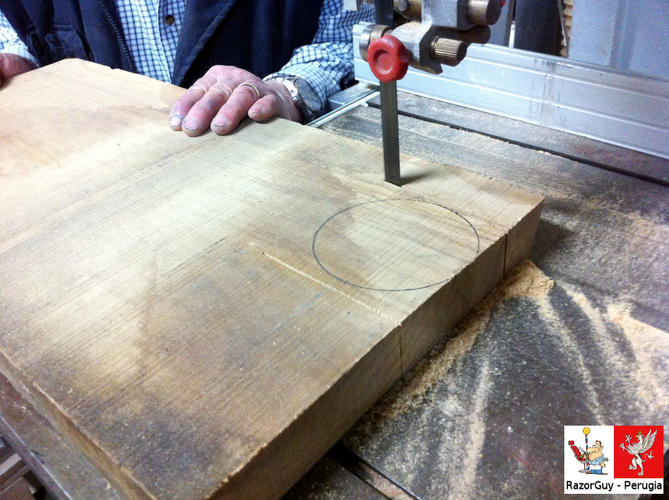
Cutting the bowl lid from a board of olive wood

Mastro Livi rounding off the piece of olive wood to be used for the lid
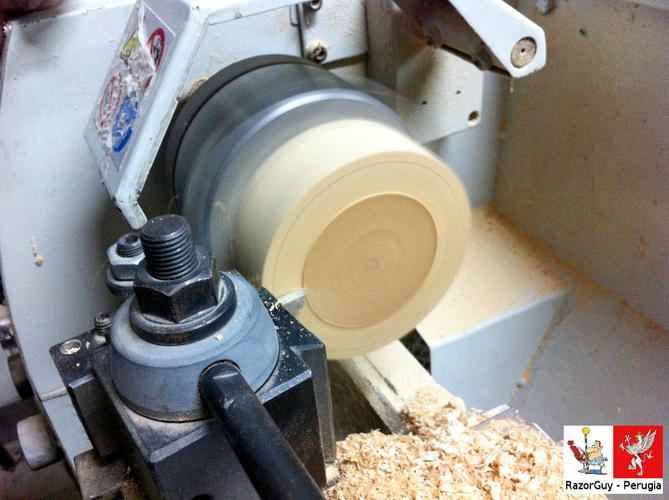
Initial shaping of the lid at the latheThe RazorGuy - StraightRazorChannel on Youtube and Google+
-
01-09-2016, 04:08 PM #877Senior Member
- Join Date
- Sep 2011
- Location
- Perugia, Italy
- Posts
- 1,924
Thanked: 469 Saturday 9 January 2016
Saturday 9 January 2016

Belgian Williams Shave
I am still testing the new shaving products I recently bought in Belgium and it is interesting to see how a product changes from country to country. This is the case of Aqua Velva after shave, for example. I am particularly fond of this after shave, in particular because it was my father's favorite and I like it both for its fragrance and performance. The Aqua Velva sold in Belgium seems to be quite different from the one sold in Italy. Fragrance is notably different, although having the same base nuances, the INCI is quite different, not just a matter of ingredient types but also of sequence. In terms of performance, they are both good. I also used this Williams shaving cream, bought in Belgium, and it did not impress me that much. A good soap but not the best, besides the fact it tends to easily dry on the skin. The icing on the cake was of course my awesome Mastro Livi CarboInox razor: a striking combination of beauty and excellence of smoothness, giving a superb and close shave.
- Pre-Shave: RazorGuy Pre-Shave Oil
- Soap: Williams Shaving Cream
- Brush: Omega Bristle Brush 80266
- Strop: Mastro Livi Travel Loom Strop and Hand Palm
- Razor: Mastro Livi CarboInox, 6/8 Full Hollow, Barber's Notch
- Post-Shave: Alum Block
- Post-Shave: Argan Oil
- After Shave: Aqua Velva
engine46 likes this.The RazorGuy - StraightRazorChannel on Youtube and Google+
-
01-11-2016, 11:53 AM #878Senior Member
- Join Date
- Sep 2011
- Location
- Perugia, Italy
- Posts
- 1,924
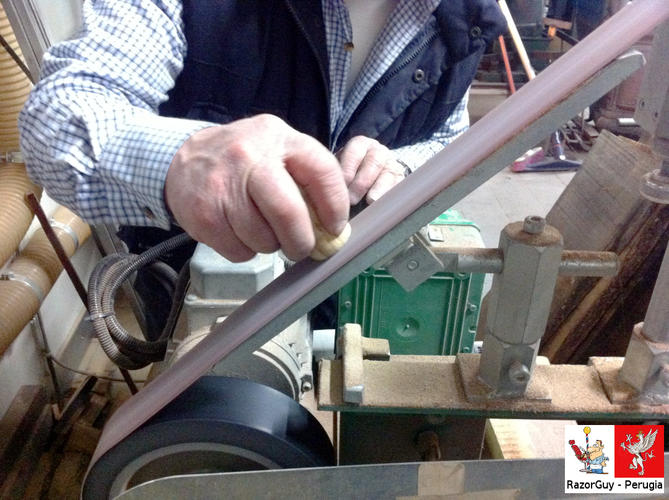
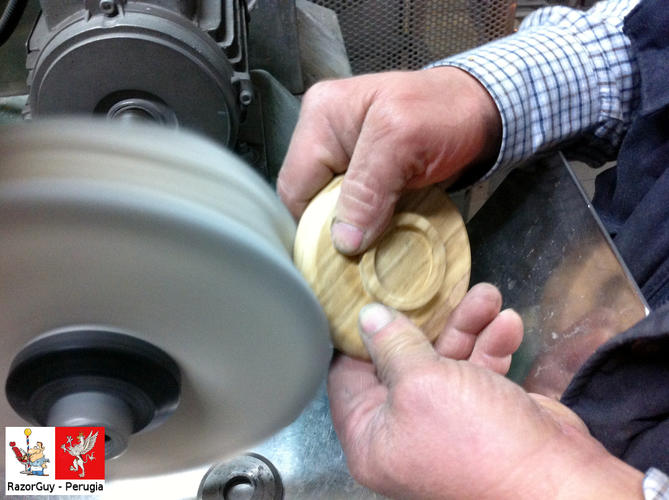
Thanked: 469 The Making of a Soap Bowl and Badger Brush
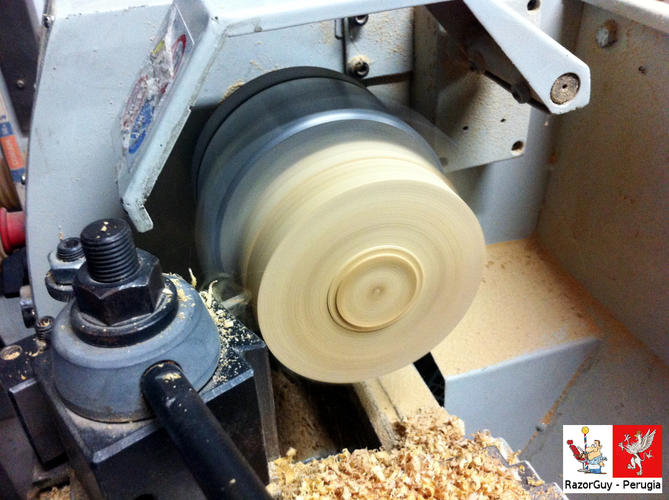
The making of the lid at the lathe
Making the brush holder
Refining the side of the lid
Refining the bottom of the lidengine46 likes this.The RazorGuy - StraightRazorChannel on Youtube and Google+
-
01-12-2016, 10:00 AM #879Senior Member
- Join Date
- Sep 2011
- Location
- Perugia, Italy
- Posts
- 1,924
Thanked: 469 The Making of a Soap Bowl and Badger Brush
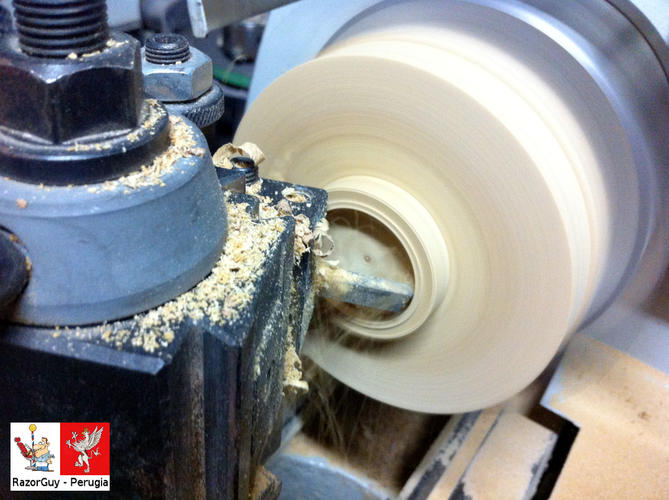
Mastro Livi at the lathe making the lid for the bowl
Shaping the rim for the inner part of the lid
Mastro Livi polishing the lidengine46 likes this.The RazorGuy - StraightRazorChannel on Youtube and Google+
-
The Following User Says Thank You to razorguy For This Useful Post:
taskind (01-12-2016)
-
01-13-2016, 10:29 AM #880Senior Member
- Join Date
- Sep 2011
- Location
- Perugia, Italy
- Posts
- 1,924
Thanked: 469 The Making of a Soap Bowl and Badger Brush
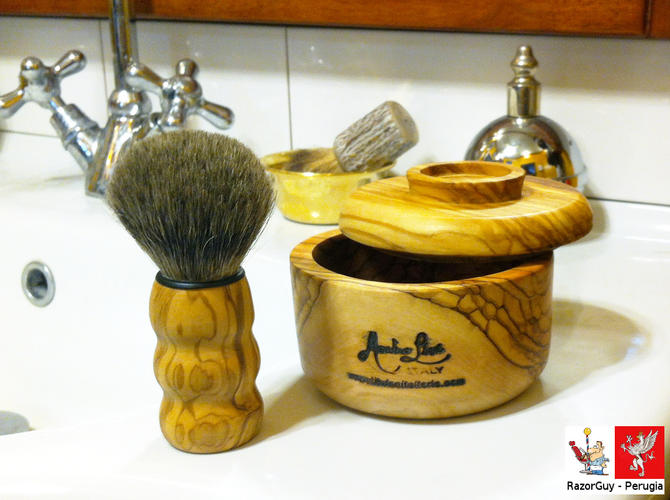
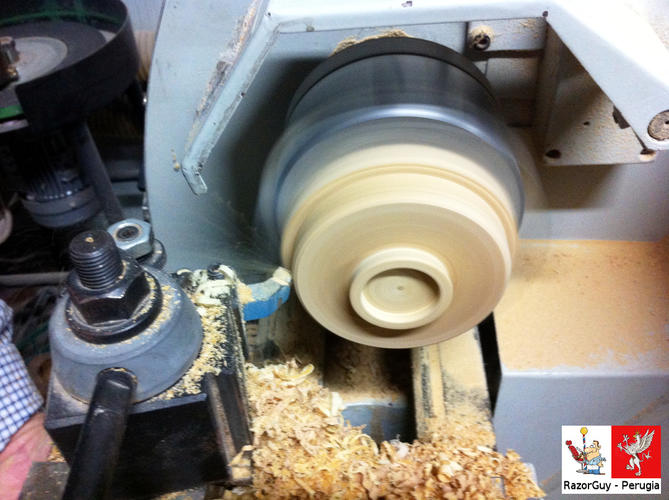
The finished matching brush and bowl
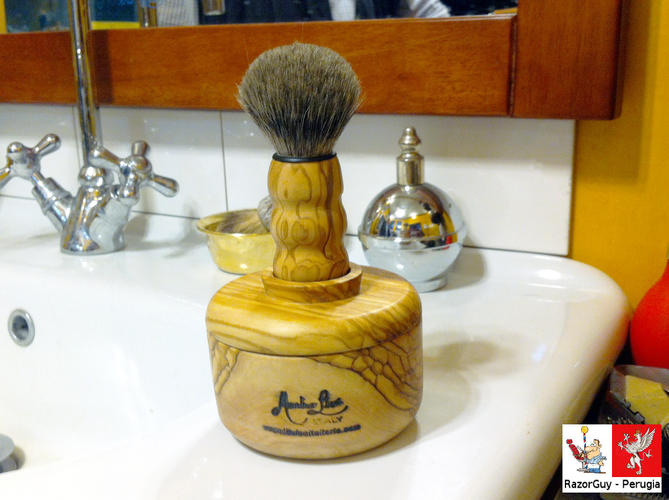
The olive wood bowl with its brush
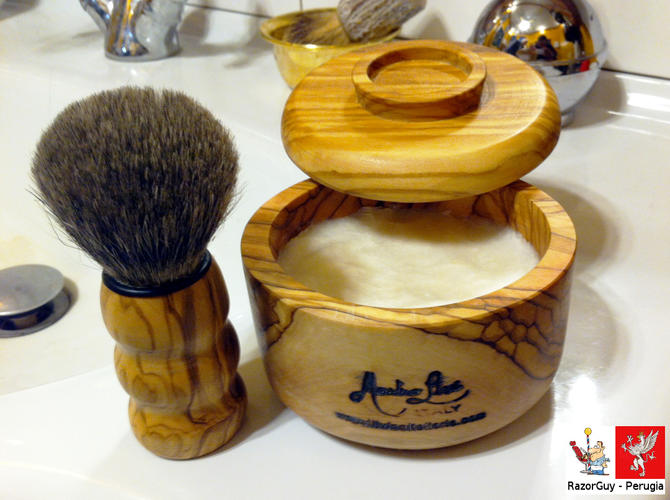
The olive wood bowl filled with soap and the matching brushThe RazorGuy - StraightRazorChannel on Youtube and Google+
-
The Following User Says Thank You to razorguy For This Useful Post:
engine46 (01-18-2016)


